自己做的,仅供参考。对错自负
湛江师范学院2014-2015学年度第 2学期
期中试卷
科目:LINUX网络服务器管理
|
题号 |
一、 操作 |
二、 C 编程 |
三、 shell编程 |
四、 辩论 |
总分 |
评分 |
复核 |
|
分值 |
25 |
25 |
25 |
25 |
100 |
蔡广基 |
|
|
得分 |
|
得分 |
评卷人 |
|
蔡广基 |
(50分)
一、课本pp.333认证网站某目录的方法中,用户账号保存到认证用户文件中。用户账号也可以保存到MySQL的表中。试参照/etc/httpd/conf.d/auth_mysql.conf
第8-38行,做实验:
1、在文档根目录下创建lab目录,在lab下创建主页,内容自定。(5分)
2、以MySQL的root用户,创建数据库auth,在该库中创建表users。(10分)
3、把数据库auth中表users授权给用户lili,权限select,insert,update, delete,密码lili123。(10分)
4、以用户lili连接MySQL,在上述表中插入账号:用户luo,密码luo123;用户guo,密码guo123。(10分)
5、在该目录下创建局部配置文件,实现对该目录的访问认证,用户账号保存到数据库auth的表users中。(10分)
6、在Windows的浏览器中测试。(5分)
写出实验的步骤和结果。
1、在文档根目录下创建lab目录,在lab下创建主页
[root@localhost root]# cd /var/www/html
[root@localhost html]# mkdir lab
[root@localhost html]# cd lab
[root@localhost lab]# cat > index.php
<h1>这是主页</h1>
2、以MySQL的root用户,创建数据库auth,在该库中创建表users。
[root@localhost root]# mysql -u root -p
Enter password:
Welcome to the MySQL monitor. Commands end with ; or g.
Your MySQL connection id is 1 to server version: 3.23.54
Type 'help;' or 'h' for help. Type 'c' to clear the buffer.
mysql> CREATE DATABASE auth;
Query OK, 1 row affected (0.10 sec)
mysql> USE auth;
Database changed
mysql> CREATE TABLE users (
-> user_name CHAR(30) NOT NULL,
-> user_passwd CHAR(20) NOT NULL,
-> PRIMARY KEY (user_name)
-> );
Query OK, 0 rows affected (0.04 sec)
3、 把数据库auth中表users授权给用户lili,权限select,insert,update, delete,密码lili123。
mysql> GRANT ALL ON auth.users TO lili@localhost IDENTIFIED BY 'lili123';
Query OK, 0 rows affected (0.07 sec)
4、 以用户lili连接MySQL,在上述表中插入账号:用户luo,密码luo123;用户guo,密码guo123。
mysql> exit
Bye
[root@localhost root]# mysql -u lili -p
Enter password:
Welcome to the MySQL monitor. Commands end with ; or g.
Your MySQL connection id is 3 to server version: 3.23.54
Type 'help;' or 'h' for help. Type 'c' to clear the buffer.
mysql> USE auth;
Reading table information for completion of table and column names
You can turn off this feature to get a quicker startup with -A
Database changed
mysql> insert into users values
-> ("luo", ENCRYPT('luo123')),
-> ("guo", ENCRYPT('guo123'));
Query OK, 2 rows affected (0.04 sec)
Records: 2 Duplicates: 0 Warnings: 0
mysql> exit
Bye
5、 ①、修改全局配置
[root@localhost root]# vi /etc/httpd/conf/httpd.conf
把AddDefaultCharset的值修改为 utf-8 ,如下
AddDefaultCharset utf-8
找到<Directory "/var/www/html"> </Directory>节点,把AllowOverride值修改为 All 如下
AllowOverride All
②、使上面配置生效
[root@localhost root]# apachectl restart
③、创建局部配置文件,实现对该目录的访问认证
[root@localhost root]# cd /var/www/html/lab
[root@localhost lab]# cat > .htaccess
AuthName "MySQL authenticated zone"
AuthType Basic
AuthMySQLUser lili
AuthMySQLPassword lili123
AuthMySQLDB auth
AuthMySQLUserTable users
AuthMySQLNameField user_name
AuthMySQLPasswordField user_passwd
require valid-user
6、在Windows的浏览器中测试。
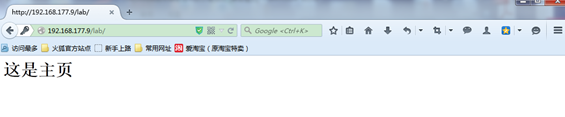
在浏览器输入http://192.168.177.9/lab/,回车
出现下面的验证提示框,可以分别输入前面数据库里面的luo和guo帐号对应的账号和密码,来分别登录查看主页内容。

用户名输入guo,密码输入guo123,按"确定"按钮得到下面页面
|
得分 |
评卷人 |
|
蔡广基 |
二、(50分)
参照课本pp.233图8-4做实验,设:
|
左边 |
右边 |
|
|
子网 |
VMnet8 |
VMnet1 |
|
网关接口 |
eth0: 192.168.177.4 |
eth1: 192.168.150.4 |
|
中继代理服务器 |
192.168.177.3 |
|
|
dhcp服务器 |
192.168.150.3 |
用你机上VMware中的实际ip替换上述地址。试做实验:
1、用脚本自动部署dhcp服务器。运行之。(10分)
2、配置中继代理服务器。运行之。(10分)
3、VMware及其网关上,做必要的操作。(10分)
4、在子网VMnet1的Windows 客户端测试。(10分)
5、在子网VMnet8的Windows 客户端测试。(10分)
写出实验的步骤和结果。
答:1、先去192.168.150.3机,用脚本自动部署dhcp服务器
①(查看dhcp软件是否安装)
[root@localhost root]# rpm -qa | grep dhcp
如果没有安装,用(我的电脑)来FTP登录,ftp://192.168.150.3/,文件-》登录-》输入帐号和密码用(除了root用户之外的用户)登录,再复制 dhcp-3.0pl1-23.i386.rpm和dhcp-devel-3.0pl1-23.i386.rpm到Linux端,接下来就按照下面命令安装
[root@localhost 01]# rpm -ivh dhcp-3.0pl1-23.i386.rpm
[root@localhost 01]# rpm -ivh dhcp-devel-3.0pl1-23.i386.rpm
这里安装后的检测
[root@localhost 01]# rpm -qa | grep dhcp
dhcp-3.0pl1-23
dhcp-devel-3.0pl1-23
②写脚本
[root@localhost etc]# cat > dnsgen.sh
IP="192.168.150"
#! /bin/bash
cat >> /etc/dhcpd.conf << +END+
ddns-update-style interim;
ignore client-updates;
subnet $IP.0 netmask 255.255.255.0 {
option routers $IP.4;
option subnet-mask 255.255.255.0;
option domain-name "gr.org";
option domain-name-servers $IP.3;
option time-offset 28800;
range dynamic-bootp $IP.30 $IP.230;
default-lease-time 21600;
max-lease-time 43200;
# we want the nameserver to appear at a fixed address
host ns {
next-server marvin.redhat.com;
hardware ethernet 12:34:56:78:AB:CD;
fixed-address 207.175.42.254;
}
}
+END+
③执行脚本
[root@localhost etc]# sh dnsgen.sh
④防止下面启动服务时中文乱码
[root@localhost etc]# vi /etc/init.d/functions
(将这句话注释掉,解决乱码问题)# . /etc/sysconfig/i18n
⑤启动服务
[root@localhost etc]# service dhcpd start
启动 dhcpd: [ 确定 ]
2、配置中继代理服务器。运行之
①确保网关接口可以转发即net.ipv4.ip_forward = 1
以及添加192.168.177.3 和 192.168.150.3之间的路由,使两机之间可以互相ping通
②确保192.168.177.3安装了dhcp软件,关闭dhcpd 服务
[root@localhost root]# service dhcpd stop
③配置中继代理服务器
[root@localhost yanji]# vi /etc/sysconfig/dhcrelay
# Command line options here
INTERFACES="eth0"
DHCPSERVERS="192.168.150.3"
[root@localhost yanji]# service dhcrelay start
启动 dhcrelay: [ 确定 ]
④去192.168.150.3机添加192.168.177.0/24的子网
[root@localhost root]# cat >> /etc/dhcpd.conf
subnet 192.168.177.0 netmask 255.255.255.0 {
# --- default gateway
option routers 192.168.177.4;
option subnet-mask 255.255.255.0;
option domain-name "or.org";
option domain-name-servers 192.168.177.3;
option time-offset 28800;
range 192.168.177.81 192.168.177.200;
default-lease-time 86400;
max-lease-time 172800;
}
[root@localhost root]# service dhcpd restart
关闭 dhcpd: [ 确定 ]
启动 dhcpd: [ 确定 ]
3、VMware及其网关上,做必要的操作。
①、到VMware主界面"编辑"-》"虚拟网络编辑器"分别把VMnet1和VMnet8里面的"使用本地DHCP服务将IP地址分配给虚拟机"的勾去掉。
②去网关接口,如192.168.177.4机
[root@localhost network-scripts]# vi /etc/sysctl.conf
把net.ipv4.ip_forward的值改为1
使上面的更改生效
[root@localhost network-scripts]# sysctl -p
net.ipv4.ip_forward = 1
net.ipv4.conf.default.rp_filter = 1
kernel.sysrq = 0
kernel.core_uses_pid = 1
[root@localhost root]# service iptables stop
清除所有链: [ 确定 ]
删除用户定义的链: [ 确定 ]
将内建链重设为默认的"ACCEPT"策略: [ 确定 ]
4、在子网VMnet1的Windows 客户端测试。
①将VMnet1的(属性-》TCP/IPv4-》把里面的"自动获取IP地址"打上勾,手动设置DNS服务器为192.168.150.3),把VMnet1禁用,再将其启用
②cmd 进命令行
C:UsersAdministrator>ipconfig /all
以太网适配器 VMware Network Adapter VMnet1:
连接特定的 DNS 后缀 . . . . . . . : gr.org
描述. . . . . . . . . . . . . . . : VMware Virtual Ethernet Adapter for VMnet1
物理地址. . . . . . . . . . . . . : 00-50-56-C0-00-01
DHCP 已启用 . . . . . . . . . . . : 是
自动配置已启用. . . . . . . . . . : 是
本地链接 IPv6 地址. . . . . . . . : fe80::fc2a:cb28:3df8:f2d0%12(首选)
IPv4 地址 . . . . . . . . . . . . : 192.168.150.230(首选)
子网掩码 . . . . . . . . . . . . : 255.255.255.0
获得租约的时间 . . . . . . . . . : 2015年5月15日 22:19:32
租约过期的时间 . . . . . . . . . : 2015年5月16日 4:19:31
默认网关. . . . . . . . . . . . . : 192.168.150.4
DHCP 服务器 . . . . . . . . . . . : 192.168.150.3
DHCPv6 IAID . . . . . . . . . . . : 419450966
DHCPv6 客户端 DUID . . . . . . . : 00-01-00-01-1C-45-73-32-00-12-7B-70-A0-F2
DNS 服务器 . . . . . . . . . . . : 192.168.150.3
TCPIP 上的 NetBIOS . . . . . . . : 已启用
由上面可以得到IPv4 地址为192.168.150.230,dhcp服务器正常运行。
5、在子网VMnet8的Windows 客户端测试。
①将VMnet8的(属性-》TCP/IPv4-》把里面的"自动获取IP地址"打上勾,手动设置DNS服务器为192.168.150.3),把VMnet8禁用,再将其启用
②cmd 进命令行
C:UsersAdministrator>ipconfig/all
以太网适配器 VMware Network Adapter VMnet8:
连接特定的 DNS 后缀 . . . . . . . : or.org
描述. . . . . . . . . . . . . . . : VMware Virtual Ethernet Adapter for VMnet8
物理地址. . . . . . . . . . . . . : 00-50-56-C0-00-08
DHCP 已启用 . . . . . . . . . . . : 是
自动配置已启用. . . . . . . . . . : 是
本地链接 IPv6 地址. . . . . . . . : fe80::4117:b3f0:133b:52de%13(首选)
IPv4 地址 . . . . . . . . . . . . : 192.168.177.200(首选)
子网掩码 . . . . . . . . . . . . : 255.255.255.0
获得租约的时间 . . . . . . . . . : 2015年5月16日 0:19:17
租约过期的时间 . . . . . . . . . : 2015年5月17日 0:19:17
默认网关. . . . . . . . . . . . . : 192.168.177.4
DHCP 服务器 . . . . . . . . . . . : 192.168.150.3
DHCPv6 IAID . . . . . . . . . . . : 453005398
DHCPv6 客户端 DUID . . . . . . . : 00-01-00-01-1C-45-73-32-00-12-7B-70-A0-F2
DNS 服务器 . . . . . . . . . . . : 192.168.150.3
TCPIP 上的 NetBIOS . . . . . . . : 已启用
由上面可以得到IPv4 地址为192.168.177.200,默认网关: 192.168.177.4
DHCP 服务器: 192.168.150.3,而VMnet8的Windows本来是192.168.177.1的,这样说明了中继代理服务器正常运行。