俗人手把手教你搭建vue项目
项目使用vue-cli开始,包含全家桶(vue-cli + vue3.0 + vuex + vue-router + axios +
element-ui),包括自定义方法等。俗人会在本文中把详细的流程呈现出来。
我把新建的项目放到我的库里,有需要的可以自行c
https://github.com/webwjg/newVue.git
1. 下载vue-cli
在命令窗口(shift+右键)输入:
npm install -g @vue/cli
然后稍等片刻,之后在你想要的目录位置下开始创建vue项目,还是在命令窗口输入:
vue create youname
youName是你自己定义的项目名字(不能有大写字母),之后会出现

default是默认, Manually select features是手动设置,我选择的是手动设置,键盘的上下键可以进行选择,空格键是确认选中。
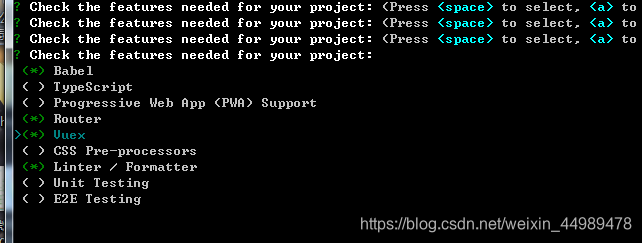
这是我选中的,看个人需求,之后
①. 选择ESLint + Prettier
 ESLint with error prevention only
 ESLint + Airbnb config
 ESLint + Standard config
 ESLint + Prettier
- 1
- 2
- 3
- 4
选择ESLint + Prettier。
② . 选择语法检查方式,
> to invert selection)
>(*) Lint on save   // 保存就检测
 ( ) Lint and fix on commit  //fix和commit保存
- 1
- 2
- 3
这里选择保存就检查。
③. 配置文件存放位置
 Where do you prefer placing config for Babel, ESLint, etc.?
 In dedicated config files // 独立文件放置
 In package.json //放package.json里
- 1
- 2
- 3
- 4
这里我选择In package.json。之后就可以一直 y下去了。
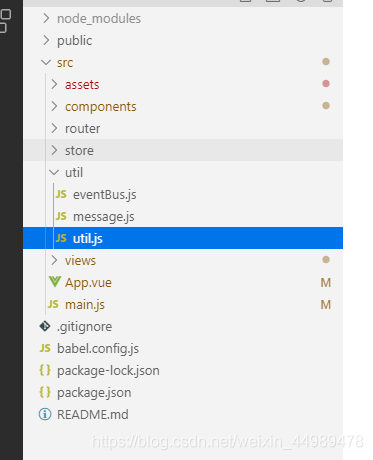
给大家看下我的项目结构:

components是主要页面,views写子组件。
2 .配置
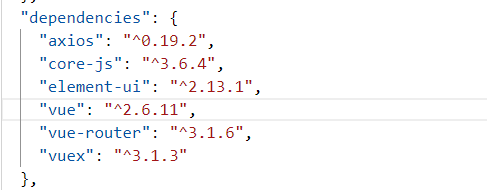
首先把你需要的下载下来,因为创建项目的时候已经下载过vue-router和vuex了,下载只需要下载axios
npm install axios
下载成功,刷新下package.json,中会有版本信息
注意,当你定义一个变量或者组件,但是你没有使用,会报错,我们需要修改配置,在package.json的"rules"里添加
   "vue/no-unused-components": "off",
      "no-unused-vars": [
        0,
        {
          "vars": "all",
          "args": "after-used"
        }
      ]
- 1
- 2
- 3
- 4
- 5
- 6
- 7
- 8
①. vue-router
新建一个新组件,然后去router下的index.js去注册
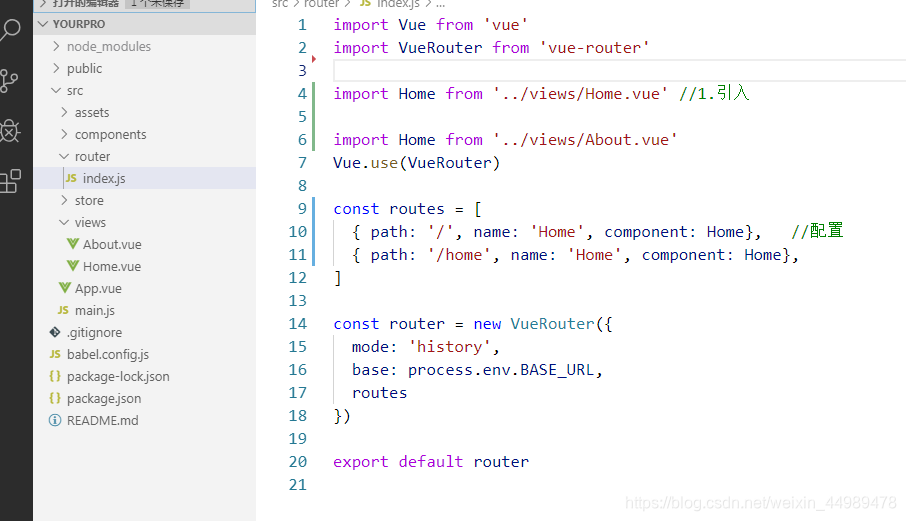
注意,配置中path的值是自定义的,可以与引入的名字不同,但是name和component最好与引入时的命名保持一致。
路由传参
//跳转传参
this.$router.push({path:'/model', query: { page: '1', code: '6666' }});
//model组件接收

this.$route.query.code

this.$route.query.page
- 1
- 2
- 3
- 4
- 5
- 6
- 7
②. vuex
首先项目中的store就是vuex,在创建项目的时候已经自动配好了,我们直接用就好了。
教大家粗略的使用vuex,看个简单的保存数组吧
export default new Vuex.Store({
state: {

myarr:[],

},

mutations: {

storeArr(state,myarr){//state就是上面的state,myarr是组件传来的

state.myarr=myarr;

},

},

actions: {
},

modules: {

}

})
- 1
- 2
- 3
- 4
- 5
- 6
- 7
- 8
- 9
- 10
- 11
- 12
- 13
- 14
- 15
- 16
- 17
组件中:
 storeBtn:function(){
        this.$store.commit("storeArr",this.dataArr);
     },
- 1
- 2
- 3
这只使用了mutations,是同步的,想要异步执行就还得使用actions,
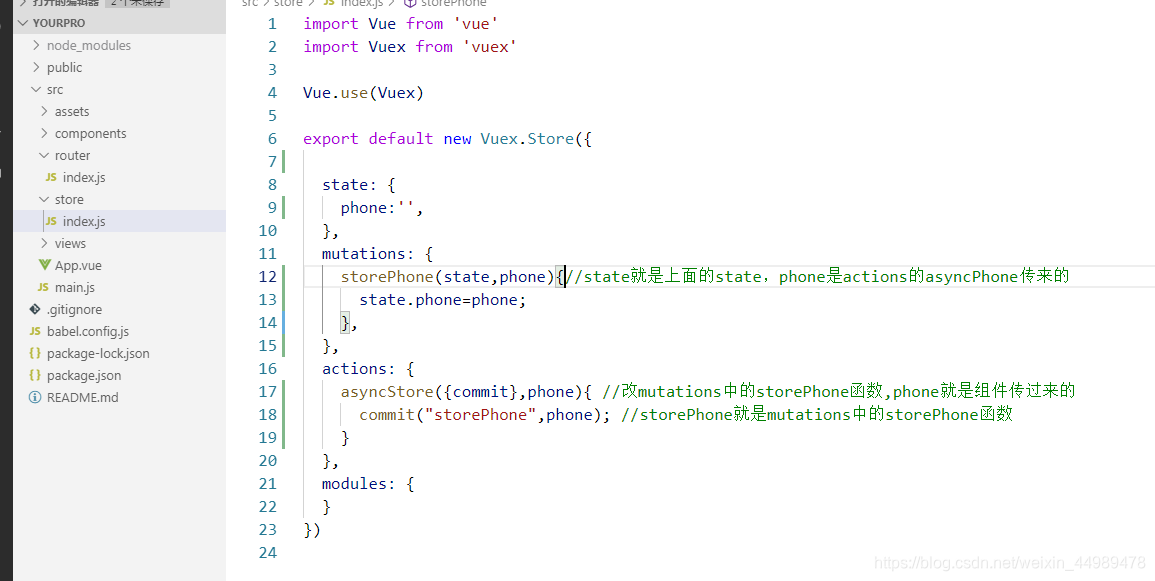
组件中:
export default {
  name: 'HelloWorld',
  props: {
    msg: String
  },
  data(){
    return {
      userPhone:'19999999999',
    }
  },
  methods:{
    storePhone:function(){
      this.$store.dispatch("asyncStore",this.userPhone)
    },
  }
}
- 1
- 2
- 3
- 4
- 5
- 6
- 7
- 8
- 9
- 10
- 11
- 12
- 13
- 14
- 15
- 16
- 17
如果想获取state中的值,可以用this.$store.state.phone;
③. axios
axios默认的是application/json,如果使用这种编码方式,那么传递到后台的将是序列化后的json字符串,我们发送的格式也不是对象,这就很不舒服。给大家看下我的笨方法,在main.js中
import axios from 'axios'
axios.defaults.transformRequest = [function (data) {
 let obj = ''
 for (let item in data) {
   obj+= encodeURIComponent(item) + '=' + encodeURIComponent(data[item]) + '&'
 }
 return obj
}]
Vue.prototype.$axios=axios
- 1
- 2
- 3
- 4
- 5
- 6
- 7
- 8
- 9
- 10
- 11
发送请求:
	let data={a:1,b:2};
   this.$axios.post('/url',data).then((res)=>{
          console.log(res)
        })
- 1
- 2
- 3
- 4
这样就符合我的使用习惯了。
⑤.element-ui
第一步当然是下载了
npm install element-ui
对了,卸载就是把install改为uninstall
然后去main.js引入
import ElementUI from ‘element-ui’;
Vue.use(ElementUI);
用的时候可以去官网去c代码,放在自己的项目中就可以了
例: <el-button @click="dialogVisible = false">取 消</el-button>
地址:https://element.eleme.cn/#/zh-CN/component/dialog
④. 自定义方法
我的是与components同级新建个文件夹(util)
util中的util.js就是写方法的地方
export default {
myutil:function(val){

console.log(val);

},
}
- 1
- 2
- 3
- 4
- 5
- 6
- 7
在main.js(全局)中引入,也可以在你使用的组件中单独引入
import util from './util/util.js'
Vue.prototype.util=util;
- 1
- 2
在组件中调用:
this.util.myutil(666);
- 1
最后奉上一些vue中有用的小知识
1.通过ref操作子组件的事件并传值,
父组件中
 <model  ref='openModel'  :receivedata="this.receivedata"></model>
{this.$refs.openModel.openValue(true) //方法传值,}

子组件

props: {  //通过prop传的值

receivedata:Object,

},
methods:{ //通过ref传的值

openValue(val){

this.dialogVisible=val;

},

}
- 1
- 2
- 3
- 4
- 5
- 6
- 7
- 8
- 9
- 10
- 11
- 12
- 13
- 14
- 15
2.修改父组件或者根组件data的值
 this.$parent.isOpen=false;  //修改父组件的data
 this.$root.isOpen=true;  //修改根组件
- 1
- 2
- 3
3.保存vuex的state,使其刷新后不会消失
if (sessionStorage.getItem("store")) {
this.$store.replaceState(Object.assign({}, this.$store.state,JSON.parse(sessionStorage.getItem("store"))))
}
window.addEventListener<span class="token punctuation">(</span><span class="token string">"pagehide"</span>,<span class="token punctuation">(</span><span class="token punctuation">)</span><span class="token operator">=</span><span class="token operator">></span><span class="token punctuation">{</span>
sessionStorage.setItem<span class="token punctuation">(</span><span class="token string">"store"</span>,JSON.stringify<span class="token punctuation">(</span>this.<span class="token variable">$store</span>.state<span class="token punctuation">))</span>
<span class="token punctuation">}</span><span class="token punctuation">)</span>
- 1
- 2
- 3
- 4
- 5
- 6
- 7
- 8
如果有哪些不对的地方,敬请指正。
</article>【leetcode】1441. Build an Array With Stack Operations
【leetcode】1437. Check If All 1's Are at Least Length K Places Away
cxCheckCombobox
修改现有字段默认值
2018.01.02 exprottoexcel
Statusbar OwnerDraw
dxComponentPrinter记录
单据暂存操作思路整理
设置模式9(装饰者,责任链,桥接,访问者)
- 最新文章
-
0909 编译原理
作业2 结对 四则运算
作业1 四则运算
A*算法最简单的介绍
mysql5.6.19安装说明
Eclipse导出Java代码API
启发式爬山法
中文繁体和简体转换 (Java代码)
如何提取网址中域名和域名主体(java)
leetcode Sudoku java
- 热门文章
-
hadoop wrong key class: class org.apache.hadoop.io.Tex
pageRank---python实现
Hadoop Mapreduce分区、分组、二次排序过程详解[转]
【leetcode】1455. Check If a Word Occurs As a Prefix of Any Word in a Sentence
【leetcode】1452. People Whose List of Favorite Companies Is Not a Subset of Another List
【leetcode】1451. Rearrange Words in a Sentence
【leetcode】1450. Number of Students Doing Homework at a Given Time
【leetcode】1448. Count Good Nodes in Binary Tree
【leetcode】1447. Simplified Fractions
【leetcode】1446. Consecutive Characters