1、RGB ->灰度
#灰度   方式1
img=cv2.imread('b.png',0)
img1=cv2.imread('b.png',1)
height=img1.shape[0]
width=img1.shape[1]
print(img1.shape)
# cv2.imshow('rgb',img1)
# cv2.imshow('gray',img)
# cv2.waitKey(0)
#灰度  方式2
# dst=cv2.cvtColor(img1,cv2.COLOR_BGR2GRAY)#颜色空间转换
# cv2.imshow('gray1',dst)
# cv2.waitKey(0)
import numpy as np
#灰度  方式3
#RGB  R=G=B=GRAY
# dst=np.zeros((height,width,3),np.uint8)
# for i in range(height):
#     for j in range(width):
#         (b,g,r)=img1[i,j]
#         gray=(int(b)+int(g)+int(r))/3
#         dst[i,j]=np.uint8(gray)
# cv2.imshow('dst',dst)
# cv2.waitKey(0)

#灰度  方式4
# dst=np.zeros((height,width,3),np.uint8)
# for i in range(height):
#     for j in range(width):
#         (b,g,r)=img1[i,j]
#         gray=int(b)*0.114+int(g)*0.587+int(r)*0.299
#         dst[i,j]=np.uint8(gray)
# cv2.imshow('dst',dst)
# cv2.waitKey(0)

#算法优化
# dst=np.zeros((height,width,3),np.uint8)
# for i in range(height):
#     for j in range(width):
#         (b,g,r)=img1[i,j]
#         b=int(b)
#         g=int(g)
#         r=int(r)
#         # gray=(b*1+g*2+r*1)/4#1+2+1=4  加的值越大越精确
#         gray=(b*300+g*200+r*500)/1000
#         dst[i,j]=gray
#
# cv2.imshow('优化',dst)
# cv2.waitKey(0)
2、颜色反转,底板效果
# # 灰度图片  255-px
# gray=cv2.cvtColor(img1,cv2.COLOR_BGR2GRAY)
# dst=np.zeros((height,width,1),np.uint8)
# for i in range(height):
#     for j in range(width):
#         dstpx=255-gray[i,j]
#         dst[i,j]=dstpx
#
# cv2.imshow('dst',dst)
# cv2.waitKey(0)
# **************************
# RGB颜色反转
# dst=np.zeros((height,width,3),np.uint8)
# for i in range(height):
#     for j in range(width):
#         (b,g,r)=img1[i,j]
#         dst[i,j]=[255-b,255-g,255-r]
#
# cv2.imshow('dst',dst)
# cv2.waitKey(0)
3、马赛克
# 马赛克
# dst=np.zeros((height,width,3),np.uint8)
# dst=img1
# for i in range(100,150):
#     for j in range(50,150):
#         if i%10==0 and j%10==0:
#             for n in range(10):
#                 for m in range(10):
#                     print(img1[i,j])
#                     # (b,g,r)=img1[i,j]
#                     # dst[i+n,j+m]=(b,g,r)
#                     dst[i+n,j+m]=img1[i,j]
# cv2.imshow('masaike',dst)
# cv2.waitKey(0)
4、毛玻璃
# dst=np.zeros(img1.shape,np.uint8)
# 随机数范围mm
# mm=8
#
# for i in range(height):
#     for j in range(width):
#         index=int(random.random()*8)
#         if i+8 < height and j+8 <
#             dst[i,j]=img1[i+index,j+index]
#         else:
#             dst[i,j] = img1[i-index, j-index]
#
# cv2.imshow('maoboli',dst)
# cv2.waitKey(0)
5、图片融合
img=cv2.imread('a.jpg',1)
img=cv2.resize(img,(256,256))

roiH=int(height)
roiW=int(width)
# imgROI融合区域大小,两张图片一样大小
imgROI=img[0:roiH,0:roiW]
img1ROI=img1[0:roiH,0:roiW]
dst=np.zeros(img.shape,np.uint8)

dst=cv2.addWeighted(imgROI,0.6,img1ROI,0.4,0)

cv2.imshow('ss',dst)
cv2.waitKey(0)
6、边缘检测
img=cv2.imread('a.jpg',1)

#1 gray  2 高斯滤波 3 canny

gray=cv2.cvtColor(img,cv2.COLOR_BGR2GRAY)
# 高斯滤波   去除干扰像素
imgG=cv2.GaussianBlur(gray,(3,3),0)
# 图像卷积
dst1=cv2.Canny(img,50,50)
dst2=cv2.Canny(imgG,50,50)
cv2.imshow('dst2_meiyoulvbo',dst1)
cv2.imshow('lvbo',dst2)
cv2.waitKey(0)
7、浮雕效果
img=cv2.imread('b.png',1)
cv2.imshow('src',img)
gray=cv2.cvtColor(img,cv2.COLOR_BGR2GRAY)
dst=np.zeros((height,width,1),np.uint8)
for i in range(height):
    for j in range(width-1):
        dst[i,j]=gray[i,j]-gray[i,j+1]+150
        if dst[i,j]>255:
            dst[i,j]=255
        if dst[i,j]<0:
            dst[i, j]=0
cv2.imshow('dst',dst)
cv2.waitKey(0)
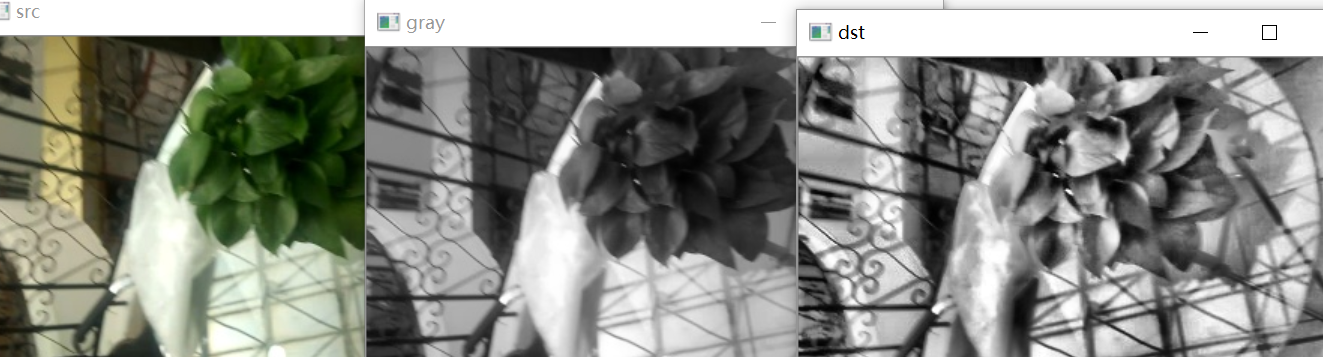
8、对比度
import cv2 as cv
img = cv.imread('3.jpg')
cv.imshow('src', img)
gray = cv.cvtColor(img,cv.COLOR_BGR2GRAY)
cv.imshow('gray', gray)
# 对比度
clahe = cv.createCLAHE(clipLimit=5, tileGridSize=(8, 8))
dst = clahe.apply(gray)
cv.imshow('dst', dst)
cv.waitKey(0)
效果: