一、单元测试
生成的demo里面包含spring-boot-starter-test :测试模块,包括JUnit、Hamcrest、Mockito,没有的手动加上。
<dependency>
    <groupId>org.springframework.boot</groupId>
    <artifactId>spring-boot-starter-test
</artifactId> </dependency>
添加测试类:
@RunWith(SpringRunner.class)
@SpringBootTest
public class DemoApplicationTests {

    private MockMvc mvc;

    @Before
    public void setUp(){
        mvc = MockMvcBuilders.standaloneSetup(new HelloWorldController()).build();
    }

    @Test
    public void getHello() throws Exception {
        mvc.perform(MockMvcRequestBuilders.get("/hello").accept(MediaType.APPLICATION_JSON))
                .andExpect(status().isOk())
                .andExpect(content().string(equalTo("Hello World")));
    }
}
二、修改访问端口和路径
1、修改端口号
- 使用properties文件方式:
server.port=8088
- 使用yml文件方式:
server:
  port:8088
2、修改项目访问路径
使用properties文件方式:在application.properties,添加如下配置即可修改项目访问路径:
server.servlet.context-path=/springboot-demo
- 使用yml文件方式:
server:
  port:8088
  servlet:
   context-path: /springboot-demo
3、修改默认容器
在之前默认使用的 WEB 容器是 Tomcat 容器,实际上在 SpringBoot 里面如果用户有需要也可以将容器更换为 jetty 容器,如果 现在要想使用这个容器,则只需要追加一些依赖即可:
1、移除默认容器
<dependency>
  <groupId>org.springframework.boot</groupId>
  <artifactId>spring-boot-starter-web</artifactId>
  <exclusions>
    <exclusion>
      <groupId>org.springframework.boot</groupId>
               <artifactId>spring-boot-starter-tomcat</artifactId>
          </exclusion>
  </exclusions>
</dependency>
2、添加jetty
<dependency>
  <groupId>org.springframework.boot</groupId>
  <artifactId>spring-boot-starter-jetty</artifactId>
</dependency>
三、加载读取多个配置文件
1、application.properties 和 application.yml的优先级
那么这个时候将优先进行application.properties配置文件的加载,如果现在两个配置项的作用冲突了,则以 properties 为主,如果不冲突,则以存在的为主。
2、多配置文件支持(yml和property)
格式必须是application-xxx.properties或者是application-xxx.yml命
在application.properties或application.yml中引入,有两个用法:
1、直接引入
创建application-message.properties,内容如下:
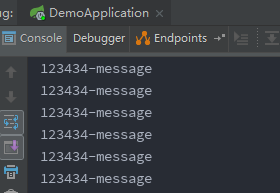
code=123434-message
content=消息不存在
在application.properties或application.yml中引入,多个文件用逗号隔开
spring.profiles.include=message
注入到bean中
@Component
public class Message{
    @Value("${code}")
    private String code;

    @Value("${content}")
    private String content;

    public String getCode() {
        return code;
    }

    public void setCode(String code) {
        this.code = code;
    }

    public String getContent() {
        return content;
    }

    public void setContent(String content) {
        this.content = content;
    }
}
使用:
package com.example.demo.controller;

import com.example.demo.Property.BaseMsg;
import com.example.demo.Property.Message;
import org.springframework.beans.factory.annotation.Autowired;
import org.springframework.web.bind.annotation.RequestMapping;
import org.springframework.web.bind.annotation.RestController;

import java.util.Properties;

@RestController
public class HelloWorldController {

    @Autowired
    private Message message;


    @RequestMapping("/message")
    public String message() {
        System.out.println(message.getCode());
        return "message:"+message.getCode();
    }
}
测试,访问:http://localhost:8082/message
2、特定环境激活
spring.profiles.active=devMsg
或通过启动参数激活,在启动命令中添加
-Dspring.profiles.active="devMsg"
@Profile表示只有当spring.profiles.active激活配置一致时才会注入,用法示例:
@Component
@Profile("testMsg")
public class TestMsg extends BaseMsg{
    @Value("${msg.code}")
    private String msgCode;
    public String getMsgCode() {
        return msgCode;
    }
    public void setMsgCode(String msgCode) {
        this.msgCode = msgCode;
    }
}
四、springboot多环境配置
多环境配置有两种方式,一种配置在同一个文件中,另一种时时配置在多个文件中。
1、配置在多个文件中
在Spring Boot中多环境配置文件名需要满足application-{profile}.properties的格式,其中{profile}对应你的环境标识,比如:
application-dev.properties:开发环境
application-test.properties:测试环境
application-prod.properties:生产环境
至于哪个具体的配置文件会被加载,需要在application.properties文件中通过spring.profiles.active属性来设置,其值对应{profile}值。
spring.profiles.active=test就会加载application-test.properties配置文件内容
或
执行java -jar xxx.jar --spring.profiles.active=test,也就是测试环境的配置(test)
2、配置同一个文件中
spring:
  profiles:
    active: pro
server:
  servlet:
    context-path: /springboot-demo
---
#开发环境配置
spring:
  profiles: dev
server:
  port: 8080
---
#测试环境配置
spring:
  profiles: test
server:
  port: 8081
---
#生产环境配置
spring:
  profiles: pro
server:
  port: 8082
通过spring.profiles.active: pro或者java -jar xxx.jar --spring.profiles.active=pro动态切换环境,---分隔符,分开后相当于单独一个文件,---前是公共配置。System.getProperty()方法获取系统变量和启动参数。
五、打包发布
1、打包
- 运行maven package,如果项目有改动需要先运行maven clean
- 打包完,target下面会有项目jar包,demo-0.0.1-SNAPSHOT.jar
2、运行
拷贝demo-0.0.1-SNAPSHOT.jar到指定目录,运行
java -jar demo-0.0.1-SNAPSHOT.jar
访问:http://192.168.1.100:8081/hello