一、CALayer
1.CALayer
CALayer属于QuartzCore.framework框架,从Xcode5起我们不必要手动导入这个库。
CALayer我们可以简单理解为一个层。当我们绘制的UIView能在屏幕显示,其实质是因为这个层。
我们下面通过代码理解一下CALayer的基本用法。
    CALayer *caLayer = [CALayer layer];
    caLayer.backgroundColor = [UIColor cyanColor].CGColor;
    caLayer.frame = CGRectMake(10, 20, 100, 100);
    caLayer.cornerRadius = 20;
    caLayer.masksToBounds = YES;
    [self.view.layer addSublayer:caLayer];
当我们执行上述代码的时候,会在view上添加一个layer层。其效果如下图所示。

其中cornerRadius值的大小决定layer的形状,在四个角用它的长度做半切圆。我们也可以设置边框,边框颜色等信息。
    CALayer *caLayer1 = [CALayer layer];
    caLayer1.frame = CGRectMake(10, 20, 200, 200);
    caLayer1.contents = (id)[UIImage imageNamed:@"health.jpg"].CGImage;
    caLayer1.cornerRadius = 100;
    caLayer1.masksToBounds = YES;
    caLayer1.borderWidth = 10;
    caLayer1.borderColor = [UIColor greenColor].CGColor;
    [self.view.layer addSublayer:caLayer1];
效果如下: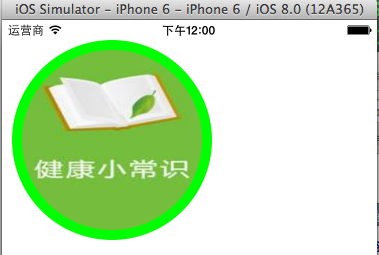
CALayer还有一个重要的属性position(锚点默认0.5,0.5),和caLayer.anchorPoint(0-1)
我们可以通过下图理解:
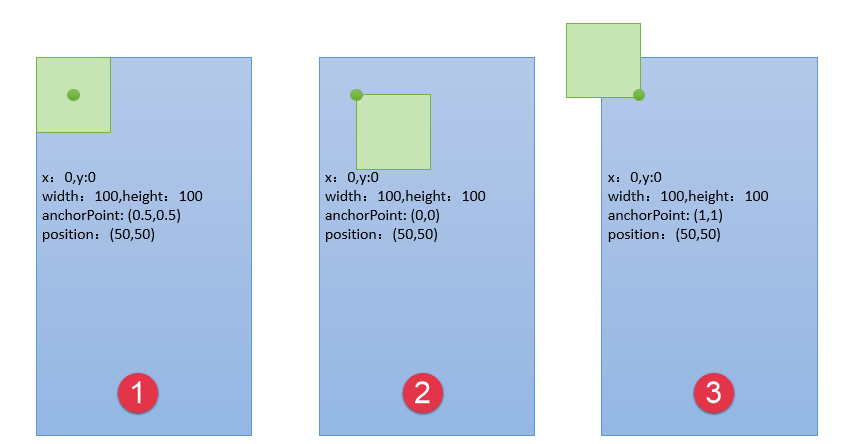
执行下面代码:
    CALayer *caLayer = [CALayer layer];
    caLayer.backgroundColor = [UIColor cyanColor].CGColor;
    caLayer.cornerRadius = 20;
    caLayer.bounds = CGRectMake(200, 20, 200, 200);
    caLayer.position = CGPointMake(100, 100);
    caLayer.anchorPoint = CGPointMake(0.5, 0);
    caLayer.masksToBounds = YES;
    [self.view.layer addSublayer:caLayer];
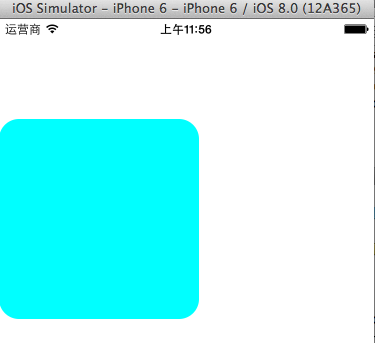
效果为:
2.CATextLayer
CATextLayer是CALayer的子类。我们可以在上面写文字,设置字体等信息。
    CATextLayer *caTextlayer = [CATextLayer layer];
    caTextlayer.frame = CGRectMake(10, 20, 300, 100);
    caTextlayer.string = @"Roy says hello";
    caTextlayer.foregroundColor = [UIColor orangeColor].CGColor;
    [self.view.layer addSublayer:caTextlayer];
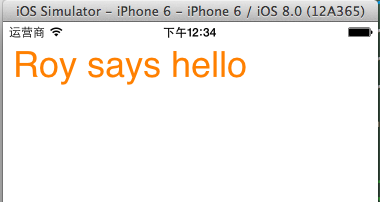
3.CAGradientLayer
这个类也是继承CALayer.可以实现颜色渐变。
    CAGradientLayer *dLayer = [CAGradientLayer layer];
    dLayer.colors = @[(id)[UIColor yellowColor].CGColor,(id)[UIColor grayColor].CGColor,(id)[UIColor redColor].CGColor,(id)[UIColor greenColor].CGColor];
    dLayer.startPoint = CGPointMake(0, 0);
    dLayer.endPoint = CGPointMake(1, 1);
    dLayer.locations = @[@0.0,@0.2,@0.5,@01];//0-1
    dLayer.frame = CGRectMake(10, 20, 320, 100);
    [self.view.layer addSublayer:dLayer];

二、CAAnimation
关于CAAnimation,能够看懂下面一幅图和下面的代码即可。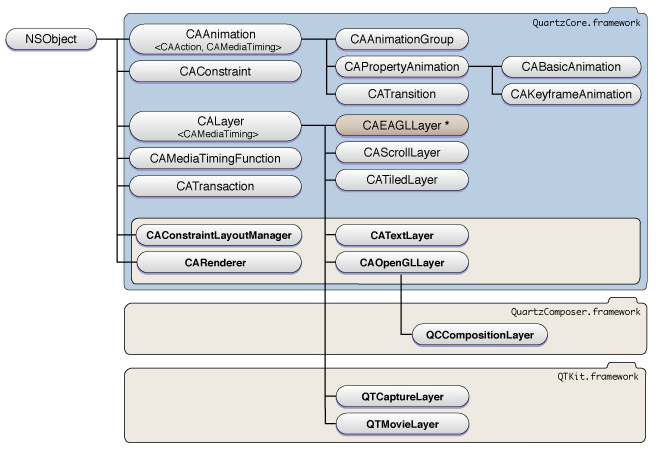

#import "ViewController.h"

@interface ViewController ()
{
    CALayer *layer;
}
@end

@implementation ViewController

- (void)viewDidLoad {
    [super viewDidLoad];
    // Do any additional setup after loading the view, typically from a nib.
    layer = [CALayer layer];
    layer.frame = CGRectMake(10, 20, 60, 60);
    layer.backgroundColor = [UIColor grayColor].CGColor;
    [self.view.layer addSublayer:layer];

    UIButton *button = [UIButton buttonWithType:UIButtonTypeCustom];
    button.frame = CGRectMake(10, 20, 100, 30);
    button.backgroundColor = [UIColor purpleColor];
    [button addTarget:self action:@selector(btnClick) forControlEvents:UIControlEventTouchUpInside];
    [self.view addSubview:button];
   // [self basicAnimation];
   // [self keyframeAnimation];
   // [self groupAnimation];

}
-(void)btnClick
{
    //过渡动画,只有在点击事件中才能执行
     [self transitionAnimation];
}
//基础动画,继承属性动画
-(void)basicAnimation
{
    /*
        //背景颜色变换动画
        CABasicAnimation *animation = [CABasicAnimation animation];
        //The key-path describing the property to be animated
        animation.keyPath = @"backgroundColor";
        //动画周期
        animation.duration = 2;
        //从哪个属性开始动画
        animation.fromValue = (id)[UIColor grayColor].CGColor;
        //到哪个属性结束动画
        animation.toValue = (id)[UIColor greenColor].CGColor;
        [layer addAnimation:animation forKey:nil];
     */

    //位置移动

    CABasicAnimation *animation = [CABasicAnimation animation];
    animation.keyPath = @"position";
    animation.fromValue = [NSValue valueWithCGPoint:CGPointMake(10, 20)];
    animation.toValue = [NSValue valueWithCGPoint:CGPointMake(100, 200)];
    animation.duration = 3;
    [layer addAnimation:animation forKey:nil];
}

//帧动画,继承属性动画
-(void)keyframeAnimation
{
    /*
    CAKeyframeAnimation *animation = [CAKeyframeAnimation animation];
    //动画的属性
    animation.keyPath = @"backgroundColor";
    //动画过渡值
    animation.values = @[(id)[UIColor redColor].CGColor,(id)[UIColor greenColor].CGColor,(id)[UIColor purpleColor].CGColor];
    //动画过渡时间
    animation.keyTimes = @[@0.0,@0.5,@1];
    animation.duration = 2;
    [layer addAnimation:animation forKey:nil];
     */

    CAKeyframeAnimation *animation = [CAKeyframeAnimation animation];
    animation.keyPath = @"position";
    animation.values = @[[NSValue valueWithCGPoint:CGPointMake(10, 20)],[NSValue valueWithCGPoint:CGPointMake(10, 300)],[NSValue valueWithCGPoint:CGPointMake(200, 300)],[NSValue valueWithCGPoint:CGPointMake(10, 300)],[NSValue valueWithCGPoint:CGPointMake(10, 20)],[NSValue valueWithCGPoint:CGPointMake(50, 50)]];
    animation.autoreverses = YES;
    animation.duration = 2;
    [layer addAnimation:animation forKey:nil];
}

//组动画,组合动画,多个动画同时执行
-(void)groupAnimation
{
    //移动
    CABasicAnimation *basic =[CABasicAnimation animation ];
    basic.keyPath = @"position";
    basic.duration = 2;
    basic.autoreverses = YES;
    basic.fromValue = [NSValue valueWithCGPoint:layer.position];
    basic.byValue = [NSValue valueWithCGPoint:CGPointMake(20, 0)];
    //颜色变化
    CAKeyframeAnimation *keyframe = [CAKeyframeAnimation animation];
    keyframe.keyPath = @"backgroundColor";
    keyframe.values =  @[(id)[UIColor redColor].CGColor,(id)[UIColor yellowColor].CGColor,(id)[UIColor greenColor].CGColor];
    keyframe.duration = 2;
    keyframe.autoreverses = YES;


    CAAnimationGroup *group = [CAAnimationGroup animation];
    group.animations = @[basic,keyframe];
    //这边时间是以group的时间为主的
    group.duration = 4;
    [layer addAnimation:group forKey:nil];
}

//过渡动画
- (void)transitionAnimation
{
    CATransition *animation = [CATransition animation];
    animation.type = @"pageUnCurl";
    animation.delegate = self;
    animation.duration = 2;
    animation.autoreverses = YES;
    [layer addAnimation:animation forKey:nil];

}
- (void)didReceiveMemoryWarning {
    [super didReceiveMemoryWarning];
    // Dispose of any resources that can be recreated.
}

@end
其中过度动画的类型,我们可以使用下面的效果。
cube 方块
suckEffect 三角
rippleEffect 水波抖动
pageCurl 上翻页
pageUnCurl 下翻页
cameraIrisHollowOpen 镜头快门开
cameraIrisHollowClose 镜头快门开
