实验环境
windows xp sp3
Nginx版本:1.5.12;
下载地址:http://nginx.org/en/download.html
Tomcat版本:6.0.39
下载地址:http://tomcat.apache.org/download-60.cgi
一、配置nginx
1、 在D盘根目录建立nginx文件夹,把下载的nginx发布包nginx-1.5.12.zip解压到该目录。
2、 D: ginx ginx-1.5.12目录结构
Nginx-
|_ conf 配置目录
|_ contrib.
|_ docs 文档目录
|_ logs 日志目录
|_ temp 临时文件目录
|_ html 静态页面目录
|_ nginx.exe 主程序
3、 启动nginx
windows下启动nginx非常简单,双击运行nginx.exe即可。Nginx默认运行在80端口,检查nginx是否启动我们只需要在浏览器中输入http://localhost便可看到如下页面,说明我们nginx已经启起来了。

1、 停止nginx
如果需要停止nginx,需要打开一个命令行窗口,进入nginx解压的目录,也就是进入nginx.exe文件所在的目录,输入命令nginx –s stop 便可停止nginx。
二、集群配置
1、 配置tomcat
在D盘根目录建立tomcat文件夹,解压2份tomcat6.0.39发布包到该目录下,分别命名为tomcat01,tomcat02。为了便于观察我们访问的是哪个tomcat,我们修改tomcat01的D: omcat omcat01webappsROOTindex.html中

<td align="left" valign="top"><b>Apache Tomcat</b></td>
改为
<td align="left" valign="top"><b>Apache Tomcat 1</b></td>
同理我们把tomcat02的D: omcat omcat02webappsROOTindex.html中

<td align="left" valign="top"><b>Apache Tomcat</b></td>
改为
<td align="left" valign="top"><b>Apache Tomcat 2</b></td>
2个tomcat我们在同一台计算机上,为了让2个tomcat的端口不冲突,我们把tomcat02的D: omcat omcat02confserver.xml中

<Server port="8005" shutdown="SHUTDOWN">
改为
<Server port="8105" shutdown="SHUTDOWN">

<Connector port="8080" protocol="HTTP/1.1"
connectionTimeout="20000"
redirectPort="8443" />
改为
<Connector port="8180" protocol="HTTP/1.1"
connectionTimeout="20000"
redirectPort="8543" />

<Connector port="8009" protocol="AJP/1.3" redirectPort="8443" />
改为
<Connector port="8109" protocol="AJP/1.3" redirectPort="8543" />
2、 配置nginx
nginx.conf

- #Nginx所用用户和组,window下不指定
- #user niumd niumd;
- #工作的子进程数量(通常等于CPU数量或者2倍于CPU)
- worker_processes 2;
- #错误日志存放路径
- #error_log logs/error.log;
- #error_log logs/error.log notice;
- #error_log logs/error.log info;
- #指定pid存放文件
- #pid logs/nginx.pid;
- events {
- #使用网络IO模型linux建议epoll,FreeBSD建议采用kqueue,window下不指定。
- #use epoll;
- #允许最大连接数
- worker_connections 1024;
- }
- http {
- include mime.types;
- default_type application/octet-stream;
- #定义日志格式
- log_format main '$remote_addr - $remote_user [$time_local] "$request" '
- '$status $body_bytes_sent "$http_referer" '
- '"$http_user_agent" "$http_x_forwarded_for"';
- access_log logs/access.log main;
- client_header_timeout 3m;
- client_body_timeout 3m;
- send_timeout 3m;
- client_header_buffer_size 1k;
- large_client_header_buffers 4 4k;
- sendfile on;
- tcp_nopush on;
- tcp_nodelay on;
- #keepalive_timeout 0;
- keepalive_timeout 65;
- #gzip on;
- upstream localhost {
- #根据ip计算将请求分配各那个后端tomcat,许多人误认为可以解决session问题,其实并不能。
- #同一机器在多网情况下,路由切换,ip可能不同
- ip_hash;
- server localhost:8080;
- server localhost:8180;
- }
- server {
- listen 80;
- server_name localhost;
- #charset koi8-r;
- #access_log logs/host.access.log main;
- location / {
- proxy_connect_timeout 3;
- proxy_send_timeout 30;
- proxy_read_timeout 30;
- proxy_pass http://localhost;
- }
- #error_page 404 /404.html;
- # redirect server error pages to the static page /50x.html
- #
- error_page 500 502 503 504 /50x.html;
- location = /50x.html {
- root html;
- }
- }
- }
3、 查看反向代理配置结果
启动nginx、tomcat01、tomcat02。
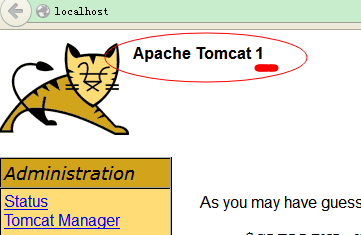
浏览器输入http://localhost便看到tomcat01的管理界面,如下图。
然后透明停止tomcat02,刷新页面,nginx自动帮我们切换到tomcat02了,如下图。
