一、路由概念
1.1 路由是一个网络工程中的术语,路由(routing)就是通过互联的网络把信息从源地址传递到目的地址的活动
1.2 路由器提供了两种机制:路由和传递
- 路由是决定数据包从来源到目的地的路径
- 转送将输入端的数据转移到合适的输出端
1.3 路由表本质上就是一个映射表,决定了数据包的指南
1.4 后端路由(第一阶段):后端处理URL和页面之间的映射关系
1.5 前后端分离阶段(第二阶段):
- 后端只负责提供数据,不负责任何阶段的内容;
- 前端渲染,浏览器中显示的网页中的大部分内容,都是由前端写的js代码在浏览器中执行,最终渲染出来的网页
1.6 单页面富应用阶段(第三阶段):
- SPA最主要的特点就是在前后端分离的基础上加了一层前端路由
- 也就是前端来维护一套路由规则
1.7 前端路由的核心:改变url,但是页面不进行整体的刷新
二、vue-router 基本使用(官网:https://router.vuejs.org/zh/)
2.1 vue-router适用于构建单页面应用,并且是基于路由和组件的
- 路由用于设定访问路径,将路径和组件映射起来
- 在vue-router的单页面应用中,页面的路径的改变就是组件的切换
2.2 通过工程化方式进行开发
步骤一:安装vue-router
npm install vue-router -save
步骤二:在模块化工程中使用它(因为是一个插件,所以可以通过Vue.use()来安装路由功能)
- 第一步:导入路由对象,并且调用Vue.use(VueRouter)
- 第二步:创建路由实例,并且传入路由映射配置
- 第三步:在Vue实例中挂载创建的路由实例
////////////在router的index.js中
//配置路由相关的信息
import VueRouter from 'vue-router'
import Vue from 'vue'

//1.通过Vue.use(插件),安装插件
Vue.use(VueRouter)

//2.创建路由对象
const routes = [

]
const router = new VueRouter({
  //在routes中配置组件之间的映射关系
  routes: routes,
  //默认情况下,路径的改变使用的URL的hash。下面则是使用 HTML5的history模式
  mode: 'history'
})

//3.将router对象传入vue实例中
export default router


////////////在main.js中

import Vue from 'vue'
import App from './App'
import router from './router/index.js' //index可以省略
Vue.config.productionTip = false

/* eslint-disable no-new */
new Vue({
  el: '#app',
  router:router,  //直接可以简写成router
  render: h => h(App)
})
2.3 使用vue-router的步骤
- 第一步:创建路由组件
- 第二步:配置路由映射:组件和路径映射关系
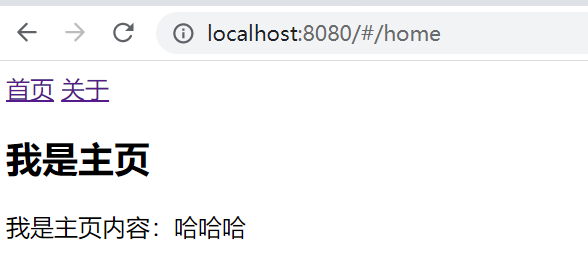
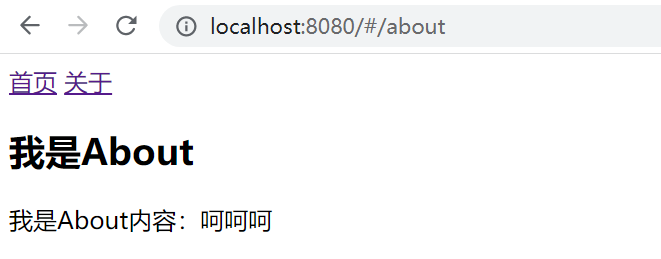
- 第三步:使用路由:通过<router-link>和<router-view>
//配置路由映射
import Home from '../components/Home'
import About from '../components/About'
//2.创建路由对象
const routes = [
  {
  path: '',
  //设置默认打开的url路径
  redirect: '/home'
 },{
    path: '/home',
    component: Home
  },{
    path: '/about',
    component: About
  }
]

//使用路由 在App.vue中使用路由
<div id="app">
    <!-- 路由的显示 -->
    <router-link to="/home">首页</router-link>
    <router-link to="/about">关于</router-link>

    <!-- router-view 相当于展位 -->
    <router-view></router-view>
</div>
例子:也可以进行通过代码修改路由
<template>
  <div id="app">
    <!-- 路由的显示 -->
    <!--
      <router-link to="/home" tag="button" replace active-class="active">首页</router-link>
      <router-link to="/about" tag="button" replace active-class="active">关于</router-link>
      -->
    <!-- <router-link to="/home" tag="button" replace>首页</router-link>
    <router-link to="/about" tag="button" replace>关于</router-link> -->

    <button @click='homeClick'>首页</button>
    <button @click='aboutClick'>关于</button>

    <!-- router-view 相当于占位 -->
    <router-view></router-view>
  </div>
</template>

<script>
export default {
  name: 'App',
  methods: {
    homeClick(){
      //通过代码方式修改路由 vue-router
      //push => pushState
      //this.$router.push('/home')
      this.$router.replace('/home')
      console.log("homeClick")
    },
    aboutClick(){
      //this.$router.push('/about')
      this.$router.replace('/about')
      console.log("aboutClick");
    }
  }
}
</script>

<style>
.active{
  color: red;
}
</style>
- <router-link> :该标签是一个vue-router中已经内置的组件,它会被渲染成一个<a>标签
- <router-link> :该标签会根据当前的路径,动态渲染出不同的组件
- 网页的其他内容,比如底部的标题、导航。或者底部的一些版权信息会和<router-view>处于同一级
- 在路由切换时,切换的是<router-view>挂载的组件,其他的内容不会发生改变
- 效果图如下
2.4 <router-link>属性的补充
- tag:tag可以指定<router-link>之后渲染成什么组件;例如 tag="button" 会渲染成<button>
- replace:replace不会留下history记录,所以指定replace的情况下,后退键返回不能返回到上一个页面中
- active-class:当<router-link>对应的路由不匹配时,会自动给当前元素设置一个router-link-active的class,设置active-class可以修改默认的名称
在进行高亮显示的导航菜单或者底部tabbar时,会用到该类
但是通常不会修改类的属性,会直接使用默认的router-link-active即可
三、vue-router 理由懒加载
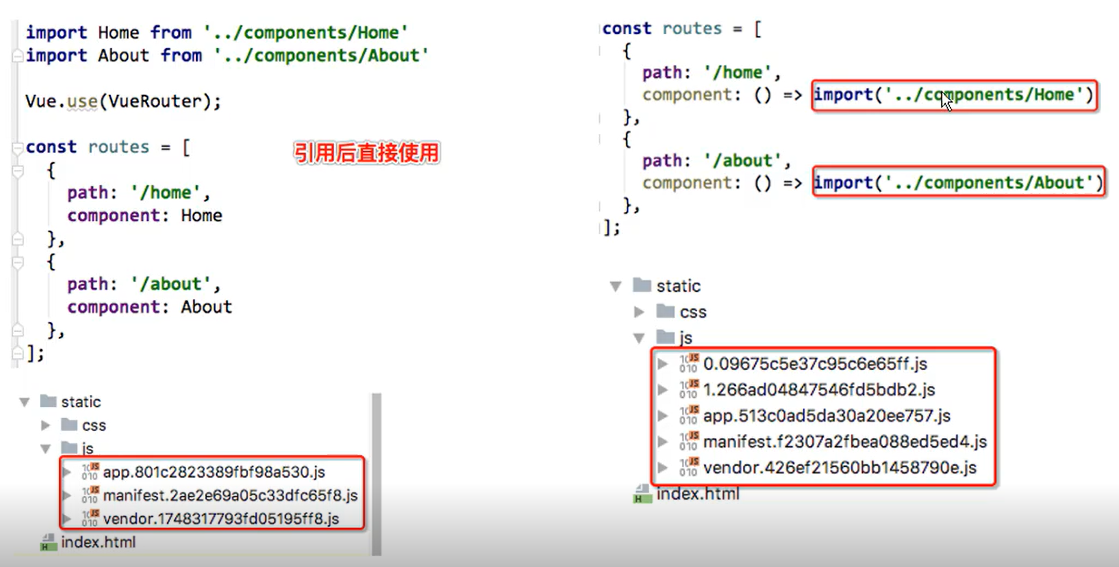
■方式一:结合Vue的异步组件和Webpack的代码分析
const Home = resolve => {require.ensure(['../components/Home.vue'], () =>
{ resolve(require('../components/Home.vue')) })}
■方式二: AMD写法
const About = resolve => requore(['../components./About.vue'], resolve);
■式三:在ES6中,我们可以有更加简单的写法来组织Vue异步组件和Webpack的代码分割
const Home = () => import('../components/Home.vue')
四、vue-router 动态路由
4.1 创建User.vue文件
<template>
  <div>
    <h2>我是用户界面</h2>
    <p>我是用户的相关信息,嘿嘿嘿</p>
    <p>{{userId}}</p>
  </div>
</template>
<script>
export default{
  name:'User',
  computed: {
    userId(){
      //$route取到正处于活跃的路由
      return this.$route.params.abcId
    }
  }
}
</script>
<style scoped></style>
4.2 路由文件夹下index.js文件配置
//配置路由相关的信息
import VueRouter from 'vue-router'
import Vue from 'vue'

import Home from '../components/Home'
import About from '../components/About'
import User from '../components/User'

//1.通过Vue.use(插件),安装插件
Vue.use(VueRouter)

//2.创建路由对象
const routes = [
  {
    path: '',
    //redirect 重定向
    redirect: '/home'
  },
  {
    path: '/home',
    component: Home
  },{
    path: '/about',
    component: About
  },{
    //重点
    path: '/User/:abcId',
    component: User
  }
]
const router = new VueRouter({
  //在routes中配置组件之间的映射关系
  routes: routes,
  mode: 'history',
  linkActiveClass: 'active'
})

//3.将router对象传入vue实例中
export default router
4.3 App.vue 使用
<template>
  <div id="app">
    <router-link to="/Home" tag="button" active-class="active">首页</router-link>
    <router-link to="/About" tag="button" active-class="active">关于</router-link>
    <router-link v-bind:to="'/User/'+userId" tag="button" active-class="active">用户</router-link>
    <!-- router-view 相当于占位 -->
    <router-view></router-view>
  </div>
</template>

<script>
export default {
  name: 'App',
  data(){
    return {
      userId: 'lisi'
    }
  }
}
</script>

<style>
.active{
  color: red;
}
</style>
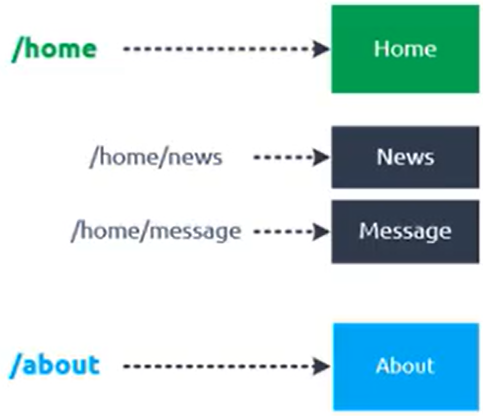
五、vue-router 嵌套路由
■嵌套路由是一个很常见的功能
ロ 比如在home页面中,我们希望通过/home/news和/home/message访问一些内容.
ロ 一个路径映射一个组件,访问这两个路径也会分别渲染两个组件.
实现嵌套路由有两个不步骤
创建对应的子组件,并在路由映射中配置对应的子路由
在组件内部使用<router-view> 标签。
js配置文件
//配置路由相关的信息
import VueRouter from 'vue-router'
import Vue from 'vue'

// import Home from '../components/Home'
// import About from '../components/About'
// import User from '../components/User'

//1.通过Vue.use(插件),安装插件
Vue.use(VueRouter)

//2.创建路由对象
const routes = [
  {
    path: '',
    //redirect 重定向
    redirect: '/home'
  },
  {
    path: '/home',
    //component: Home
    component: ()=> import('../components/Home'),
    children:[
      {
        path: '',
        redirect: '/home/news'
      },{
        //子路由不需要加 “/”
        path: 'news',
        component: ()=> import('../components/HomeNews')
      },{
        path: 'messages',
        component: ()=> import('../components/HomeMessage')
      }
    ]
  },{
    path: '/about',
    // component: About
    component: ()=> import('../components/About')
  },{
    path: '/User/:abcId',
    // component: User
    component: ()=> import('../components/User')
  }
]
const router = new VueRouter({
  //在routes中配置组件之间的映射关系
  routes: routes,
  mode: 'history',
  linkActiveClass: 'active'
})

//3.将router对象传入vue实例中
export default router
六、vue-router 传递参数
传递参数主要有两种类型: params和query
params的类型:
- 配置路由格式: /router/:id
- 传递的方式:在path后面跟上对应的值
- 传递后形成的路径: /router/123, /router/abc
query的类型:
- 配置路由格式: /router,也就是普通配置
- 传递的方式:对象中使用query的key作为传递方式
- 传递后形成的路径: /router?id=123, /router?id=abc
七、vue-router 导航守卫
7.1 在钩子当中定义一些标题,可以利用mata(元数据)来定义
7.2 利用导航守卫,修改标题
//2.创建路由对象
const routes = [
  {
    path: '',
    //redirect 重定向
    redirect: '/home'
  },
  {
    path: '/home',
    //component: Home
    component: ()=> import('../components/Home'),
    meta: {
      //元数据
      title: "首页"
    }
  },{
    path: '/about',
    // component: About
    component: ()=> import('../components/About'),
    meta: {
      title: "关于"
    }
  },{
    path: '/user/:Id',
    component: ()=> import('../components/User'),
    meta: {
      title: "用户"
    }
  },{
    path: '/profile',
    component: ()=> import('../components/Profile'),
    meta: {
      title: "档案"
    }
  },{
    path: '/user2/:Id',
    component: ()=> import('../components/User2'),
    meta: {
      title: "用户2"
    }
  },{
    path: '/profile2',
    component: ()=> import('../components/Profile2'),
    meta: {
      title: "档案2"
    }
  }
]
7.3 导航钩子的三个参数的解析
- to:即将要进入的目标路由对象
- form:当前导航即将要离开的路由对象
- next:调用该方法后,才能进入下一个钩子
// router.beforeEach(function(to, form, next){
// })
router.beforeEach((to, from, next)=>{
  //从from跳转到to
  document.title = to.matched[0].meta.title
  next()
})
注意:beforeEach(to, from, next):前置钩子,在跳转之前进行处理,需要主动调用 next() 函数
afterEach(to, from):后置钩子,在跳转之后进行处理,不需要主动调用 next() 函数
八、keep-alive
8.1 keep-alive 是Vue内置的一个组件,可以使被包含的组件保留状态,或避免重新渲染
有两个重要的属性
include -字符串或正则表达式,只有匹配的组件会被缓存
exclude -字符串或政策表达式,任何匹配的组件都不会被缓存
如下所示 exclude="定义组件的name的值" ;注意:中间不能加 空格
    <keep-alive exclude="Profile,User">
      <router-view></router-view>
    </keep-alive>
8.2 router-view 也是一个组件,如果直接被包在keep-alive里面,所有路径匹配到的视图组件都会被缓存。
8.3 可以通过create声明周期函数来验证