【官方文档:https://developers.arcgis.com/javascript/latest/sample-code/intro-popuptemplate/index.html】
一、Intro to PopupTemplate(关于popup模板)
popups(弹出框)提供了一种简便的方式去查看layers(图层)或者graphics(图形)的属性信息。它也可以展示鼠标在view(视图)中的点击位置的坐标等其他相关信息。在ArcMap中,查看要素图层(shapefile)的属性需要打开attribute table(属性表)。在地图中选择想查看信息的要素,在属性表中会高亮显示那一行;或者,在表中找到关心的那一行,在地图中会高亮显示那一个要素。除了在属性表中可以看到要素的属性字段值,也可以打开标注,但这样只能在地图中展示一个字段的值。
ArcGIS Pro、ArcGIS Online、Portal中出现了popup的概念,点击地图中关心的要素(点、线或面),就会弹出一个弹出框,以表格、文本、图表、图片等形式展现所选择要素的属性信息。这个弹出框就是popup。
每一个view(视图)都有一个popup,但是这个popup所展现的内容和展现这些内容所采用的形式、格式是由每一个图层(layer)决定的。如果不对popup进行自定义的设置(不对popupTemplate进行设置),popup会以默认表格的形式展示当前图层要素的所有字段值。API提供了popupTemplate(popup模板)的概念,允许用户自定义popup,回答要展现哪些字段值、怎样展现这些值的问题。
1.代码骨架
 1 <!doctype html>
 2 <html>
 3     <head>
 4         <meta charset="utf-8">
 5         <!-- 移动端优化 -->
 6         <meta name="viewport" content="initial-scale=1,maximum-scale=1,user-scalable=no">
 7         <title>Intro to PopupTemplate</title>
 8
 9         <!-- JS API的引入 -->
10         <link rel="stylesheet" href="https://js.arcgis.com/4.8/esri/css/main.css">
11         <script src="https://js.arcgis.com/4.8/"></script>
12
13         <!-- 设置style以正确显示地图 -->
14         <style>
15             html,body,#viewDiv{
16                 padding:0;
17                 margin:0;
18                 height:100%;
19                 width:100%;
20             }
21         </style>
22
23         <script>
24
25         </script>
26     </head>
27
28     <body>
29         <div id="viewDiv"></div>
30     </body>
31 </html>
其中,包括JS API的引入、style样式的设置等等。
2.基础语句
 1 <script>
 2     require([
 3         "esri/Map",
 4         "esri/views/MapView",
 5         "esri/layers/FeatureLayer",  //以展示FeatureLayer的popup为例
 6         "dojo/domReady!"
 7         ],function(Map,MapView,FeatureLayer){
 8             //创建Map(实例化)
 9             var map=new Map({
10                 basemap:"gray",
11             });
12
13             //创建MapView(实例化)
14             var view=new MapView({
15                 container:"viewDiv",
16                 map:map,
17                 center:[-73.950,40.702],
18                 zoom:11
19             });
20
21             //创建FeatureLayer(实例化)
22             var featureLayer=new FeatureLayer({
23                 url:"https://services.arcgis.com/V6ZHFr6zdgNZuVG0/ArcGIS/rest/services/NYCDemographics1/FeatureServer/0",
24                 outFields:["*"]
25             });
26
27             //将新创建的FeatureLayer添加到map中
28             map.layers.add(featureLayer);
29 });
30</script>
上面语句创建了地图(Map)与和视图(MapView),并将地图绑定到了视图中。创建了一个FeatureLayer(要素图层)并添加到了Map实例中。关于Map和MapView的概念,请查看:https://www.cnblogs.com/wangmengdx/p/9385033.html。
此时出现了底图和featureLayer,但是点击这个图层上的面状要素,并不会弹出popup。
3.编写popupTemplate模板标题
1 var template={  //autocasts as new popupTemplate()(一个概念)
2//{ZIP}指向当前图层要素的ZIP属性字段值
3     title:"Marriage in NY,Zip Code:{ZIP}"
4 };
5
6//featureLayer的popup将使用自己设置的模板
7 featureLayer.popupTemplate=template;
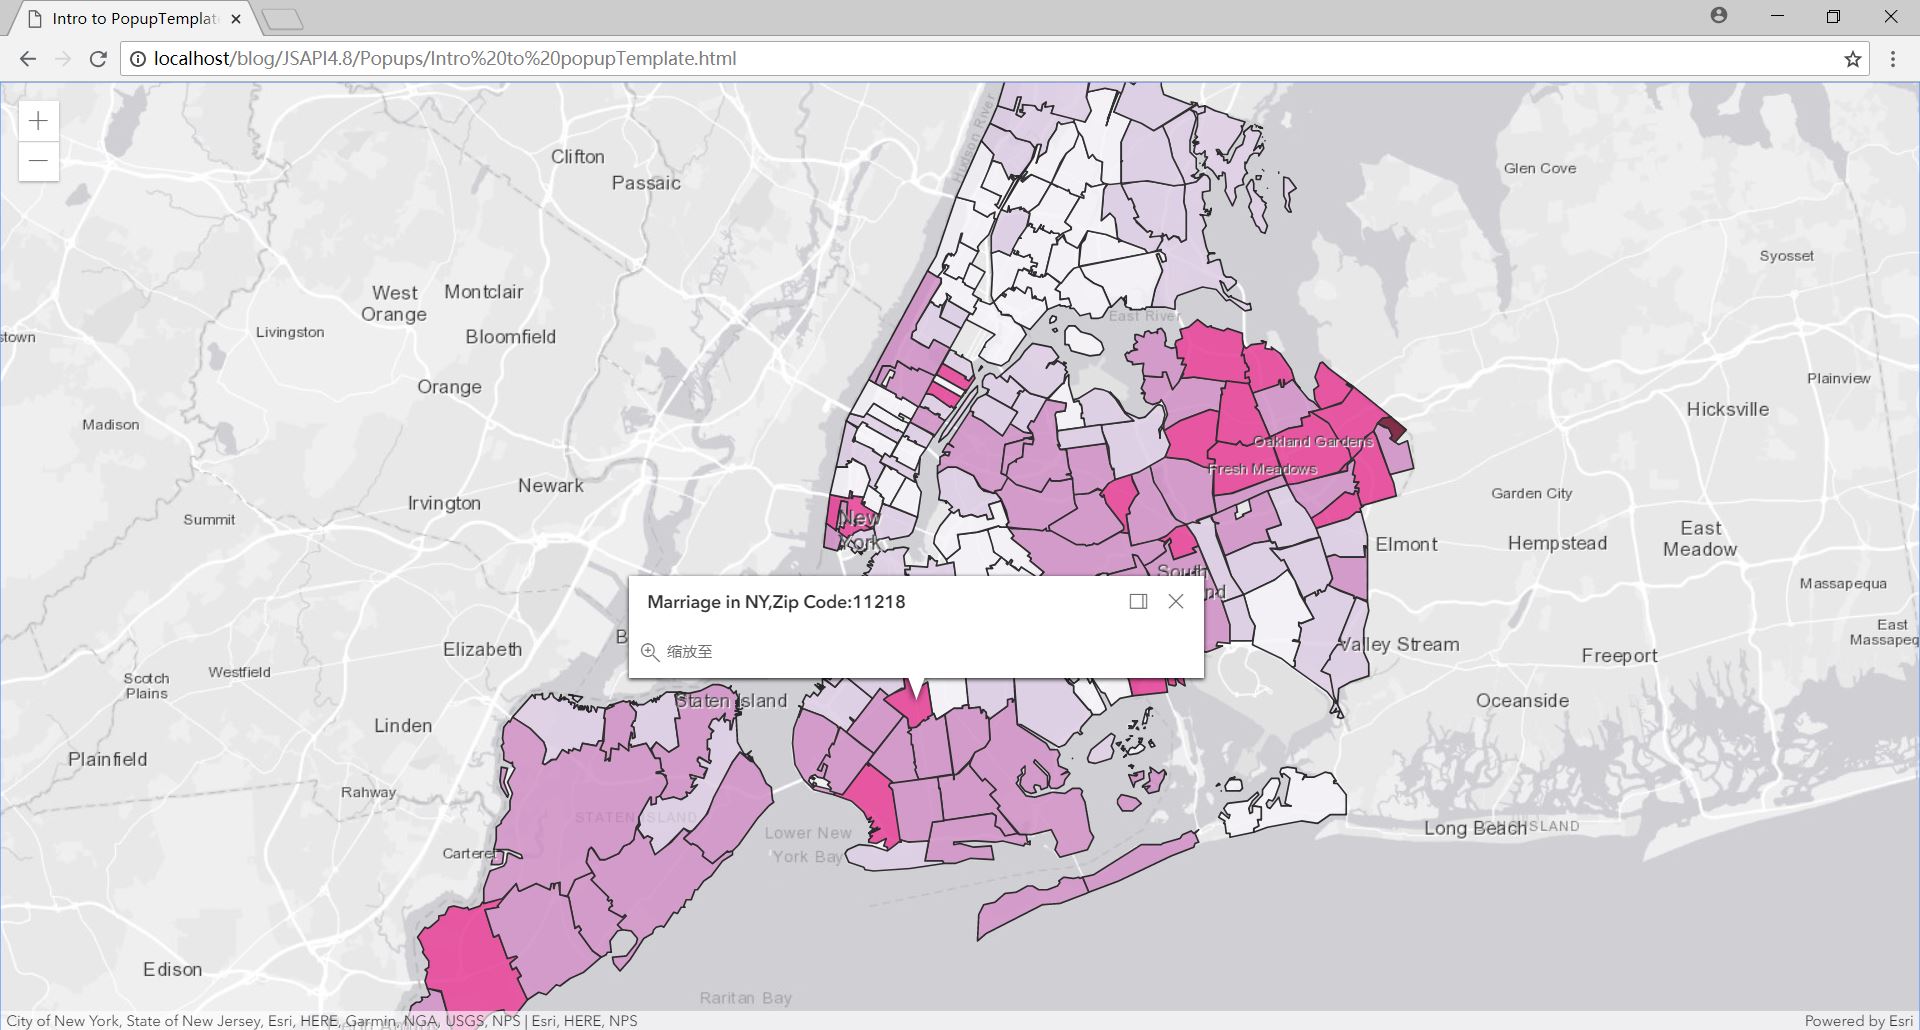
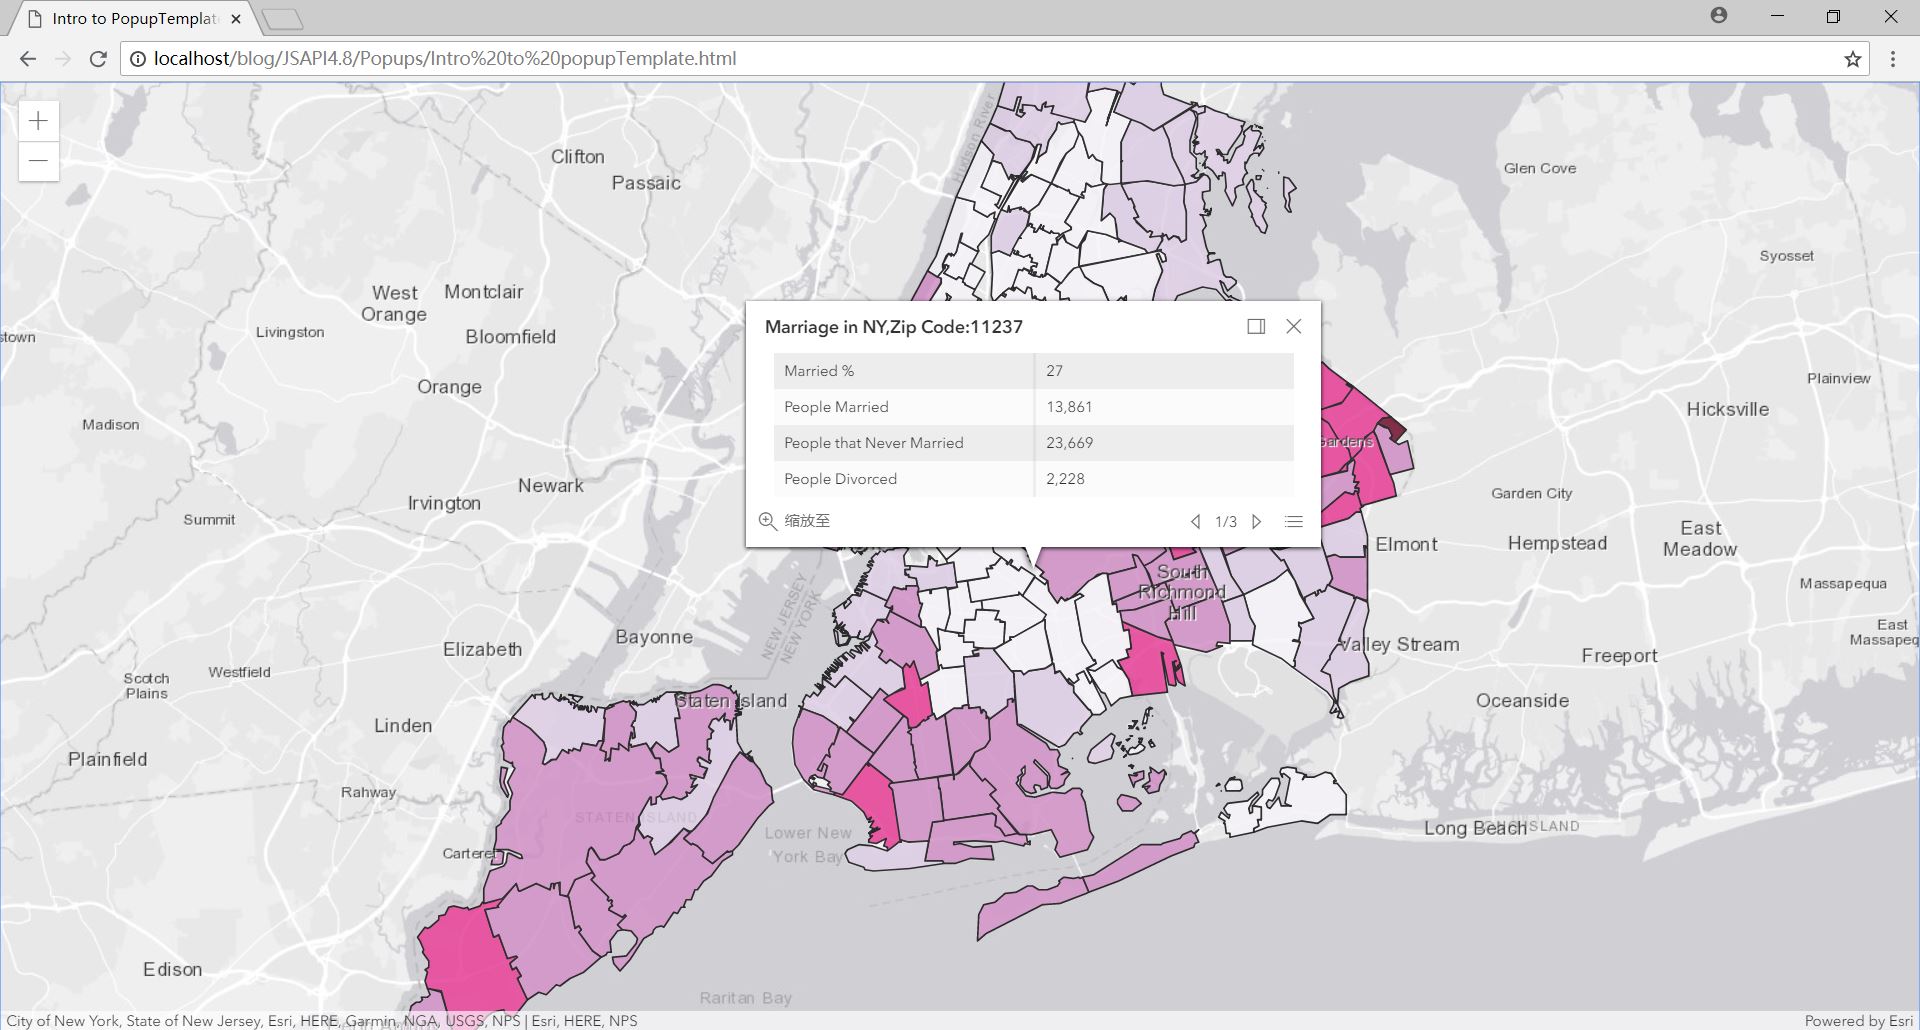
创建了一个模板并对模板的标题进行了设置,显示所选择图层要素的ZIP字段值,这个标题就是popup弹出框的标题。使用{field}这种形式引用图层要素的某一个字段值。这里有一个JavaScript API中很重要的概念:autocast。这里创建了一个对象(变量)template,并没有按照var template=new PopupTemplate({ //some codes })这种形式,甚至在require()中都没有引入esri/PopupTemplate模块。但是上面的代码中却使用了popupTemplate实例的属性title。这种用法是可以的,也是经常会用到的,这就是autocast的概念。有关autocast的更多信息,请查看:https://developers.arcgis.com/javascript/latest/guide/autocasting/index.html。
只包括title标题的模板创建完成后,将它赋给featureLayer的popupTemplate属性。当点击featureLayer中的要素时,就会按照这个自定义模板的形式弹出popup,展示相关的内容。
4.编写popupTemplate模板主体内容
 1 var template={  //autocasts as new popupTemplate()(一个概念)
 2//{ZIP}指向当前图层要素的ZIP属性字段值
 3     title:"Marriage in NY,Zip Code:{ZIP}",
 4     content:[{
 5         type:"fields",
 6         fieldInfos:[{
 7             fieldName:"MARRIEDRATE",
 8             label:"Married %",
 9             visible:true
10         },{
11             fieldName:"MARRIED_CY",
12             label:"People Married",
13             visible:true
14         },{
15             fieldName:"NEVMARR_CY",
16             label:"People that Never Married",
17             visible:true
18         },{
19             fieldName:"DIVORCD_CY",
20             label:"People Divorced",
21             visible:true
22         }]
23     }]
24 };
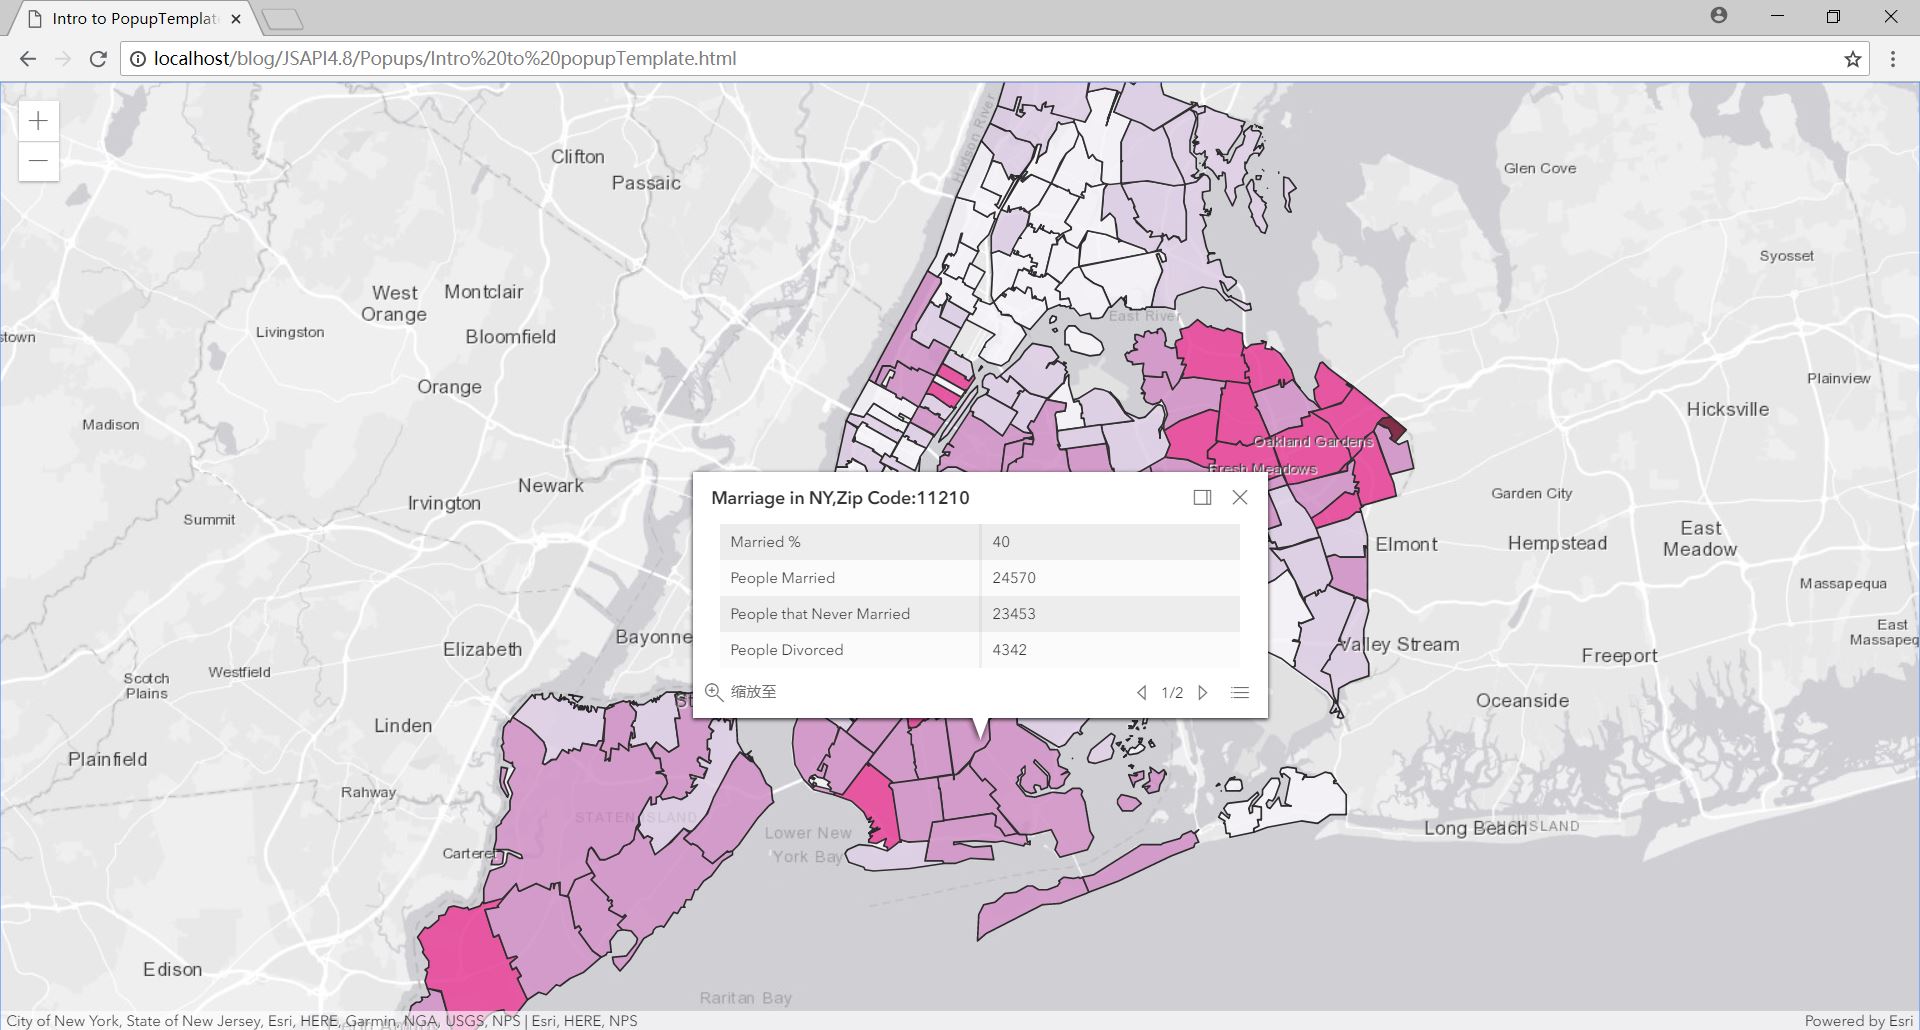
content是popupTemplate的主体内容,它的值是一个对象数组,按照这种形式:content:[{obj 1},{obj 2},...,{obj n}]。即在popup中可以显示很多种内容(obj 1规定的、obj 2规定的内容等等)。上面代码只规定了一个obj1,它设置了字段值以表格的形式展示(还可以以文本、图表、图片等形式展示)。obj1中有两个属性,第一个是type(这里是"fields"),用于标识这段内容想展示什么样的数据;第二个是fieldInfos(根据type的不同而不同),设置要展示的字段值以及展示的格式。其中,fieldInfos的形式是这样的:fieldInfos:[{filed 1},{field 2},...,{field n}],图层要素可能包含很多的字段值,但这里只展示关心感兴趣的值。field 1中包含的属性有fieldName,字段名字;label,该字段在popup中展示时所用的名字;visible,设置这个字段是否显示出来,如果是false,即使对这个字段值进行了设置,也不在popup中显示。
这样的写法很容易看错,要注意层次关系和大括号的匹配。层次关系如下:
 1 content:[  //content开始
 2
 3 {//obj1(fields)
 4     type:"fields",
 5     fieldInfos:[{
 6         //field1
 7         //some codes
 8     },{
 9         //field2
10         //some codes
11     }]
12 },
13
14 {//obj2(text)
15     type:"text",
16     text:""
17 },
18
19 {//obj3(media)
20     type:"media",
21     mediaInfos:[{
22         //media1  pie-chart
23         //some codes
24     },{
25         //media2  image
26         //some codes
27     }]
28 },
29
30 {//obj4(attachment)
31     type:"attachment"32     // some codes35 }
36
37 ]  //content结束
上面要展示的4个内容(obj1、obj2、obj3、obj4)对应着fields、text、media(图表或图片)、attachment这4种展示信息的形式,在后文中会讲到。
5.格式化显示数字数据
可以设置千分位符(当数字大于1000,显示小数点,不确定当数字大于1000000是否会显示两个小数点)、小数点位以达到更好的显示效果。
1 format:{
2     digitSeparator:true,  //设置千分位符
3     places:0  //小数点保留0位(四舍五入到整数)
4 }
format是fieldInfos中的一个属性,写在fieldInfos中。
6.将自定义的template赋给featureLayer的popupTemplate属性
(因为前面要演示popup的效果,已经进行了赋值)。将自定义的template(popup模板)赋值给图层的popupTemplate属性,就可以用自己定义的popup形式展示所点击要素的属性内容。
有两种方法可以实现。一是在featureLayer的构造函数中设置popupTemplate属性,即在创建featureLayer时将之前已经写好代码的template赋给popupTemplate;二是调用代码将template赋值给图层的popupTemplate属性,这适用于在创建图层时还没有写好template的情况。
方法一:
1 var featureLayer=new FeatureLayer({
2     url:"https://services.arcgis.com/V6ZHFr6zdgNZuVG0/ArcGIS/rest/services/NYCDemographics1/FeatureServer/0",
3     popupTemplate:template,
4     outFields:["*"]
5 });
方法二:
1 featureLayer.popupTemplate=template;
7.最终代码及运行效果

 1 <!doctype html>
 2 <html>
 3     <head>
 4         <meta charset="utf-8">
 5         <!-- 移动端优化 -->
 6         <meta name="viewport" content="initial-scale=1,maximum-scale=1,user-scalable=no">
 7         <title>Intro to PopupTemplate</title>
 8
 9         <!-- JS API的引入 -->
10         <link rel="stylesheet" href="https://js.arcgis.com/4.8/esri/css/main.css">
11         <script src="https://js.arcgis.com/4.8/"></script>
12
13         <!-- 设置style以正确显示地图 -->
14         <style>
15             html,body,#viewDiv{
16                 padding:0;
17                 margin:0;
18                 height:100%;
19                 width:100%;
20             }
21         </style>
22
23         <script>
24             require([
25                 "esri/Map",
26                 "esri/views/MapView",
27                 "esri/layers/FeatureLayer",  //以展示FeatureLayer的popup为例
28                 "dojo/domReady!"
29                 ],function(Map,MapView,FeatureLayer){
30                     //创建Map(实例化)
31                     var map=new Map({
32                         basemap:"gray",
33                     });
34
35                     //创建MapView(实例化)
36                     var view=new MapView({
37                         container:"viewDiv",
38                         map:map,
39                         center:[-73.950,40.702],
40                         zoom:11
41                     });
42
43                     //创建FeatureLayer(实例化)
44                     var featureLayer=new FeatureLayer({
45                         url:"https://services.arcgis.com/V6ZHFr6zdgNZuVG0/ArcGIS/rest/services/NYCDemographics1/FeatureServer/0",
46                         outFields:["*"]
47                     });
48
49                     //将新创建的FeatureLayer添加到map中
50                     map.layers.add(featureLayer);
51
52                     var template={  //autocasts as new popupTemplate()(一个概念)
53                         //{ZIP}指向当前图层要素的ZIP属性字段值
54                         title:"Marriage in NY,Zip Code:{ZIP}",
55                         content:[{
56                             type:"fields",
57                             fieldInfos:[{
58                                 fieldName:"MARRIEDRATE",
59                                 label:"Married %",
60                                 visible:true
61                             },{
62                                 fieldName:"MARRIED_CY",
63                                 label:"People Married",
64                                 visible:true,
65                                 format:{
66                                     digitSeparator:true,  //设置千分位符
67                                     places:0  //小数点保留0位(四舍五入到整数)
68                                 }
69                             },{
70                                 fieldName:"NEVMARR_CY",
71                                 label:"People that Never Married",
72                                 visible:true,
73                                 format:{
74                                     digitSeparator:true,
75                                     places:0
76                                 }
77                             },{
78                                 fieldName:"DIVORCD_CY",
79                                 label:"People Divorced",
80                                 visible:true,
81                                 format:{
82                                     digitSeparator:true,
83                                     places:0
84                                 }
85                             }]
86                         }]
87                     };
88
89                     //featureLayer的popup将使用自己设置的模板
90                     featureLayer.popupTemplate=template;
91             });
92         </script>
93     </head>
94
95     <body>
96         <div id="viewDiv"></div>
97     </body>
98 </html>
二、Multiple popup elements(popup中的多种元素)
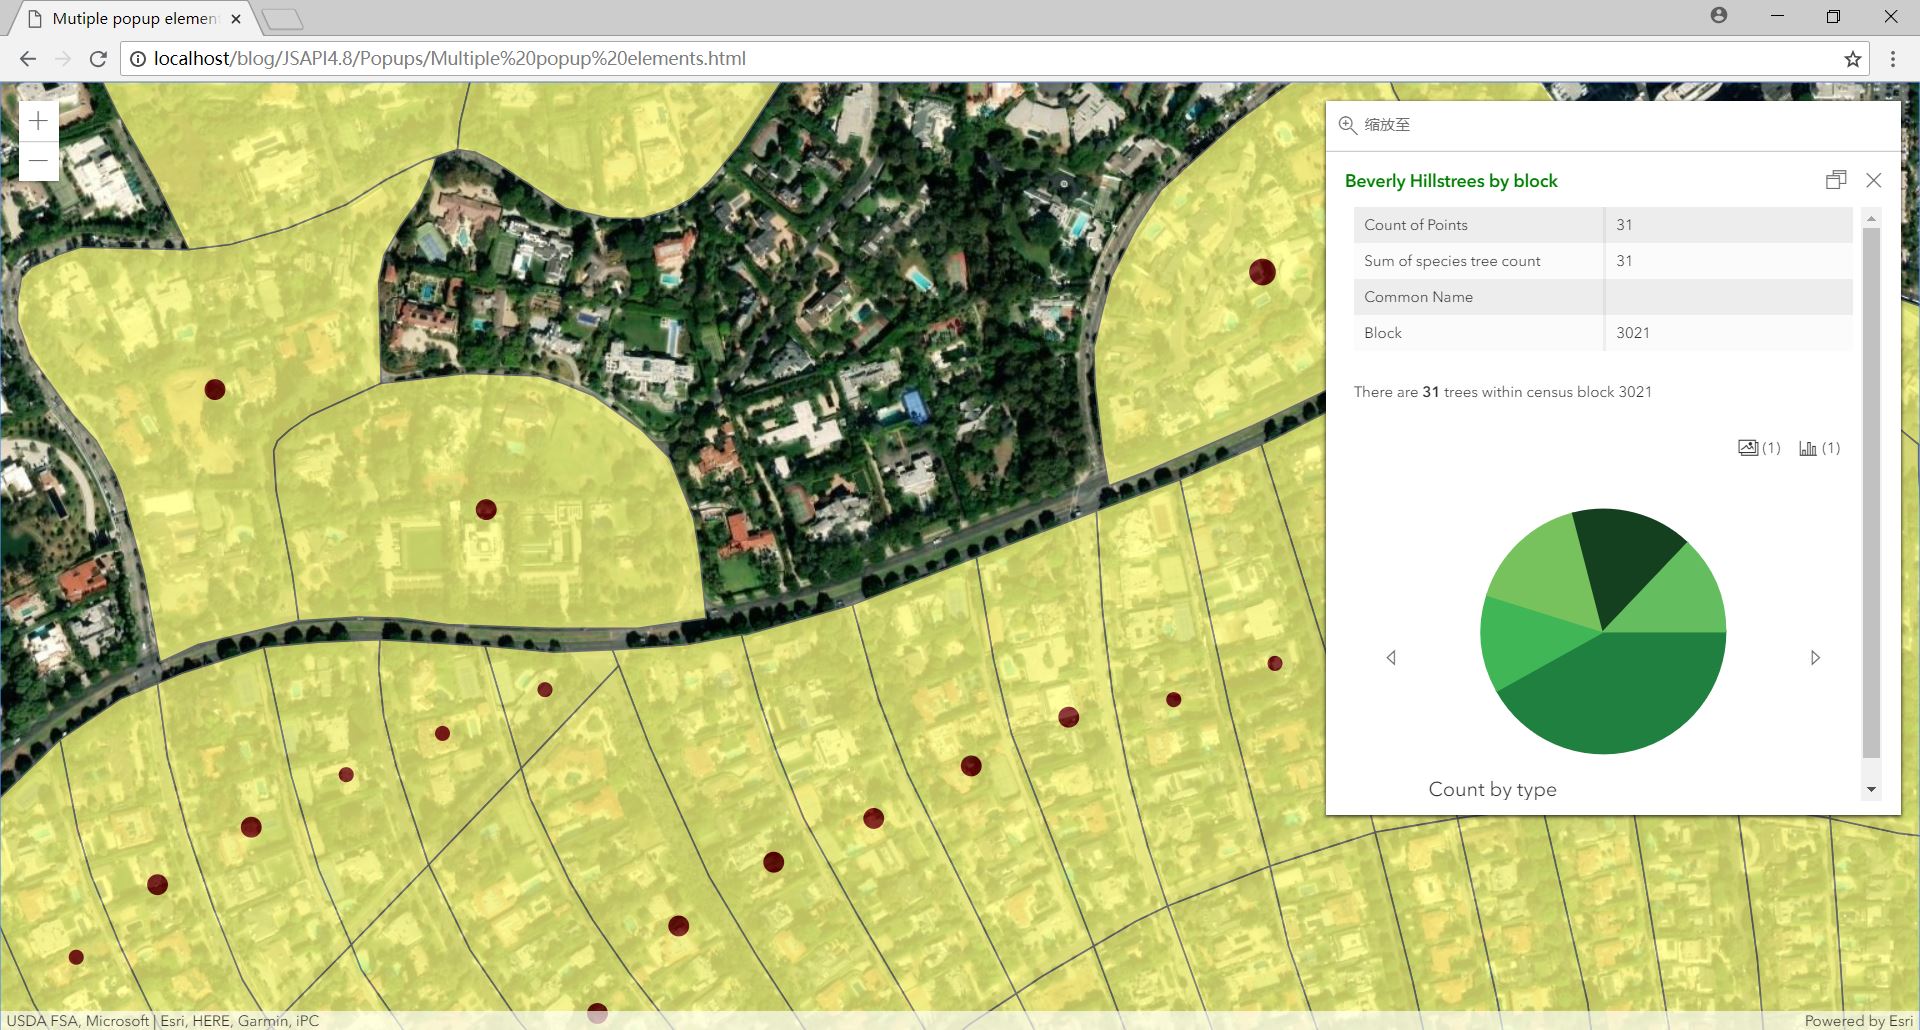
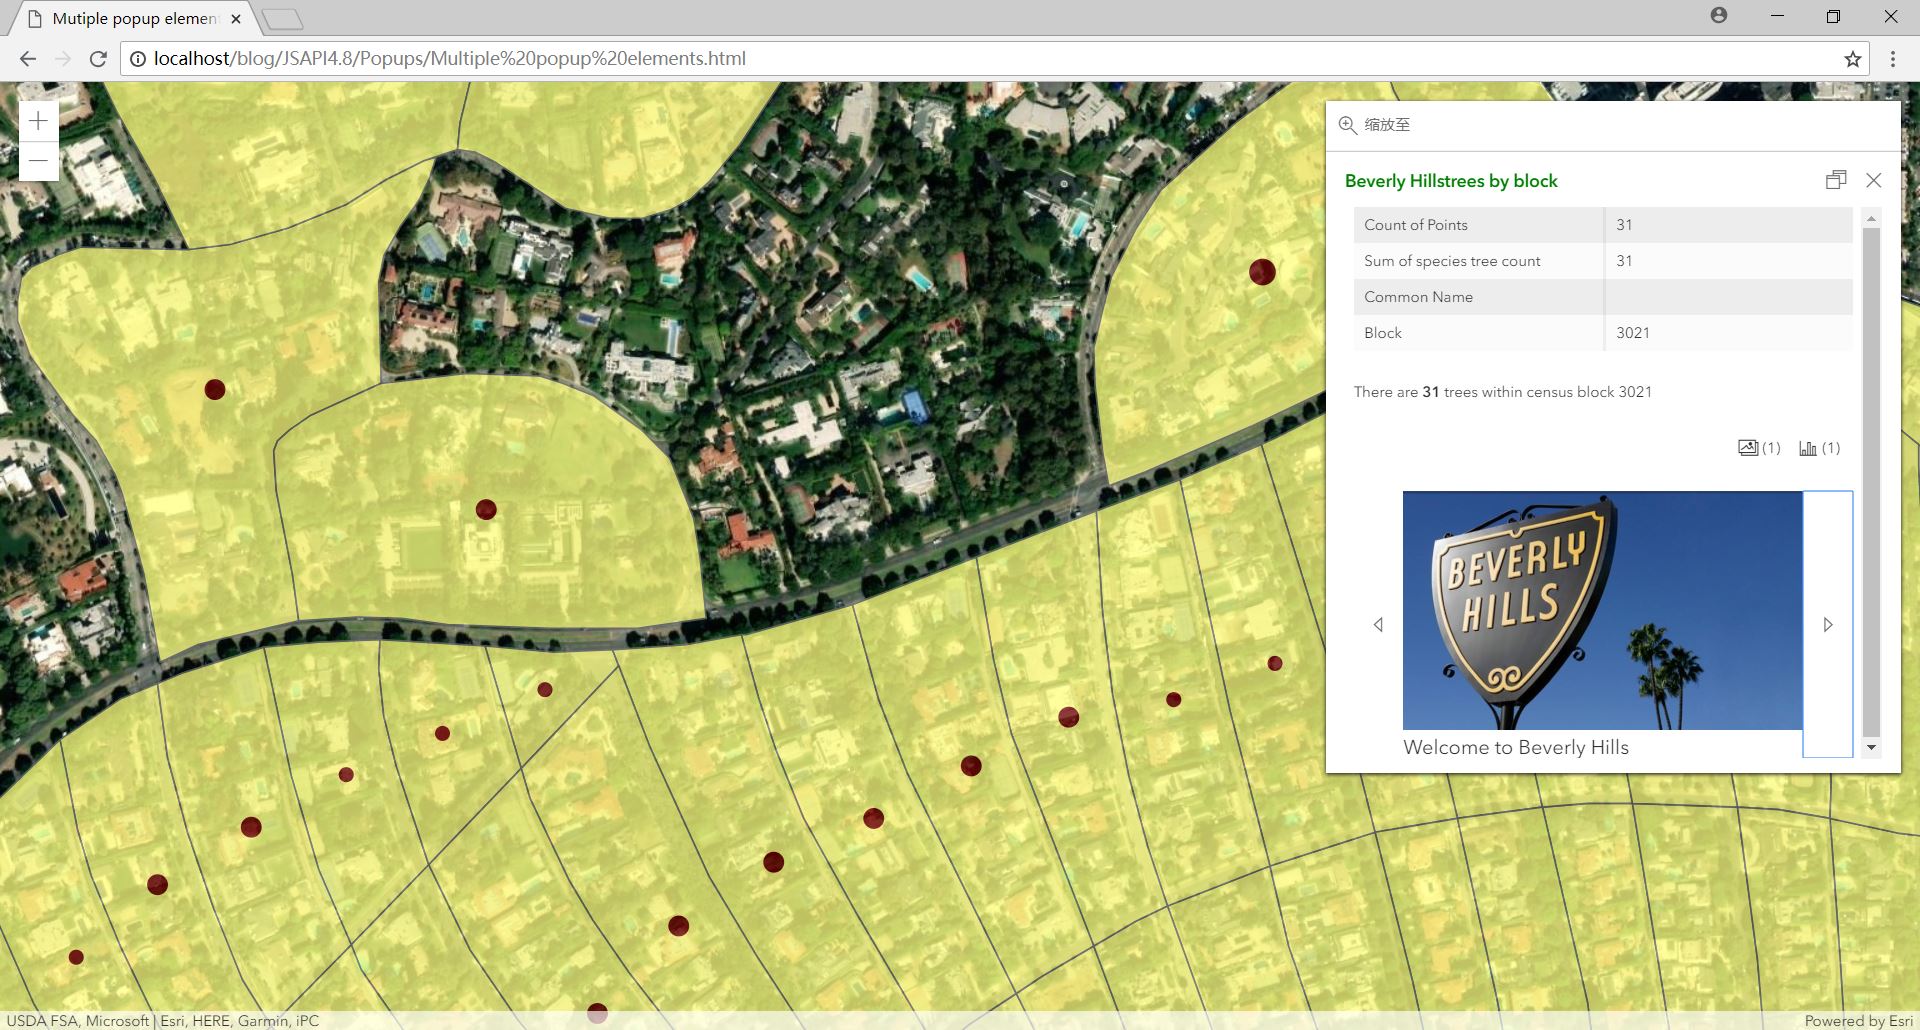
除了以表格形式,在popup中还可以通过文本、图表、图片或其他与图层有关的附件(attachment)来表示图层要素的字段值。这些内容在popup弹出框中显示的顺序由在popupTemplate中编写的顺序决定。这个例子展示了在popup中显示属性字段表格、文本、图片以及由字段值生成的图表。
1.基本代码
 1 <!doctype html>
 2 <html>
 3     <head>
 4         <meta charset="utf-8">
 5         <meta name="viewport" content="initial-scale=1,maximum-scale=1,user-scalable=no">
 6         <title>Mutiple popup elements</title>
 7
 8         <!-- JS API的引入 -->
 9         <link rel="stylesheet" href="https://js.arcgis.com/4.8/esri/css/main.css">
10         <script src="https://js.arcgis.com/4.8/"></script>
11
12         <!-- 设置style,以正确显示地图 -->
13         <style>
14             html,body,#viewDiv{
15                 padding:0;
16                 margin:0;
17                 height:100%;
18                 width:100%;
19             }
20         </style>
21
22         <script>
23             require([
24                 "esri/Map",
25                 "esri/views/MapView",
26                 "esri/layers/FeatureLayer",
27                 "dojo/domReady!"
28                 ],function(Map,MapView,FeatureLayer){
29                     //创建地图(实例化)
30                     var map=new Map({
31                         basemap:"hybrid"
32                     });
33
34                     //创建视图(实例化)
35                     var view=new MapView({
36                         container:"viewDiv",
37                         map:map,
38                         center:[-118.3994,34.0871],
39                         zoom:17,
40
41                         //固定popup,取消浮动
42                         popup:{
43                             dockEnabled:true,  //将popup固定住
44                             dockOptions:{
45                                 buttonEnabld:false,  //将切换固定状态的那个按钮隐藏掉
46                                 breakpoint:false  //不明白什么作用,但是如果是true或去掉不写,popup将不固定
47                             }
48                         }
49                     });
50
51                     var featureLayer=new FeatureLayer({
52                         url:"https://services.arcgis.com/V6ZHFr6zdgNZuVG0/ArcGIS/rest/services/Beverly%20Hills%20Trees%20By%20Block/FeatureServer/0",
53                         outFields:["*"]
54                     });
55
56                     //将featureLayer添加到map中
57                     map.layers.add(featureLayer);
58             });
59         </script>
60     </head>
61
62     <body>
63         <div id="viewDiv"></div>
64     </body>
65 </html>
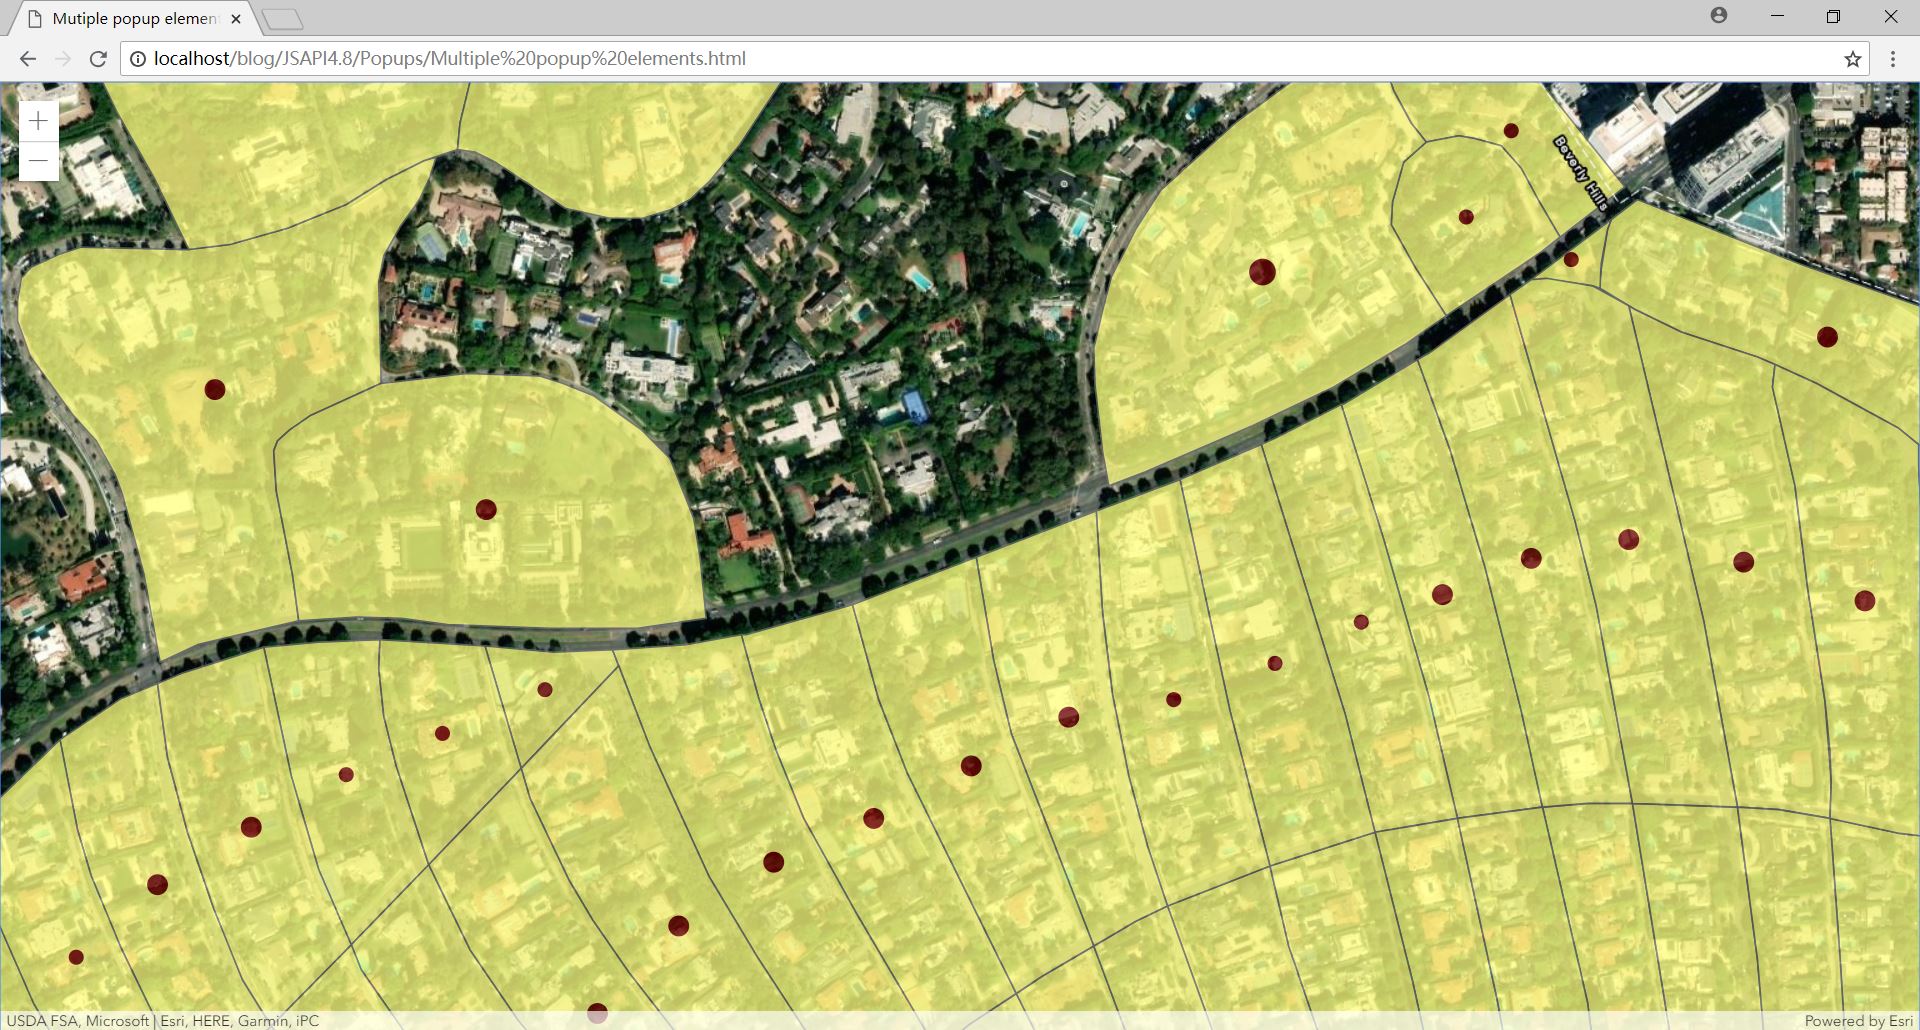
因为这个例子中popup里面的内容比较多,为了更好的表现效果,将popup固定。popup是view的一个属性,在popup中,将dockEnabled设置为true,并将dockOptions属性下的两个属性buttonEnabled和breakpoint设置为false,即可固定popup。
当前运行结果显示底图和图层,但点击图层要素不会弹出popup。
2.设置popupTemplate
1 var featureLayer=new FeatureLayer({
2     url:"https://services.arcgis.com/V6ZHFr6zdgNZuVG0/ArcGIS/rest/services/Beverly%20Hills%20Trees%20By%20Block/FeatureServer/0",
3     outFields:["*"],
4     popupTemplate:{  //添加popupTemplate属性
5     }
6 });
在FeatureLayer的构造函数中添加popupTemplate属性,并用空括号给它赋值。属性虽然是空的,但是开启了图层要素的popup。现在再点击要素,会弹出一个空的popup。
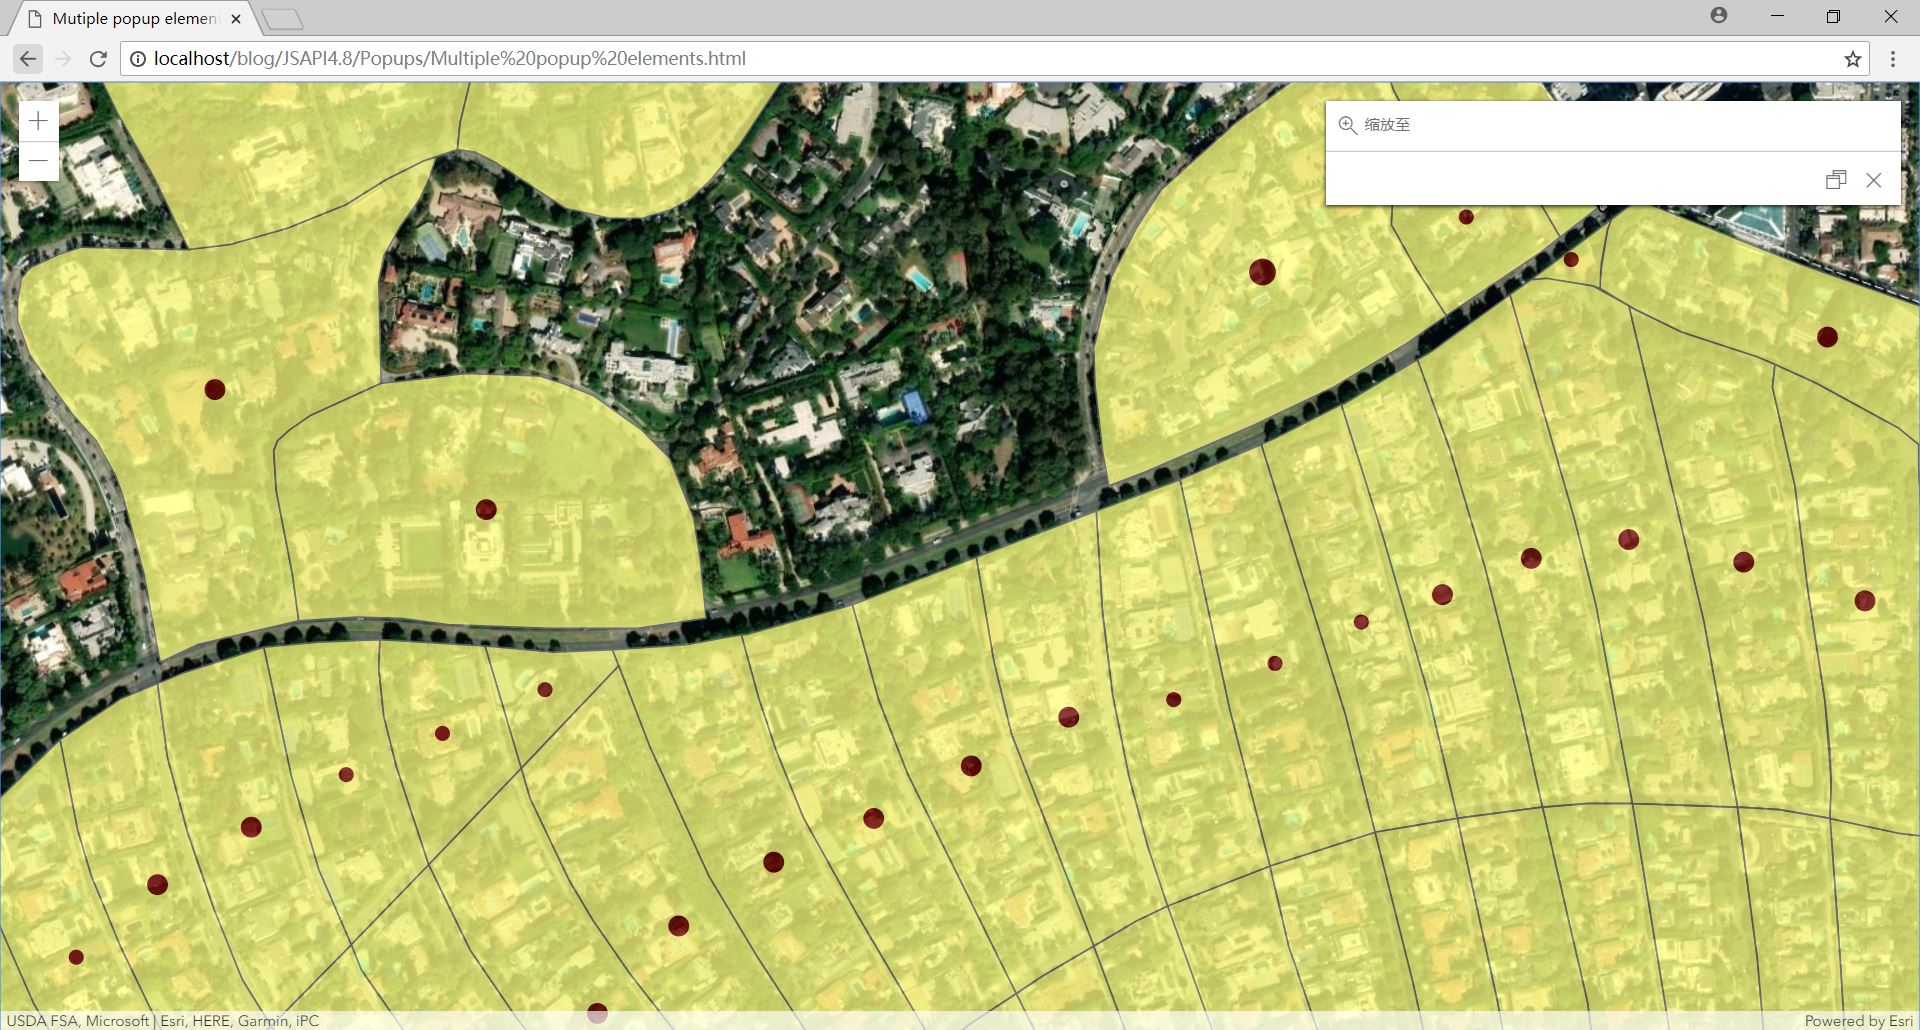
在popupTemplate属性中编写自定义的popup样式,这是直接在构造featureLayer时完成的,即在其构造函数中完成。而上一个例子是在FeatureLayer的构造函数外定义了一个模板,再赋值给featureLayer的popupTemplate属性。两种方式都可以。
①编写popupTemplate标题
1 popupTemplate:{
2//在popupTemplate中可以使用HTML标签,以达到更好的表现效果
3     title:"<font color='#008000'>Beverly Hillstrees by block",
4     content:[{
5     }]
6 }
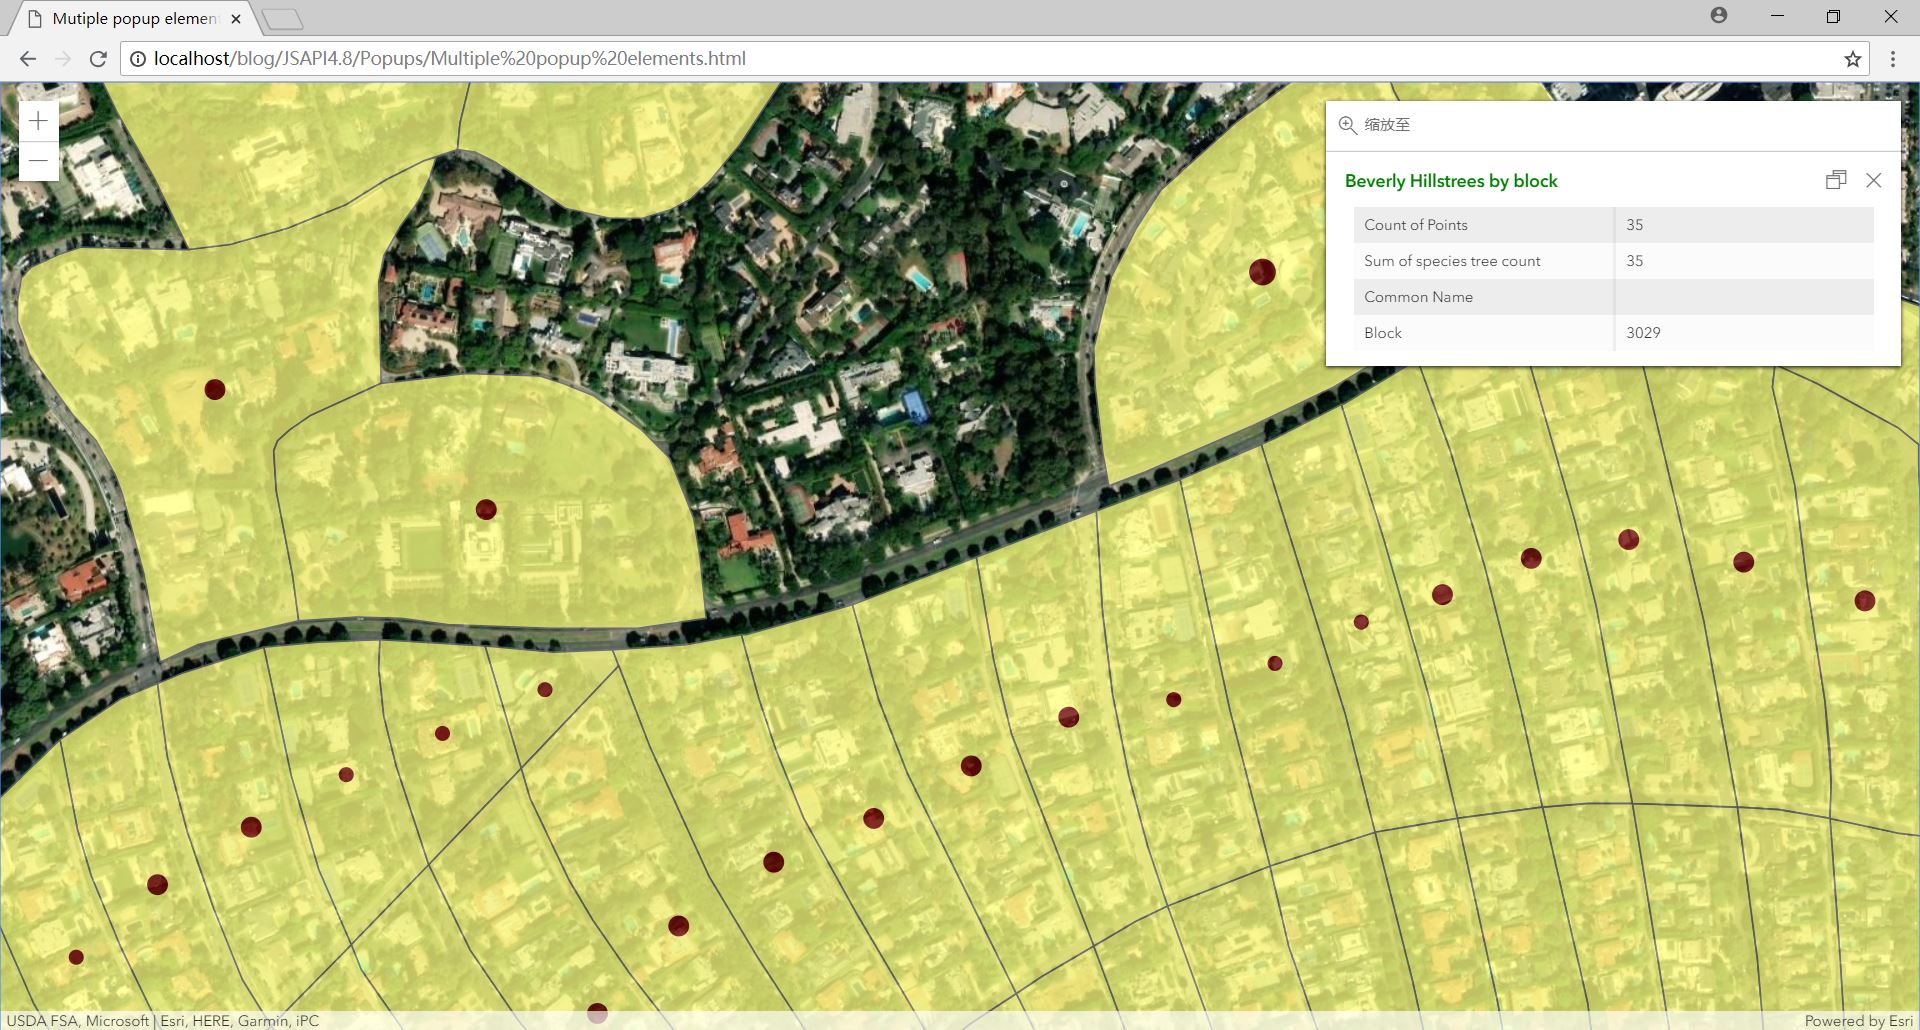
在popupTemplate中出现字符串的地方,都可以使用HTML标签对字符进行符号化设置,以达到更好的效果。上面在title中为标题设置了'#008000'颜色(绿色)。popup中最主要的内容要写在content中。content中代码的层次关系和上一个例子一样。
②编写popupTemplate中的fields(字段值)
 1 popupTemplate:{
 2//在popupTemplate中可以使用HTML标签,以达到更好的表现效果
 3     title:"<font color='#008000'>Beverly Hillstrees by block",
 4     content:[{
 5         type:"fields",
 6         fieldInfos:[{  //fieldInfos 开始
 7             fieldName:"Point_Count",
 8             label:"Count of Points",
 9             visible:true,
10             format:{
11                 digitSeparator:true,
12                 places:0
13             }
14         },{
15             fieldName:"relationships/0/Point_Count_COMMON",
16             label:"Sum of species tree count",
17             statisticType:"sum",  //需要有这一句,不然结果是空(原因未知)
18             visible:true,
19             format:{
20                 digitSeparator:true,
21                 places:0
22             }
23         },{
24             fieldName:"relationships/0/COMMON",
25             label:"Common Name",
26             visible:true
27         },{
28             fieldName:"BLOCKCE10",
29             label:"Block",
30             visible:true
31         }]  //fieldInfos 结束
32     }]
33 }
fieldName是要表现的图层要素的属性字段名称(存储在数据中的名称),label是在popup中显示的字段名称,visible设置该字段是否在popup中显示,format设置一些显示格式。
③编写popupTemplate中的text(文本值)
 1 popupTemplate:{
 2//在popupTemplate中可以使用HTML标签,以达到更好的表现效果
 3     title:"<font color='#008000'>Beverly Hillstrees by block",
 4     content:[{
 5         type:"fields",
 6         fieldInfos:[{
 7             fieldName:"Point_Count",
 8             label:"Count of Points",
 9             visible:true,
10             format:{
11                 digitSeparator:true,
12                 places:0
13             }
14         },{
15             fieldName:"relationships/0/Point_Count_COMMON",
16             label:"Sum of species tree count",
17             statisticType:"sum",  //需要有这一句,不然结果是空(原因未知)
18             visible:true,
19             format:{
20                 digitSeparator:true,
21                 places:0
22             }
23         },{
24             fieldName:"relationships/0/COMMON",
25             label:"Common Name",
26             visible:true
27         },{
28             fieldName:"BLOCKCE10",
29             label:"Block",
30             visible:true
31         }]
32     },{
33         type:"text",
34         text:"There are <strong>{Point_Count}</strong> trees within census block {BLOCKCE10}"
35     }]
36 }
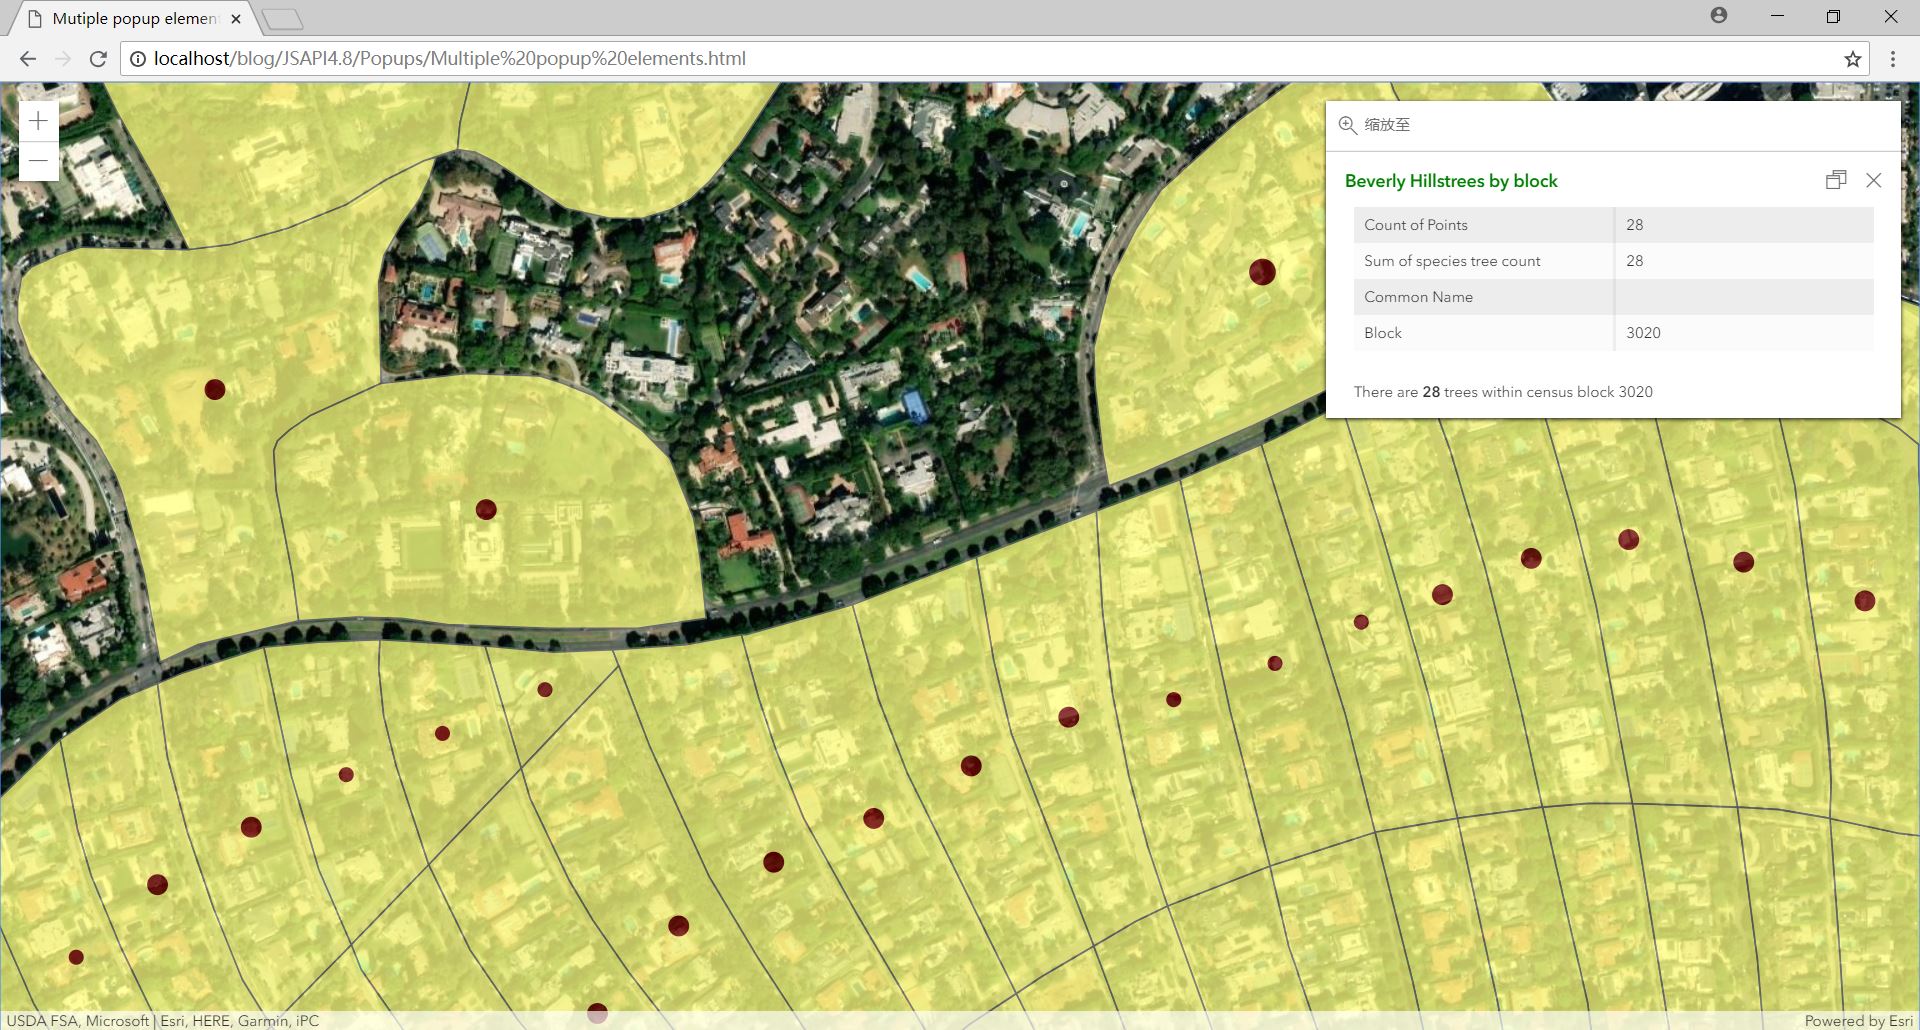
④编写popupTemplate中media(图表、图片)
 1 popupTemplate:{
 2//在popupTemplate中可以使用HTML标签,以达到更好的表现效果
 3     title:"<font color='#008000'>Beverly Hillstrees by block",
 4     content:[{
 5         type:"fields",
 6         fieldInfos:[{
 7             fieldName:"Point_Count",
 8             label:"Count of Points",
 9             visible:true,
10             format:{
11                 digitSeparator:true,
12                 places:0
13             }
14         },{
15             fieldName:"relationships/0/Point_Count_COMMON",
16             label:"Sum of species tree count",
17             statisticType:"sum",  //需要有这一句,不然结果是空(原因未知)
18             visible:true,
19             format:{
20                 digitSeparator:true,
21                 places:0
22             }
23         },{
24             fieldName:"relationships/0/COMMON",
25             label:"Common Name",
26             visible:true
27         },{
28             fieldName:"BLOCKCE10",
29             label:"Block",
30             visible:true
31         }]
32     },{
33         type:"text",
34         text:"There are <strong>{Point_Count}</strong> trees within census block {BLOCKCE10}"
35     },{
36         type:"media",
37         mediaInfos:[{
38             title:"Count by type",  //media内容下的标题
39             type:"pie-chart",  //饼图
40             caption:"one pie-chart",  //图表的标题
41             value:{
42                 theme:"Grasshopper",  //图表的主题样式
43                 //一系列设置饼图的参数,涉及到related table的知识
44                 fields:["relationships/0/Point_Count_COMMON"],
45                 normalizeField:null,
46                 tooltipField:"relationships/0/COMMON"
47             }
48         },{
49             title:"Welcome to Beverly Hills",
50             type:"image",  //图片
51             value:{
52                 sourceURL:"https://www.beverlyhills.org/cbhfiles/storage/files/13203374121770673849/122707_039r_final.jpg" //图片URL
53             }
54         }]
55     }]
56 }
对于每一个内容来说(字段表格、文本、图表、图片)都可以有一个标题。除了这几种类型外,popup中还可以添加一种attachment类型的内容。官方文档中未给出相应例子。
3.最终代码及运行效果

  1 <!doctype html>
  2 <html>
  3     <head>
  4         <meta charset="utf-8">
  5         <meta name="viewport" content="initial-scale=1,maximum-scale=1,user-scalable=no">
  6         <title>Mutiple popup elements</title>
  7
  8         <!-- JS API的引入 -->
  9         <link rel="stylesheet" href="https://js.arcgis.com/4.8/esri/css/main.css">
 10         <script src="https://js.arcgis.com/4.8/"></script>
 11
 12         <!-- 设置style,以正确显示地图 -->
 13         <style>
 14             html,body,#viewDiv{
 15                 padding:0;
 16                 margin:0;
 17                 height:100%;
 18                 width:100%;
 19             }
 20         </style>
 21
 22         <script>
 23             require([
 24                 "esri/Map",
 25                 "esri/views/MapView",
 26                 "esri/layers/FeatureLayer",
 27                 "dojo/domReady!"
 28                 ],function(Map,MapView,FeatureLayer){
 29                     //创建地图(实例化)
 30                     var map=new Map({
 31                         basemap:"hybrid"
 32                     });
 33
 34                     //创建视图(实例化)
 35                     var view=new MapView({
 36                         container:"viewDiv",
 37                         map:map,
 38                         center:[-118.3994,34.0871],
 39                         zoom:17,
 40
 41                         //固定popup,取消浮动
 42                         popup:{
 43                             dockEnabled:true,  //将popup固定住
 44                             dockOptions:{
 45                                 buttonEnabld:false,  //将切换固定状态的那个按钮隐藏掉
 46                                 breakpoint:false  //不明白什么作用,但是如果是true或去掉不写,popup将不固定
 47                             }
 48                         }
 49                     });
 50
 51                     var featureLayer=new FeatureLayer({
 52                         url:"https://services.arcgis.com/V6ZHFr6zdgNZuVG0/ArcGIS/rest/services/Beverly%20Hills%20Trees%20By%20Block/FeatureServer/0",
 53                         outFields:["*"],
 54                         popupTemplate:{
 55                             //在popupTemplate中可以使用HTML标签,以达到更好的表现效果
 56                             title:"<font color='#008000'>Beverly Hillstrees by block",
 57                             content:[{
 58                                 type:"fields",
 59                                 fieldInfos:[{
 60                                     fieldName:"Point_Count",
 61                                     label:"Count of Points",
 62                                     visible:true,
 63                                     format:{
 64                                         digitSeparator:true,
 65                                         places:0
 66                                     }
 67                                 },{
 68                                     fieldName:"relationships/0/Point_Count_COMMON",
 69                                     label:"Sum of species tree count",
 70                                     statisticType:"sum",  //需要有这一句,不然结果是空(原因未知)
 71                                     visible:true,
 72                                     format:{
 73                                         digitSeparator:true,
 74                                         places:0
 75                                     }
 76                                 },{
 77                                     fieldName:"relationships/0/COMMON",
 78                                     label:"Common Name",
 79                                     visible:true
 80                                 },{
 81                                     fieldName:"BLOCKCE10",
 82                                     label:"Block",
 83                                     visible:true
 84                                 }]
 85                             },{
 86                                 type:"text",
 87                                 text:"There are <strong>{Point_Count}</strong> trees within census block {BLOCKCE10}"
 88                             },{
 89                                 type:"media",
 90                                 mediaInfos:[{
 91                                     title:"Count by type",  //media内容下的标题
 92                                     type:"pie-chart",  //饼图
 93                                     caption:"one pie-chart",  //图表的标题
 94                                     value:{
 95                                         theme:"Grasshopper",  //图表的主题样式
 96                                         //一系列设置饼图的参数,涉及到related table的知识
 97                                         fields:["relationships/0/Point_Count_COMMON"],
 98                                         normalizeField:null,
 99                                         tooltipField:"relationships/0/COMMON"
100                                     }
101                                 },{
102                                     title:"Welcome to Beverly Hills",
103                                     type:"image",  //图片
104                                     value:{
105                                         sourceURL:"https://www.beverlyhills.org/cbhfiles/storage/files/13203374121770673849/122707_039r_final.jpg" //图片URL
106                                     }
107                                 }]
108                             }]
109                         }
110                     });
111
112                     //将featureLayer添加到map中
113                     map.layers.add(featureLayer);
114             });
115         </script>
116     </head>
117
118     <body>
119         <div id="viewDiv"></div>
120     </body>
121 </html>
