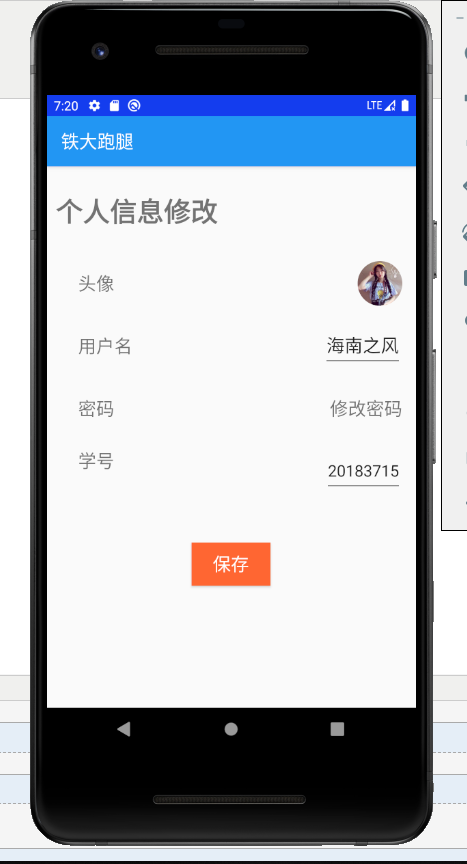
今天对个人页面进行了 完善
效果图:

package com.example.runapp.fragment;

import android.content.Context;
import android.content.Intent;
import android.net.Uri;
import android.os.Bundle;

import androidx.fragment.app.Fragment;

import android.view.LayoutInflater;
import android.view.View;
import android.view.ViewGroup;
import android.widget.RelativeLayout;

import com.example.runapp.PersonActivity;
import com.example.runapp.R;


public class personFragment extends Fragment {
    View mRootView;
    RelativeLayout person;

    public personFragment() {
        // Required empty public constructor
    }


    @Override
    public View onCreateView(LayoutInflater inflater, ViewGroup container,
                             Bundle savedInstanceState) {
        // Inflate the layout for this fragment
        mRootView=inflater.inflate(R.layout.fragment_person, container, false);
        InitView();
        return  mRootView;
    }

    private void InitView() {
        person=mRootView.findViewById(R.id.person);
        person.setOnClickListener(new View.OnClickListener() {
            @Override
            public void onClick(View v) {
                Intent intent=new Intent();
                intent.setClass(getActivity(), PersonActivity.class);
                startActivity(intent);
            }
        });
    }


}
package com.example.runapp;

import androidx.appcompat.app.AppCompatActivity;

import android.graphics.Bitmap;
import android.graphics.BitmapFactory;
import android.graphics.Canvas;
import android.graphics.Color;
import android.graphics.Paint;
import android.graphics.PorterDuff;
import android.graphics.PorterDuffXfermode;
import android.graphics.Rect;
import android.graphics.RectF;
import android.os.Bundle;
import android.util.Log;
import android.widget.ImageView;

public class PersonActivity extends AppCompatActivity {

    @Override
    protected void onCreate(Bundle savedInstanceState) {
        super.onCreate(savedInstanceState);
        setContentView(R.layout.activity_person);

        ImageRevise();
        Initview();

    }

    private void ImageRevise() {
        Bitmap bitmap = BitmapFactory.decodeResource(getResources(),R.drawable.person_logo);
        //设置bitmap.getWidth()可以获得圆形
        Bitmap bitmap1 = ClipSquareBitmap(bitmap,200,bitmap.getWidth());
        ImageView imageView=this.findViewById(R.id.imageView_head);
        imageView.setImageBitmap(bitmap1);
    }

    private void Initview() {

    }
    public static Bitmap ClipSquareBitmap(Bitmap bmp, int width, int radius) {
        if (bmp == null || width <= 0)
            return null;
        //如果图片比较小就没必要进行缩放了

        /**
         * 把图片进行缩放,以宽高最小的一边为准,缩放图片比例
         * */
        if (bmp.getWidth() > width && bmp.getHeight() > width) {
            if (bmp.getWidth() > bmp.getHeight()) {
                bmp = Bitmap.createScaledBitmap(bmp, (int) (((float) width) * bmp.getWidth() / bmp.getHeight()), width, false);
            } else {
                bmp = Bitmap.createScaledBitmap(bmp, width, (int) (((float) width) * bmp.getHeight() / bmp.getWidth()), false);
            }

        } else {
            width = bmp.getWidth() > bmp.getHeight() ? bmp.getHeight() : bmp.getWidth();
            Log.d("zeyu","宽" + width + ",w" + bmp.getWidth() + ",h" + bmp.getHeight());
            if (radius > width) {
                radius = width;
            }
        }
        Bitmap output = Bitmap.createBitmap(width, width, Bitmap.Config.ARGB_8888);
        Canvas canvas = new Canvas(output);
        //设置画笔全透明
        canvas.drawARGB(0, 0, 0, 0);
        Paint paints = new Paint();
        paints.setColor(Color.WHITE);
        paints.setAntiAlias(true);//去锯齿
        paints.setFilterBitmap(true);
        //防抖动
        paints.setDither(true);

        //把图片圆形绘制矩形
        if (radius <= 0)
            canvas.drawRect(new Rect(0, 0, width, width), paints);
        else //绘制圆角
            canvas.drawRoundRect(new RectF(0, 0, width, width), radius, radius, paints);
        // 取两层绘制交集。显示前景色。
        paints.setXfermode(new PorterDuffXfermode(PorterDuff.Mode.SRC_IN));
        Rect rect = new Rect();
        if (bmp.getWidth() >= bmp.getHeight()) {
            rect.set((bmp.getWidth() - width) / 2, 0, (bmp.getWidth() + width) / 2, width);
        } else {
            rect.set(0, (bmp.getHeight() - width) / 2, width, (bmp.getHeight() + width) / 2);
        }
        Rect rect2 = new Rect(0, 0, width, width);
        //第一个rect 针对bmp的绘制区域,rect2表示绘制到上面位置
        canvas.drawBitmap(bmp, rect, rect2, paints);
        bmp.recycle();
        return output;
    }

}