预览 : https://volodyan.github.io/vue_url_arcgis-preview/#/
1.在创建vue项目后,安装@arcgis/core@4.22.2
npm install @arcgis/core@4.22.2
2.在组件中,使用 import 语句加载单个模块
import "@arcgis/core/assets/esri/themes/light/main.css";
import Map from "@arcgis/core/Map";
import MapView from "@arcgis/core/views/MapView";
全部代码如下:
点击查看代码
<template>
  <div class="MapView">
    <div id="viewDiv">
      <div id="el-select-theme">
        <el-select
          v-model="theme"
          placeholder="请选择"
          @change="BasemapChangeFun"
        >
          <el-option
            v-for="item in options"
            :key="item.value"
            :label="item.label"
            :value="item.value"
          >
          </el-option>
        </el-select>
      </div>
    </div>
  </div>
</template>
<script>
import "@arcgis/core/assets/esri/themes/light/main.css";
import Map from "@arcgis/core/Map";
import MapView from "@arcgis/core/views/MapView";

export default {
  name: "MapView",
  data() {
    return {
      options: [
        {
          value: "dark-gray-vector",
          label: "vector",
        },
        {
          value: "hybrid",
          label: "hybrid",
        },
        {
          value: "topo",
          label: "topo",
        },
        {
          value: "streets",
          label: "streets",
        },
        {
          value: "dark-gray",
          label: "dark-gray",
        },
        {
          value: "osm",
          label: "osm",
        },
        {
          value: "oceans",
          label: "海洋",
        },
      ],
      theme: "",
      mapview: "",
    };
  },
  mounted() {
    this.loadArcgisMap();
  },
  beforeDestroy() {
    this.DestroyArcgisMap();
  },
  methods: {
    loadArcgisMap() {
      const map = new Map({
        basemap: "topo-vector",
      });

      this.mapview = new MapView({
        container: "viewDiv",
        map: map,
        center: [-80, 35],
        extent: {
          spatialReference: {
            latestWkid: 3857,
            wkid: 102100,
          },
          xmin: -59087672,
          ymin: 4108613,
          xmax: -43095009,
          ymax: 8340167,
        },
      });
      this.mapview.ui.components = []; //清空所有ESRI自带的组件

      this.mapview.popup.dockEnabled = false;
      this.mapview.popup.collapseEnabled = false;
      this.mapview.popup.dockOptions = {
        buttonEnabled: false,
        breakpoint: false,
        position: "bottom-left",
      }; //禁用停靠
      this.mapview.popup.actions = null;
      this.mapview.popup = null;
      this.mapview.ui.add("el-select-theme", "top-right");
    },
    BasemapChangeFun(val) {
      this.mapview.map.basemap = val;
    },
    DestroyArcgisMap() {
      this.mapview.destroy();
      this.mapview.map = null;
      this.mapview.container = null;
    },
  },
};
</script>

<style  lang="scss" scoped>
.MapView {
   100%;
  height: 100%;
  #viewDiv {
     100%;
    height: 100%;
  }
}
</style>
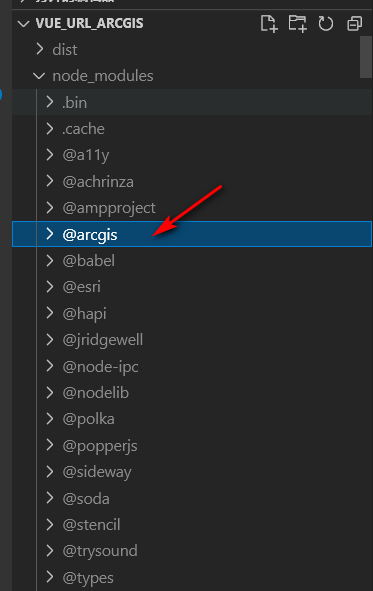
3.执行npm install ncp -g命令,全局安装ncp
npm install ncp -g
4.在package.json文件里修改运行命令,如下:
"serve": "npm run copy && vue-cli-service serve"
"build": "npm run copy && vue-cli-service build",
"copy": "ncp ./node_modules/@arcgis/core/assets ./public/assets"
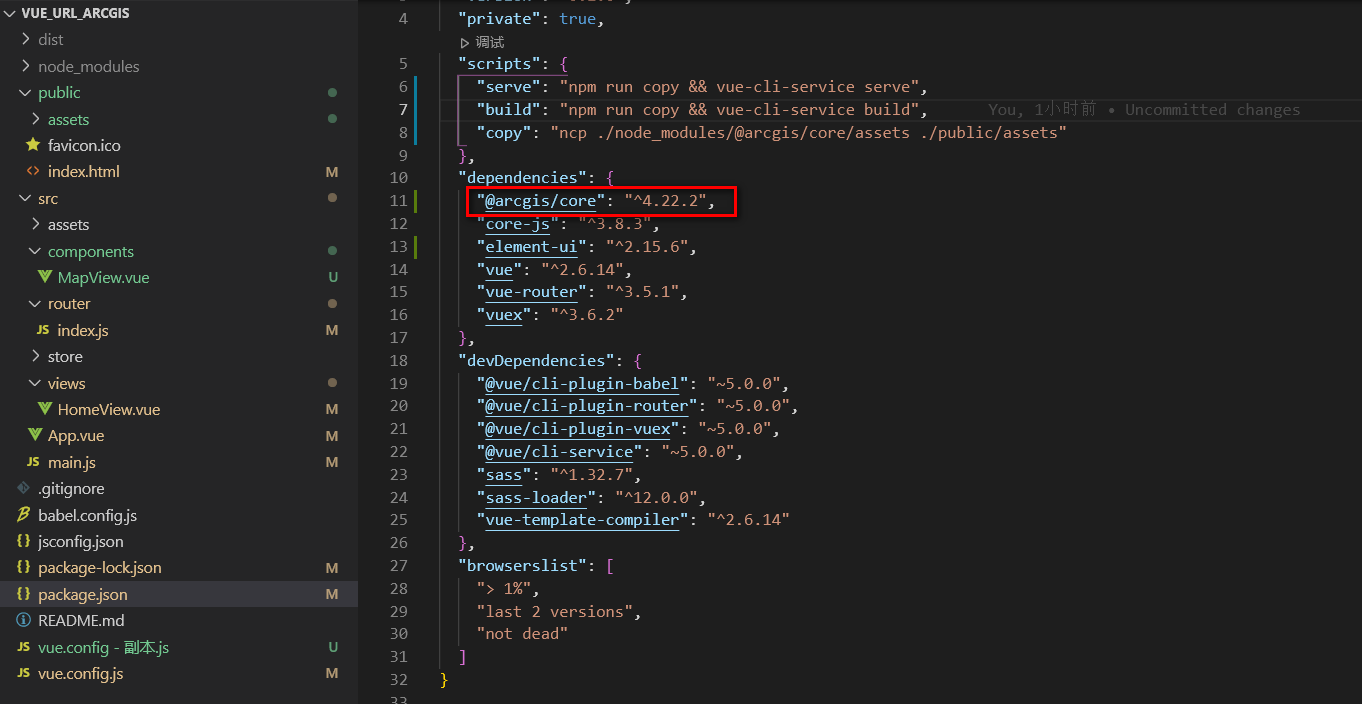
package.json如下
点击查看代码
{
  "name": "vue_url_arcgis",
  "version": "0.1.0",
  "private": true,
  "scripts": {
    "serve": "npm run copy && vue-cli-service serve",
    "build": "npm run copy && vue-cli-service build",
    "copy": "ncp ./node_modules/@arcgis/core/assets ./public/assets"
  },
  "dependencies": {
    "@arcgis/core": "^4.22.2",
    "core-js": "^3.8.3",
    "element-ui": "^2.15.6",
    "vue": "^2.6.14",
    "vue-router": "^3.5.1",
    "vuex": "^3.6.2"
  },
  "devDependencies": {
    "@vue/cli-plugin-babel": "~5.0.0",
    "@vue/cli-plugin-router": "~5.0.0",
    "@vue/cli-plugin-vuex": "~5.0.0",
    "@vue/cli-service": "~5.0.0",
    "sass": "^1.32.7",
    "sass-loader": "^12.0.0",
    "vue-template-compiler": "^2.6.14"
  },
  "browserslist": [
    "> 1%",
    "last 2 versions",
    "not dead"
  ]
}
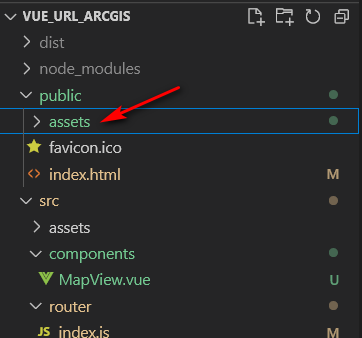
5.运行 npm run serve命令启动项目,在public文件下会新增assets文件夹,assets文件夹是编译后的arcgis地图相关文件,如图所示:
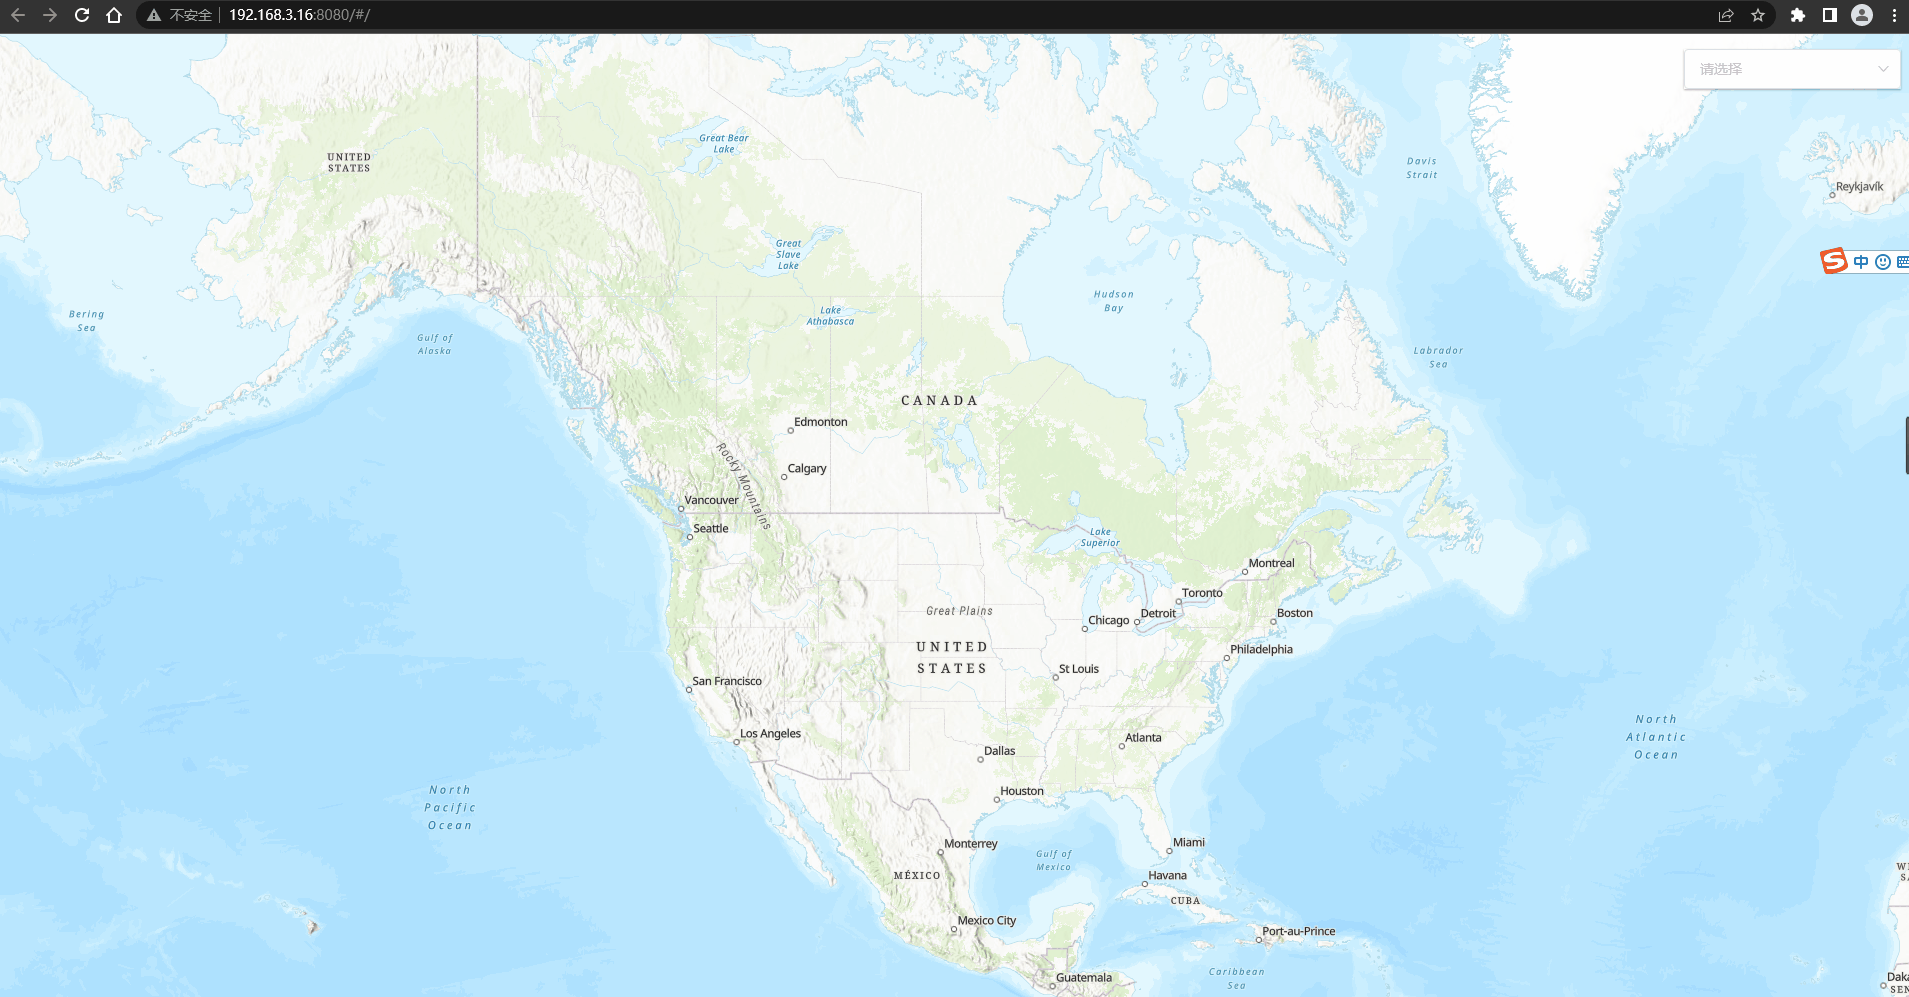
6.运行后的预览图,如下:
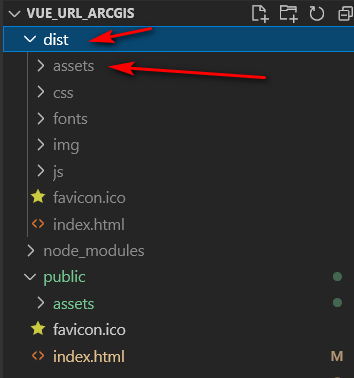
7.运行npm run build打包项目,打包后的项目如下:
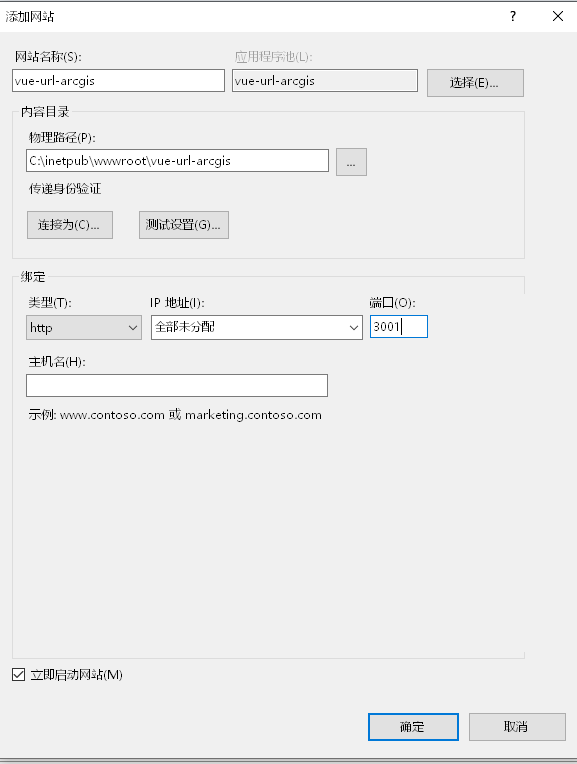
8.发布在iis服务器上测试
(1).在iis上添加网站
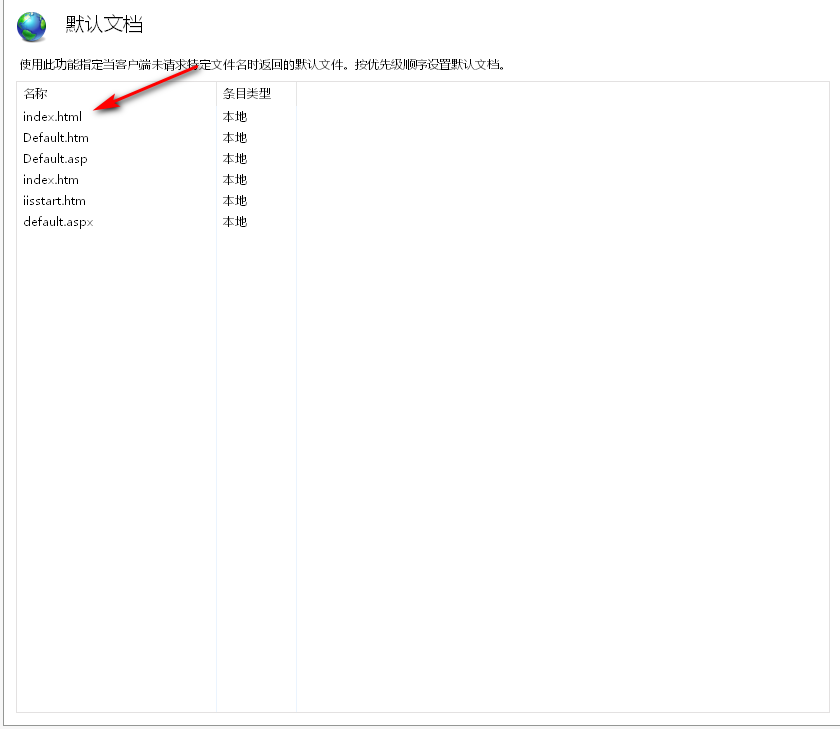
(2).将默认文档上移至首位
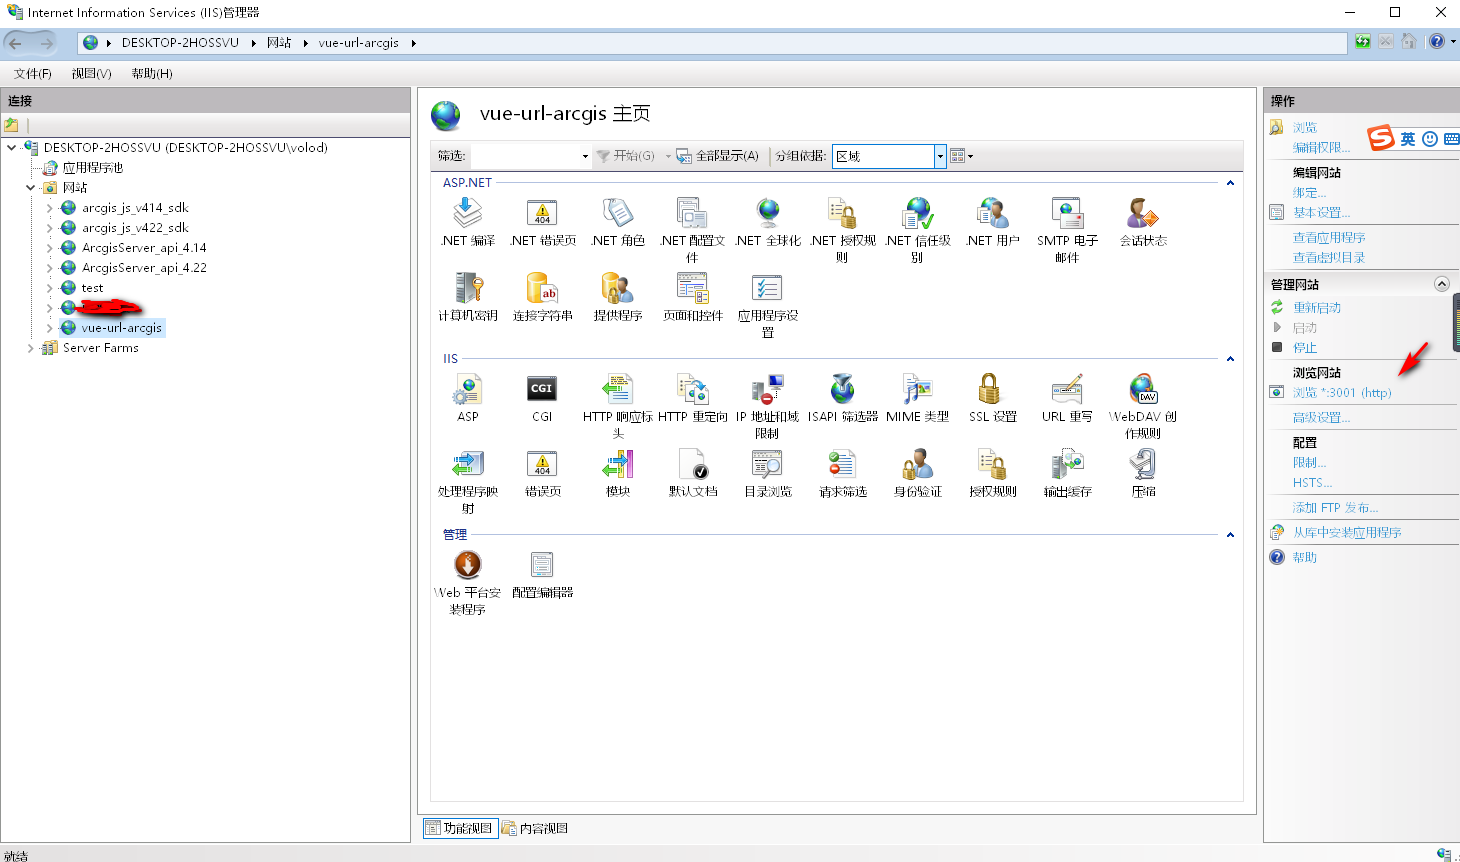
(3).预览发布后的网站
(4).浏览器预览

Github源码: https://github.com/volodyan/vue_url_arcgis
参考文档如下:
1.https://xuqwblog.blog.csdn.net/article/details/111376081
2.https://blog.csdn.net/tjx1997/article/details/119610327
3.https://developers.arcgis.com/javascript/latest/es-modules/