树莓派上的40个GPIO是最好玩的东西
它们可以被C,/C++, Python, Java等语言直接控制
现在就来看看怎么用Node.js做到同样的事情
在试验之前, 请先安装好Node.js, 具体可以移步到: <树莓派.安装系统+Node.js+MongoDB系列环境>
1.准备试验文件夹
mkdir /home/pi/Documents/test-gpio-demo/
2.创建文件package.json
{
  "name": "test-gpio-demo",
  "version": "0.0.1",
  "dependencies":{
    "rpio2":"0.4.1"
  }
}
3.创建主文件blank.js
//blink.js
const Gpio = require('/home/pi/Documents/test-gpio/node_modules/rpio2/lib/index.js').Gpio;
var led = new Gpio(36);  //创建 P36 引脚

led.open(Gpio.OUTPUT, Gpio.LOW); //设置为 OUTPUT、默认低电平

for(var i = 0; i < 20; i++){
    led.toggle();  //切换 led 的电平状态
    led.sleep(300);  //等待 500ms
}

led.close();
4.硬件电路连接

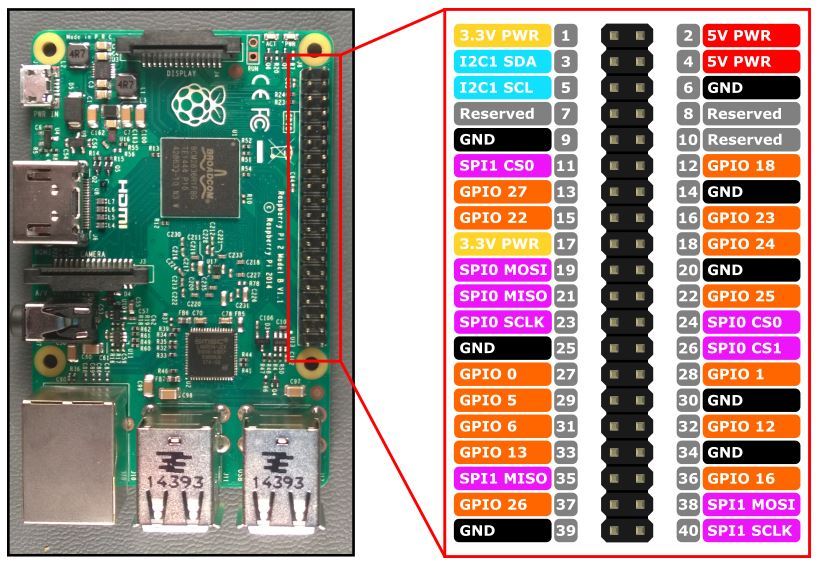
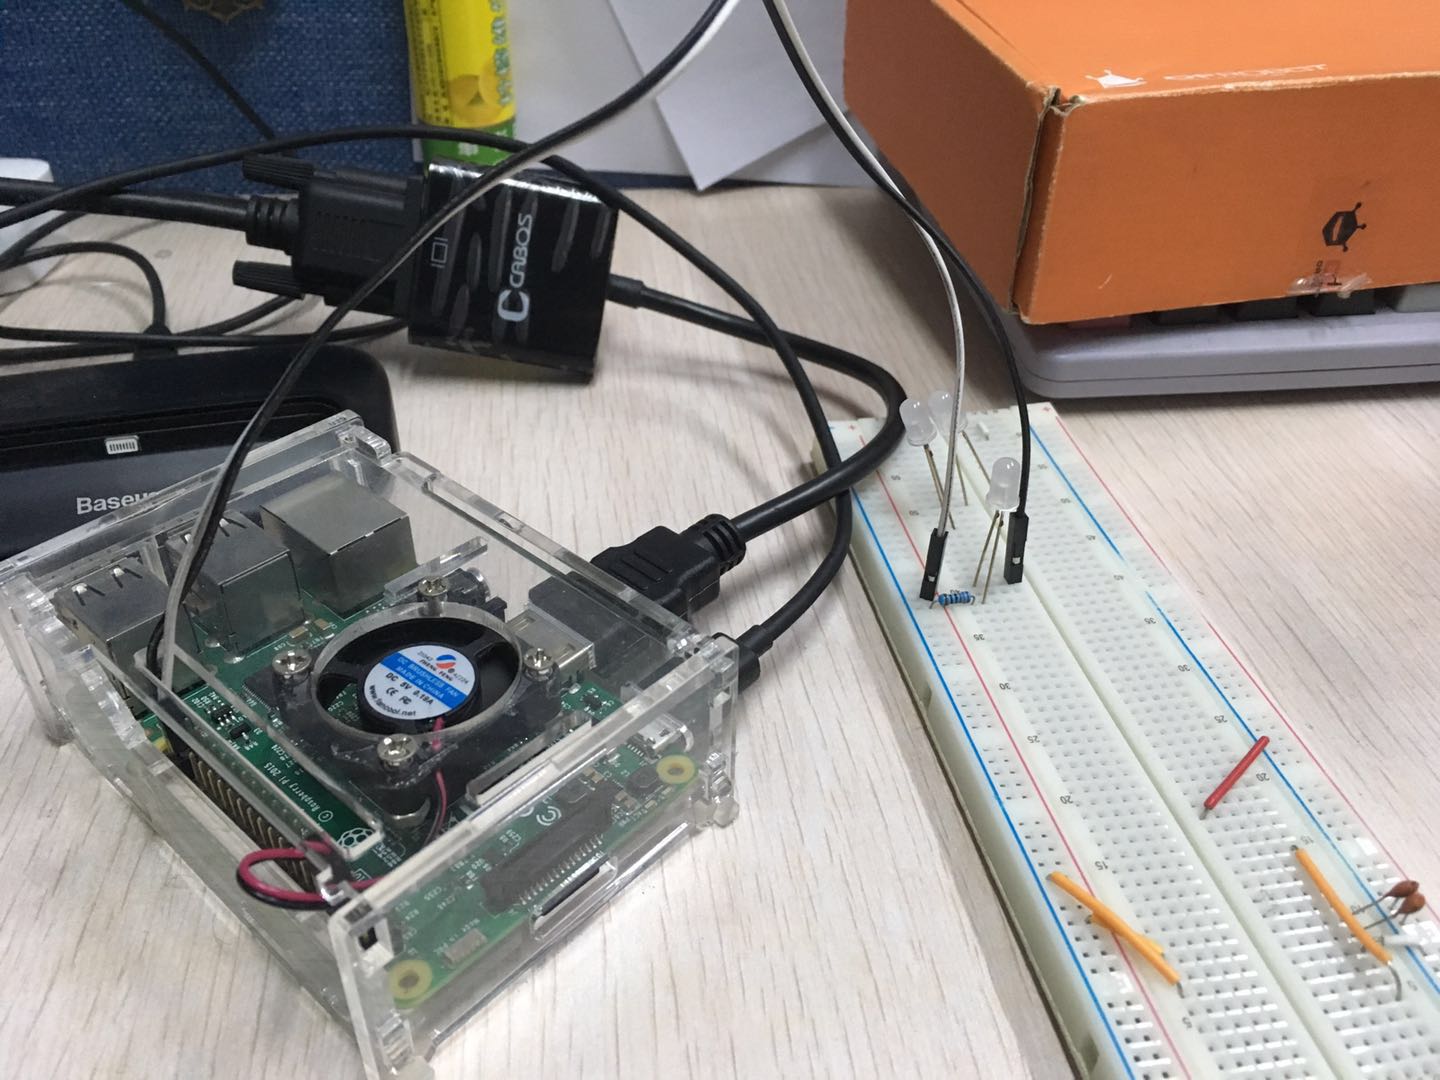
第36脚(GPIO16) 经过一个电阻(220欧或1K都可以),再接到LED的正级
LED负级接到第34脚(GND)
5.试运行
node /home/pi/Documents/test-gpio-demo/blank.js
闪灯效果:
亮灯

灭灯:

试验成功!
===============================分隔线=========================
rpio2常规用法:

Synchronously
const Gpio = require('./lib/index.js').Gpio;
const gpio = new Gpio(40);

gpio.open(Gpio.OUTPUT);

for(var i = 0; i < 10; i++){
    gpio.toggle();
    gpio.sleep(500);
}

gpio.close();
Asynchronously
const Gpio = require('../lib/index.js').Gpio;
const gpio = new Gpio(40);

gpio.open(Gpio.OUTPUT);

void function loop(){
  Promise.resolve(gpio.toggle())
  .then(gpio.sleep.bind(null, 500, true))
  .then(loop)
}();

process.on("SIGINT", function(){
  gpio.close();

  console.log('shutdown!');
  process.exit(0);
});
Toggle with button
const Gpio = require('../lib/index.js').Gpio;
const button = new Gpio(32);
const output = new Gpio(40);

button.open(Gpio.INPUT);
output.open(Gpio.OUTPUT, Gpio.LOW);

//button down
button.on('rising', function(){
  output.toggle();
});

process.on("SIGINT", function(){
  button.close();
  output.close();

  console.log('shutdown!');
  process.exit(0);
});