场景
在一个项目中,使用了多个 DbContext 且使用同一个数据库的情况
创建新项目
-
打开 Visual Studio 2017
-
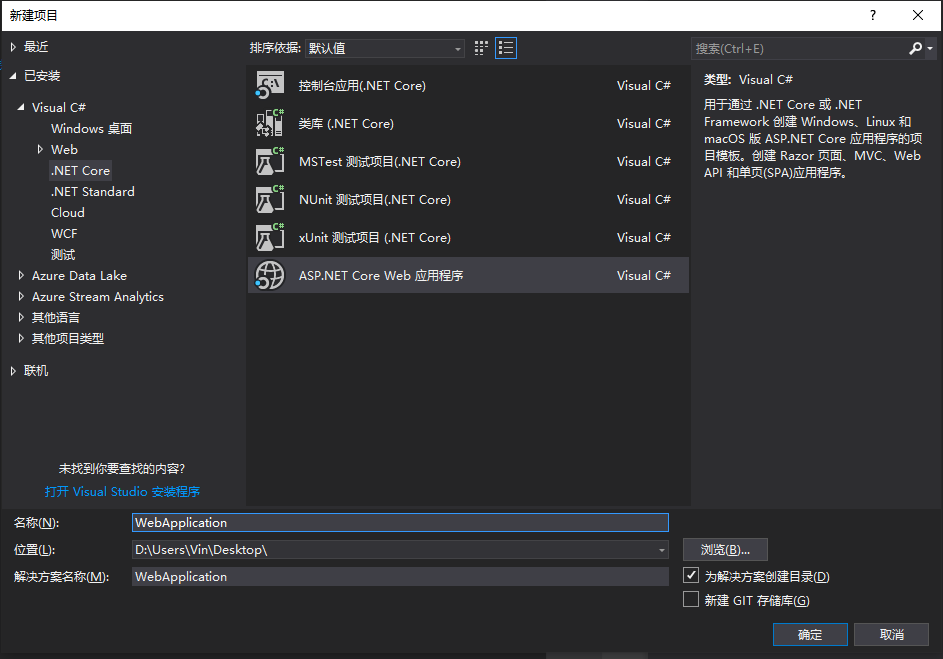
“文件”>“新建”>“项目”
-
从左菜单中选择“已安装”>“Visual C#”>“.NET Core”。
-
选择“ASP.NET Core Web 应用程序”。
-
输入“WebApplication”作为名称,然后单击“确定”。
-
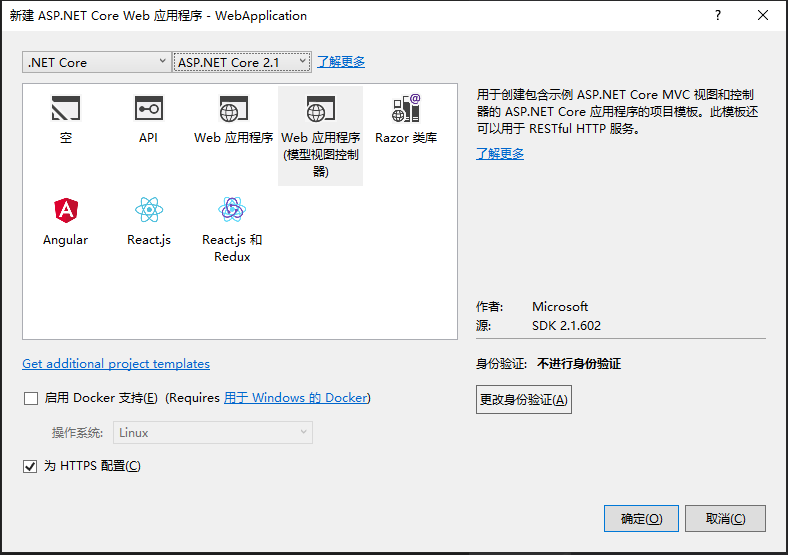
在“新建 ASP.NET Core Web 应用程序”对话框中:
-
确保在下拉列表中选择“.NET Core”和“ASP.NET Core 2.1”
-
选择“Web 应用程序(模型视图控制器)”项目模板
-
确保将“身份验证”设置为“无身份验证”
-
单击“确定”
创建第一个模型
-
右键单击“Models”文件夹,然后选择“添加”>“类”。
-
输入“FirstModel.cs”作为名称,然后单击“确定”。
-
将此文件的内容替换为以下代码:
using System.Collections.Generic;
using Microsoft.EntityFrameworkCore;

namespace WebApplication.Models
{
    public class FirstDbContext : DbContext
    {
        public FirstDbContext(DbContextOptions<FirstDbContext> options)
            : base(options)
        { }

        public DbSet<Blog> Blogs { get; set; }
        public DbSet<Post> Posts { get; set; }
    }

    public class Blog
    {
        public int BlogId { get; set; }
        public string Url { get; set; }

        public ICollection<Post> Posts { get; set; }
    }

    public class Post
    {
        public int PostId { get; set; }
        public string Title { get; set; }
        public string Content { get; set; }

        public int BlogId { get; set; }
        public Blog Blog { get; set; }
    }
}
生产应用通常会将每个类放在单独的文件中。 为简单起见,本教程将这些类放在一个文件中。
创建第二个模型
-
右键单击“Models”文件夹,然后选择“添加”>“类”。
-
输入“SecondModel.cs”作为名称,然后单击“确定”。
-
将此文件的内容替换为以下代码:
using Microsoft.EntityFrameworkCore;

namespace WebApplication.Models
{
    public class SecondDbContext : DbContext
    {
        public SecondDbContext(DbContextOptions<SecondDbContext> options)
            : base(options)
        { }

        public DbSet<Student> Students { get; set; }
    }

    public class Student
    {
        public int Id { get; set; }
        public string Name { get; set; }
    }
}
生产应用通常会将每个类放在单独的文件中。 为简单起见,本教程将这些类放在一个文件中。
-
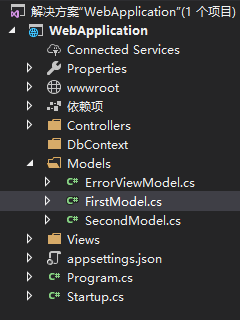
至此,项目的目录结构如下:
使用依赖注入注册上下文
若要使 FirstDbContext 和 SecondDbContext 可用于 MVC 控制器,请在 Startup.cs 中将其注册为服务。
在应用程序启动过程中,通过依赖关系注入 注册服务(如 FirstDbContext),以便能够通过构造函数的参数和属性向使用服务的组件(如 MVC 控制器)自动提供该服务。
-
在 Startup.cs 中,添加以下 using 语句:
using WebApplication.Models; using Microsoft.EntityFrameworkCore; -
将以下
手动高亮的代码添加到ConfigureServices方法:public void ConfigureServices(IServiceCollection services) { services.Configure<CookiePolicyOptions>(options => { // This lambda determines whether user consent for non-essential cookies is needed for a given request. options.CheckConsentNeeded = context => true; options.MinimumSameSitePolicy = SameSiteMode.None; }); services.AddMvc().SetCompatibilityVersion(CompatibilityVersion.Version_2_1); var connection = @"Server=你的数据库地址;Database=MultipleDbContext;User Id=你的数据库账号;Password=你的数据库密码;"; // 手动高亮 services.AddDbContext<FirstDbContext> // 手动高亮 (options => options.UseSqlServer(connection, x => x.MigrationsHistoryTable("__FirstDbMigrationsHistory"))); // 手动高亮 services.AddDbContext<SecondDbContext> // 手动高亮 (options => options.UseSqlServer(connection, x => x.MigrationsHistoryTable("__SecondDbMigrationsHistory"))); // 手动高亮 }生产应用通常会将连接字符串放在配置文件或环境变量中。 为简单起见,本教程在代码中定义它。
创建数据库
以下步骤使用迁移创建数据库。
-
“工具”>“NuGet 包管理器”>“包管理器控制台”
-
运行以下命令创建
FirstDbContext的迁移:Add-Migration InitialCreate -Context FirstDbContext -OutputDir MigrationsFirstDbContextMigrations Update-Database -Context FirstDbContext-Context
参数表示要使用的 DbContext类,请参阅这里了解详细信息。 -
“工具”>“NuGet 包管理器”>“包管理器控制台”
-
运行以下命令创建
SecondDbContext的迁移:Add-Migration InitialCreate -Context SecondDbContext -OutputDir MigrationsSecondDbContextMigrations Update-Database -Context SecondDbContext -
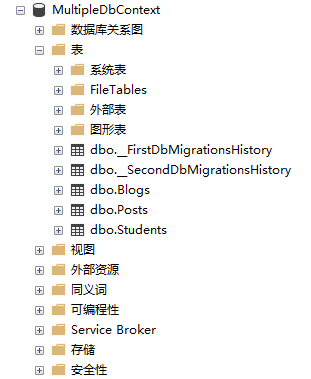
至此,项目的目录结构如下:

-
数据库如下:
需要注意的情况
请避免两个 DBContext 内的实体有互相主外键连接的情况
-
示例
// FirstDbContext
public class FirstDbContext : DbContext
{
    public FirstDbContext(DbContextOptions<FirstDbContext> options)
        : base(options)
    { }

    public DbSet<Blog> Blogs { get; set; }
    public DbSet<Post> Posts { get; set; }
}

public class Blog
{
    public int BlogId { get; set; }
    public string Url { get; set; }

    public ICollection<Post> Posts { get; set; }


    public int StudentId { get; set; }
    public Student Student { get; set; }
}

public class Post
{
    public int PostId { get; set; }
    public string Title { get; set; }
    public string Content { get; set; }

    public int BlogId { get; set; }
    public Blog Blog { get; set; }
}


// SecondDbContext
public class SecondDbContext : DbContext
{
    public SecondDbContext(DbContextOptions<SecondDbContext> options)
        : base(options)
    { }

    public DbSet<Student> Students { get; set; }
}

public class Student
{
    public int Id { get; set; }
    public string Name { get; set; }

    public ICollection<Blog> Blogs { get; set; }
}