首先简单的介绍下什么koa-router,为什么要使用它,可以简单看下上一篇文章. 了解koa-router
首先我们来看下koa-router的源码的基本结构如下,它是由两部分组成的:
------- koa-router
| |--- lib
| | |-- layer.js
| | |-- router.js
如上基本结构。
一:router.js 代码基本结构
我们先看 router.js 代码结构如下:
module.exports = Router;

function Router(opts) {
  if (!(this instanceof Router)) {
    return new Router(opts);
  }

  this.opts = opts || {};
  this.methods = this.opts.methods || [
    'HEAD',
    'OPTIONS',
    'GET',
    'PUT',
    'PATCH',
    'POST',
    'DELETE'
  ];

  this.params = {};
  this.stack = [];
};

Router.prototype.del = Router.prototype['delete'];
Router.prototype.use = function () {
  // ....
}
Router.prototype.prefix = function (prefix) {
  // ....
}
Router.prototype.routes = Router.prototype.middleware = function () {
  // ...
}
Router.prototype.allowedMethods = function (options) {
  // ...
}
Router.prototype.all = function (name, path, middleware) {
  // ...
}
Router.prototype.redirect = function (source, destination, code) {
  // ...
}
Router.prototype.register = function (path, methods, middleware, opts) {
  // ...
}
Router.prototype.route = function (name) {
  // ...
}
Router.prototype.url = function (name, params) {
  // ...
}
Router.prototype.match = function (path, method) {
  // ...
}
Router.prototype.param = function (param, middleware) {
  // ...
}
Router.url = function (path, params) {
  // ...
}
如上就是koa-router中的router.js 中的代码结构,定义了一个 Router 函数,然后在该函数的原型上定义了很多方法。然后使用 module.exports = Router; 导出该函数。因此如果我们要使用该router函数的话,需要首先导入该router.js 代码,因此需要 var Router = require('koa-router'); 然后再实例化该router函数,如代码:var router = new Router(); 或者我们直接可以如下编写代码:var router = require('koa-router')(); 比如如下koa-router代码的demo列子:
const Koa = require('koa');
const app = new Koa();

const router = require('koa-router')();

// 添加路由
router.get('/', ctx => {
  ctx.body = '<h1>欢迎光临index page 页面</h1>';
});

router.get('/home', ctx => {
  ctx.body = '<h1>欢迎光临home页面</h1>';
});

// 加载路由中间件
app.use(router.routes());

app.use(router.allowedMethods());

app.listen(3001, () => {
  console.log('server is running at http://localhost:3001');
});
当我们运行该js文件的时候,在浏览器访问 http://localhost:3001/ 的时候,就会显示 "欢迎光临index page 页面" 这些信息,当我们在浏览器访问 http://localhost:3001/home 的时候,在页面上会显示 "欢迎光临home页面" 等信息。它是如何调用的呢?
首先我们来分析下,Router这个构造函数代码;基本源码如下:
function Router(opts) {
  if (!(this instanceof Router)) {
    return new Router(opts);
  }

  this.opts = opts || {};
  this.methods = this.opts.methods || [
    'HEAD',
    'OPTIONS',
    'GET',
    'PUT',
    'PATCH',
    'POST',
    'DELETE'
  ];

  this.params = {};
  this.stack = [];
};
如上代码,首先会判断 是否是该Router实列,如果不是的话,就实例化该对象。因此我们 Router() 或 new Router() 这样调用效果是一致的。该Router函数会传入一个对象参数 opts,该对象 opts会有methods这样的key。会传入一些http方法等。
然后 this.methods; 它是一个数组是存放允许使用的HTTP的常用的方法名,后面会使用到,先保存到 this.methods里面。
this.params = {}; 定义了一个对象,它具体干什么用的,我暂时也不知道,先放在这里。
this.stack = []; 定义了一个数组,先放在这里,我也不知道具体干什么用的。
二. 路由注册
第二步我们就是添加我们的路由,比如app.js代码如下:
// 添加路由
router.get('/', ctx => {
  ctx.body = '<h1>欢迎光临index page 页面</h1>';
});
在我们的router.js源码中会有这么一段代码,我们来看下:
var methods = require('methods');
methods函数源码如下:
/*!
 * methods
 * Copyright(c) 2013-2014 TJ Holowaychuk
 * Copyright(c) 2015-2016 Douglas Christopher Wilson
 * MIT Licensed
 */

'use strict';
/**
 * Module dependencies.
 * @private
 */

var http = require('http');
/**
 * Module exports.
 * @public
 */

module.exports = getCurrentNodeMethods() || getBasicNodeMethods();
/**
 * Get the current Node.js methods.
 * @private
 */

function getCurrentNodeMethods() {
  return http.METHODS && http.METHODS.map(function lowerCaseMethod(method) {
    return method.toLowerCase();
  });
}

/**
 * Get the "basic" Node.js methods, a snapshot from Node.js 0.10.
 * @private
 */

function getBasicNodeMethods() {
  return [
    'get',
    'post',
    'put',
    'head',
    'delete',
    'options',
    'trace',
    'copy',
    'lock',
    'mkcol',
    'move',
    'purge',
    'propfind',
    'proppatch',
    'unlock',
    'report',
    'mkactivity',
    'checkout',
    'merge',
    'm-search',
    'notify',
    'subscribe',
    'unsubscribe',
    'patch',
    'search',
    'connect'
  ];
}
因此在我们的 router.js 中 这样引入 var methods = require('methods');后,我们的methods的值被保存为如下:
var methods = [
  'get',
  'post',
  'put',
  'head',
  'delete',
  'options',
  'trace',
  'copy',
  'lock',
  'mkcol',
  'move',
  'purge',
  'propfind',
  'proppatch',
  'unlock',
  'report',
  'mkactivity',
  'checkout',
  'merge',
  'm-search',
  'notify',
  'subscribe',
  'unsubscribe',
  'patch',
  'search',
  'connect'
];
然后router.js 代码中的源码由如下代码:
methods.forEach(function (method) {
  Router.prototype[method] = function (name, path, middleware) {
    var middleware;

    if (typeof path === 'string' || path instanceof RegExp) {
      middleware = Array.prototype.slice.call(arguments, 2);
    } else {
      middleware = Array.prototype.slice.call(arguments, 1);
      path = name;
      name = null;
    }

    this.register(path, [method], middleware, {
      name: name
    });

    return this;
  };
});
也就是说遍历 methods 上面的数组中保存的 get/post/... 等方法。最后就变成如下这样的:
Router.property['get'] = function(name, path, middleware) {};
Router.property['post'] = function(name, path, middleware) {};
Router.property['put'] = function(name, path, middleware) {};
Router.property['head'] = function(name, path, middleware) {};
..... 等等这样的函数。通过如上代码,我们再来看下我们的app.js中的这句代码就可以理解了:
router.get('/', ctx => {
  ctx.body = '<h1>欢迎光临index page 页面</h1>';
});

router.get('/home', ctx => {
  ctx.body = '<h1>欢迎光临home页面</h1>';
});
如上代码 router 是 Router的实列返回的对象,Router的原型对象上会有 get, post,put .... 等等这样的方法,因此我们可以使用 router.get('/', ctx => {}). 这样添加一个或多个路由了。
其中我们的 Router的原型上(property)的get/post 等方法会有三个参数,第一个参数name,我们可以理解为字符串,它可以理解为路由的路径(比如上面的 '/', 或 '/home') 这样的。第二个参数 path 就是我们的函数了。该函数返回了 ctx对象。我们可以做个简单的打印,如下方法内部:
Router.prototype[method] = function (name, path, middleware) {
  console.log(name);
  console.log(path);
  console.log('-----');
  console.log(middleware);
  console.log(1111111);
}
当我们 node app.js 重新执行的时候,在node命令行中,可以看到如下打印信息:
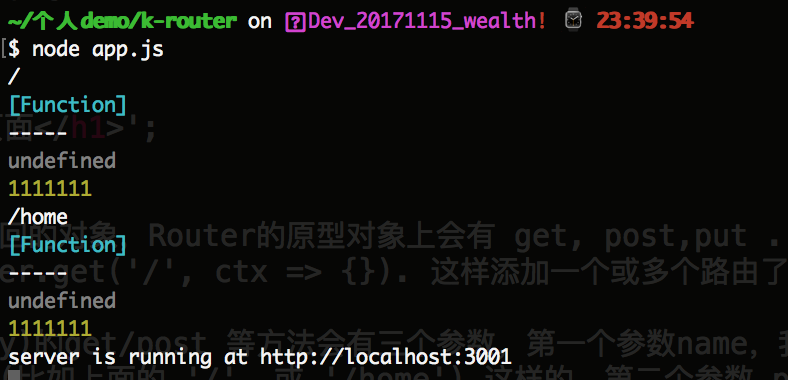
可以看到,我们 router.get('/', ctx => {}) 添加路由的时候,console.log(name); 打印的是 '/'; console.log(path); 打印的是 [Function], console.log(middleware); 打印的就是 undefined了。当我们添加 home路由的时候 router.get('/home', ctx => {}), console.log(name) 打印的是 '/home'了,console.log(path); 打印的是 [Function], console.log(middleware); 打印的也是 undefined了。
如上分析我们可以看到 Router中的各个方法已经可以理解添加路由了,下面我们继续看下该方法的内部代码是如何判断的?代码如下:
Router.prototype[method] = function (name, path, middleware) {
  var middleware;

  if (typeof path === 'string' || path instanceof RegExp) {
    middleware = Array.prototype.slice.call(arguments, 2);
  } else {
    middleware = Array.prototype.slice.call(arguments, 1);
    path = name;
    name = null;
  }

  this.register(path, [method], middleware, {
    name: name
  });

  return this;
};
如上代码,其实添加路由还有一种方式,如下代码:
router.get('user', '/users/:id', (ctx, next) => {
  ctx.body = 'hello world';
});
const r = router.url('user', 3);
console.log(r); // 生成路由 /users/3
按照官网的解释是:路由也可以有names(名字),router.url 方法方便我们在代码中根据路由名称和参数(可选)去生成具体的 URL。可能在开发环境中会使用到。因此会有如上两种情况。两个参数或三个参数的情况。
Router.prototype.register
因此 如上代码if判断,if (typeof path === 'string' || path instanceof RegExp) {} 如果path是一个字符串,或者是一个正则表达式的实列的话,就从第二个参数截取,也就是说从第二个参数后,或者说把第三个参数赋值给 middleware 这个参数。否则的话,如果path它是一个函数的话,那么就从第一个参数去截取,也就是说把第二个参数赋值给 middleware 这个变量。然后 path = name; name = null; 最后我们会调用 register 方法去注册路由;下面我们来看看下 register 方法的代码如下:
/*
 * 该方法有四个参数
 * @param {String} path 路由的路径
 * @param {String} methods 'get、post、put、'等对应的方法
 * @param {Function} middleware 该参数是一个函数。会返回ctx对象。
 * @param {opts} {name: name} 如果只有两个参数,该name值为null。否则就有值。
*/
Router.prototype.register = function (path, methods, middleware, opts) {
  opts = opts || {};

  var router = this;
  var stack = this.stack;

  // support array of paths
  if (Array.isArray(path)) {
    path.forEach(function (p) {
      router.register.call(router, p, methods, middleware, opts);
    });

    return this;
  }

  // create route
  var route = new Layer(path, methods, middleware, {
    end: opts.end === false ? opts.end : true,
    name: opts.name,
    sensitive: opts.sensitive || this.opts.sensitive || false,
    strict: opts.strict || this.opts.strict || false,
    prefix: opts.prefix || this.opts.prefix || "",
    ignoreCaptures: opts.ignoreCaptures
  });

  if (this.opts.prefix) {
    route.setPrefix(this.opts.prefix);
  }

  // add parameter middleware
  Object.keys(this.params).forEach(function (param) {
    route.param(param, this.params[param]);
  }, this);

  stack.push(route);

  return route;
};
Router.prototype.register 该方法是注册路由的核心函数。该方法直接挂载在Router的原型上,因此我们在router的实列上也可以访问到该方法。因此在使用实列我们之前是这样注册路由的:
router.get('/home', ctx => {
  ctx.body = '<h1>欢迎光临home页面</h1>';
});
其实上面的代码相当于如下代码:
router.register('/home', ['GET'], [(ctx, next) => {}], {name: null});
这样的代码。我们可以从上面的代码传进来的参数可以理解成如上的代码了。
我们继续看如上源码,首先会判断path是否是一个数组,如果是一个数组的话,会使用递归的方式依次调用router.register 这个方法。最后返回this对象。因此如下代码也是可以的:
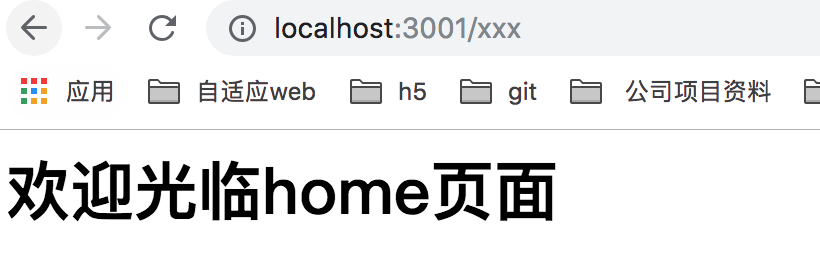
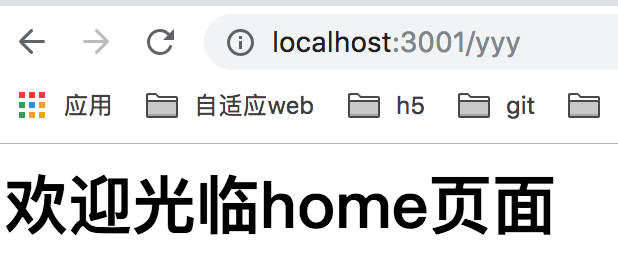
router.get(['/home', '/xxx', '/yyy'], ctx => {
  ctx.body = '<h1>欢迎光临home页面</h1>';
});
如上 path路径是一个数组也是支持的,http://localhost:3001/home, http://localhost:3001/xxx, http://localhost:3001/yyy 访问的都会返回 "欢迎光临home页面" 页面的显示。如下所示: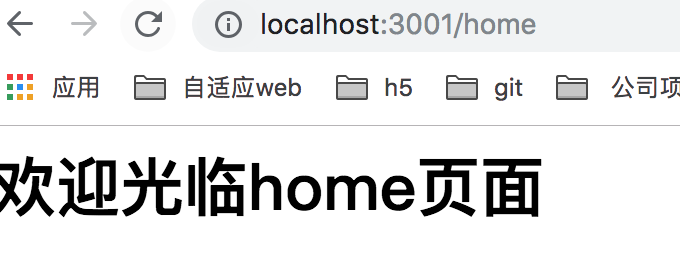
代码继续往后看,实例化Layer函数,该函数我们晚点再来分析,我们继续往下看代码:如下所示:
if (this.opts.prefix) {
  route.setPrefix(this.opts.prefix);
}
理解Router.prototype.prefix
会判断opts对象是否有 prefix 的前缀的key,如果有的话就会调用 route.setPrefix() 方法。我们先来看看prefix的作用是什么。基本源代码如下:
Router.prototype.prefix = function (prefix) {
  prefix = prefix.replace(//$/, '');

  this.opts.prefix = prefix;

  this.stack.forEach(function (route) {
    route.setPrefix(prefix);
  });
  return this;
};
该prefix的作用就是给路由全局加前缀的含义;比如app.js改成如下代码:
const Koa = require('koa');
const app = new Koa();

const router = require('koa-router')({
  prefix: '/prefix'
});
// 添加路由
router.get('/', ctx => {
  ctx.body = '<h1>欢迎光临index page 页面</h1>';
});

router.get('/home', ctx => {
  ctx.body = '<h1>欢迎光临home页面</h1>';
});

router.get('user', '/users/:id', (ctx, next) => {
  ctx.body = 'hello world';
});
const r = router.url('user', 3);
console.log(r); // 生成路由 /users/3

// 加载路由中间件
app.use(router.routes());

app.use(router.allowedMethods());

app.listen(3001, () => {
  console.log('server is running at http://localhost:3001');
});
现在当我们继续访问 http://localhost:3001/home 或 http://localhost:3001/ 的时候,页面是访问不到的,如果我们加上前缀 '/prefix' 是可以访问的到的,如 http://localhost:3001/prefix/home 或 http://localhost:3001/prefix。其中代码 route.setPrefix(this.opts.prefix);中的setPrefix的方法中的route就是new Layer的实列对象了,因此setPrefix的方法就是在Layer.js 里面,setPrefix方法如下所示:
Layer.prototype.setPrefix
Layer.prototype.setPrefix = function (prefix) {
  if (this.path) {
    this.path = prefix + this.path;
    this.paramNames = [];
    this.regexp = pathToRegExp(this.path, this.paramNames, this.opts);
  }

  return this;
};
如上代码可以看到,如果有路由路径的话,this.path = prefix + this.path; 因此路由路径发生改变了。然后把路径 使用 pathToRegExp 转换成正则表达式保存到 this.regexp 中。最后返回Layer对象。
想要了解 pathToRegExp,可以看我之前的一篇文章,了解pathToRegExp
下面我们来看下Layer.js 代码的结构如下:
var debug = require('debug')('koa-router');
var pathToRegExp = require('path-to-regexp');
var uri = require('urijs');

module.exports = Layer;

function Layer(path, methods, middleware, opts) {

};

Layer.prototype.match = function (path) {
  // ...
}

Layer.prototype.params = function (path, captures, existingParams) {
  // ...
}

Layer.prototype.captures = function (path) {
  // ...
}

Layer.prototype.url = function (params, options) {
  // ...
}

Layer.prototype.param = function (param, fn) {
  // ...
}

Layer.prototype.setPrefix = function (prefix) {
  // ...
}
Layer.js 如上代码结构晚点再折腾,我们还是回到 router.js中的register函数代码上了;
/*
 * 该方法有四个参数
 * @param {String} path 路由的路径
 * @param {String} methods 'get、post、put、'等对应的方法
 * @param {Function} middleware 该参数是一个函数。会返回ctx对象。
 * @param {opts} {name: name} 如果只有两个参数,该name值为null。否则就有值。
*/
Router.prototype.register = function (path, methods, middleware, opts) {
  // create route
  var route = new Layer(path, methods, middleware, {
    end: opts.end === false ? opts.end : true,
    name: opts.name,
    sensitive: opts.sensitive || this.opts.sensitive || false,
    strict: opts.strict || this.opts.strict || false,
    prefix: opts.prefix || this.opts.prefix || "",
    ignoreCaptures: opts.ignoreCaptures
  });
}
在该函数内部会引用 Layer.js 进来,然后实列化该对象。因此我们可以理解Layer.js 的作用是:
注意:Layer类的作用可以理解为,创建一个实列对象来管理每一个路由。也就是说每一个路由都会实例化一个Layer对象。
注意:如上opts中的参数像 end、sensitive、strict、ignoreCaptures等这些参数是pathToRegExp库中参数用法。
我们可以从opts这个配置上传入进来后,在Layer.js 中会调用 pathToRegExp 将路径字符串转换为正则表达式时,会将该这些参数传入到 pathToRegExp 这个js中去。
因此对于app.js 中注册路由这段代码来讲 router.get('/', ctx => {});的话,注册路由实例化Layer对象。
/*
 path: '/',
 methods: 'GET',
 middleware: [Function]
*/
var route = new Layer(path, methods, middleware, {
  end: false,
  name: null,
  sensitive: false,
  strict: false,
  prefix: '',
  ignoreCaptures: opts.ignoreCaptures = undefined
});
就会调用Layer.js 的构造函数 Layer, 如下代码:
/**
 * Initialize a new routing Layer with given `method`, `path`, and `middleware`.
 *
 * @param {String|RegExp} path Path string or regular expression.
 * @param {Array} methods Array of HTTP verbs.
 * @param {Array} middleware Layer callback/middleware or series of.
 * @param {Object=} opts
 * @param {String=} opts.name route name
 * @param {String=} opts.sensitive case sensitive (default: false)
 * @param {String=} opts.strict require the trailing slash (default: false)
 * @returns {Layer}
 * @private
 */

function Layer(path, methods, middleware, opts) {
  this.opts = opts || {};
  this.name = this.opts.name || null;
  this.methods = [];
  this.paramNames = [];
  this.stack = Array.isArray(middleware) ? middleware : [middleware];

  methods.forEach(function(method) {
    var l = this.methods.push(method.toUpperCase());
    if (this.methods[l-1] === 'GET') {
      this.methods.unshift('HEAD');
    }
  }, this);

  // ensure middleware is a function
  this.stack.forEach(function(fn) {
    var type = (typeof fn);
    if (type !== 'function') {
      throw new Error(
        methods.toString() + " `" + (this.opts.name || path) +"`: `middleware` "
        + "must be a function, not `" + type + "`"
      );
    }
  }, this);

  this.path = path;
  this.regexp = pathToRegExp(path, this.paramNames, this.opts);

  debug('defined route %s %s', this.methods, this.opts.prefix + this.path);
};
如上是Layer.js 代码,this.methods === Layer.methods 保存了所有http的方法,如果是Get请求的话,最后 this.methods = ['HEAD', 'GET'] 了。this.stack === Layer.stack 则保存的是 我们的函数,如下:
// 添加路由
router.get('/', ctx => {
  ctx.body = '<h1>欢迎光临index page 页面</h1>';
});
中的 function(ctx) {} 这个函数了。最后 通过 pathToRegExp.js 会将我们的路由字符串转换成正则表达式,保存到 this.regexp === Layer.regexp 变量中。
现在我们再回到 router.js中的 Router.prototype.register 方法中,再接着执行如下代码:
// add parameter middleware
Object.keys(this.params).forEach(function (param) {
  route.param(param, this.params[param]);
}, this);

stack.push(route);

return route;
如上代码,目前的 this.params 还是 {}. 因此不会遍历进去。最后代码:stack.push(route); 含义是把当前的Layer对象的实列保存到 this.stack中。
注意:
1. Router.stack 的作用是保存每一个路由,也就是Layer的实列对象。
2. Layer.stack 的作用是 保存的是 每个路由的回调函数中间件。
两者的区别是:一个路由可以添加多个回调函数的。
最后代码返回了 route,也就是反回了 Layer对象的实列。
三:加载路由中间件
在app.js 中的代码,如下调用:
// 加载路由中间件
app.use(router.routes());
如上代码,我们可以分成二步,第一步是:router.routes(); 这个方法返回值,再把返回值传给 app.use(); 调用即可加载路由中间件了。因此我们首先来看第一步:router.routes()方法内部到底做了什么事情了。如下代码:
理解Router.prototype.routes
/**
 * Returns router middleware which dispatches a route matching the request.
 *
 * @returns {Function}
 */

Router.prototype.routes = Router.prototype.middleware = function () {
  var router = this;
  var dispatch = function dispatch(ctx, next) {
    debug('%s %s', ctx.method, ctx.path);

    var path = router.opts.routerPath || ctx.routerPath || ctx.path;
    var matched = router.match(path, ctx.method);
    var layerChain, layer, i;

    if (ctx.matched) {
      ctx.matched.push.apply(ctx.matched, matched.path);
    } else {
      ctx.matched = matched.path;
    }

    ctx.router = router;

    if (!matched.route) return next();

    var matchedLayers = matched.pathAndMethod
    var mostSpecificLayer = matchedLayers[matchedLayers.length - 1]
    ctx._matchedRoute = mostSpecificLayer.path;
    if (mostSpecificLayer.name) {
      ctx._matchedRouteName = mostSpecificLayer.name;
    }

    layerChain = matchedLayers.reduce(function(memo, layer) {
      memo.push(function(ctx, next) {
        ctx.captures = layer.captures(path, ctx.captures);
        ctx.params = layer.params(path, ctx.captures, ctx.params);
        ctx.routerName = layer.name;
        return next();
      });
      return memo.concat(layer.stack);
    }, []);

    return compose(layerChain)(ctx, next);
  };

  dispatch.router = this;

  return dispatch;
};
如上代码:Router.prototype.routes = Router.prototype.middleware; router.routes 的别名也叫 router.middleware. 当我们使用 router.routes() 调用的时候,返回了一个dispatch函数,dispatch.router = this; Router实列对象也是dispatch中的router属性。返回了一个dispatch函数后,我们就使用 app.use(router.routes); 会将路由模块添加到koa的中间件处理机制了。koa的中间件机制是以一个函数存在的,因此我们routes函数也就返回了一个函数。
具体想要了解koa中的洋葱型模型,可以看我这篇文章。
app.use(fn); 会将所有的中间件函数存放到 this.middleware 数组中,当我们在app.js中使用 app.listen()方法的时候,如下代码:
app.listen(3001, () => {
  console.log('server is running at http://localhost:3001');
});
koa中的部分 listen方法代码如下:
listen(...args) {
  debug('listen');
  const server = http.createServer(this.callback());
  return server.listen(...args);
}
最后当我们在浏览器中访问 http://localhost:3001/prefix/home 时候 会自动执行路由中的dispatch函数了。
我们再回到 Router.prototype.routes = Router.prototype.middleware = function () {} 中的dispatch函数,看看该函数内部做了什么事情了。
该dispatch 函数有两个参数 ctx 和 next. 这两个参数是koa中的基本知识,就不多介绍该两个参数了。
var router = this; 保存Router实列对象。var path = router.opts.routerPath || ctx.routerPath || ctx.path; 这句代码就拿到了 路由字符串了,比如当我们访问 http://localhost:3001/prefix/home 时候,ctx.path 就返回了 '/prefix/home'; 接着执行 var matched = router.match(path, ctx.method); 代码,会进行路由匹配。
理解Router.prototype.match:
router.match() 方法如下:
/**
 * Match given `path` and return corresponding routes.
 *
 * @param {String} path
 * @param {String} method
 * @returns {Object.<path, pathAndMethod>} returns layers that matched path and
 * path and method.
 * @private
 */

Router.prototype.match = function (path, method) {
  var layers = this.stack;
  var layer;
  var matched = {
    path: [],
    pathAndMethod: [],
    route: false
  };

  for (var len = layers.length, i = 0; i < len; i++) {
    layer = layers[i];

    debug('test %s %s', layer.path, layer.regexp);
    // 这里是使用由路由字符串生成的正则表达式判断当前路径是否符合该正则
    if (layer.match(path)) {

      // 将对应的 Layer 实例加入到结果集的 path 数组中
      matched.path.push(layer);

      // 如果对应的 layer 实例中 methods 数组为空或者数组中有找到对应的方法
      if (layer.methods.length === 0 || ~layer.methods.indexOf(method)) {
        // 将 layer 放入到结果集的 pathAndMethod 中
        matched.pathAndMethod.push(layer);
        if (layer.methods.length) matched.route = true;
      }
    }
  }

  return matched;
};
var matched = router.match(path, ctx.method); 调用该方法,会传入两个参数,第一个参数就是路由字符串 '/prefix/home'; 第二个参数 ctx.method, 也就是 'get' 方法。在match方法内部。this.stack === router.stack了,保存了每个路由的实列对象,我们可以打印下 this.stack, 它的值是如下所示:
[ Layer {
    opts:
     { end: true,
       name: null,
       sensitive: false,
       strict: false,
       prefix: '/prefix',
       ignoreCaptures: undefined },
    name: null,
    methods: [ 'HEAD', 'GET' ],
    paramNames: [],
    stack: [ [Function] ],
    path: '/prefix/',
    regexp: { /^/prefix(?:/(?=$))?$/i keys: [] } },
  Layer {
    opts:
     { end: true,
       name: null,
       sensitive: false,
       strict: false,
       prefix: '/prefix',
       ignoreCaptures: undefined },
    name: null,
    methods: [ 'HEAD', 'GET' ],
    paramNames: [],
    stack: [ [Function] ],
    path: '/prefix/home',
    regexp: { /^/prefix/home(?:/(?=$))?$/i keys: [] } },
  Layer {
    opts:
     { end: true,
       name: 'user',
       sensitive: false,
       strict: false,
       prefix: '/prefix',
       ignoreCaptures: undefined },
    name: 'user',
    methods: [ 'HEAD', 'GET' ],
    paramNames:
     [ { name: 'id',
         prefix: '/',
         delimiter: '/',
         optional: false,
         repeat: false,
         partial: false,
         asterisk: false,
         pattern: '[^\/]+?' } ],
    stack: [ [Function] ],
    path: '/prefix/users/:id',
    regexp:
     { /^/prefix/users/((?:[^/]+?))(?:/(?=$))?$/i
       keys:
        [ { name: 'id',
            prefix: '/',
            delimiter: '/',
            optional: false,
            repeat: false,
            partial: false,
            asterisk: false,
            pattern: '[^\/]+?' } ] } } ]
可以看到数组中有三个Layer对象,那是因为我们注册了三次路由,比如我们的app.js代码如下:
// 添加路由
router.get('/', ctx => {
  ctx.body = '<h1>欢迎光临index page 页面</h1>';
});

router.get('/home', ctx => {
  ctx.body = '<h1>欢迎光临home页面</h1>';
});

router.get('user', '/users/:id', (ctx, next) => {
  ctx.body = 'hello world';
});
注册了多少次路由,Layer类就会实例化多少次,而我们的Router.stack就是保存的是Layer实例化对象。保存的值是如上所示:
然后就遍历循环 this.stack了。如果 if (layer.match(path)) {},如果其中一个Layer对象匹配到该路由路径的话,就把该Layer对象存入到 matched.path.push(layer);matched对象中的path数组中了。具体的含义可以看上面的代码注释。
通过上面返回的结果集, 我们知道一个请求来临的时候, 我们可以使用正则来匹配路由是否符合, 然后在 path 数组或者 pathAndMethod 数组中找到对应的 Layer 实例对象. 我们再回到 Router.prototype.routes = function() {} 中的如下代码:
if (ctx.matched) {
  ctx.matched.push.apply(ctx.matched, matched.path);
} else {
  ctx.matched = matched.path;
}
默认ctx.matched 为undefined,因此使用 matched.path 赋值该 ctx.matched了。当我们在浏览器访问:http://localhost:3001/prefix/home 时候,那么就会在match函数内部匹配到 '/prefix/home' 路由了,因此:matched.path 返回的值如下:
[ Layer {
    opts:
     { end: true,
       name: null,
       sensitive: false,
       strict: false,
       prefix: '/prefix',
       ignoreCaptures: undefined },
    name: null,
    methods: [ 'HEAD', 'GET' ],
    paramNames: [],
    stack: [ [Function] ],
    path: '/prefix/home',
    regexp: { /^/prefix/home(?:/(?=$))?$/i keys: [] } } ]
最终 ctx.matched 值也就是上面的值了。
ctx.router = router; 代码,也就是说把router对象挂载到 ctx中的router对象了。
if (!matched.route) return next(); 该代码的含义是:如果没有匹配到对应的路由的话,则直接跳过如下代码,执行下一个中间件。
如下三句代码的含义:
var matchedLayers = matched.pathAndMethod
var mostSpecificLayer = matchedLayers[matchedLayers.length - 1]
ctx._matchedRoute = mostSpecificLayer.path;
matchedLayers 值是:
[ Layer {
    opts:
     { end: true,
       name: null,
       sensitive: false,
       strict: false,
       prefix: '/prefix',
       ignoreCaptures: undefined },
    name: null,
    methods: [ 'HEAD', 'GET' ],
    paramNames: [],
    stack: [ [Function] ],
    path: '/prefix/home',
    regexp: { /^/prefix/home(?:/(?=$))?$/i keys: [] } } ]
因此 mostSpecificLayer 也是上面的值哦;然后 ctx._matchedRoute = mostSpecificLayer.path = '/prefix/home' 了。
接着代码判断:
if (mostSpecificLayer.name) {
  ctx._matchedRouteName = mostSpecificLayer.name;
}
如上我们可以看到 mostSpecificLayer.name 为null,因此就不会进入if内部语句代码。当然如果改对象的name不为null的话,就会把该对应的name值保存到ctx对象上的_matchedRouteName属性上了。
接着代码如下
/*
 该函数的主要思想是:构建路径对应路由的处理中间件函数数组,
 在每个匹配的路由对应的中间件处理函数数组前添加一个用于处理。
*/
layerChain = matchedLayers.reduce(function(memo, layer) {
  memo.push(function(ctx, next) {
    ctx.captures = layer.captures(path, ctx.captures);
    ctx.params = layer.params(path, ctx.captures, ctx.params);
    ctx.routerName = layer.name;
    return next();
  });
  return memo.concat(layer.stack);
}, []);

return compose(layerChain)(ctx, next);
理解 koa-compose 的思想,可以看这篇文章。
它的作用是将多个中间件函数合并成一个中间件函数,然后执行该函数。
matchedLayers.reduce中的reduce是将接收一个函数作为累加器,数组中的每个值(从左到右)开始缩减,最终计算为一个值。
Router.prototype.allowedMethod 方法的作用就是用于处理请求的错误。 具体的可以看下源码,已经很晚了,Layer.js内部也有一些方法还未讲解到,大家有空可以去折腾下。koa-router源码先分析到这里了。