实验小组成员:
(1)庞斌(负责环境配置、登录验证、cookie) 博客地址:https://www.cnblogs.com/XiaoPB/
(2)郭昭杰(负责session、博客编写) 博客地址:https://www.cnblogs.com/ashes-g/
(3)唐任峻杰 (负责过滤器) 博客地址:https://www.cnblogs.com/trjjcool/
项目码云地址:https://gitee.com/ashes-g/j2ee
一、配置MySQL
主要参考博文https://www.cnblogs.com/winton-nfs/p/11524007.html进行MySQL安装与配置
首先进入官网https://www.mysql.com/,找到DOWNLOAD标签,下载安装包
也可以通过百度网盘下载:https://pan.baidu.com/s/1oz0TZZWkaFwoC9r2XwYGXA 提取码:2b25
下载完成后双击开始安装并设置初始账户的密码,安装选项都选择默认选项即可

安装完成后,在任务栏左下角搜索框内输入cmd,以管理员身份运行

进入MySQL安装目录的bin文件夹内,输入mysqld --install安装MySQL服务
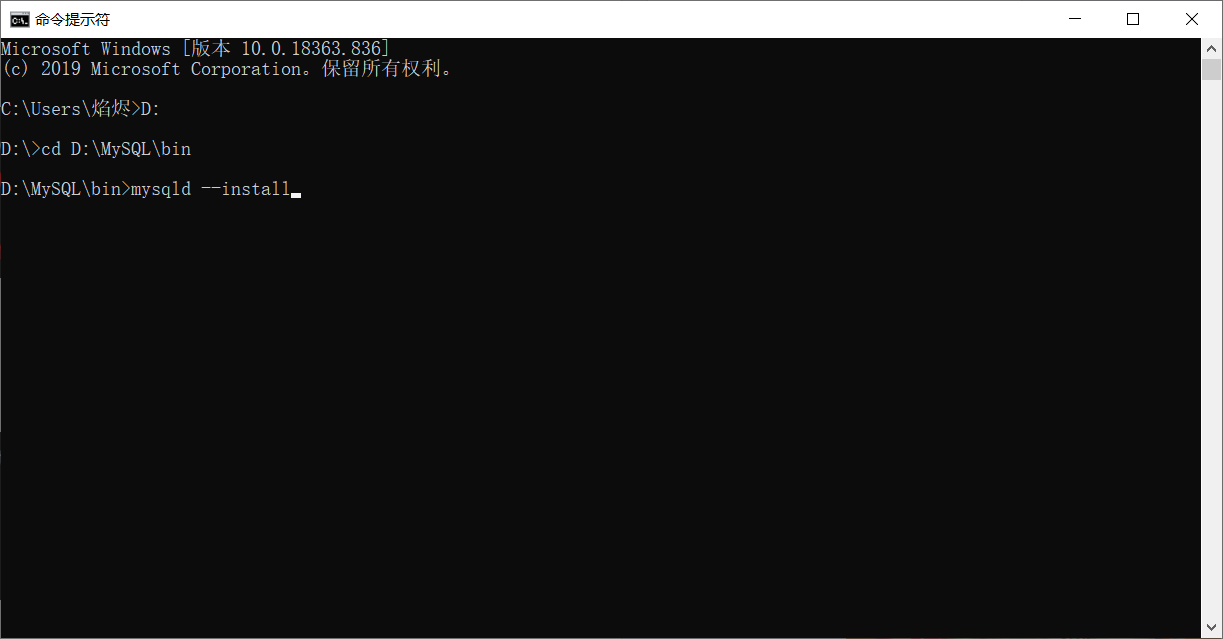
随后输入mysqld --initialize --console命令进行初始化

输入net start mysql开启MySQL的服务
注:后续可按照上述参考博文进一步进行修改密码等操作,但我们小组使用的是可视化界面进行数据库操作,跳过了这一步
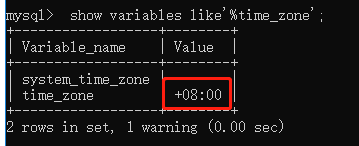
为防止IDEA中连接数据库失败,还需要在命令行中设置时区
参考博文:https://blog.csdn.net/liuqiker/article/details/102455077
在命令行中依次输入命令并执行即可完成设置时区:mysql -hlocalhost -uroot -p;show variables like'%time_zone';set global time_zone = '+8:00'
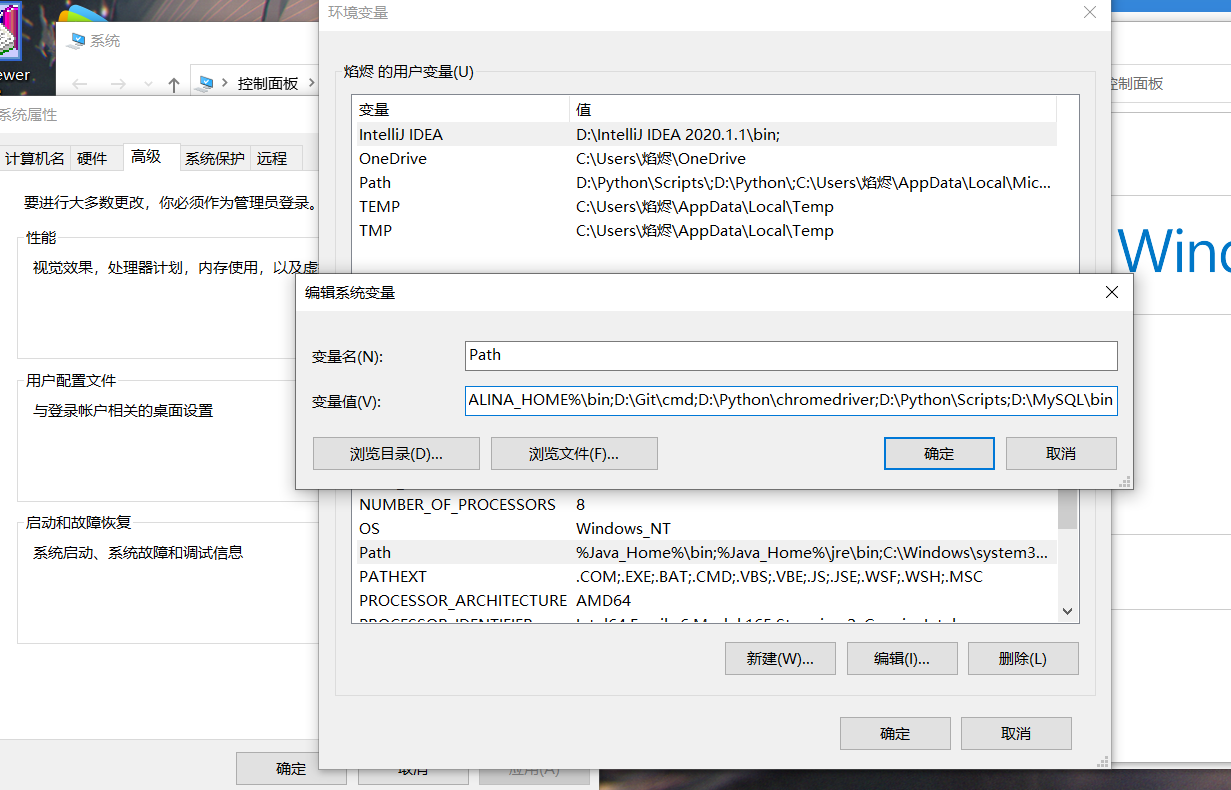
右击此电脑→高级系统设置→环境变量,在系统变量中找到Path,点击编辑并加入MySQL的安装目录
在开始菜单找到MySQL Workbench 8.0 CE,运行MySQL的可视化操作界面

找到红框处的加号,输入安装时设置的用户名和密码新建数据库连接
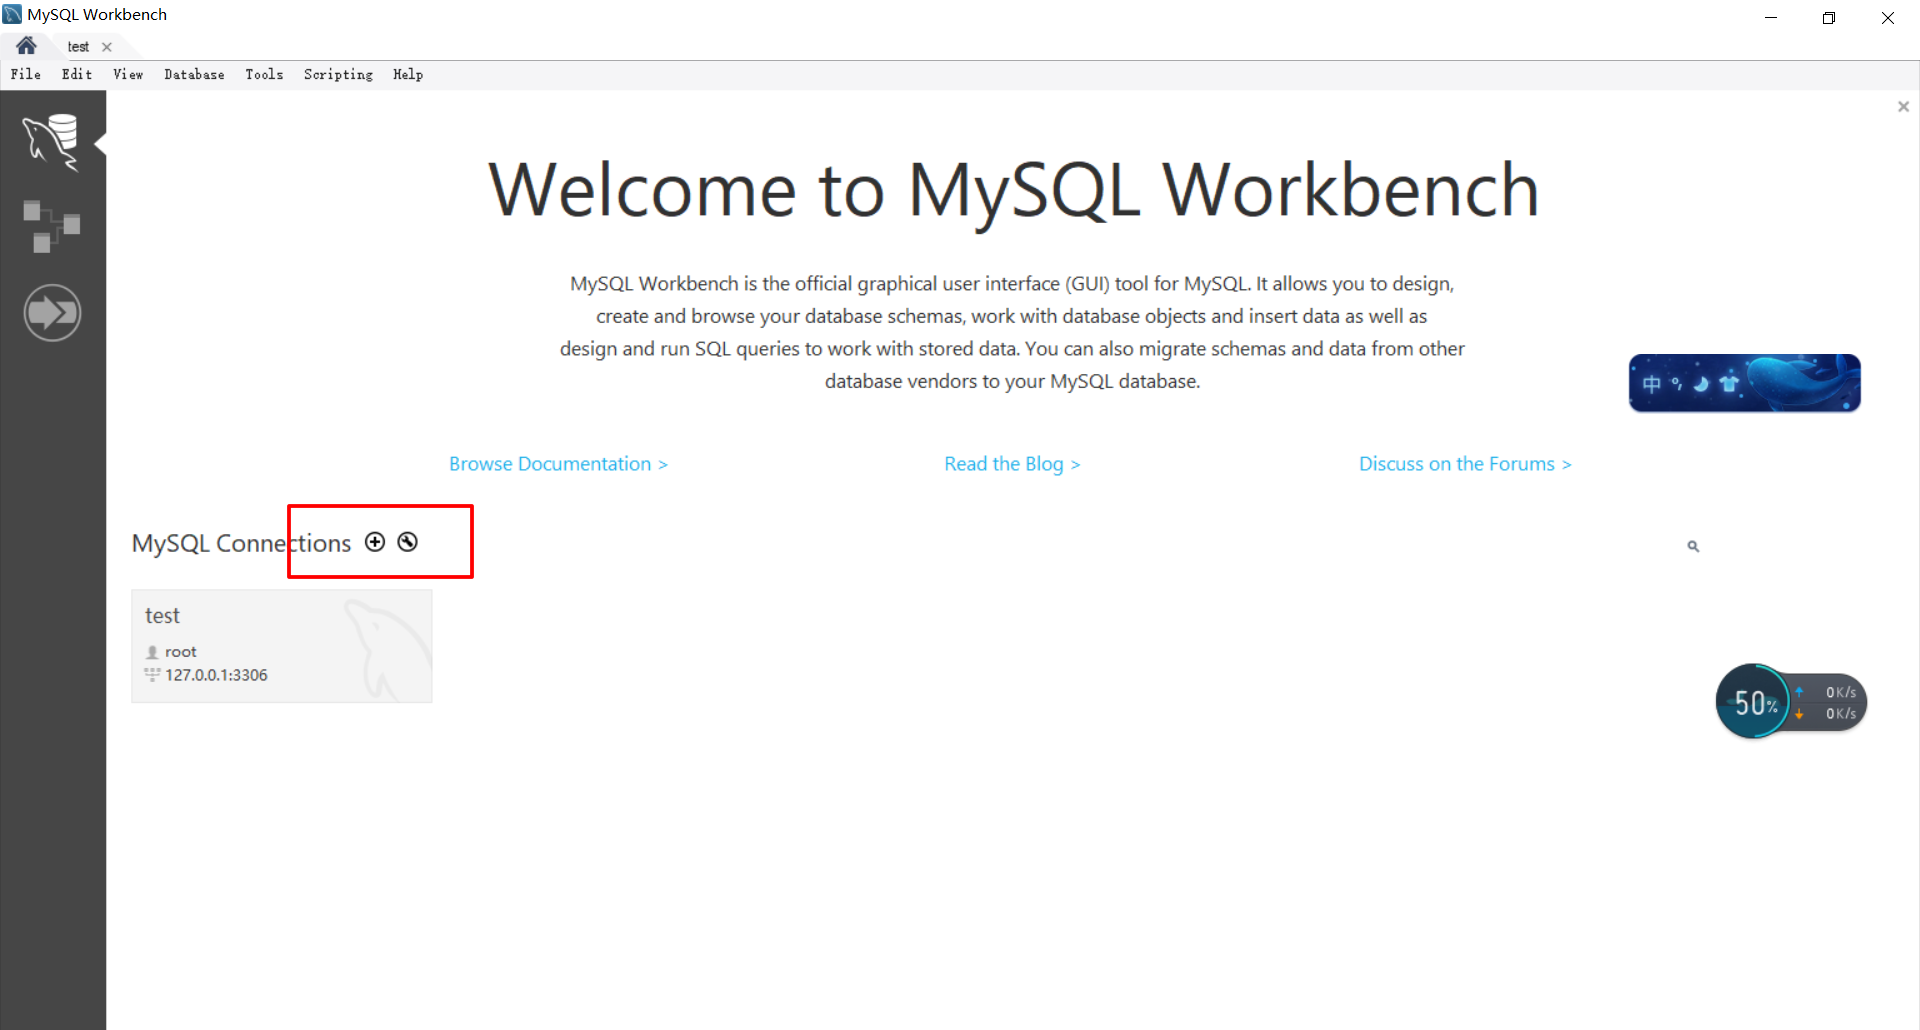
完成后点击连接,在界面内找到左下角的SCHEMAS,右键选择Create Schema创建数据库
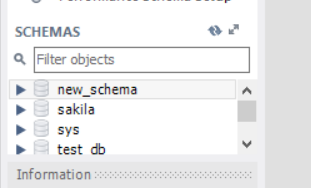
在建立的数据库下以类似操作创建表,并录入网页登录要校验的用户名和密码数据
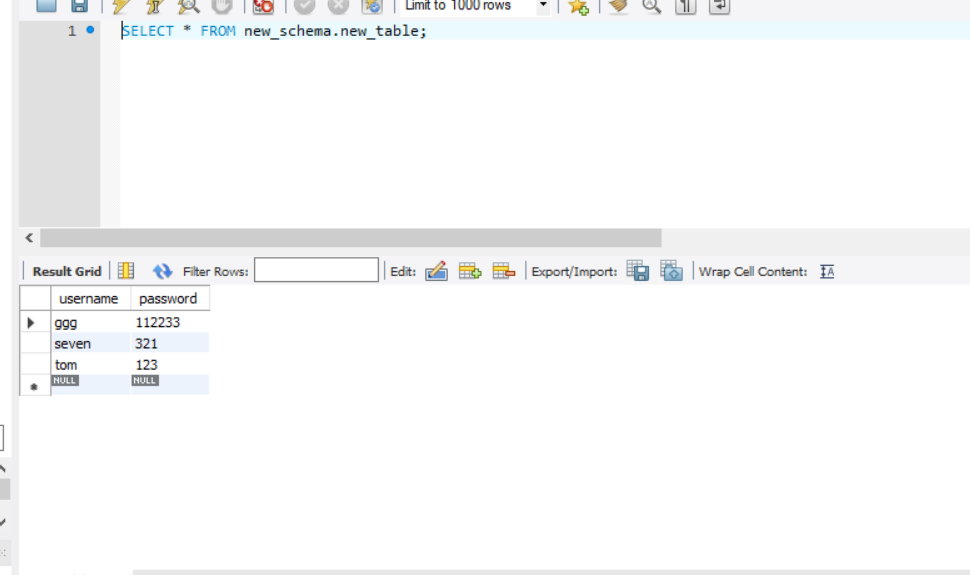
MySQL相关配置完成
二、在IDEA中的相关配置
在IDEA中建立一个web项目,点击右上角运行的左边,选择Edit Configurations
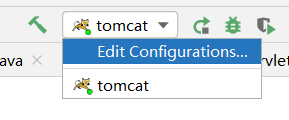
配置Tomcat服务器

进入Moudles配置,在下图红框位置创建两个文件夹lib和classes
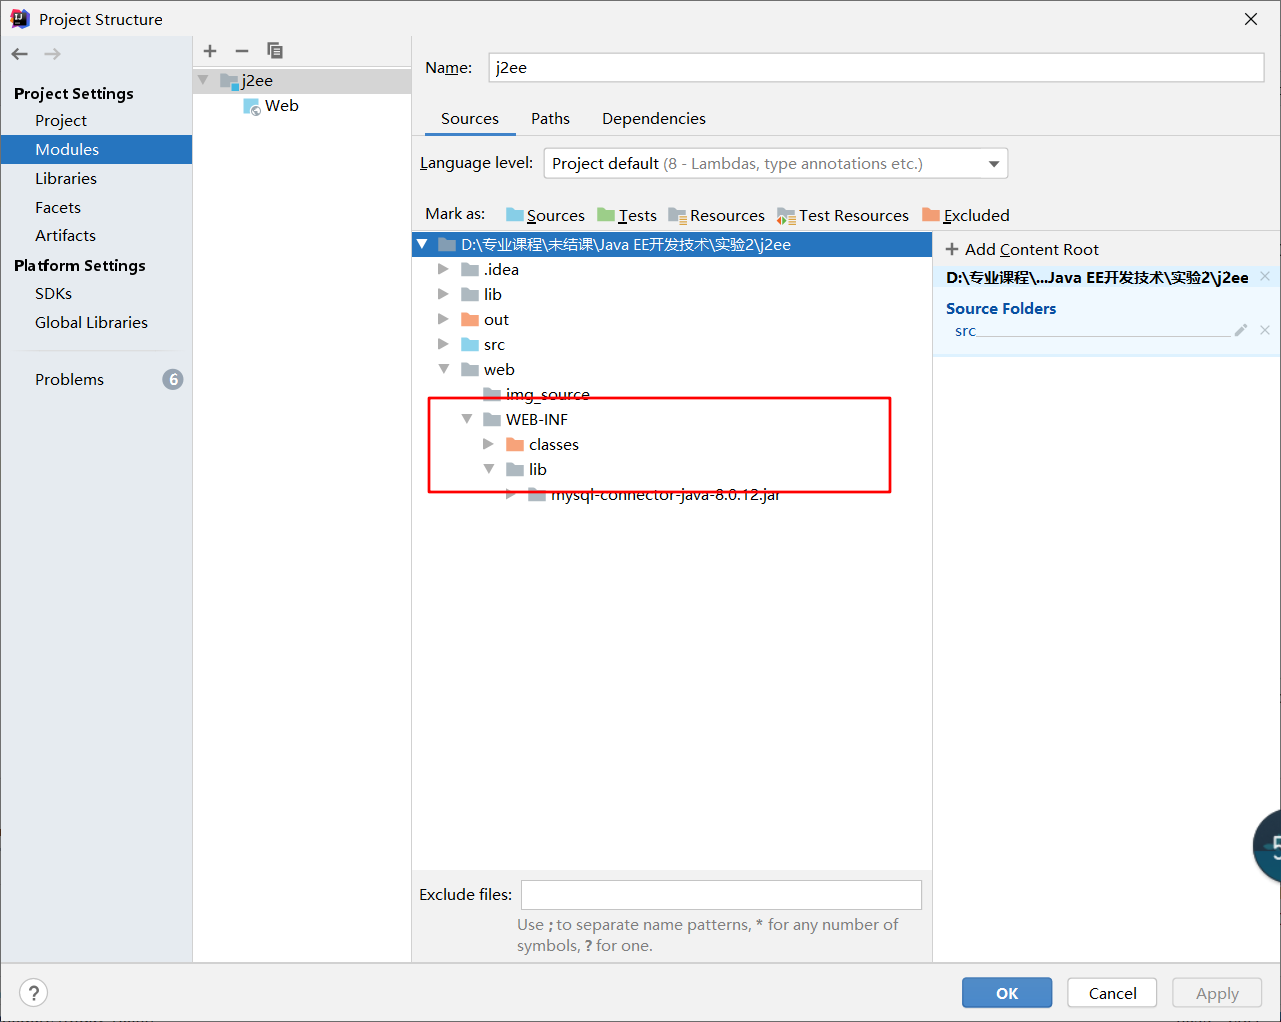
在path选项中更改为刚才Classes文件夹的路径
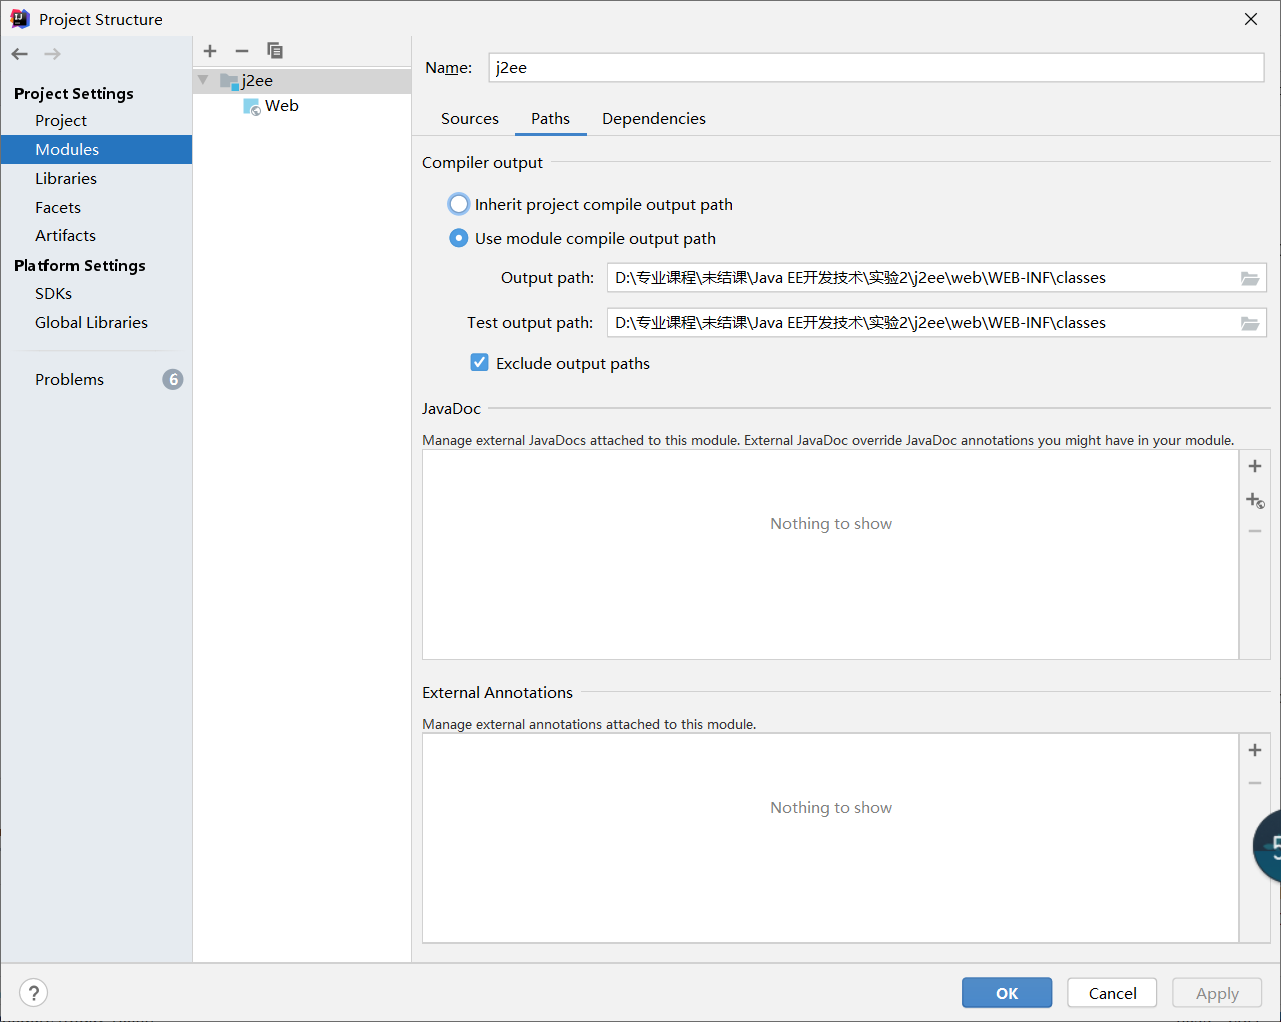
在dependencies选项中添加lib文件夹依赖

在C:Program Files (x86)MySQLConnector J 8.0文件夹中找到驱动JAR文件,将其放入lib文件夹下
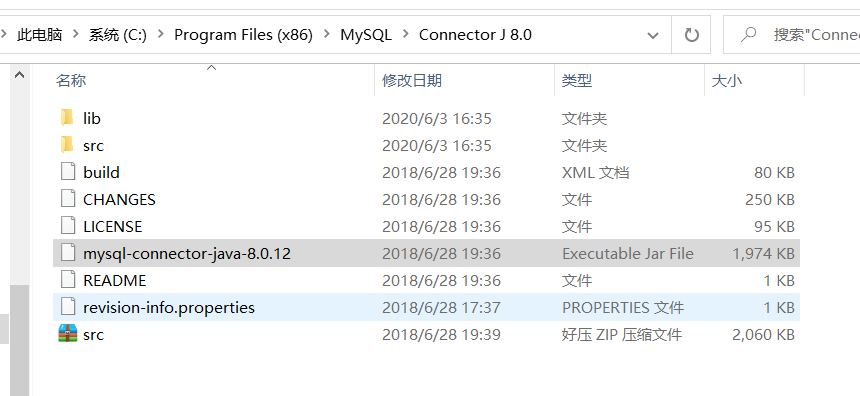
IDEA相关配置完成
三、用户名和密码校验
相关代码:
 1 import javax.servlet.ServletContext;
 2 import javax.servlet.ServletException;
 3 import javax.servlet.annotation.WebServlet;
 4 import javax.servlet.http.*;
 5 import java.io.IOException;
 6 import java.io.PrintWriter;
 7 import java.sql.Connection;
 8 import java.sql.DriverManager;
 9 import java.sql.ResultSet;
10 import java.sql.Statement;
11
12
13 @WebServlet(name = "LoginServlet")
14 public class LoginServlet extends HttpServlet {
15     protected void doPost(HttpServletRequest request, HttpServletResponse response) throws ServletException, IOException {
16                 response.setContentType("text/html; charset=UTF-8");
17                 request.setCharacterEncoding("UTF-8");
18
19         PrintWriter output=response.getWriter();
20         String username = request.getParameter("username");
21         String pwd = request.getParameter("pwd");
22         //output.println("账号:  "+username+"  密码:  "+pwd+"<br>");
23         ResultSet rs ;
24         Statement statement = null;
25         Connection conn =null;
26
27         try {
28             Class.forName("com.mysql.jdbc.Driver");
29             conn = DriverManager.getConnection("jdbc:mysql://localhost:3306","root","Guozhaojie610");
30             String sql="select * from test_db.login_chitestlist where username='"+username+"' and password='"+pwd+"'";
31             statement =conn.createStatement();
32             rs = statement.executeQuery(sql);
33
34
35
36             if(rs.next()){
37                 output.println("登录成功!<br>");
38                 output.println("当前用户:  "+username+" "+" 密码:   "+pwd+"<br>");
39
40                 Cookie uname = new Cookie("usname",username);
41                 uname.setMaxAge(60*60*24*30);
42                 response.addCookie(uname);
43
44                 Cookie upwd = new Cookie("password",pwd);
45                 upwd.setMaxAge(60*60*24*30);
46                 response.addCookie(upwd);
47
48                 //创建session
49                 HttpSession session=request.getSession();
50                 //获取session内的计数
51                 Object count;
52                 ServletContext servletContext=getServletContext();
53                 count=servletContext.getAttribute("count");
54                 //显示当前在线人数
55                 output.println("当前在线人数:"+count);
56
57             }else {
58                 output.println("账号或密码错误");
59             }
60
61
62         } catch (Exception e) {
63             e.printStackTrace();
64         }
65     }
66
67     protected void doGet(HttpServletRequest request, HttpServletResponse response) throws ServletException, IOException {
68
69     }
70 }
四、使用cookie保存登录信息
相关代码:
 1 import javax.servlet.ServletException;
 2 import javax.servlet.annotation.WebServlet;
 3 import javax.servlet.http.Cookie;
 4 import javax.servlet.http.HttpServlet;
 5 import javax.servlet.http.HttpServletRequest;
 6 import javax.servlet.http.HttpServletResponse;
 7 import java.io.IOException;
 8
 9 @WebServlet(name = "GetCookie")
10 public class GetCookie extends HttpServlet {
11     protected void doPost(HttpServletRequest request, HttpServletResponse response) throws ServletException, IOException {
12
13     }
14
15     protected void doGet(HttpServletRequest request, HttpServletResponse response) throws ServletException, IOException {
16         Cookie coo[] = request.getCookies();//获取request中cookie集合
17
18         //循环遍历
19         for (Cookie co : coo) {
20             System.out.println(co.getName() + ":" + co.getValue());
21             response.getWriter().println(co.getValue());
22         }
23     }
24 }
五、使用session显示当前在线人数
相关代码:
 1 import javax.servlet.ServletContext;
 2 import javax.servlet.annotation.WebListener;
 3 import javax.servlet.http.HttpSession;
 4 import javax.servlet.http.HttpSessionEvent;
 5 import javax.servlet.http.HttpSessionListener;
 6
 7 @WebListener
 8 public class SessionListener implements HttpSessionListener {
 9     public static int count=0;
10
11     //session创建时计数+1
12     @Override
13     public void sessionCreated(HttpSessionEvent hse){
14         HttpSession httpSession=hse.getSession();
15         ServletContext servletContext=httpSession.getServletContext();
16         count++;
17         servletContext.setAttribute("count",count);
18     }
19
20     //session销毁时计数-1
21     @Override
22     public void sessionDestroyed(HttpSessionEvent hse){
23         HttpSession httpSession=hse.getSession();
24         ServletContext servletContext=httpSession.getServletContext();
25         count--;
26         servletContext.setAttribute("count",count);
27     }
28
29 }
六、使用过滤器解决中文乱码问题
相关代码:
 1 import javax.servlet.*;
 2 import javax.servlet.annotation.WebFilter;
 3 import java.io.IOException;
 4
 5 @WebFilter(filterName = "Filter")
 6 public class Filter implements javax.servlet.Filter {
 7     public void destroy() {
 8     }
 9
10     public void doFilter(ServletRequest req, ServletResponse resp, FilterChain chain) throws ServletException, IOException {
11         String encoding=req.getCharacterEncoding();
12         System.out.println("before encoding"+encoding+"filter");
13         encoding="utf-8";
14         req.setCharacterEncoding(encoding);
15         resp.setContentType("text/html;charset="+encoding);
16         System.out.println("after encoding"+encoding+"filter");
17         System.err.println("-----");
18         chain.doFilter(req, resp);
19     }
20
21     public void init(FilterConfig config) throws ServletException {
22
23     }
24
25 }
七、web.xml中相关的配置信息
 1 <?xml version="1.0" encoding="UTF-8"?>
 2 <web-app xmlns="http://xmlns.jcp.org/xml/ns/javaee"
 3          xmlns:xsi="http://www.w3.org/2001/XMLSchema-instance"
 4          xsi:schemaLocation="http://xmlns.jcp.org/xml/ns/javaee http://xmlns.jcp.org/xml/ns/javaee/web-app_4_0.xsd"
 5          version="4.0">
 6     <servlet>
 7         <servlet-name>TestServlet</servlet-name>
 8         <servlet-class>TestServlet</servlet-class>
 9     </servlet>
10     <servlet-mapping>
11         <servlet-name>TestServlet</servlet-name>
12         <url-pattern>/swpu</url-pattern>
13     </servlet-mapping>
14     <servlet>
15         <servlet-name>LoginServlet</servlet-name>
16         <servlet-class>LoginServlet</servlet-class>
17     </servlet>
18     <servlet-mapping>
19         <servlet-name>LoginServlet</servlet-name>
20         <url-pattern>/TEST</url-pattern>
21     </servlet-mapping>
22     <servlet>
23         <servlet-name>GetCookie</servlet-name>
24         <servlet-class>GetCookie</servlet-class>
25     </servlet>
26     <servlet-mapping>
27         <servlet-name>GetCookie</servlet-name>
28         <url-pattern>/GetCookie</url-pattern>
29     </servlet-mapping>
30     <listener>
31         <listener-class>SessionListener</listener-class>
32     </listener>
33     <session-config>
34         <session-timeout>3</session-timeout>
35     </session-config>
36     <filter>
37         <filter-name>Filter</filter-name>
38         <filter-class>Filter</filter-class>
39     </filter>
40     <filter-mapping>
41         <filter-name>Filter</filter-name>
42         <url-pattern>/*</url-pattern>
43         <dispatcher>REQUEST</dispatcher>
44         <dispatcher>FORWARD</dispatcher>
45     </filter-mapping>
46
47 </web-app>
八、最终运行效果
登录首页:

登录失败

登陆成功

在另一个浏览器中继续登录:

