1. 安装mininet
从github上获取Mininet源码并运行安装脚本
$ git clone git://github.com/mininet/mininet
$ ./mininet/util/install.sh -a
测试mininet的基本功能
$ mn --test pingall
2. 用字符命令生成拓扑,并测试连通性
目标拓扑如下
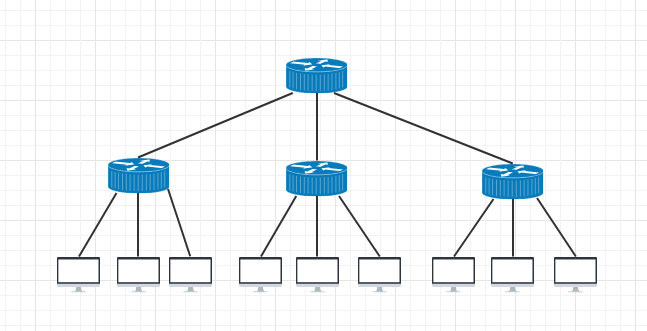
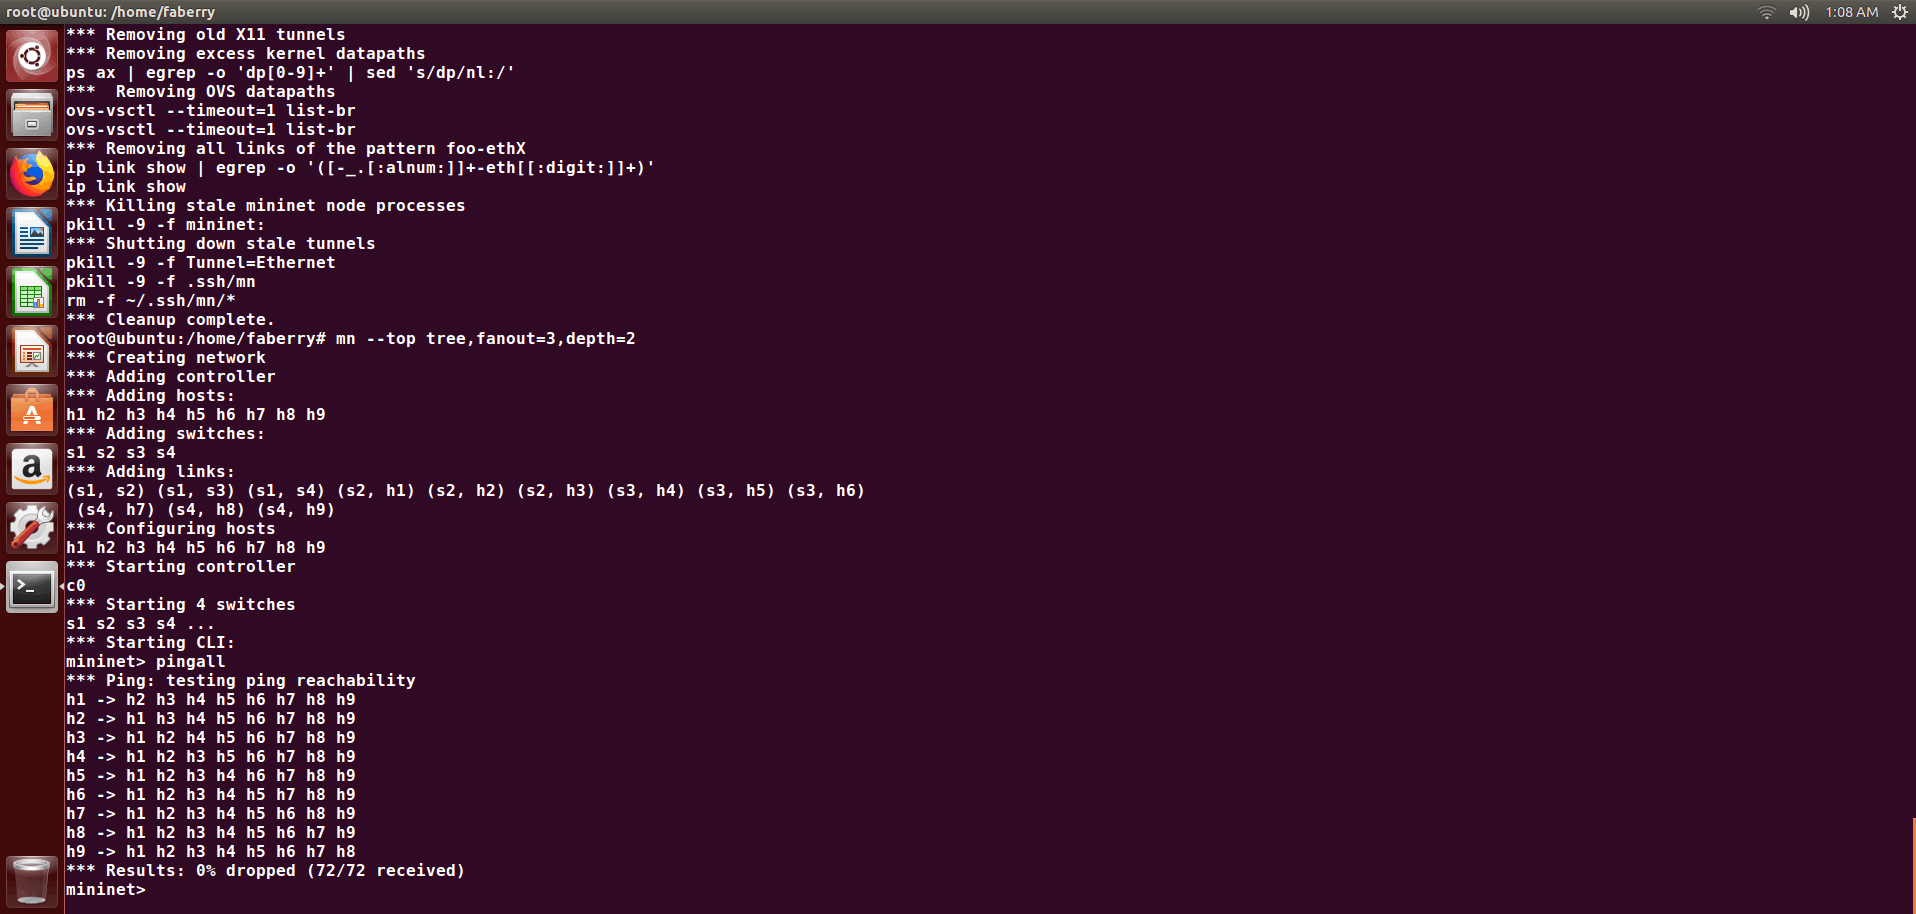
由图可知其深度为2,扇出为3,通过运行命令mn --topo tree, fanout=3,depth=2,生成并测试结果如下
3. 用可视化界面生成拓扑,并测试连通性
使用如下命令运行MiniEdit的图形化界面
$ ./mininet/mininet/example/miniedit.py
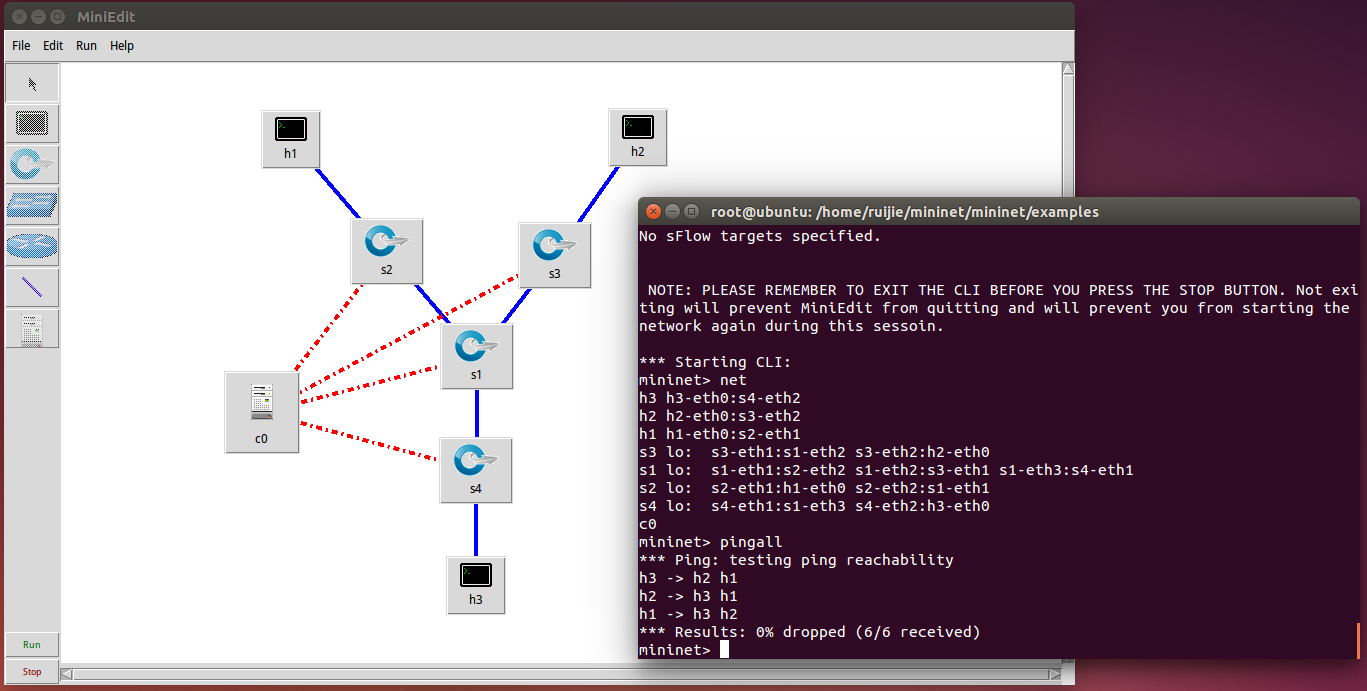
画出如下拓扑并运行命令测试其连通性
4. 用Python脚本生成一个Fat-tree型的拓扑
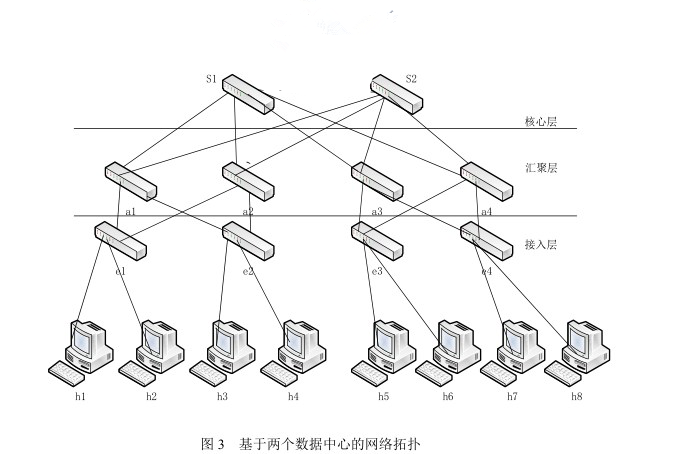
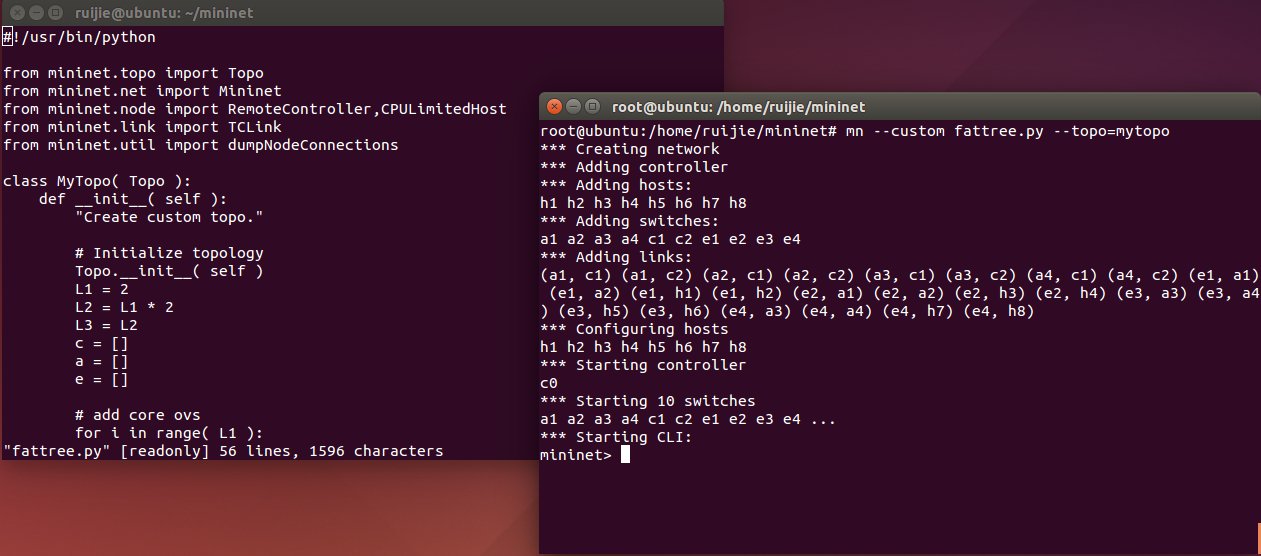
目标拓扑图如上,根据其结构,编写python代码如下
#!/usr/bin/python

from mininet.topo import Topo
from mininet.net import Mininet
from mininet.node import RemoteController,CPULimitedHost
from mininet.link import TCLink
from mininet.util import dumpNodeConnections

class MyTopo( Topo ):
    def __init__( self ):
        "Create custom topo."

        # Initialize topology
        Topo.__init__( self )
        L1 = 2
        L2 = L1 * 2
        L3 = L2
        c = []
        a = []
        e = []

        # add core ovs
        for i in range( L1 ):
                sw = self.addSwitch( 'c{}'.format( i + 1 ) )
                c.append( sw )

        # add aggregation ovs
        for i in range( L2 ):
                sw = self.addSwitch( 'a{}'.format( i + 1 ) )
                a.append( sw )

        # add edge ovs
        for i in range( L3 ):
                sw = self.addSwitch( 'e{}'.format( i + 1 ) )
                e.append( sw )

        # add links between core and aggregation ovs
        for i in range( L1 ):
                sw1 = c[i]
                for sw2 in a:
			self.addLink( sw2, sw1 )

        # add links between aggregation and edge ovs
        for i in range( 0, L2, 2 ):
                for sw1 in a[i:i+2]:
	                for sw2 in e[i:i+2]:
			            self.addLink( sw2, sw1 )

        #add hosts and its links with edge ovs
        count = 1
        for sw1 in e:
                for i in range(2):
                	host = self.addHost( 'h{}'.format( count ) )
                	self.addLink( sw1, host )
                	count += 1
topos = { 'mytopo': ( lambda: MyTopo() ) }
运行结果如图
