1.最基本的控制台应用程序
打开VS2013,新建项目->Visual C#->控制台应用程序,名称采用默认的ConsoleApplication1,然后确定。
代码如下
 1 using System;
 2 using System.Collections.Generic;
 3 using System.Linq;
 4 using System.Text;
 5 using System.Threading.Tasks;
 6
 7 namespace ConsoleApplication1
 8 {
 9     class Program
10     {
11         static void Main(string[] args)
12         {
13               Console.WriteLine("hello, world!");
14               //避免控制台一闪而逝
15               Console.ReadKey();
16         }
17     }
18 }
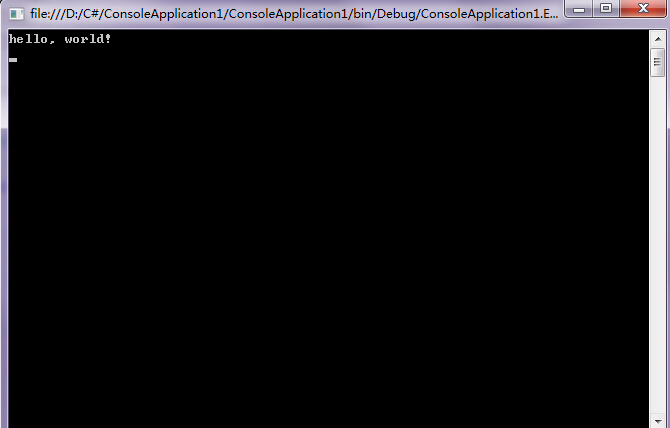
这一切都非常简单,跟java几乎一样。然后点击上方启动按钮,便可得运行结果如下:

同时,C#提供了许多函数对控制台进行设置,比如Console.BackgroundColor可以设置控制台的背景色,Console.ForegroundColor可以设置前景色,Console.Title可以设置控制台的标题。将上面代码修改如下
 1 using System;
 2 using System.Collections.Generic;
 3 using System.Linq;
 4 using System.Text;
 5 using System.Threading.Tasks;
 6
 7 namespace ConsoleApplication1
 8 {
 9     class Program
10     {
11         static void Main(string[] args)
12         {
13               //背景色绿色
14               Console.BackgroundColor = ConsoleColor.Green;
15               //字体色红色
16               Console.ForegroundColor = ConsoleColor.Red;
17               //设置标题
18               Console.Title = "hello!";
19               Console.WriteLine("hello, world!");
20               //避免控制台一闪而逝
21               Console.ReadKey();
22         }
23     }
24 }
然后运行效果如下:

还有许多有关控制台设置的程序,此处就不一一列举了。
2.桌面应用程序
此处采用WPF技术创建桌面应用程序。
新建项目->Visual C#->WPF应用程序,名称采用默认的WpfApplication1,确定,之后会出现一个分成两个窗格的选项卡。上面的窗格显示了一个空窗口,称为MainWindow,下面的窗格显示了一些文本,即生成窗口的代码。单击屏幕左上方的工具箱->常用WPF组件->Button,在窗口上添加了一个按钮。双击该按钮,现在显示MainWindow.xaml.cs中的C#代码,代码如下():
 1 using System;
 2 using System.Collections.Generic;
 3 using System.Linq;
 4 using System.Text;
 5 using System.Threading.Tasks;
 6 using System.Windows;
 7 using System.Windows.Controls;
 8 using System.Windows.Data;
 9 using System.Windows.Documents;
10 using System.Windows.Input;
11 using System.Windows.Media;
12 using System.Windows.Media.Imaging;
13 using System.Windows.Navigation;
14 using System.Windows.Shapes;
15
16 namespace WpfApplication1
17 {
18     /// <summary>
19     /// MainWindow.xaml 的交互逻辑
20     /// </summary>
21     public partial class MainWindow : Window
22     {
23         public MainWindow()
24         {
25             InitializeComponent();
26         }
27
28         private void Button_Click(object sender, RoutedEventArgs e)
29         {
30             //此处为新添代码,其余为自动写好的
31             MessageBox.Show("hello, world!");
32         }
33     }
34 }
MessageBox.Show里可填入任意字符串。
运行效果如下:

单击Button效果如下:

MainWindow.xaml代码如下:
1 <Window x:Class="WpfApplication1.MainWindow"
2         xmlns="http://schemas.microsoft.com/winfx/2006/xaml/presentation"
3         xmlns:x="http://schemas.microsoft.com/winfx/2006/xaml"
4         Title="MainWindow" Height="350" Width="525">
5     <Grid>
6         <Button Content="Button" HorizontalAlignment="Left" VerticalAlignment="Top" Width="75" Click="Button_Click"/>
7     </Grid>
8 </Window>
此代码是自动生成的,也很简单,此处就不再具体阐释。单击按钮选中它,在屏幕右下角的属性窗口显示了按钮的各个属性如下

可通过设置Content改变按钮上的文本,现在改为Click Me。同时也可用鼠标拖动按钮到窗口中央。此时XAML代码如下:
1 <Window x:Class="WpfApplication1.MainWindow"
2         xmlns="http://schemas.microsoft.com/winfx/2006/xaml/presentation"
3         xmlns:x="http://schemas.microsoft.com/winfx/2006/xaml"
4         Title="MainWindow" Height="350" Width="525">
5     <Button Content="Click Me" HorizontalAlignment="Left" VerticalAlignment="Top" Width="81" Click="Button_Click" RenderTransformOrigin="2.92,6.409" Margin="210,130,0,0" Height="33"/>
6 </Window>
效果如下:

大部分代码都是自动生成,而且十分简单易懂,故不一一阐释。
限于篇幅,其他还有许多基础内容并未展示,同时由于系统原因,也未能开始学习Windows Phone开发基础教程,之后会尽力补上。
本次学习记录至此。