vue-axios
vue的作者在vue2.0发布之后宣告---停止对vue-resource的更新,推荐使用axios
前段时间用了用,现在说说其基本用法.
一.准备阶段 ----如果你只是个前端不会写接口或者你们要前后分离的话,你需要知道mock
这里交个你一个超级简单的方式
1.创建一个mock文件夹
2.创建tree.json然后随便写点数据上去

3.修改dev-server里面的配置---记住修改这里的时候在你运行npm run build 的时候不会被build 所以需要你和后端人员协商好路径问题 避免 404
目录:bulid/dev-server

二 . 安装
//安装
npm install axios
三. 使用
在src/components文件夹下创建 RainAxios.vue
<template>
  <div>
    <div>msg: {{msg}}</div>
    <button @click='fn("../123")'>点击</button>
    <!--<audio autoplay="autoplay" src="audio/index.mp3"/>-->
  </div>
</template>
<style scoped>

</style>
<script>
  import Axios from 'axios'
  export default{
    data(){
      return {
        msg: 'hello Axios',
      }
    },
    components: {},
    methods: {
      fn: function () {
        var _this = this;
        Axios.get("./mock/tree.json")
          .then(function (rsp) {
            _this.msg = rsp.data.name
          })
      }
    }
  }
</script>
这个组件的需求很简单 , 点击发送axios请求tree.json 并将返回值赋给msg
src/router/index.js
import Vue from 'vue'
import Router from 'vue-router'
import Axios1 from '@/components/RainAxios'

Vue.use(Router)

export default new Router({
  routes: [
    {
      path: '/',
      name: 'Axios',
      component: Axios1
    }
  ]
})
不用我结识了吧 ----这是我最后一次写如此详细的教程了
以后只要是vue的东西都需要想想是否需要改router里面的东西

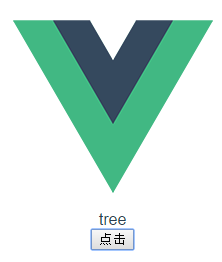
点击后值改变

如果你完成了上述功能 ---- 现在正式谈谈axios的用法了哦!!
axios提供了以下方法
axios.request(config)

axios.get(url[, config])

axios.delete(url[, config])

axios.head(url[, config])

axios.post(url[, data[, config]])

axios.put(url[, data[, config]])

axios.patch(url[, data[, config]])
能看懂吧!
不解释了!!!
建议最好配置一下相关配置 ----英文不好就不帮你们翻译了免得误导你们
{
  // “URL”是用于请求的服务器URL
  url: '/user',

  // 是在请求时使用的请求方法
  method: 'get', // 默认

  // baseURL
  baseURL: 'https://some-domain.com/api/',

  // ` transformrequest ` 允许修改请求的数据后再发送到服务器
  transformRequest: [function (data) {
    // 做一些你想做的数据的改变

    return data;
  }],

  // `transformResponse` allows changes to the response data to be made before
  // it is passed to then/catch
  transformResponse: [function (data) {
    // Do whatever you want to transform the data

    return data;
  }],

  // `headers` are custom headers to be sent
  headers: {'X-Requested-With': 'XMLHttpRequest'},

  // `params` are the URL parameters to be sent with the request
  // Must be a plain object or a URLSearchParams object
  params: {
    ID: 12345
  },

  // `paramsSerializer` is an optional function in charge of serializing `params`
  // (e.g. https://www.npmjs.com/package/qs, http://api.jquery.com/jquery.param/)
  paramsSerializer: function(params) {
    return Qs.stringify(params, {arrayFormat: 'brackets'})
  },

  // `data` is the data to be sent as the request body
  // Only applicable for request methods 'PUT', 'POST', and 'PATCH'
  // When no `transformRequest` is set, must be of one of the following types:
  // - string, plain object, ArrayBuffer, ArrayBufferView, URLSearchParams
  // - Browser only: FormData, File, Blob
  // - Node only: Stream
  data: {
    firstName: 'Fred'
  },

  // `timeout` specifies the number of milliseconds before the request times out.
  // If the request takes longer than `timeout`, the request will be aborted.
  timeout: 1000,

  // `withCredentials` indicates whether or not cross-site Access-Control requests
  // should be made using credentials
  withCredentials: false, // default

  // `adapter` allows custom handling of requests which makes testing easier.
  // Return a promise and supply a valid response (see [response docs](#response-api)).
  adapter: function (config) {
    /* ... */
  },

  // `auth` indicates that HTTP Basic auth should be used, and supplies credentials.
  // This will set an `Authorization` header, overwriting any existing
  // `Authorization` custom headers you have set using `headers`.
  auth: {
    username: 'janedoe',
    password: 's00pers3cret'
  },

  // `responseType` indicates the type of data that the server will respond with
  // options are 'arraybuffer', 'blob', 'document', 'json', 'text', 'stream'
  responseType: 'json', // default

  // `xsrfCookieName` is the name of the cookie to use as a value for xsrf token
  xsrfCookieName: 'XSRF-TOKEN', // default

  // `xsrfHeaderName` is the name of the http header that carries the xsrf token value
  xsrfHeaderName: 'X-XSRF-TOKEN', // default

  // `onUploadProgress` allows handling of progress events for uploads
  onUploadProgress: function (progressEvent) {
    // Do whatever you want with the native progress event
  },

  // `onDownloadProgress` allows handling of progress events for downloads
  onDownloadProgress: function (progressEvent) {
    // Do whatever you want with the native progress event
  },

  // `maxContentLength` defines the max size of the http response content allowed
  maxContentLength: 2000,

  // `validateStatus` defines whether to resolve or reject the promise for a given
  // HTTP response status code. If `validateStatus` returns `true` (or is set to `null`
  // or `undefined`), the promise will be resolved; otherwise, the promise will be
  // rejected.
  validateStatus: function (status) {
    return status >= 200 && status < 300; // default
  },

  // `maxRedirects` defines the maximum number of redirects to follow in node.js.
  // If set to 0, no redirects will be followed.
  maxRedirects: 5, // default

  // `httpAgent` and `httpsAgent` define a custom agent to be used when performing http
  // and https requests, respectively, in node.js. This allows to configure options like
  // `keepAlive` that are not enabled by default.
  httpAgent: new http.Agent({ keepAlive: true }),
  httpsAgent: new https.Agent({ keepAlive: true }),

  // 'proxy' defines the hostname and port of the proxy server
  // `auth` indicates that HTTP Basic auth should be used to connect to the proxy, and supplies credentials.
  // This will set an `Proxy-Authorization` header, overwriting any existing `Proxy-Authorization` custom headers you have set using `headers`.
  proxy: {
    host: '127.0.0.1',
    port: 9000,
    auth: : {
      username: 'mikeymike',
      password: 'rapunz3l'
    }
  },

  // `cancelToken` specifies a cancel token that can be used to cancel the request
  // (see Cancellation section below for details)
  cancelToken: new CancelToken(function (cancel) {
  })
}
感觉没啥区别 玩不转的可以继续 jquery--$.ajax
个人感觉npm中的教程不错 不过没有配合 vue-cli+webpack使用
个人觉得使用vue使用express静态服务器有点low 然后来看看 如何使用json-server http://www.cnblogs.com/web-Rain/p/6520238.html
