ssh整合,开工
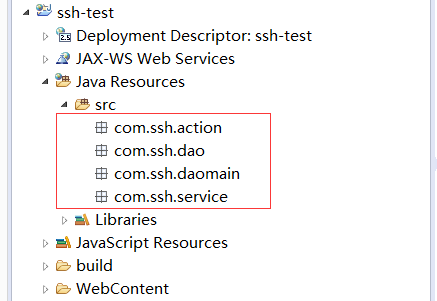
1、首先创建web项目,之后在web文件夹下创建我们所需要的包:web层、service层、dao层,JavaBean工具类也单独创建一个包吧,就这样:
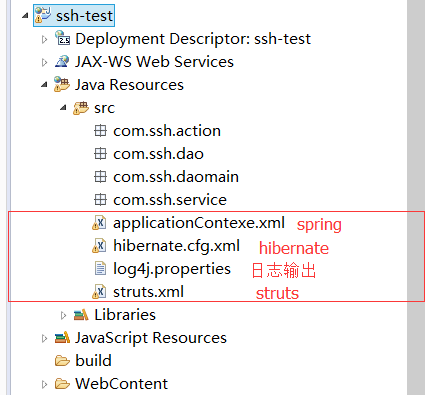
2、接下来在src的目录下创建struts2框架的配置文件(struts.xml)、spring框架的配置文件(applicationContext.xml)和hibernate框架的配置文件(hibernate.cfg.xml),另外再加上日志输出的文件吧(log4j.properties):
3、web.xml配置文件:(固定的,ssh框架万年不变)
<?xml version="1.0" encoding="UTF-8"?>
<web-app xmlns:xsi="http://www.w3.org/2001/XMLSchema-instance"
    xmlns="http://java.sun.com/xml/ns/javaee"
    xsi:schemaLocation="http://java.sun.com/xml/ns/javaee http://java.sun.com/xml/ns/javaee/web-app_2_5.xsd"
    id="WebApp_ID" version="2.5">
    <display-name>ssh-test</display-name>

    <!-- 配置Spring框架整合WEB的监听器 -->
    <listener>
        <listener-class>org.springframework.web.context.ContextLoaderListener</listener-class>
    </listener>
    <context-param>
        <param-name>contextConfigLocation</param-name>
        <param-value>classpath:applicationContext.xml</param-value>
    </context-param>

    <!-- 配置Struts2框架的核心的过滤器 -->
    <filter>
        <filter-name>struts2</filter-name>
        <filter-class>org.apache.struts2.dispatcher.ng.filter.StrutsPrepareAndExecuteFilter</filter-class>
    </filter>
    <filter-mapping>
        <filter-name>struts2</filter-name>
        <url-pattern>/*</url-pattern>
    </filter-mapping>

    <welcome-file-list>
        <welcome-file>index.html</welcome-file>
        <welcome-file>index.htm</welcome-file>
        <welcome-file>index.jsp</welcome-file>
        <welcome-file>default.html</welcome-file>
        <welcome-file>default.htm</welcome-file>
        <welcome-file>default.jsp</welcome-file>
    </welcome-file-list>
</web-app>
applicationContext.xml配置文件:(因为没有添加项目,所以只有纯净的约束)
<?xml version="1.0" encoding="UTF-8"?>
<beans xmlns="http://www.springframework.org/schema/beans"
    xmlns:xsi="http://www.w3.org/2001/XMLSchema-instance"
    xmlns:context="http://www.springframework.org/schema/context"
    xmlns:aop="http://www.springframework.org/schema/aop"
    xmlns:tx="http://www.springframework.org/schema/tx"
    xsi:schemaLocation="http://www.springframework.org/schema/beans
    http://www.springframework.org/schema/beans/spring-beans.xsd
    http://www.springframework.org/schema/context
    http://www.springframework.org/schema/context/spring-context.xsd
    http://www.springframework.org/schema/aop
    http://www.springframework.org/schema/aop/spring-aop.xsd
    http://www.springframework.org/schema/tx
    http://www.springframework.org/schema/tx/spring-tx.xsd">


</beans>
hibernate.cfg.xml的配置文件:(负责数据库连接和JavaBean的映射等)
<?xml version="1.0" encoding="UTF-8"?>
<!DOCTYPE hibernate-configuration PUBLIC
    "-//Hibernate/Hibernate Configuration DTD 3.0//EN"
    "http://www.hibernate.org/dtd/hibernate-configuration-3.0.dtd">

<hibernate-configuration>

    <session-factory>
        <!-- 必须配置 -->
        <property name="hibernate.connection.driver_class">com.mysql.jdbc.Driver</property>
        <property name="hibernate.connection.url">jdbc:mysql:///ssh-test</property>
        <property name="hibernate.connection.username">root</property>
        <property name="hibernate.connection.password">123</property>
        <property name="hibernate.dialect">org.hibernate.dialect.MySQLDialect</property>

        <!-- 可选配置 -->
        <property name="hibernate.show_sql">true</property>
        <property name="hibernate.format_sql">true</property>
        <property name="hibernate.hbm2ddl.auto">update</property>

        <!-- 配置C3P0的连接池 -->
        <property name="connection.provider_class">org.hibernate.connection.C3P0ConnectionProvider</property>

        <!-- 不能配置绑定当前的线程的操作 -->

        <!-- 映射配置文件 -->
        <mapping resource="这里在后面填写"/>

    </session-factory>

</hibernate-configuration>
log4j.properties输出日志配置(不解释):
### direct log messages to stdout ###
log4j.appender.stdout=org.apache.log4j.ConsoleAppender
log4j.appender.stdout.Target=System.err
log4j.appender.stdout.layout=org.apache.log4j.PatternLayout
log4j.appender.stdout.layout.ConversionPattern=%d{ABSOLUTE} %5p %c{1}:%L - %m%n

### direct messages to file mylog.log ###
log4j.appender.file=org.apache.log4j.FileAppender
log4j.appender.file.File=c:mylog.log
log4j.appender.file.layout=org.apache.log4j.PatternLayout
log4j.appender.file.layout.ConversionPattern=%d{ABSOLUTE} %5p %c{1}:%L - %m%n

### set log levels - for more verbose logging change 'info' to 'debug' ###

log4j.rootLogger=info, stdout
struts.xml的配置文档(没加项目,只有约束):
<?xml version="1.0" encoding="UTF-8" ?>
<!DOCTYPE struts PUBLIC
    "-//Apache Software Foundation//DTD Struts Configuration 2.3//EN"
    "http://struts.apache.org/dtds/struts-2.3.dtd">

<struts>


</struts>
好了,按照以上的配置,ssh框加就可以完全运行了,如果有出现错误的地方,还请指正。(目前本人没发现,/斜眼笑)
----------------------------------------下面继续做些增删改查,前端代码略过----------------------------------------------
增加客户:(详细的前台代码已经省略)
jsp页面:

javabean:
package com.ssh-test.domain;

public class Customer {

    private Long cust_id;
    private String cust_name;
    private Long cust_user_id;
    private Long cust_create_id;
    private String cust_source;
    private String cust_industry;
    private String cust_level;
    private String cust_linkman;
    private String cust_phone;
    private String cust_mobile;

    public Long getCust_id() {
        return cust_id;
    }
    public void setCust_id(Long cust_id) {
        this.cust_id = cust_id;
    }
    public String getCust_name() {
        return cust_name;
    }
    public void setCust_name(String cust_name) {
        this.cust_name = cust_name;
    }
    public Long getCust_user_id() {
        return cust_user_id;
    }
    public void setCust_user_id(Long cust_user_id) {
        this.cust_user_id = cust_user_id;
    }
    public Long getCust_create_id() {
        return cust_create_id;
    }
    public void setCust_create_id(Long cust_create_id) {
        this.cust_create_id = cust_create_id;
    }
    public String getCust_source() {
        return cust_source;
    }
    public void setCust_source(String cust_source) {
        this.cust_source = cust_source;
    }
    public String getCust_industry() {
        return cust_industry;
    }
    public void setCust_industry(String cust_industry) {
        this.cust_industry = cust_industry;
    }
    public String getCust_level() {
        return cust_level;
    }
    public void setCust_level(String cust_level) {
        this.cust_level = cust_level;
    }
    public String getCust_linkman() {
        return cust_linkman;
    }
    public void setCust_linkman(String cust_linkman) {
        this.cust_linkman = cust_linkman;
    }
    public String getCust_phone() {
        return cust_phone;
    }
    public void setCust_phone(String cust_phone) {
        this.cust_phone = cust_phone;
    }
    public String getCust_mobile() {
        return cust_mobile;
    }
    public void setCust_mobile(String cust_mobile) {
        this.cust_mobile = cust_mobile;
    }
    @Override
    public String toString() {
        return "Customer [cust_id=" + cust_id + ", cust_name=" + cust_name + ", cust_user_id=" + cust_user_id
                + ", cust_create_id=" + cust_create_id + ", cust_source=" + cust_source + ", cust_industry="
                + cust_industry + ", cust_level=" + cust_level + ", cust_linkman=" + cust_linkman + ", cust_phone="
                + cust_phone + ", cust_mobile=" + cust_mobile + "]";
    }

}
javabean的映射文件:(javabean.hbm.xml)
<?xml version="1.0" encoding="UTF-8"?>
<!DOCTYPE hibernate-mapping PUBLIC
    "-//Hibernate/Hibernate Mapping DTD 3.0//EN"
    "http://www.hibernate.org/dtd/hibernate-mapping-3.0.dtd">

<hibernate-mapping>

    <class name="com.ssh-test.domain.Customer" table="cst_customer">
        <id name="cust_id" column="cust_id">
            <generator class="native"/>
        </id>

        <property name="cust_name" column="cust_name"/>
        <property name="cust_user_id" column="cust_user_id"/>
        <property name="cust_create_id" column="cust_create_id"/>
        <property name="cust_source" column="cust_source"/>
        <property name="cust_industry" column="cust_industry"/>
        <property name="cust_level" column="cust_level"/>
        <property name="cust_linkman" column="cust_linkman"/>
        <property name="cust_phone" column="cust_phone"/>
        <property name="cust_mobile" column="cust_mobile"/>

    </class>

</hibernate-mapping>
struts.xml配置:
<?xml version="1.0" encoding="UTF-8" ?>
<!DOCTYPE struts PUBLIC
    "-//Apache Software Foundation//DTD Struts Configuration 2.3//EN"
    "http://struts.apache.org/dtds/struts-2.3.dtd">

<struts>
    <!-- 先配置包的结构 -->
    <!-- namespace是jsp页面提交路径的来时,加上下面的action中neme属性,正好是全路径 -->
    <package name="crm" extends="struts-default" namespace="/">
        <!-- 配置客户的Action -->
        <!-- class是action的全路径 如果Action由Spring框架来管理的话,class标签只需要填写ID值就ok,剩下的系统会自动装配的 -->
        <action name="customer_*" class="com.itheima.web.action.CustomerAction" method="{1}">

        </action>
    </package>
</struts>
applicationContext.xml(spring配置)
<?xml version="1.0" encoding="UTF-8"?>
<beans xmlns="http://www.springframework.org/schema/beans"
    xmlns:xsi="http://www.w3.org/2001/XMLSchema-instance"
    xmlns:context="http://www.springframework.org/schema/context"
    xmlns:aop="http://www.springframework.org/schema/aop"
    xmlns:tx="http://www.springframework.org/schema/tx"
    xsi:schemaLocation="http://www.springframework.org/schema/beans
    http://www.springframework.org/schema/beans/spring-beans.xsd
    http://www.springframework.org/schema/context
    http://www.springframework.org/schema/context/spring-context.xsd
    http://www.springframework.org/schema/aop
    http://www.springframework.org/schema/aop/spring-aop.xsd
    http://www.springframework.org/schema/tx
    http://www.springframework.org/schema/tx/spring-tx.xsd">

    <!-- 配置客户的模块 -->
    <bean id="customerService" class="com.itheima.service.CustomerServiceImpl">

    </bean>


</beans>
CustomerAction.java(也就是struts框架接收前台代码)
/**
 * 客户的控制层
 * @author Administrator
 *
 */
public class CustomerAction extends ActionSupport implements ModelDriven<Customer>{


    private static final long serialVersionUID = 6168304372879392674L;

    //这就是模型驱动,不要忘记自己手动去new
    private Customer customer = new Customer();
    public Customer getModel() {
        return customer;
    }


    /**
     * 保存客户的方法
     * @return
     */
    public String add(){
        //在这里调试输出一下,看看struts是否正常
        System.out.println(customer);

        //拿到web工厂
        WebApplicationContext context = WebApplicationContextUtils.getWebApplicationContext(ServletActionContext.getServletContext());
        CustomerService cs = (CustomerService) context.getBean("customerService");
        // 调用方法
        cs.save(customer);
        return NONE;
    }


}
临时有事,未完待续