上篇文章我们讲到了如何用volley进行简单的网络请求,我们可以很容易的接受到string、JsonObjec类型的返回结果,之前的例子仅仅是一次请求,这里需要说明volley本身就是适合高并发的,所以它可以运行你用volley在短时间内进行多次请求,并且不用去手动管理线程数。仅仅是请求文字过于基础了,本篇将讲述如何用volley从网络下载图片。
一、用ImageRequest来请求图片
ImageRequest是一个图片请求对象,它继承自Request<Bitmap>,所以请求得到的结果是一个bitmap。
1.1 使用步骤
ImageRequest仍旧是一个request对象,所以使用方式和StringRequest、JsonObjectRequest、JsonArrayRequest十分相似。
步骤:
- 建立一个RequestQueue对象
- 建立一个ImageRequest对象
- 将ImageRequest添加到RequestQueue中
第一步、第三步我们在上篇文章中已经做好了,如果不清楚的话可以去上一篇文章查看。
1.2 分析构造函数
源码中的构造函数是这样定义的:
    public ImageRequest(String url, Response.Listener<Bitmap> listener, int maxWidth, int maxHeight,
            Config decodeConfig, Response.ErrorListener errorListener) {
        super(Method.GET, url, errorListener);
        setRetryPolicy(
                new DefaultRetryPolicy(IMAGE_TIMEOUT_MS, IMAGE_MAX_RETRIES, IMAGE_BACKOFF_MULT));
        mListener = listener;
        mDecodeConfig = decodeConfig;
        mMaxWidth = maxWidth;
        mMaxHeight = maxHeight;
    }
默认的请求方式是GET,初始化方法需要传入:图片的url,一个响应结果监听器,图片的最大宽度,图片的最大高度,图片的颜色属性,出错响应的监听器。
说明:图片的颜色属性,Bitmap.Config下的几个常量都可以在这里使用,其中ARGB_8888可以展示最好的颜色属性,每个图片像素占据4个字节的大小,而RGB_565则表示每个图片像素占据2个字节大小
    /** Socket timeout in milliseconds for image requests */
    private static final int IMAGE_TIMEOUT_MS = 1000;

    /** Default number of retries for image requests */
    private static final int IMAGE_MAX_RETRIES = 2;

    /** Default backoff multiplier for image requests */
    private static final float IMAGE_BACKOFF_MULT = 2f;
- 设定超时时间:1000ms;
- 最大的请求次数:2次;
- 发生冲突时的重传延迟增加数:2f(这个应该和TCP协议有关,冲突时需要退避一段时间,然后再次请求);
1.3 解释maxWidth,maxHeight参数
注释中详细说明了图片宽高的意义和作用,为了便于理解我再详细说一下。
    /**
     * Creates a new image request, decoding to a maximum specified width and
     * height. If both width and height are zero, the image will be decoded to
     * its natural size. If one of the two is nonzero, that dimension will be
     * clamped and the other one will be set to preserve the image's aspect
     * ratio. If both width and height are nonzero, the image will be decoded to
     * be fit in the rectangle of dimensions width x height while keeping its
     * aspect ratio.
     *
     * @param url URL of the image
     * @param listener Listener to receive the decoded bitmap
     * @param maxWidth Maximum width to decode this bitmap to, or zero for none
     * @param maxHeight Maximum height to decode this bitmap to, or zero for
     *            none
     * @param decodeConfig Format to decode the bitmap to
     * @param errorListener Error listener, or null to ignore errors
     */
先来完整解释下注释的意思:
- 建立一个请求对象,按照最大宽高进行解码 。
- 如果设定的宽和高都是0,那么下载到的图片将会按照实际的大小进行解码,也就是不压缩。
- 如果宽和高中的一个或两个值不为0,那么图片的宽/高(取决于你设定了宽还是高)会压缩至设定好的值,而另一个宽/高将会按原始比例改变。
- 如果宽和高都不是0,那么得到的图片将会“按比例”解码到你设定的宽高,也就是说最终得到的图片大小不一定是你最初设定的大小。
举个例子:
我的图片原本像素是:850x1200.
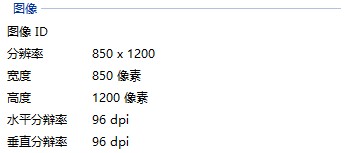
当maxWidth = 0,maxHeight = 0时,最终得到的bitmap的宽高是850x1200
当maxWidth = 0,maxHeight = 600时,得到的bitmap是425x600.这就说明它会按照一个不为0的边的值,将图片进行等比缩放。
当maxWidth = 100,maxHeight = 600时,我们得到的bitmap竟然是100x141,是按照100进行等比缩小后的图片,而不是100x600.
要弄清这个问题,我们还得看源码,源码中解析响应结果的方法叫做doParse(…)
    /**
     * The real guts of parseNetworkResponse. Broken out for readability.
     */
    private Response<Bitmap> doParse(NetworkResponse response) {
        byte[] data = response.data;
        BitmapFactory.Options decodeOptions = new BitmapFactory.Options();
        Bitmap bitmap = null;
        if (mMaxWidth == 0 && mMaxHeight == 0) {
       // 如果宽高都是0,那么就返回原始尺寸
            decodeOptions.inPreferredConfig = mDecodeConfig;
            bitmap = BitmapFactory.decodeByteArray(data, 0, data.length, decodeOptions);
        } else {
            // If we have to resize this image, first get the natural bounds.
      // 如果我们已经重设了image的尺寸(宽高中有一个或两个不为0),那么先得到原始的大小

            decodeOptions.inJustDecodeBounds = true; // 设置先不得到bitmap,仅仅获取bitmap的参数。
            BitmapFactory.decodeByteArray(data, 0, data.length, decodeOptions); // 第一次解码,主要获得的是bitmap的实际宽、高
            int actualWidth = decodeOptions.outWidth; // 得到bitmap的宽
            int actualHeight = decodeOptions.outHeight; // 得到bitmap的高

            // Then compute the dimensions we would ideally like to decode to.
            // 然后计算我们想要得到的最终尺寸
            int desiredWidth = getResizedDimension(mMaxWidth, mMaxHeight,
                    actualWidth, actualHeight);
            int desiredHeight = getResizedDimension(mMaxHeight, mMaxWidth,
                    actualHeight, actualWidth);

            // Decode to the nearest power of two scaling factor.
            // 把图片解码到最接近2的幂次方的大小
            decodeOptions.inJustDecodeBounds = false;
            // TODO(ficus): Do we need this or is it okay since API 8 doesn't support it?
            // decodeOptions.inPreferQualityOverSpeed = PREFER_QUALITY_OVER_SPEED;
            decodeOptions.inSampleSize =
                findBestSampleSize(actualWidth, actualHeight, desiredWidth, desiredHeight);
            Bitmap tempBitmap =
                BitmapFactory.decodeByteArray(data, 0, data.length, decodeOptions);

            // If necessary, scale down to the maximal acceptable size.
            // 如果有必要的话,把得到的bitmap的最大边进行压缩来适应尺寸
            if (tempBitmap != null && (tempBitmap.getWidth() > desiredWidth ||
                    tempBitmap.getHeight() > desiredHeight)) {
                // 通过createScaledBitmap来压缩到目标尺寸
                bitmap = Bitmap.createScaledBitmap(tempBitmap,
                        desiredWidth, desiredHeight, true);
                tempBitmap.recycle();
            } else {
                bitmap = tempBitmap;
            }
        }
        if (bitmap == null) {
            return Response.error(new ParseError(response));
        } else {
            return Response.success(bitmap, HttpHeaderParser.parseCacheHeaders(response));
        }
    }

    /**
     * Returns the largest power-of-two divisor for use in downscaling a bitmap
     * that will not result in the scaling past the desired dimensions.
     *
     * @param actualWidth Actual width of the bitmap
     * @param actualHeight Actual height of the bitmap
     * @param desiredWidth Desired width of the bitmap
     * @param desiredHeight Desired height of the bitmap
     */
    // Visible for testing.
    static int findBestSampleSize(
            int actualWidth, int actualHeight, int desiredWidth, int desiredHeight) {
                // 计算inSampleSize的方法,详细知识自行百度吧。最终原图会被压缩为inSampleSize分之一
                // inSampleSize的值计算出来都是2的幂次方
        double wr = (double) actualWidth / desiredWidth;
        double hr = (double) actualHeight / desiredHeight;
        double ratio = Math.min(wr, hr);
        float n = 1.0f;
        while ((n * 2) <= ratio) {
            n *= 2;
        }

        return (int) n;
    }
此时我们发现重要的方法是getResizedDimension,它最终确定了图片的最终尺寸。
    /**
     * Scales one side of a rectangle to fit aspect ratio.
     *
     * @param maxPrimary Maximum size of the primary dimension (i.e. width for
     *        max width), or zero to maintain aspect ratio with secondary
     *        dimension
     * @param maxSecondary Maximum size of the secondary dimension, or zero to
     *        maintain aspect ratio with primary dimension
     * @param actualPrimary Actual size of the primary dimension
     * @param actualSecondary Actual size of the secondary dimension
     */
    private static int getResizedDimension(int maxPrimary, int maxSecondary, int actualPrimary,
            int actualSecondary) {
        // If no dominant value at all, just return the actual.
        if (maxPrimary == 0 && maxSecondary == 0) {
            return actualPrimary;
        }

        // If primary is unspecified, scale primary to match secondary's scaling ratio.
        if (maxPrimary == 0) {
            double ratio = (double) maxSecondary / (double) actualSecondary;
            return (int) (actualPrimary * ratio);
        }

        if (maxSecondary == 0) {
            return maxPrimary;
        }

        double ratio = (double) actualSecondary / (double) actualPrimary;
        int resized = maxPrimary;
        if (resized * ratio > maxSecondary) {
            resized = (int) (maxSecondary / ratio);
        }
        return resized;
    }
在我们目标宽、高都不为0时会调用下面的代码段:
double ratio = (double) actualSecondary / (double) actualPrimary;
        int resized = maxPrimary;
        if (resized * ratio > maxSecondary) {
            resized = (int) (maxSecondary / ratio);
        }
它会计算一个ratio(比值),这就是为啥它会按比例缩小的原因。
1.4 初始化对象并使用
        ImageRequest imageRequest = new ImageRequest(
                "http://img5.duitang.com/uploads/item/201409/14/20140914162144_MBEmX.jpeg",
                new ResponseListener(),
                0, // 图片的宽度,如果是0,就不会进行压缩,否则会根据数值进行压缩
                0, // 图片的高度,如果是0,就不进行压缩,否则会压缩
                Config.ARGB_8888, // 图片的颜色属性
                new ResponseErrorListener());
监听器:
    private class ResponseListener implements Response.Listener<Bitmap> {

        @Override
        public void onResponse(Bitmap response) {
           //  Log.d("TAG", "-------------
" + response.toString());
            iv.setImageBitmap(response);
        }
    }

    private class ResponseErrorListener implements Response.ErrorListener {

        @Override
        public void onErrorResponse(VolleyError error) {
            Log.e("TAG", error.getMessage(), error);
        }
    }
最后将其添加到请求队列即可:
mQueue.add(imageRequest);
1.5 题外话
这样我们就用volley获得了网络图片,代码也十分简单。你可能会说,有没有其他的,更好的方式来获取图片呢?当然有的,比如volley还提供了ImageLoader、NetworkImageView这样的对象,它们可以更加方便的获取图片。值得一提的是这两个对象的内部都是使用了ImageRequest进行操作的,也就是说imageRequest是本质,这也就是为啥我专门写一篇来分析ImageRequest的原因。
说话要言之有理,所以贴上ImageLoader、NetworkImageView源码中部分片段来证明其内部确实是用了ImageRequest。
ImageLoader的源码片段:
    public ImageContainer get(String requestUrl, ImageListener imageListener,
            int maxWidth, int maxHeight) {
        // ………// The request is not already in flight. Send the new request to the network and
        // track it.
        Request<Bitmap> newRequest = makeImageRequest(requestUrl, maxWidth, maxHeight, cacheKey);
        newRequest.setShouldCache(mShouldCache);
        mRequestQueue.add(newRequest);
        mInFlightRequests.put(cacheKey,
                new BatchedImageRequest(newRequest, imageContainer));
        return imageContainer;
    }
    protected Request<Bitmap> makeImageRequest(String requestUrl, int maxWidth, int maxHeight, final String cacheKey) {
        return new ImageRequest(requestUrl, new Listener<Bitmap>() {
            @Override
            public void onResponse(Bitmap response) {
                onGetImageSuccess(cacheKey, response);
            }
        }, maxWidth, maxHeight,
        Config.RGB_565, new ErrorListener() {
            @Override
            public void onErrorResponse(VolleyError error) {
                onGetImageError(cacheKey, error);
            }
        });
    }
在ImageLoader重要的get()方法中,建立了一个newRequest对象,并将其放入请求队列中。这里的newRequest是通过makeImageRequest()来产生的,而makeImageRequest()实际是返回了一个ImageRequest对象。所以用到了ImageRequest对象。
NetworkImageView的源码片段:
    public void setImageUrl(String url, ImageLoader imageLoader) {
        mUrl = url;
        mImageLoader = imageLoader;
        // The URL has potentially changed. See if we need to load it.
        loadImageIfNecessary(false);
    }
它本身就调用的是ImageLoader对象,所以自然也是用到了ImageRequest。
二、Request简介
2.1 前言
Request是Volley中最最核心的类,之前讲到的对象都是它的子类。从字面意思看,这个对象是用来执行请求的,但通过之前的使用我们发现,它还做了很多别的事情。先贴一个Request的子类。
        ImageRequest imageRequest = new ImageRequest(
                "http://img5.duitang.com/uploads/item/201409/14/20140914162144_MBEmX.jpeg",
                new ResponseListener(),
                0, // 图片的宽度,如果是0,就不会进行压缩,否则会根据数值进行压缩
                0, // 图片的高度,如果是0,就不进行压缩,否则会压缩
                Config.ARGB_8888, // 图片的颜色属性
                new ResponseErrorListener());
从中我们可以发现这个ImageRequest中传入了请求的url,毕竟是request嘛,请求的url是必须的,但我们还发现这个请求对象还处理了两个监听器,这就说明它不仅仅做了请求,同时对于响应的结果也做了分发处理。
2.2 部分API
getCacheKey()
Returns the cache key for this request. By default, this is the URL.
返回这个请求对象中缓存对象的key,默认返回的是请求的URL
getBodyContentType()
Returns the content type of the POST or PUT body.
返回POST或PUT请求内容的类型,我测试的结果是:application/x-www-form-urlencoded; charset=UTF-8
从源码就能看出,默认的编码方式是UTF-8:
/**
     * Default encoding for POST or PUT parameters. See {@link #getParamsEncoding()}.
     */
    private static final String DEFAULT_PARAMS_ENCODING = "UTF-8";
    /**
     * Returns the content type of the POST or PUT body.
     */
    public String getBodyContentType() {
        return "application/x-www-form-urlencoded; charset=" + getParamsEncoding();
    }
getSequence()
Returns the sequence number of this request.
返回请求的序列数
getUrl()
Returns the URL of this request.
返回请求的URL
setShouldCache(boolean bl)
Set whether or not responses to this request should be cached.
设置这个请求是否有缓存,这个缓存是磁盘缓存,和内存缓存没什么事情,默认是true,也就是说如果你不设置为false,这个请求就会在磁盘中进行缓存。其实,之前讲的的StringRequest,JsonRequest,ImageRequest得到的数据都会被缓存,无论是Json数据,还是图片都会自动的缓存起来。然而,一旦你设置setShouldCache(false),这些数据就不会被缓存了。
getBody()
Returns the raw POST or PUT body to be sent.
返回POST或PUT的请求体
deliverError()
分发错误信息,这个就是调用监听器的方法,贴源码就明白了。
    /**
     * Delivers error message to the ErrorListener that the Request was
     * initialized with.
     *
     * @param error Error details
     */
    public void deliverError(VolleyError error) {
        if (mErrorListener != null) {
            mErrorListener.onErrorResponse(error);
        }
    }
setRetryPolicy(RetryPolicy retryPolicy)
对一个request的重新请求策略的设置,不同的项目是否需要重新请求,重新请求几次,请求超时的时间,这些就在这设置到里面。
  /**
     * Sets the retry policy for this request.
     *
     * @return This Request object to allow for chaining.
     */
    public Request<?> setRetryPolicy(RetryPolicy retryPolicy) {
        mRetryPolicy = retryPolicy;
        return this;
    }
从上面的源码可以看出,这里需要传入一个RetryPlicy的子类,就是重新请求策略的子类,Volley会在构造Request时传一个默认的对象,叫做DefaultRetryPolicy。
    /**
     * Creates a new request with the given method (one of the values from {@link Method}),
     * URL, and error listener.  Note that the normal response listener is not provided here as
     * delivery of responses is provided by subclasses, who have a better idea of how to deliver
     * an already-parsed response.
     */
    public Request(int method, String url, Response.ErrorListener listener) {
        mMethod = method;
        mUrl = url;
        mErrorListener = listener;
        setRetryPolicy(new DefaultRetryPolicy());

        mDefaultTrafficStatsTag = findDefaultTrafficStatsTag(url);
    }
如果你对于网络请求有具体的要求,可以实现RetryPolicy接口,进行自由的配置。下面贴一下DefaultRetryPolicy源码,方便参考。


/*
 * Copyright (C) 2011 The Android Open Source Project
 *
 * Licensed under the Apache License, Version 2.0 (the "License");
 * you may not use this file except in compliance with the License.
 * You may obtain a copy of the License at
 *
 *      http://www.apache.org/licenses/LICENSE-2.0
 *
 * Unless required by applicable law or agreed to in writing, software
 * distributed under the License is distributed on an "AS IS" BASIS,
 * WITHOUT WARRANTIES OR CONDITIONS OF ANY KIND, either express or implied.
 * See the License for the specific language governing permissions and
 * limitations under the License.
 */

package com.android.volley;

/**
 * Default retry policy for requests.
 */
public class DefaultRetryPolicy implements RetryPolicy {
    /** The current timeout in milliseconds. */
    private int mCurrentTimeoutMs;

    /** The current retry count. */
    private int mCurrentRetryCount;

    /** The maximum number of attempts. */
    private final int mMaxNumRetries;

    /** The backoff multiplier for the policy. */
    private final float mBackoffMultiplier;

    /** The default socket timeout in milliseconds */
    public static final int DEFAULT_TIMEOUT_MS = 2500;

    /** The default number of retries */
    public static final int DEFAULT_MAX_RETRIES = 1;

    /** The default backoff multiplier */
    public static final float DEFAULT_BACKOFF_MULT = 1f;

    /**
     * Constructs a new retry policy using the default timeouts.
     */
    public DefaultRetryPolicy() {
        this(DEFAULT_TIMEOUT_MS, DEFAULT_MAX_RETRIES, DEFAULT_BACKOFF_MULT);
    }

    /**
     * Constructs a new retry policy.
     * @param initialTimeoutMs The initial timeout for the policy.
     * @param maxNumRetries The maximum number of retries.
     * @param backoffMultiplier Backoff multiplier for the policy.
     */
    public DefaultRetryPolicy(int initialTimeoutMs, int maxNumRetries, float backoffMultiplier) {
        mCurrentTimeoutMs = initialTimeoutMs;
        mMaxNumRetries = maxNumRetries;
        mBackoffMultiplier = backoffMultiplier;
    }

    /**
     * Returns the current timeout.
     */
    @Override
    public int getCurrentTimeout() {
        return mCurrentTimeoutMs;
    }

    /**
     * Returns the current retry count.
     */
    @Override
    public int getCurrentRetryCount() {
        return mCurrentRetryCount;
    }

    /**
     * Returns the backoff multiplier for the policy.
     */
    public float getBackoffMultiplier() {
        return mBackoffMultiplier;
    }

    /**
     * Prepares for the next retry by applying a backoff to the timeout.
     * @param error The error code of the last attempt.
     */
    @Override
    public void retry(VolleyError error) throws VolleyError {
        mCurrentRetryCount++;
        mCurrentTimeoutMs += (mCurrentTimeoutMs * mBackoffMultiplier);
        if (!hasAttemptRemaining()) {
            throw error;
        }
    }

    /**
     * Returns true if this policy has attempts remaining, false otherwise.
     */
    protected boolean hasAttemptRemaining() {
        return mCurrentRetryCount <= mMaxNumRetries;
    }
}
2.3 产生Request对象
虽然我们在代码中都会初始化一个Request对象,但是我们要在把他添加到响应队列中后才能得到它的完整体。
public <T> Request<T> add(Request<T> request) {
举例:
com.android.volley.Request<Bitmap> bitmapRequest = mQueue.add(imageRequest);
说明:如果你要设定这个request是不需要进行磁盘缓存的,那么请在把它添加到响应队列之前就进行设置,否则会得到不想要的效果。原因:源码在添加队列时会判断是否需要缓存。
    /**
     * Adds a Request to the dispatch queue.
     * @param request The request to service
     * @return The passed-in request
     */
    public <T> Request<T> add(Request<T> request) {
        // Tag the request as belonging to this queue and add it to the set of current requests.
        request.setRequestQueue(this);
        synchronized (mCurrentRequests) {
            mCurrentRequests.add(request);
        }

        // Process requests in the order they are added.
        request.setSequence(getSequenceNumber());
        request.addMarker("add-to-queue");

        // If the request is uncacheable, skip the cache queue and go straight to the network.
        if (!request.shouldCache()) {
            mNetworkQueue.add(request);
            return request; // 如果不需要缓存,直接返回request对象,不会执行下面的代码
        }

        // Insert request into stage if there's already a request with the same cache key in flight.
        synchronized (mWaitingRequests) {
            String cacheKey = request.getCacheKey();
            if (mWaitingRequests.containsKey(cacheKey)) {
                // There is already a request in flight. Queue up.
                Queue<Request<?>> stagedRequests = mWaitingRequests.get(cacheKey);
                if (stagedRequests == null) {
                    stagedRequests = new LinkedList<Request<?>>();
                }
                stagedRequests.add(request);
                mWaitingRequests.put(cacheKey, stagedRequests);
                if (VolleyLog.DEBUG) {
                    VolleyLog.v("Request for cacheKey=%s is in flight, putting on hold.", cacheKey);
                }
            } else {
                // Insert 'null' queue for this cacheKey, indicating there is now a request in
                // flight.
                mWaitingRequests.put(cacheKey, null);
                mCacheQueue.add(request);
            }
            return request;
        }
    }