紧接着上篇文章,接下来的我们用springMVC+mybatis框架实现系统登录和登录成功后显示用户列表的功能
首先,我们需要为这个项目新建一个数据库,然后创建一张用户表(我们这里使用的是mysql,可视化连接工具用的是navicat)
1、选中对应你的mysql server的连接->右键选择新建数据库
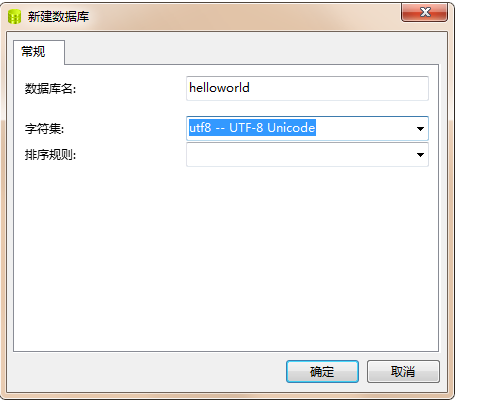
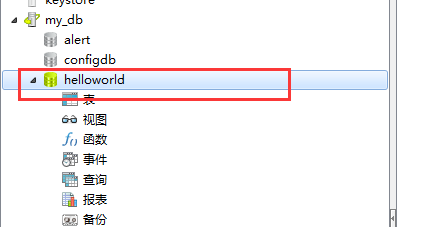
2、双击打开数据库
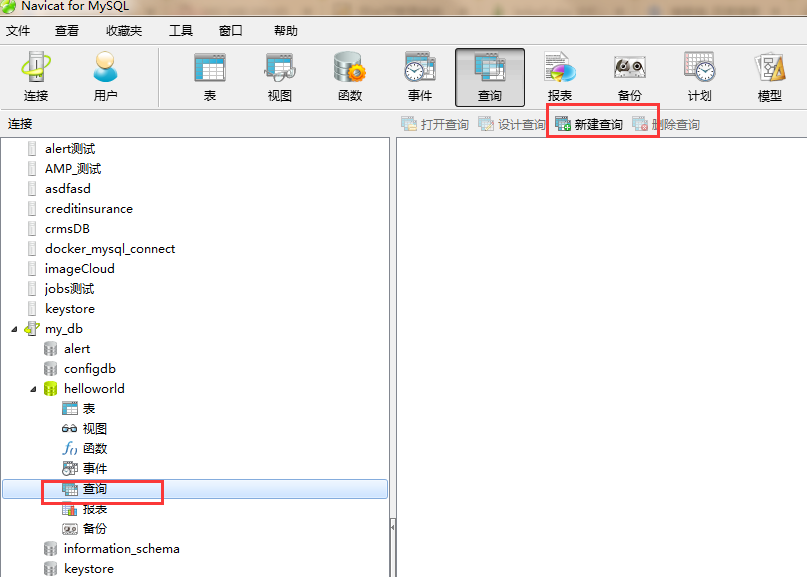
3、打开sql脚本编写界面,执行建表语句:
CREATE TABLE `td_user` (
    `user_id` INT (11) NOT NULL AUTO_INCREMENT COMMENT '用户id',
    `user_name` VARCHAR (20) DEFAULT NULL COMMENT '用户名',
    `password` VARCHAR (20) DEFAULT NULL COMMENT '密码',
    `email` VARCHAR (30) DEFAULT NULL COMMENT '用户邮箱',
    `mobile` VARCHAR (20) DEFAULT NULL COMMENT '联系方式',
    `address` VARCHAR (100) DEFAULT NULL COMMENT '地址',
    `status` VARCHAR (5) DEFAULT NULL COMMENT '用户状态:1可用,2注销',
    `create_time` datetime DEFAULT NULL COMMENT '创建时间',
    `create_id` INT (11) DEFAULT NULL COMMENT '创建人id',
    `update_time` datetime DEFAULT NULL COMMENT '修改时间',
    `update_id` INT (11) DEFAULT NULL COMMENT '修改人id',
    PRIMARY KEY (`user_id`)
) ENGINE = INNODB AUTO_INCREMENT = 16 DEFAULT CHARSET = utf8 COMMENT = '系统用户表';
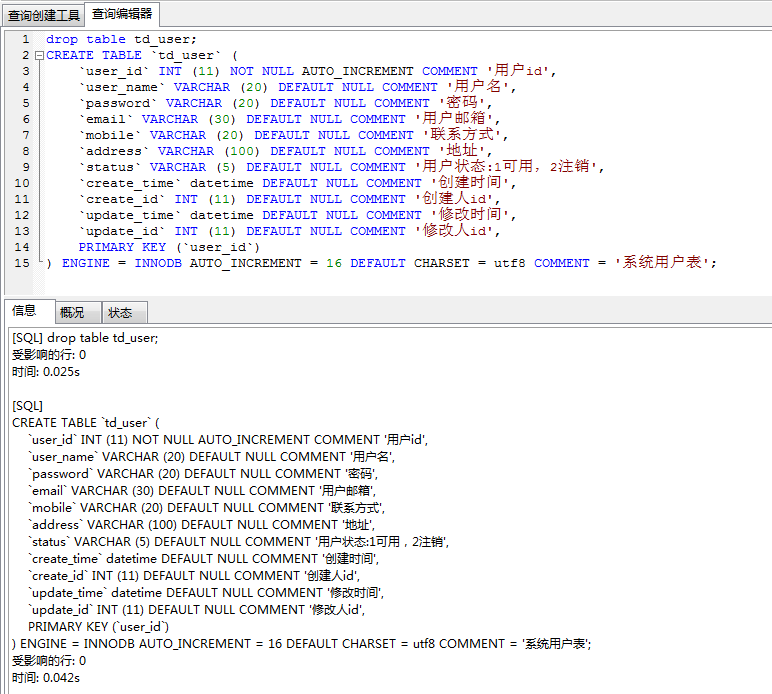
数据库表已经准备好了,下面我们要做的就是使用mybatis给我们提供的方法来用java代码连接数据库
1、我们最好把数据库的连接信息做成可配置的,这样在升级到测试、uat、生产等不同的环境时我们不需要修改代码,这里我们使用读取properties文件的配置方式

在resources文件夹下创建config/jdbc_config.properties文件
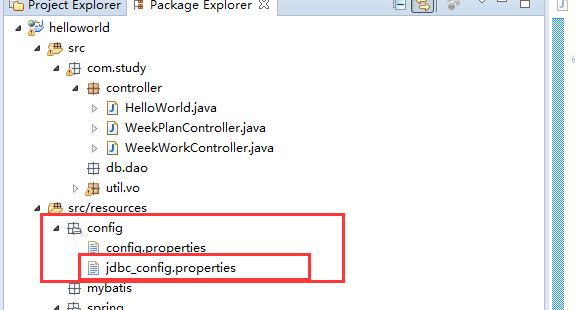
jdbc_config.properties内容如下:
jdbc.ip=localhost
jdpc.port=3306
jdbc.db.name=helloworld
jdbc.user=root
jdbc.password=123
现在要做的是写spring配置,使得spring容器能够读到properties的配置,修改上文中的spring-context.xml文件如下:
<?xml version="1.0" encoding="UTF-8"?>
<beans xmlns="http://www.springframework.org/schema/beans"
    xmlns:xsi="http://www.w3.org/2001/XMLSchema-instance" xmlns:context="http://www.springframework.org/schema/context"
    xmlns:aop="http://www.springframework.org/schema/aop"
    xsi:schemaLocation="http://www.springframework.org/schema/beans
    http://www.springframework.org/schema/beans/spring-beans-3.0.xsd
    http://www.springframework.org/schema/context
    http://www.springframework.org/schema/context/spring-context-3.0.xsd
    http://www.springframework.org/schema/aop
    http://www.springframework.org/schema/aop/spring-aop-3.0.xsd ">
    <!-- 方式3.使用注解的方式注入,主要用在java代码中使用注解注入properties文件中相应的value值 -->
    <bean id="propertyConfigurer"
        class="org.springframework.beans.factory.config.PropertiesFactoryBean">
        <!-- 这里是PropertiesFactoryBean类,它也有个locations属性,也是接收一个数组,跟上面一样 -->
        <property name="locations">
            <array>
                <value>classpath:config/jdbc_config.properties</value>
                <!-- <value>classpath:work.properties</value> -->
            </array>
        </property>
        <property name="fileEncoding" value="UTF-8"></property>
    </bean>
    <!-- 这句是为了加载jdbc配置到springcontext中,使得连接数据库的${}变量可以获得参数信息 -->
    <bean id="properties"
        class="org.springframework.beans.factory.config.PreferencesPlaceholderConfigurer">
        <property name="properties" ref="propertyConfigurer"></property>
    </bean>

</beans>
2、添加关于mybatis的配置文件:spring-mybatis.xml
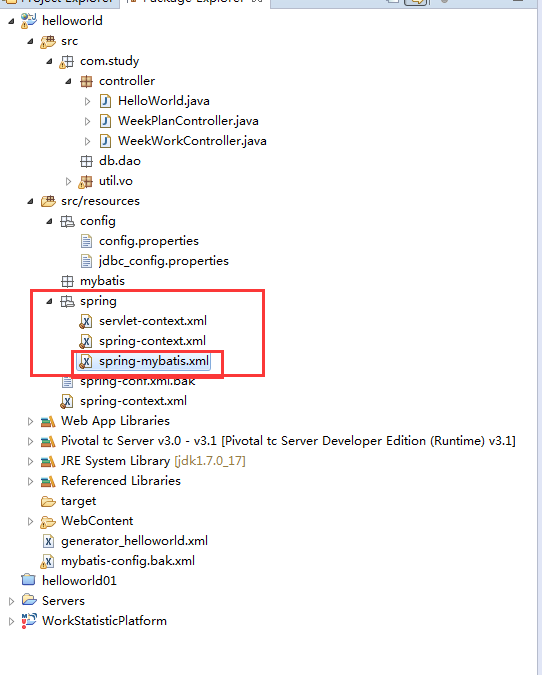
spring-mybatis.xml配置详情如下:
<?xml version="1.0" encoding="UTF-8"?> <beans xmlns="http://www.springframework.org/schema/beans" xmlns:xsi="http://www.w3.org/2001/XMLSchema-instance" xmlns:context="http://www.springframework.org/schema/context" xmlns:aop="http://www.springframework.org/schema/aop" xmlns:tx="http://www.springframework.org/schema/tx" xmlns:p="http://www.springframework.org/schema/p" xsi:schemaLocation="http://www.springframework.org/schema/beans http://www.springframework.org/schema/beans/spring-beans-3.0.xsd http://www.springframework.org/schema/context http://www.springframework.org/schema/context/spring-context-3.0.xsd http://www.springframework.org/schema/aop http://www.springframework.org/schema/aop/spring-aop-3.0.xsd http://www.springframework.org/schema/tx http://www.springframework.org/schema/tx/spring-tx-3.0.xsd"> <bean id="dataSource" class="org.apache.commons.dbcp.BasicDataSource" destroy-method="close"> <property name="driverClassName" value="com.mysql.jdbc.Driver" /> <!-- 基本属性 url、user、password --> <property name="url" value="jdbc:mysql://${jdbc.ip}:${jdpc.port}/${jdbc.db.name}?useUnicode=true&characterEncoding=utf-8&zeroDateTimeBehavior=convertToNull" /> <property name="username" value="${jdbc.user}" /> <property name="password" value="${jdbc.password}" /> <!-- 配置初始化大小、最小、最大 --> <property name="initialSize" value="1" /> <property name="minIdle" value="1" /> <property name="maxActive" value="20" /> <property name="maxIdle" value="20"></property> <!-- 配置获取连接等待超时的时间 --> <property name="maxWait" value="60000" /> <!-- 配置间隔多久才进行一次检测,检测需要关闭的空闲连接,单位是毫秒 --> <property name="timeBetweenEvictionRunsMillis" value="60000" /> <!-- 配置一个连接在池中最小生存的时间,单位是毫秒 --> <property name="minEvictableIdleTimeMillis" value="300000" /> <property name="validationQuery" value="SELECT 'x'" /> <property name="testWhileIdle" value="true" /> <property name="testOnBorrow" value="false" /> <property name="testOnReturn" value="false" /> <!-- 打开PSCache,并且指定每个连接上PSCache的大小 --> <property name="poolPreparedStatements" value="false" /> <!-- 配置监控统计拦截的filters --> </bean> <!-- MyBatis配置 --> <bean id="sqlSessionFactory" class="org.mybatis.spring.SqlSessionFactoryBean"> <property name="dataSource" ref="dataSource" /> <!-- 自动扫描entity目录, 省掉Configuration.xml里的手工配置 --> <!-- <property name="typeAliasesPackage" value="com.hjf.boot.api.domain" /> --> <!-- 显式指定Mapper文件位置 --> <property name="mapperLocations" value="classpath*:mybatis/myxml/**/*.xml" /> </bean> <!-- 扫描basePackage下所有以@MyBatisRepository标识的 接口 --> <bean class="org.mybatis.spring.mapper.MapperScannerConfigurer"> <property name="basePackage" value="com.study.db" /> <!-- <property name="annotationClass" value="com.hjf.boot.demo.boot_mybatis.dao.Mapper" /> --> </bean> <!-- 开启事务注解驱动 --> <bean id="transactionManager" class="org.springframework.jdbc.datasource.DataSourceTransactionManager"> <property name="dataSource" ref="dataSource" /> </bean> <!-- 自动扫描,多个包以 逗号分隔 <context:component-scan base-package="com.sinosig.xb.em"/> --> <!-- <aop:aspectj-autoproxy /> --> </beans>
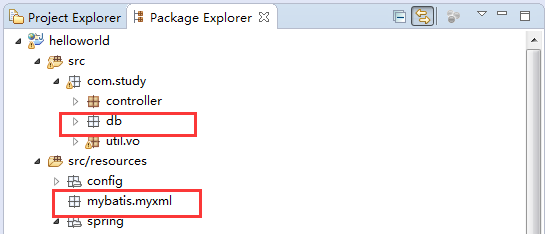
根据配置,创建存放数据库表映射文件和实体类的包和文件夹如下:
3、接下来我们就要使用mybatis的反向工程(即通过数据库表生成通用的java实体类、映射文件及dao层方法)来自动生成部分代码
1)、首先我们来安装sts使用mybatis反向工程的插件(MyBatis Generator with Eclipse Installing the Eclipse Feature)
下载插件,地址:http://www.mybatis.org/generator/
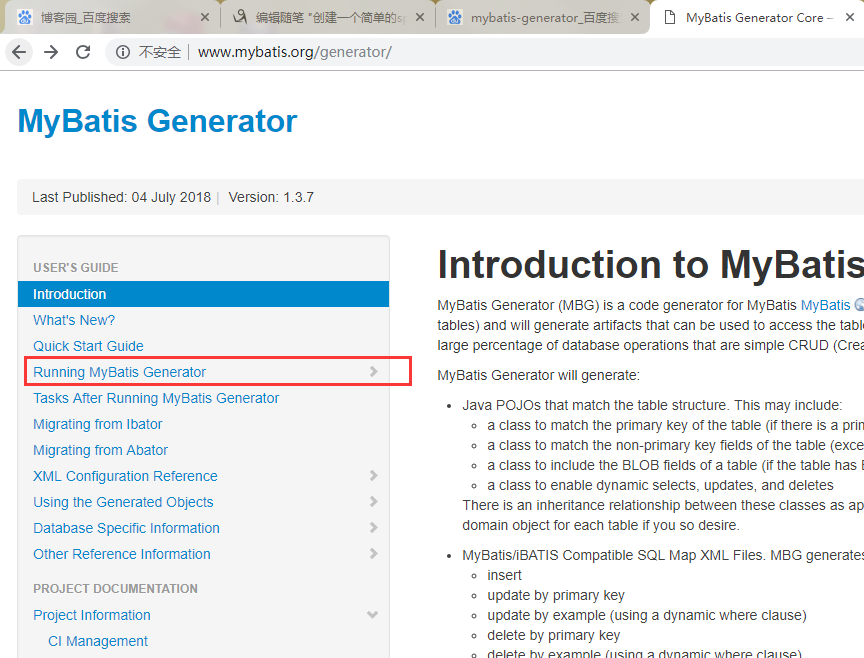
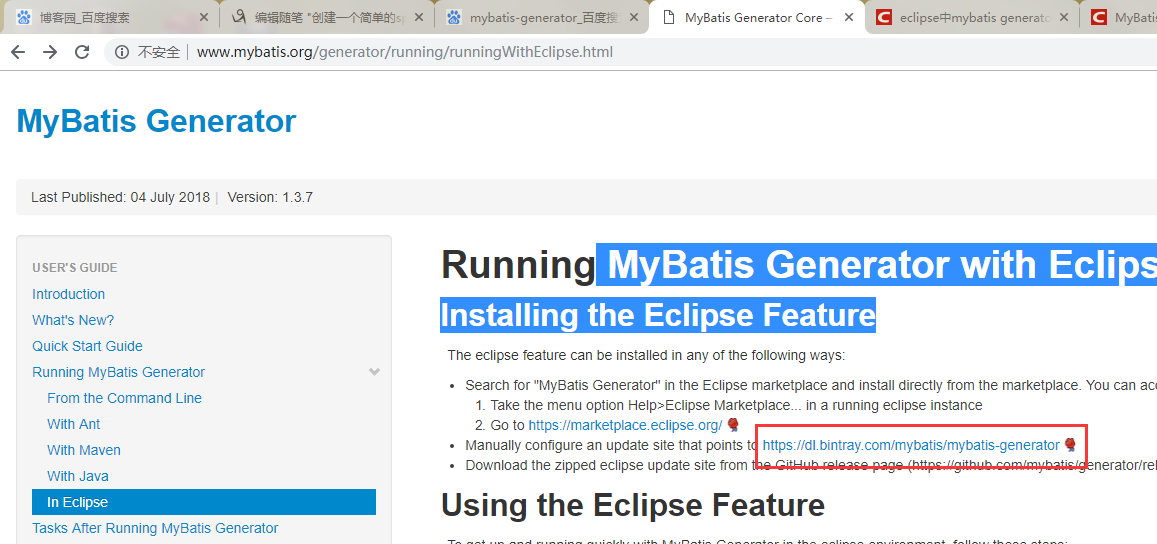


选择一个版本下载即可
安装参考(https://blog.csdn.net/qq_38002337/article/details/79440215)
将插件压缩包中的features和plugins里的东西都拷贝到eclipse的文件夹features和plugins下。或者直接将压缩包解压后直接放入eclipse的dropins文件夹下重启eclipse,验证是否安装成功。(sts只是对eclipse的一个简单封装,基本操作同eclipse)
创建mybatis方向工程需要用到的配置文件generator.xml
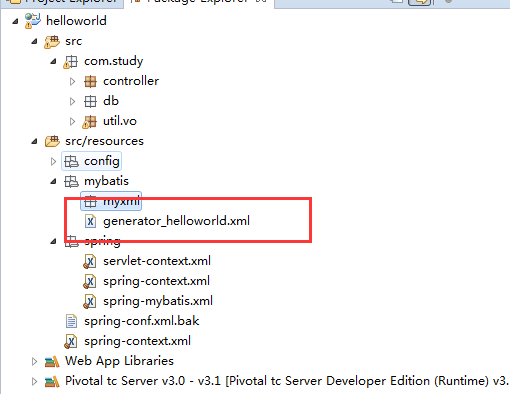
2)、创建generator_helloworld.xml文件(注意,文件实在mybatis文件夹根目录下,与myxml同级),内容如下:generator_helloworld.xml内容

<?xml version="1.0" encoding="UTF-8"?>
<!DOCTYPE generatorConfiguration
        PUBLIC "-//mybatis.org//DTD MyBatis Generator Configuration 1.0//EN"
        "http://mybatis.org/dtd/mybatis-generator-config_1_0.dtd">

<!-- 配置Run As Maven build : Goals 参数 : mybatis-generator:generate -Dmybatis.generator.overwrite=true -->
<!-- 配置 tableName,使用 Run As Maven build 生成 dao model 层 -->
<generatorConfiguration>
    <!-- 配置文件路径 -->
    <!-- <properties url="${mybatis.generator.generatorConfig.properties}"/> -->
    <!-- <properties resource="generatorConfig.properties"/> -->

    <!--数据库驱动包路径 -->
    <classPathEntry
        location="E:workspacemy.lds.wshelloworldWebContentWEB-INFlibmysql-connector-java-5.1.18.jar" />
    <context id="alertTables" targetRuntime="MyBatis3">
        <!-- mybatio分页插件 -->
        <plugin type="org.mybatis.generator.plugins.RowBoundsPlugin"></plugin>
        <!--关闭注释 -->
        <commentGenerator>
            <property name="suppressAllComments" value="true" /><!-- 是否取消注释 -->
            <property name="suppressDate" value="true" /> <!-- 是否生成注释代时间戳 -->
        </commentGenerator>

        <!--数据库连接信息 -->
        <jdbcConnection driverClass="com.mysql.jdbc.Driver"
            connectionURL="jdbc:mysql://localhost:3306/helloworld" userId="root"
            password="123">
        </jdbcConnection>

        <!-- 类型转换 -->
        <javaTypeResolver>
            <!-- 是否使用bigDecimal, false可自动转化以下类型(Long, Integer, Short, etc.) -->
            <property name="forceBigDecimals" value="false" />
        </javaTypeResolver>

        <!--生成的model 包路径 -->
        <javaModelGenerator targetPackage="com.study.db.model"
            targetProject="helloworld/src">
            <!-- 是否在当前路径下新加一层schema,eg:fase路径cn.ffcs.test.domain", true:cn.ffcs.test.domain".[schemaName] -->
            <property name="enableSubPackages" value="ture" />
            <!-- 是否针对string类型的字段在set的时候进行trim调用 -->
            <property name="trimStrings" value="true" />
            <!-- <property name="rootClass" value="com.sinosig.xb.rms.base.BaseEntity"/> -->
        </javaModelGenerator>

        <!--生成xml mapper文件 路径 -->
        <sqlMapGenerator targetPackage="mybatis.myxml"
            targetProject="helloworld/src/resources">
            <!-- 是否在当前路径下新加一层schema,eg:fase路径cn.ffcs.test.domain", true:cn.ffcs.test.domain".[schemaName] -->
            <property name="enableSubPackages" value="ture" />
        </sqlMapGenerator>

        <!-- 生成的Dao接口 的包路径 -->
        <javaClientGenerator type="XMLMAPPER"
            targetPackage="com.study.db.dao" targetProject="helloworld/src">
            <property name="enableSubPackages" value="ture" />
            <!-- baseDao -->
            <!-- <property name="rootInterface" value="com.xb.alert.platform.db.dao.BaseDao"
                /> -->
        </javaClientGenerator>

        <!--对应数据库表名 -->
        <!-- schema即为数据库名 tableName为对应的数据库表 domainObjectName要生成的实体类名 enable*ByExample是否生成
            example类 -->
        <!--tableName="td_user"代表生成所连库的td_user表的反向工程文件 -->
        <!-- <table tableName="td_user" schema="" enableInsert="true" -->
        <!--tableName="td_%"代表生成所连库的所有形如td_%表的反向工程文件 -->
        <!-- <table tableName="td_%" schema="" enableInsert="true" useGeneratedKeys="true"
            keyProperty="id" -->
        <!--%代表生成所连库的所有表的反向工程文件 -->
        <table tableName="%" schema="" enableInsert="true"
            enableCountByExample="true" enableUpdateByExample="true"
            enableDeleteByExample="true" enableSelectByExample="true"
            selectByExampleQueryId="true">
            <!-- enableCountByExample="true" enableUpdateByExample="false" enableDeleteByExample="false" -->
            <!-- enableSelectByExample="true" selectByExampleQueryId="true"> -->
            <!-- 忽略列,不生成bean 字段 <ignoreColumn column="FRED" /> -->
            <!-- 指定列的java数据类型 <columnOverride column="LONG_VARCHAR_FIELD" jdbcType="VARCHAR"
                /> -->
        </table>
    </context>
</generatorConfiguration>
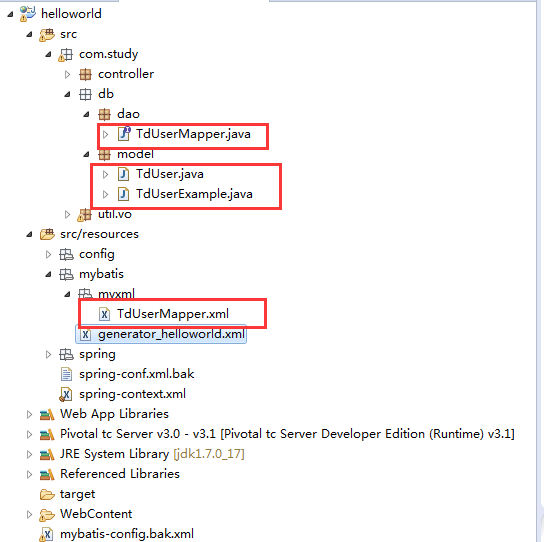
选中generator_helloworld.xml右键选择generator mybatis/ibatis artifacts为每个表生成四个文件(重复执行会报错,要要从新生成要把之前生成的删掉后在执行次操作),分别是:
表对应的实体类、表与实体类对应的xml映射文件、对表的基本操作类和封装查询条件的example类,在接下来的操作中,我们将一一得见每个文件的用处,具体如下:
关于查询数据库的基本操作我们已经完成了,下面我们要通过实现一个用户登录的功能来将整个系统跑通
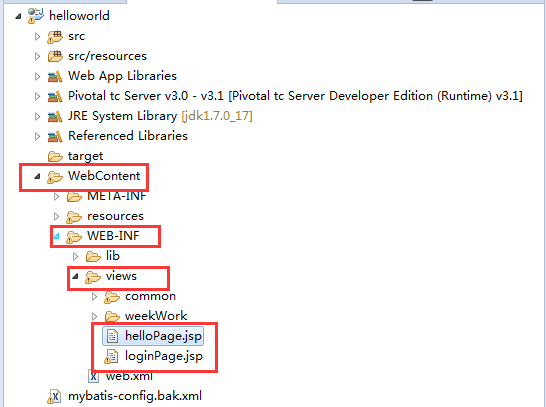
1、首先我们来写一个前端的登录页面loginPage.jsp和一个登录成功的页面helloworld.jsp

<%@ page language="java" contentType="text/html; charset=UTF-8" pageEncoding="UTF-8"%> <%@taglib uri="http://java.sun.com/jsp/jstl/core" prefix="c"%> <!DOCTYPE html PUBLIC "-//W3C//DTD HTML 4.01 Transitional//EN" "http://www.w3.org/TR/html4/loose.dtd"> <html> <head> <meta http-equiv="Content-Type" content="text/html; charset=UTF-8"> <title>loginPage</title> </head> <style type="text/css"> input { font-size: 22px; } .errorMessage { font-size: 16px; color: red; padding-top: 10px; } </style> <script type="text/javascript"> </script> <body> <div align="center" style="padding-top: 15%; font-size: 30px;"> <form action="${pageContext.request.contextPath}/doLogin" method="post"> <div> 用户名:<input type="text" name="userName" placeholder="用户名"> <span><i class="fa fa-user"></i></span> </div> <div> 密 码:<input type="password" name="password" placeholder="密码"> <span></span> </div> <div style="padding: 10px; font-size: 30px;"> <button type="submit">提交</button> <button type="reset">重置</button> </div> <!-- el表达式 https://www.cnblogs.com/xdp-gacl/p/3938361.html--> <div class="errorMessage">${error }</div> </form> </div> </body> </html>

<%@ page language="java" contentType="text/html; charset=UTF-8"
    pageEncoding="UTF-8"%>
<!DOCTYPE html>
<html>
<head>
<meta charset="utf-8">
<meta http-equiv="X-UA-Compatible" content="IE=edge">
<title>欢迎页面</title>
<!-- Tell the browser to be responsive to screen width -->
<meta
    content="width=device-width, initial-scale=1, maximum-scale=1, user-scalable=no"
    name="viewport">

</head>
<body class="hold-transition login-page">亲爱的,恭喜你,成功了!!
</body>
</html>
2、创建一个用于登录相关功能的controller类用于接收登录请求并对登录结果做跳转
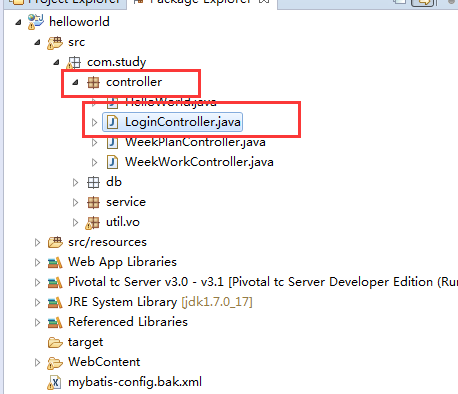
LoginController.java内容如下:
package com.study.controller;

import javax.servlet.http.HttpServletRequest;
import javax.servlet.http.HttpServletResponse;
import javax.servlet.http.HttpSession;
import org.springframework.beans.factory.annotation.Autowired;
import org.springframework.stereotype.Controller;
import org.springframework.ui.Model;
import org.springframework.web.bind.annotation.RequestMapping;
import org.springframework.web.bind.annotation.RequestMethod;
import org.springframework.web.bind.annotation.RequestParam;
import com.study.db.model.TdUser;
import com.study.service.LoginService;

/**
 * 登录控制类
 * @author thc
 */
@Controller
public class LoginController {
    @Autowired
    private LoginService lService;

    /**
     * 跳转到登录页面的方法
     */
    @RequestMapping(value = "/", method = RequestMethod.GET)
    public String login() {
        // 直接跳转到登录页面
        return "loginPage";
    }

    /**
     * 执行登录操作后,跳转到登录成功的系统功能页面
     * @return 返回跳转页面
     */
    @RequestMapping(value = "/doLogin", method = RequestMethod.POST)
    public String dologin(HttpServletRequest request, HttpServletResponse response, Model model,
            @RequestParam(value = "userName") String userName, @RequestParam(value = "password") String passWord) {
        HttpSession session = request.getSession();
        // 数据库校验登录用户
        TdUser u = lService.verifyLogin(userName, passWord);
        if (u != null) {
            // 将登录用户保存到会话session中
            session.setAttribute("loginUser", userName);return "helloPage";
        } else {
            // 登录失败,跳转登录页面,携带错误提示
            model.addAttribute("error", "对不起,用户名或密码错误,请重新登录!!");
            // request.setAttribute("error", "对不起,用户名或密码错误,请重新登录!!");
            return "loginPage";
        }
    }
}
阅读LoginController.java的代码我们会发现,我们创建了一个login()的方法,RequestMapping的value="/",意思是只要访问程序(http://localhost:8080/helloword),默认进入该方法,该方法也没有做什么逻辑处理,只是将请求跳转到了登录页面。
接下来我们有写了一个方法dologin()(因为在loginPage.jsp中form的action我们设置的是${pageContext.request.contextPath}/doLogin,所以当点击提交按钮时,浏览器就会向系统发送http://localhost:8080/helloword/doLogin,从而进入该方法),在这个方法中我们做了登录的相关操作。在这个方法中,我们要注意一下几点:
1)、因为我们用户名和密码提交的过程要相对安全,所以只能采用post表单的方式提交,所以该方法RequestMapping的method只设置了接收post请求(百度搜索“get请求和post请求”了解两者的区别)
2)、我们发现在dologin方法中,查询数据库的操作我们并没有直接写在该类里,而是通过spring注解的方式声明了一个LoginService接口,然后调用了他的verifyLogin方法或得的数据库数据,这里我们声明的LoginService是一个接口,给他加上@Autowired注解,在程序启动时,spring容器就会扫描全局所有加了@service注解的LoginService接口的实现类,然后把扫描到的实现类LoginServiceImpl的bean赋值给这个声明(程序启动时,spring会扫描全局,对添加注释的类生成相应的bean)。
在这里我们会发现,controller只是在接收浏览器的请求然后转发出去,不做过多的业务处理,而具体的业务处理是放在对应的service类里实现的。
3、下面我们来看下service层的具体实现吧
新建service包并在其中创建LoginService接口和impl包,在impl包中创建LoginService接口实现类LoginServiceImpl.java,结构如下:
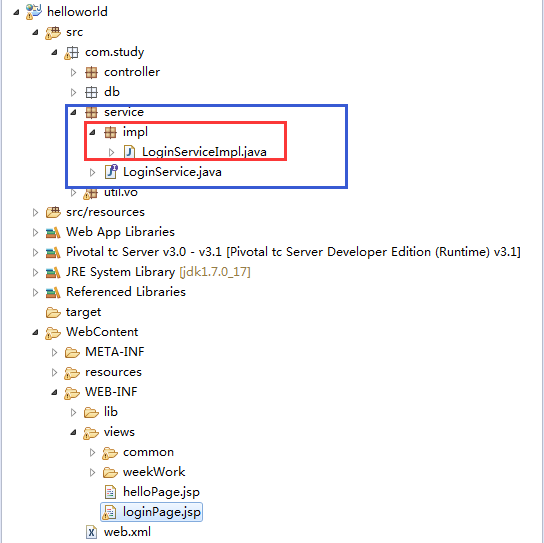
LoginService 代码如下:
package com.study.service;

import com.study.db.model.TdUser;
/**
 * login服务类接口,声明这个service需要的方法,由其实现类实现所声明的方法
 * @author Administrator
 *
 */
public interface LoginService {
    /**
     * 执行登录校验的方法,登录成功返回用户,登录失败返回null
     * @return
     */
    public TdUser verifyLogin(String userName,String password);
}
LoginServiceImpl代码内容如下:
package com.study.service.impl;

import java.util.List;

import javax.annotation.Resource;

import org.springframework.stereotype.Service;

import com.study.db.dao.TdUserMapper;
import com.study.db.model.TdUser;
import com.study.db.model.TdUserExample;
import com.study.service.LoginService;

@Service
public class LoginServiceImpl implements LoginService {

    // 声明一个tduser表的操作类
    @Resource
    private TdUserMapper mapper;

    @Override
    public TdUser verifyLogin(String userName, String password) {
        // 查询数据库,看是否存在与此用户名和密码对应的用户

        // 创建一个mybatis的查询实体,通过mybatis的形式查询数据库
        TdUserExample example = new TdUserExample();
        // 这样封装查询实体的方式可以避免拼接sql引起的安全问题:sql注入
        example.createCriteria().andUserNameEqualTo(userName).andPasswordEqualTo(password);
        // 调用mybatis反向工程生成的表操作类的查询方法
        List<TdUser> ls = mapper.selectByExample(example);
        if (ls != null && ls.size() != 0) {
            return ls.get(0);
        }
        // 返回查询结果
        return null;
    }

}
至此,整个登录功能的基本完成了,可以启动服务,通过http://localhost:8080/helloword请求应用,测试功能。
1、启动报错:

今天实验dbcp时,出的错,用的jar包是
commons-dbcp-1.4.jar
commons-pool2-2.4.1.jar
commons-collections4-4.0.jar
奇怪的是明明需要的包都有,怎会报错。后来将commons-pool2-2.4.1 换成 commons-pool-1.6后解决了。
---------------------
作者:月夜轻飞雪
来源:CSDN
原文:https://blog.csdn.net/birdofsky/article/details/47043105
版权声明:本文为博主原创文章,转载请附上博文链接!
其实我只是添加了一个commons-pool-1.6.jar包,程序中原本有commons-dbcp-1.4.jar,并没有需要引入commons-collections4-4.0.jar
2、再次尝试启动,继续报错:
org.springframework.beans.factory.BeanCreationException: Could not autowire field: private com.study.service.LoginService com.study.controller.LoginController.lService; nested exception is org.springframework.beans.factory.NoSuchBeanDefinitionException: No qualifying bean of type [com.study.service.LoginService] found for dependency: expected at least 1 bean which qualifies as autowire candidate for this dependency. Dependency annotations: {@org.springframework.beans.factory.annotation.Autowired(required=true)}
    at org.springframework.beans.factory.annotation.AutowiredAnnotationBeanPostProcessor$AutowiredFieldElement.inject(AutowiredAnnotationBeanPostProcessor.java:514)
    at org.springframework.beans.factory.annotation.InjectionMetadata.inject(InjectionMetadata.java:87)
    at org.springframework.beans.factory.annotation.AutowiredAnnotationBeanPostProcessor.postProcessPropertyValues(AutowiredAnnotationBeanPostProcessor.java:285)
    ... 30 more
意思就是spring加载不到LoginServiceImpl,可能原因有两个
1)、LoginServiceImpl.java类上面没有加@service注解 ——查看发现加了

2)、那就肯定是LoginServiceImpl.java类所在的包没有被spring容器扫描到,那肯定是配置全局扫描范围的时候错了,查看servlet-context.xml文件发现:

<context:component-scan base-package="com.study.controller" /> 意思是只扫描controller包下的类,所以要修改为扫描所有包
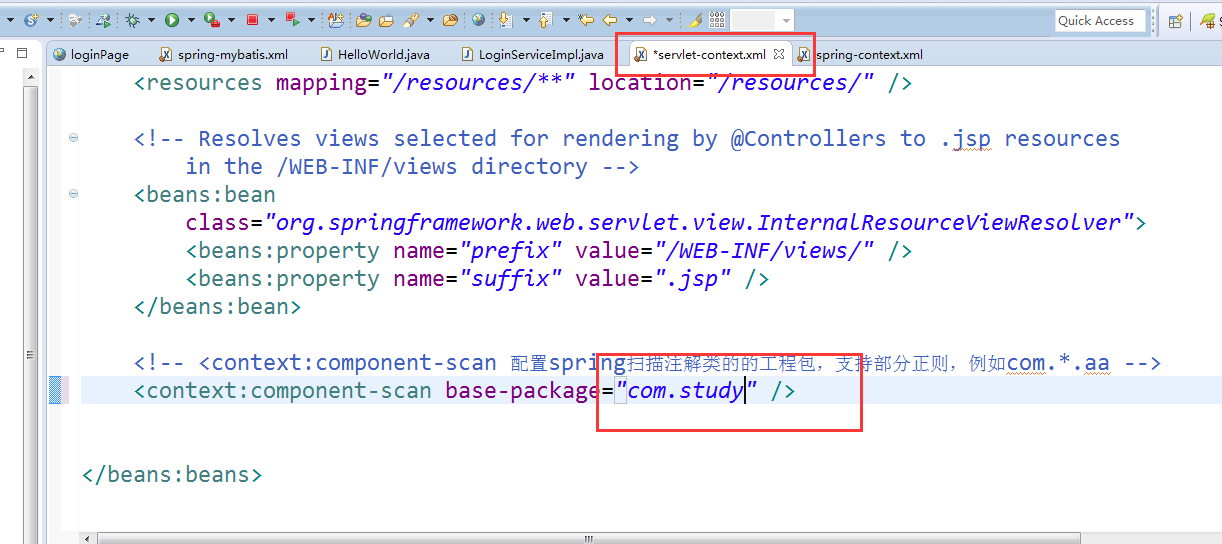
3、启动,报错
org.springframework.beans.factory.BeanCreationException: Error creating bean with name 'sqlSessionFactory' defined in file [E:workspacemy.lds.ws.metadata.pluginsorg.eclipse.wst.server.core mp0wtpwebappshelloworldWEB-INFclassesspringspring-mybatis.xml]: Invocation of init method failed; nested exception is org.springframework.core.NestedIOException: Failed to parse mapping resource: 'file [E:workspacemy.lds.ws.metadata.pluginsorg.eclipse.wst.server.core mp0wtpwebappshelloworldWEB-INFclassesmybatismyxmlgenerator_helloworld.xml]'; nested exception is org.apache.ibatis.builder.BuilderException: Error parsing Mapper XML. Cause: java.lang.NullPointerException
at org.springframework.beans.factory.support.AbstractAutowireCapableBeanFactory.initializeBean(AbstractAutowireCapableBeanFactory.java:1488)
at org.springframework.beans.factory.support.AbstractAutowireCapableBeanFactory.doCreateBean(AbstractAutowireCapableBeanFactory.java:524)
at org.springframework.beans.factory.support.AbstractAutowireCapableBeanFactory.createBean(AbstractAutowireCapableBeanFactory.java:461)
at org.springframework.beans.factory.support.AbstractBeanFactory$1.getObject(AbstractBeanFactory.java:295)
at org.springframework.beans.factory.support.DefaultSingletonBeanRegistry.getSingleton(DefaultSingletonBeanRegistry.java:223)
at org.springframework.beans.factory.support.AbstractBeanFactory.doGetBean(AbstractBeanFactory.java:292)
at org.springframework.beans.factory.support.AbstractBeanFactory.getBean(AbstractBeanFactory.java:194)
at org.springframework.beans.factory.support.DefaultListableBeanFactory.preInstantiateSingletons(DefaultListableBeanFactory.java:608)
at org.springframework.context.support.AbstractApplicationContext.finishBeanFactoryInitialization(AbstractApplicationContext.java:932)
at org.springframework.context.support.AbstractApplicationContext.refresh(AbstractApplicationContext.java:479)
at org.springframework.web.context.ContextLoader.configureAndRefreshWebApplicationContext(ContextLoader.java:389)
at org.springframework.web.context.ContextLoader.initWebApplicationContext(ContextLoader.java:294)
at org.springframework.web.context.ContextLoaderListener.contextInitialized(ContextLoaderListener.java:112)
at org.apache.catalina.core.StandardContext.listenerStart(StandardContext.java:5068)
at org.apache.catalina.core.StandardContext.startInternal(StandardContext.java:5584)
at org.apache.catalina.util.LifecycleBase.start(LifecycleBase.java:147)
at org.apache.catalina.core.ContainerBase$StartChild.call(ContainerBase.java:1572)
at org.apache.catalina.core.ContainerBase$StartChild.call(ContainerBase.java:1562)
at java.util.concurrent.FutureTask$Sync.innerRun(FutureTask.java:334)
at java.util.concurrent.FutureTask.run(FutureTask.java:166)
at java.util.concurrent.ThreadPoolExecutor.runWorker(ThreadPoolExecutor.java:1145)
at java.util.concurrent.ThreadPoolExecutor$Worker.run(ThreadPoolExecutor.java:615)
at java.lang.Thread.run(Thread.java:722)
Caused by: org.springframework.core.NestedIOException: Failed to parse mapping resource: 'file [E:workspacemy.lds.ws.metadata.pluginsorg.eclipse.wst.server.core mp0wtpwebappshelloworldWEB-INFclassesmybatismyxmlgenerator_helloworld.xml]'; nested exception is org.apache.ibatis.builder.BuilderException: Error parsing Mapper XML. Cause: java.lang.NullPointerException
at org.mybatis.spring.SqlSessionFactoryBean.buildSqlSessionFactory(SqlSessionFactoryBean.java:522)
at org.mybatis.spring.SqlSessionFactoryBean.afterPropertiesSet(SqlSessionFactoryBean.java:381)
at org.springframework.beans.factory.support.AbstractAutowireCapableBeanFactory.invokeInitMethods(AbstractAutowireCapableBeanFactory.java:1547)
at org.springframework.beans.factory.support.AbstractAutowireCapableBeanFactory.initializeBean(AbstractAutowireCapableBeanFactory.java:1485)
... 22 more
意思就是mybatismyxmlgenerator_helloworld.xml文件无法解析成java实体与数据库表的影视文件Mapper XML,原因是我们配置了mybatismyxml这个路径是存放java实体与表的映射文件的,放入了反向工程文件,默认也被解析了,但是肯定会解析错的,所以报错了

解决:把generator_helloworld.xml从myxml中移出来,如下:

再次启动,成功!!
数据库添加一条记录:
INSERT into td_user (user_name,password,email,mobile,address,status) VALUES('test','123456','test@163.com','13211575602','北京','1')
访问页面:http://localhost:8080/helloworld/
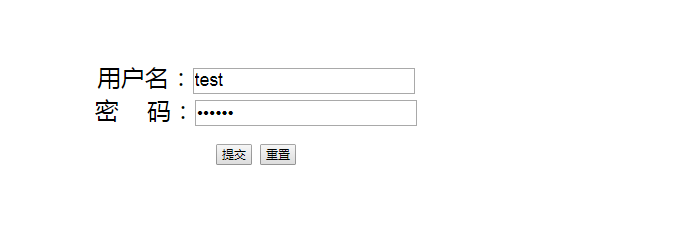
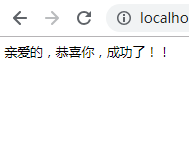
用刚刚插入的用户登录,跳转到登录成功的页面
输入错误的密码试试:
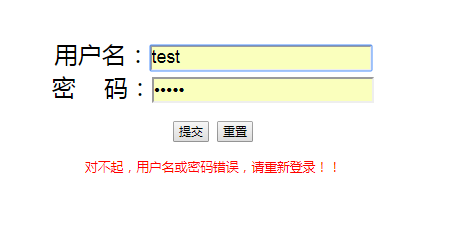
提示登录失败
接下来我们将在下一篇文章“创建一个简单的springMVC+mybatis项目(三)”里实现权限校验和用户列表的显示,以及用户信息的更改等操作。。
