参考视频:Tomcat下载安装配置使用视频教程
前言
tomcat的下载安装配置等简单操作就不在此多说了,本文看看tomcat的核心。
一、tomcat解读server.xml文件
tomcat的核心server.xml文件在conf目录下:

打开server.xml后,其中有一段名为Catalina的Service代码:
<Service name="Catalina">
<!--The connectors can use a shared executor, you can define one or more named thread pools-->
<!--
<Executor name="tomcatThreadPool" namePrefix="catalina-exec-"
maxThreads="150" minSpareThreads="4"/>
-->
<!-- A "Connector" represents an endpoint by which requests are received
and responses are returned. Documentation at :
Java HTTP Connector: /docs/config/http.html
Java AJP Connector: /docs/config/ajp.html
APR (HTTP/AJP) Connector: /docs/apr.html
Define a non-SSL/TLS HTTP/1.1 Connector on port 8080
-->
<Connector URIEncoding="gbk" connectionTimeout="20000" port="8080" protocol="HTTP/1.1" redirectPort="8443"/>
<!-- A "Connector" using the shared thread pool-->
<!--
<Connector executor="tomcatThreadPool"
port="8080" protocol="HTTP/1.1"
connectionTimeout="20000"
redirectPort="8443" />
-->
<!-- Define a SSL/TLS HTTP/1.1 Connector on port 8443
This connector uses the NIO implementation. The default
SSLImplementation will depend on the presence of the APR/native
library and the useOpenSSL attribute of the
AprLifecycleListener.
Either JSSE or OpenSSL style configuration may be used regardless of
the SSLImplementation selected. JSSE style configuration is used below.
-->
<!--
<Connector port="8443" protocol="org.apache.coyote.http11.Http11NioProtocol"
maxThreads="150" SSLEnabled="true">
<SSLHostConfig>
<Certificate certificateKeystoreFile="conf/localhost-rsa.jks"
type="RSA" />
</SSLHostConfig>
</Connector>
-->
<!-- Define a SSL/TLS HTTP/1.1 Connector on port 8443 with HTTP/2
This connector uses the APR/native implementation which always uses
OpenSSL for TLS.
Either JSSE or OpenSSL style configuration may be used. OpenSSL style
configuration is used below.
-->
<!--
<Connector port="8443" protocol="org.apache.coyote.http11.Http11AprProtocol"
maxThreads="150" SSLEnabled="true" >
<UpgradeProtocol className="org.apache.coyote.http2.Http2Protocol" />
<SSLHostConfig>
<Certificate certificateKeyFile="conf/localhost-rsa-key.pem"
certificateFile="conf/localhost-rsa-cert.pem"
certificateChainFile="conf/localhost-rsa-chain.pem"
type="RSA" />
</SSLHostConfig>
</Connector>
-->
<!-- Define an AJP 1.3 Connector on port 8009 -->
<Connector port="8009" protocol="AJP/1.3" redirectPort="8443"/>
<!-- An Engine represents the entry point (within Catalina) that processes
every request. The Engine implementation for Tomcat stand alone
analyzes the HTTP headers included with the request, and passes them
on to the appropriate Host (virtual host).
Documentation at /docs/config/engine.html -->
<!-- You should set jvmRoute to support load-balancing via AJP ie :
<Engine name="Catalina" defaultHost="localhost" jvmRoute="jvm1">
-->
<Engine defaultHost="localhost" name="Catalina">
<!--For clustering, please take a look at documentation at:
/docs/cluster-howto.html (simple how to)
/docs/config/cluster.html (reference documentation) -->
<!--
<Cluster className="org.apache.catalina.ha.tcp.SimpleTcpCluster"/>
-->
<!-- Use the LockOutRealm to prevent attempts to guess user passwords
via a brute-force attack -->
<Realm className="org.apache.catalina.realm.LockOutRealm">
<!-- This Realm uses the UserDatabase configured in the global JNDI
resources under the key "UserDatabase". Any edits
that are performed against this UserDatabase are immediately
available for use by the Realm. -->
<Realm className="org.apache.catalina.realm.UserDatabaseRealm" resourceName="UserDatabase"/>
</Realm>
<Host appBase="webapps" autoDeploy="true" name="localhost" unpackWARs="true">
<!-- SingleSignOn valve, share authentication between web applications
Documentation at: /docs/config/valve.html -->
<!--
<Valve className="org.apache.catalina.authenticator.SingleSignOn" />
-->
<!-- Access log processes all example.
Documentation at: /docs/config/valve.html
Note: The pattern used is equivalent to using pattern="common" -->
<Valve className="org.apache.catalina.valves.AccessLogValve" directory="logs" pattern="%h %l %u %t "%r" %s %b" prefix="localhost_access_log" suffix=".txt"/>
<Context docBase="E:apache-tomcat-8.5.28wtpwebappsChineseWeb" path="/ChineseWeb" reloadable="true" source="org.eclipse.jst.jee.server:ChineseWeb"/></Host>
</Engine>
</Service>
浏览器如果想使用Service这个服务,就必须通过连接器Connector,使用http/1.1协议,访问port:8080端口,这也就是为什么我们要在浏览器输入http://localhost:8080的原因:
<Connector URIEncoding="gbk" connectionTimeout="20000" port="8080" protocol="HTTP/1.1" redirectPort="8443"/>
接下来我们看看Host标签(主机),appBase规定了我们的应用app要放在webapps目录下,unpackWARs=ture表示项目的war包放在webapps目录下后会自动解压,autoDeploy="true"表示发布项目时不用重启服务器:
<Host appBase="webapps" autoDeploy="true" name="localhost" unpackWARs="true">
tomcat核心原理图:
二、虚拟主机
我们有时会租赁百度云或者阿里云的服务器,获得域名。服务端不可能让我们一个域名占用一台机器,通常一台机器负责多个域名,这些域名就是虚拟主机。
一个Engine可以包含多个虚拟主机,一个主机可以包含多个应用Context。
1. 创建虚拟目录:
我们的app都放在webapps下,可不可以放在其他地方呢?当然可以,
第一种方法(在主机下创建一个新的Context):
比如我在tomcat根目录下创建一个web应用 myWeb :

然后修改server.xml文件,在Host标签下添加一个访问路径为/myWeb(可以写别的),的Context标签(相当于在主机下添加一个应用),部分代码如下:
<Host appBase="webapps" autoDeploy="true" name="localhost" unpackWARs="true">
		<Context path="/myWeb" docBase="e:/apache-tomcat-8.5.28/myWeb"/>
然后重启服务器(重新加载server.xml),然后输入http://localhost:8080/myWeb就可以访问到。
此方法相当于创建了一个myWeb的虚拟目录,但有弊端,因为要重启服务器,有时服务器上不知跑你一个程序,你重启后势必影响其他应用。
第二种方法(创建虚拟目录,推荐):
在conf/Catalina/下有个localhost文件夹,在这里创建一个myWeb.xml文件,内容如下:

<?xml version="1.0"?>
<Context docBase="e:/apache-tomcat-8.5.28/myWeb" />
此时不必要重启服务器,服务器会自动加载myWeb.xml。
然后访问http://localhost:8080/myWeb就行
2. 创建虚拟主机:
首先了解一些概念:
域名:每个域名(好记)对应了一个ip地址(不好记),以百度(www.baidu.com)为例:
C:UsersAdministrator>ping www.baidu.com

Pinging www.a.shifen.com [14.215.177.39] with 32 bytes of data:
Reply from 14.215.177.39: bytes=32 time=25ms TTL=50
Reply from 14.215.177.39: bytes=32 time=24ms TTL=50
Reply from 14.215.177.39: bytes=32 time=53ms TTL=50
Reply from 14.215.177.39: bytes=32 time=37ms TTL=50

Ping statistics for 14.215.177.39:
    Packets: Sent = 4, Received = 4, Lost = 0 (0% loss),
Approximate round trip times in milli-seconds:
    Minimum = 24ms, Maximum = 53ms, Average = 34ms
所以现在百度域名对应的ip地址为 14.215.177.39
域名服解析服务(DNS):为域名和ip地址提供映射的服务器成为DNS服务器
=============== 现在开始创建虚拟主机========================
创建虚拟主机:在server.xml文件中host标签同级的地方再创建一个host,修改name,然后把appBase指向另一个目录(要区别于localhost的webapps)
<Host name="www.xsy.com" appBase="webapps2" autoDeploy="true" unpackWARs="true"></Host>
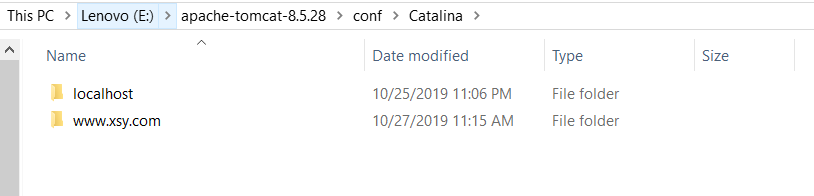
然后将webapps下tomcat自带的ROOT项目复制到webapps2下,作为虚拟主机www.xsy.com的项目,然后点击tomcat下bin/startup.bat,启动服务器。可以看到conf/Catalina下多出来了一个文件夹www.xsy.com(虚拟主机)
现在还访问不了,因为DNS没有配置好,我们接下来打开本地DNS服务:
C:WindowsSystem32driversetchost
修改文件如下(加上127.0.0.1 www.xsy.com):
# Copyright (c) 1993-2009 Microsoft Corp.
#
# This is a sample HOSTS file used by Microsoft TCP/IP for Windows.
#
# This file contains the mappings of IP addresses to host names. Each
# entry should be kept on an individual line. The IP address should
# be placed in the first column followed by the corresponding host name.
# The IP address and the host name should be separated by at least one
# space.
#
# Additionally, comments (such as these) may be inserted on individual
# lines or following the machine name denoted by a '#' symbol.
#
# For example:
#
#      102.54.94.97     rhino.acme.com          # source server
#       38.25.63.10     x.acme.com              # x client host

# localhost name resolution is handled within DNS itself.
#	127.0.0.1       localhost
#	::1             localhost
	127.0.0.1		www.xsy.com
然后无需重新启动服务器,直接在网站里输入:www.xsy.com:8080,就可以访问到我们虚拟主机下的ROOT项目的主页了

注意!当访问127.0.0.1:8080时,访问的说localhost下的项目,因为在server.xml中有这样一句代码(127.0.0.1默认访问localhost下的项目):
<Engine defaultHost="localhost" name="Catalina">
我们如何去掉www.xsy.com:8080后面的端口号呢?只需要将server.xml关于8080的代码的port修改为80就可以了:
<Connector URIEncoding="gbk" connectionTimeout="20000" port="80" protocol="HTTP/1.1" redirectPort="8443"/>
这时输入www.xsy.com就可以直接访问了
