转发一篇国外大神的博客,对于执行一些后台任务还是挺有用的。
原文地址:https://nishantrana.me/2017/03/22/configure-dynamics-365-and-azure-service-bus-integration-through-queue-and-queueclient/comment-page-1/#comment-50400
Let us configure Dynamics 365 and Azure Service Bus integration.
让我们来配置Dynamics 365 和 Azure Service Bus的集成。
Here we would implement a basic scenario, every time a lead is created in CRM we'd pass this execution context information to the queue. The app then reads and shows the information.
这里我们将部署一个基本的场景,每当一个潜在客户在CRM被创建时,我们会传递执行上下文信息到队列。这是应用程序将会读取并显示信息。
As a first step, we need to register a service end point through plugin registration tool.
第一步,我们需要通过插件注册工具来注册一个服务终结点。

Here we need to provide the connection string 
这里我们需要提供连接字符串
So, let us create SAS configured Azure service bus namespace and a queue in it.
因此,让我们在里面创建SAS配置的Azure service bus 命名空间和一个队列
Go to portal
转到门户
Search for Service Bus, provide the required details and click on Create.
搜索Service Bus,提供需要的详细信息并点击创建。

Next, we'd create a queue. Inside Service Bus go to Queues and click on plus button create a Queue
下一步,我们创建一个队列,在Service Bus 里面转到队列并点击加号按钮创建一个队列。
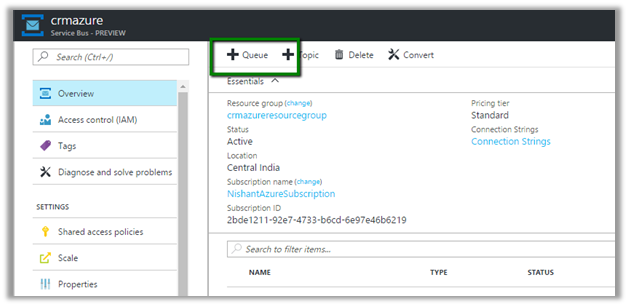
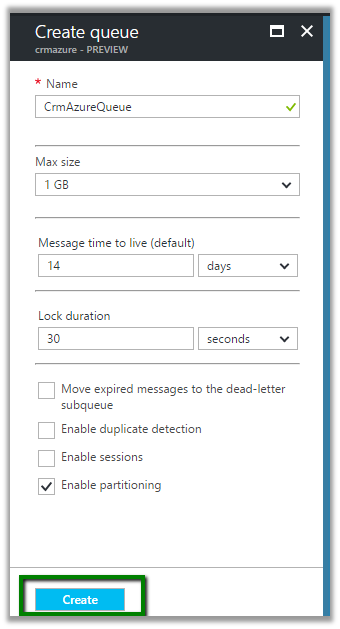
Next inside the queue we need to go to Shared Access Policy settings and click on Add button to add a new SAS Key
下一步,在队列里面我们需要转到共享访问策略设置并点击加号按钮来添加一个SAS密钥。
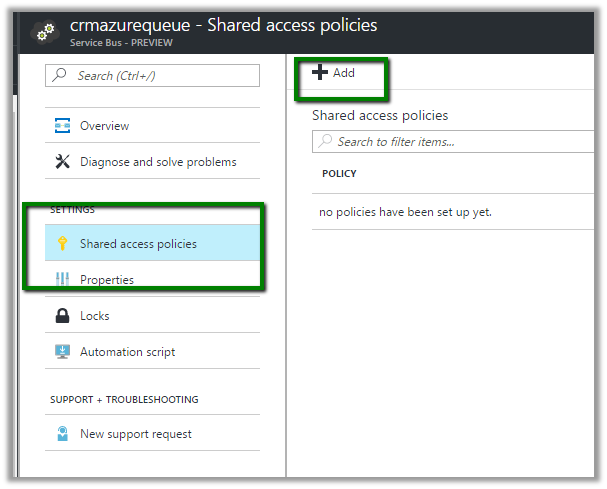
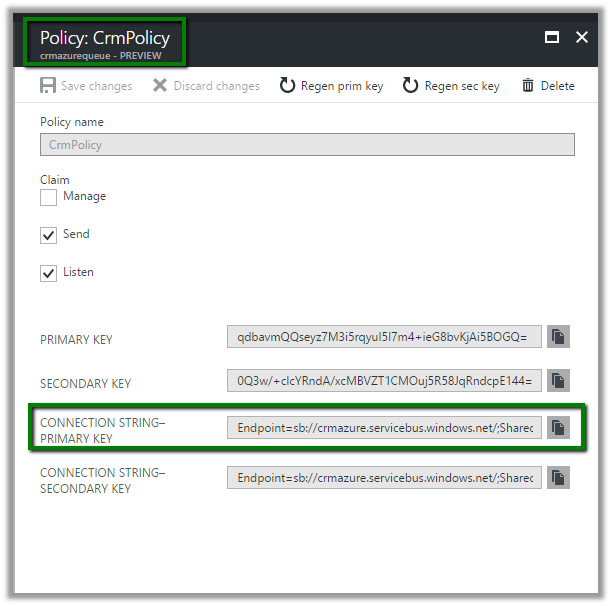
Next click on connection strings, followed by Add button to add a new SAS Key.
下一步点击加号按钮下面的连接字符串来添加一个SAS密钥,
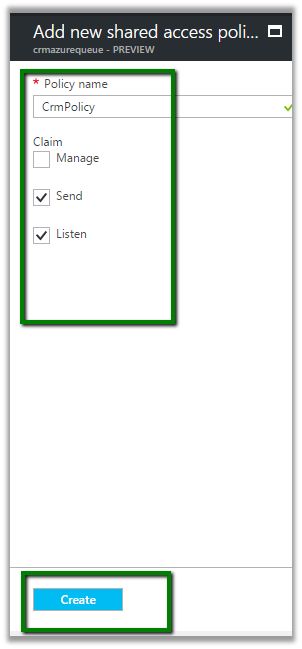
This creates the key. Now copy the connection string.
这里创建密钥,现在复制连接字符串。
Paste the connection string in the Plugin Registration tool
粘贴连接字符串到插件注册工具。
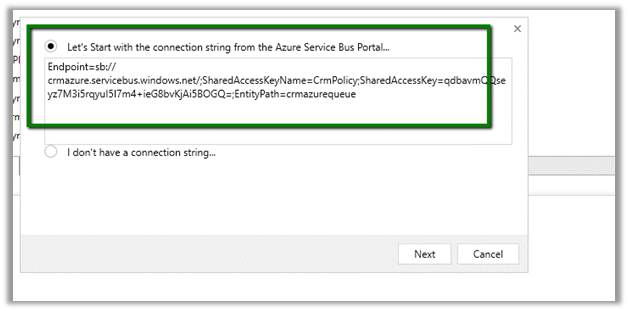
It will auto populate all the details. Now click on Save.
它将自动填充所有的详细信息,现在点击保存。
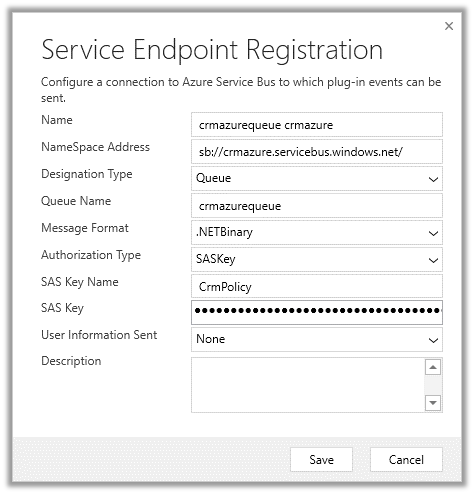
This adds a new service end point
这将会添加一个新的服务终结点
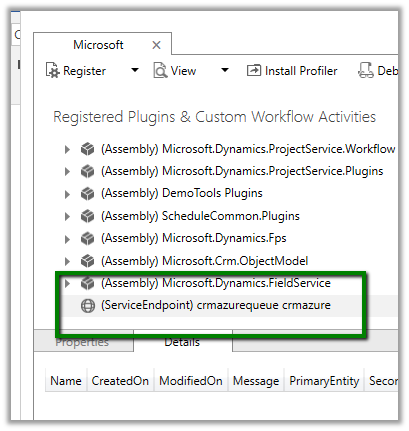
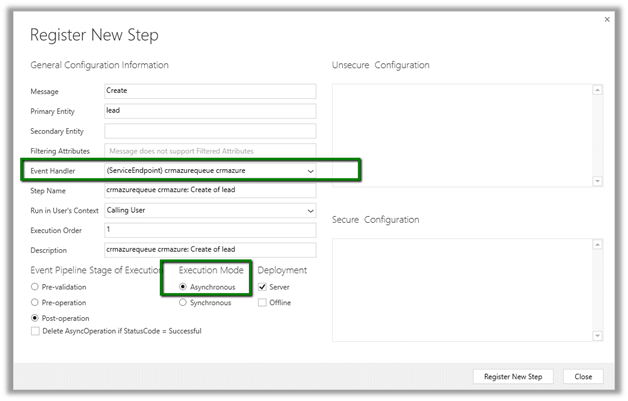
Now register a new step – Entity – Lead and Message – Create.
现在注册一个新的步骤-实体-潜在客户和消息-创建。
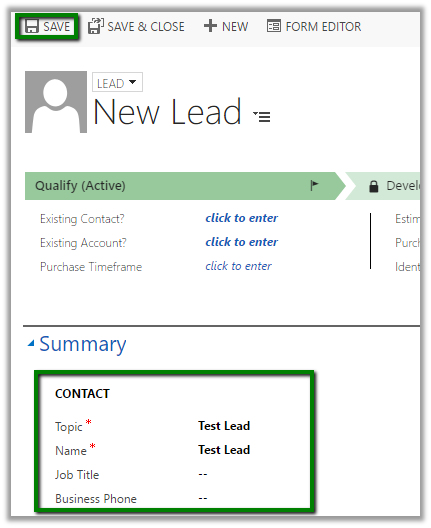
Now to trigger it let us create a lead record in CRM.
现在让我们在CRM里面创建一个潜在客户来触发它。
A corresponding System Job will have the status.
我们看到对应的系统任务状态。

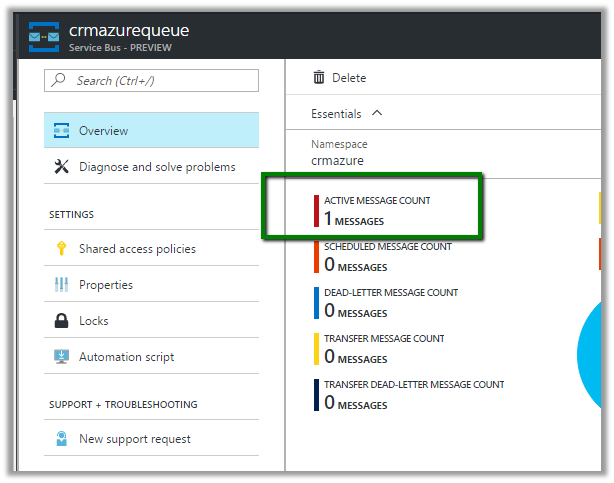
Back in our queue we can see 1 new message added to it.
回到我们的队列可以看到1条消息被添加进去。
To read the message, let us create a simple windows application.
为了读取消息,让我们创建一个简单的windows应用程序。
Install the WindowsAzure.ServiceBus package.
安装WindowsAzure.ServiceBus 包。

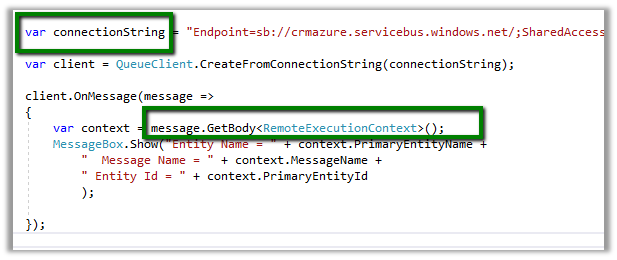
The source code for the queue. Here the connection string will be the same which we had specified in the plugin registration tool. The message body is of type RemoteExecutionContext.
队列的源代码,这里连接字符串会跟我们刚才在插件注册程序里面指定的一样。消息体的类型是RemoteExecutionContext。
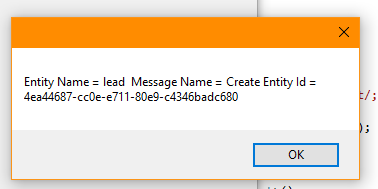
The output.
输出。
Hope it helps..
希望这篇文章能有帮助。