IOC容器装配Bean(xml方式)
1.Spring 提供配置Bean三种实例化方式
1)使用类构造器实例化(默认无参数)
<bean id="bean1" class="cn.itcast.spring.b_instance.Bean1"></bean>
//下面这段配置的含义:调用Bean2Factory的getBean2方法得到bean2<bean id="bean2" class="cn.itcast.spring.b_instance.Bean2Factory" factory-method="getBean2"></bean>
- //先创建工厂实例bean3Facory,再通过工厂实例创建目标bean实例
<bean id="bean3Factory" class="cn.itcast.spring.b_instance.Bean3Factory"></bean><bean id="bean3" factory-bean="bean3Factory" factory-method="getBean3"></bean>
2.Bean的其它属性配置
<bean>元素的id属性和name属性的区别
早期Spring开发中Bean的 id属性 ,遵守xml语法id约束
* id 的命名要满足XML对ID属性命名规范 必须以字母开始,可以使用字母、数字、连字符、下划线、句话、冒号。
* 使用name属性,就可以使用很多特殊字符,早期在struts1和spring整合 ,如<bean name="/login" class="....LoginAction" /> name中含有/ ,使用id会报错。
**如果元素没有id只有name ,name 属性值可以作为id 使用
<bean>元素scope属性
* scope="singleton" 单例 ,在Spring IoC容器中仅存在一个Bean实例 (默认的scope)* scope="prototype" 多例 ,每次从容器中调用Bean时,都返回一个新的实例,即每次调用getBean()时 ,相当于执行new XxxBean()* scope="request" 用于web开发,将Bean放入request范围 ,request.setAttribute("xxx") , 在同一个request 获得同一个Bean* scope="session" 用于web开发,将Bean 放入Session范围,在同一个Session 获得同一个Bean* scope="globalSession" 一般用于Porlet应用环境 , 分布式系统存在全局session概念 ,如果不是porlet环境,globalSession 等同于Session
如果在applicationContext.cfg.xml配置文件中的bean,未指定scope属性,那么默认为singleton
3.Bean的生命周期
1)在配置 <bean> 元素,通过 init-method 指定Bean的初始化方法,通过 destroy-method 指定Bean销毁方法
<beanid="lifeCycleBean"class="cn.itcast.spring.d_lifecycle.LifeCycleBean"init-method="setup"destroy-method="teardown"></bean>
package cn.itcast.spring.d_lifecycle;publicclassLifeCycleBean{publicvoid setup(){System.out.println("初始化...");}publicvoid teardown(){System.out.println("销毁....");}}
@Test// 测试Spring 生命周期publicvoid demo(){ClassPathXmlApplicationContext applicationContext =newClassPathXmlApplicationContext("applicationContext.xml");LifeCycleBean lifeCycleBean =(LifeCycleBean) applicationContext.getBean("lifeCycleBean");System.out.println(lifeCycleBean);}
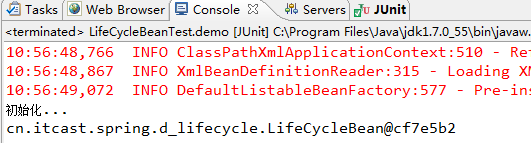
我们发现:运行完程序,销毁方法没有执行。
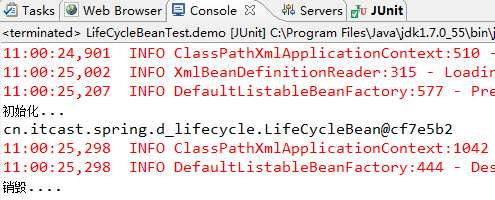
解析:这个程序运行了,但是Spring容器并不知道何时销毁。
举个例子:例如把一个Spring容器交给tomcat管理时,tomcat停止时,他就会自动调用destroy方法。那么我们就自己来调用这个方法:applicationContext.close();
* destroy-method 只对 scope="singleton" 有效
* 销毁方法,必须关闭ApplicationContext对象(手动调用),才会被调用
ClassPathXmlApplicationContext applicationContext = new ClassPathXmlApplicationContext("applicationContext.xml");applicationContext.close();
2)Bean的完整生命周期 (十一步骤)【了解内容,但是对于spring内部操作理解有一定帮助】
①instantiate bean对象实例化
②populate properties 封装属性
③如果Bean实现BeanNameAware 执行 setBeanName
④如果Bean实现BeanFactoryAware 或者 ApplicationContextAware 设置工厂 setBeanFactory 或者上下文对象 setApplicationContext
⑤如果存在类实现 BeanPostProcessor(后处理Bean) ,执行postProcessBeforeInitialization,BeanPostProcessor接口提供钩子函数,用来动态扩展修改Bean。(程序自动调用后处理Bean)
publicclassMyBeanPostProcessorimplementsBeanPostProcessor{publicObject postProcessAfterInitialization(Object bean,String beanName)throwsBeansException{System.out.println("第八步:后处理Bean,after初始化。");//后处理Bean,在这里加上一个动态代理,就把这个Bean给修改了。return bean;//返回bean,表示没有修改,如果使用动态代理,返回代理对象,那么就修改了。}publicObject postProcessBeforeInitialization(Object bean,String beanName)throwsBeansException{System.out.println("第五步:后处理Bean的:before初始化!!");//后处理Bean,在这里加上一个动态代理,就把这个Bean给修改了。return bean;//返回bean本身,表示没有修改。}}- 注意:这个前处理Bean和后处理Bean会对所有的Bean进行拦截。
⑦调用<bean init-method="init"> 指定初始化方法 init
⑧如果存在类实现 BeanPostProcessor(处理Bean) ,执行postProcessAfterInitialization
⑨执行业务处理
⑩如果Bean实现 DisposableBean 执行 destroy
⑪调用<bean destroy-method="customerDestroy"> 指定销毁方法 customerDestroy
* 为了能够比较清晰的看到上面的每一个步骤,我们模拟真实开发场景,定义一个接口和一个实现类
// 用户数据库操作publicinterfaceUserDAO{publicvoid add();publicvoid search();}
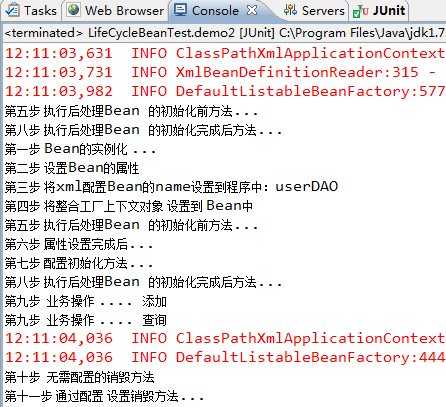
// 实现DAO 方法publicclassUserDAOImplimplementsUserDAO,BeanNameAware,ApplicationContextAware,InitializingBean,DisposableBean{privateString company;publicUserDAOImpl(){System.out.println("第一步 Bean的实例化 ...");}// 设置companypublicvoid setCompany(String company){System.out.println("第二步 设置Bean的属性");this.company = company;}- //如果实现了BeanNameAware接口,那么会将bean的那么设置到程序中,也就是userDao
publicvoid setBeanName(String beanName){System.out.println("第三步 将xml配置Bean的name设置到程序中:"+ beanName);// <bean id="userDAO"class="cn.itcast.spring.d_lifecycle.UserDAOImpl"></bean>}publicvoid setApplicationContext(ApplicationContext applicationContext)throwsBeansException{System.out.println("第四步 将整合工厂上下文对象设置到 Bean中 ");}publicvoid afterPropertiesSet()throwsException{System.out.println("第六步 属性设置完成后...");}publicvoid setup(){System.out.println("第七步 配置初始化方法...init-method='setup'");}- //Bean初始化完毕,如果有业务方法,那么就开始执行,以下方法模拟业务方法。
- //这是在接口中定义的业务操作方法
publicvoid add(){System.out.println("第九步 业务操作 .... 添加");}- //这是在接口中定义的业务操作方法
publicvoid search(){System.out.println("第九步 业务操作 .... 查询");}//destroy方法必须自己调用closed方法后才会执行。publicvoid destroy()throwsException{// 这个destroy无需配置,实现这个接口,就会自动的去调用destroy方法。System.out.println("第十步 无需配置的销毁方法");}publicvoid teardown(){System.out.println("第十一步 通过配置设置销毁方法...");}}
配置文件applicationContext.cfg.xml:
<?xml version="1.0" encoding="UTF-8"?><!-- 引入约束 来自xsd-config.html文件 --><beansxmlns="http://www.springframework.org/schema/beans"xmlns:p="http://www.springframework.org/schema/p"xmlns:xsi="http://www.w3.org/2001/XMLSchema-instance"xsi:schemaLocation="http://www.springframework.org/schema/beans http://www.springframework.org/schema/beans/spring-beans.xsd"><beanid="userDAO"class="cn.itcast.spring.d_lifecycle.UserDAOImpl"init-method="setup"destroy-method="teardown"><!--第二步,设置bean的属性--><propertyname="company"value="itcast"></property></bean><!-- 必须配置后处理Bean , bean没有id 因为由 Spring框架内部调用 --><beanclass="cn.itcast.spring.d_lifecycle.MyBeanPostProccessor"></bean></beans>
@Test// 测试Spring 生命周期publicvoid demo2(){ClassPathXmlApplicationContext applicationContext =newClassPathXmlApplicationContext("applicationContext.xml");UserDAO userDAO =(UserDAO) applicationContext.getBean("userDAO");- //执行业务方法
userDAO.add();userDAO.search();// 关闭工厂applicationContext.close();}
分析:
前面前处理Bean和后处理Bean被执行多次,表示:钩子函数会对每个bean进行拦截(前面已经配置了其他的几个Bean,每个Bean都执行2次à前处理Bean后处理bean)。故而执行多次,反复连续的输出五,八。
第三步和第四步,使我们写的Bean了解Spring容器
第五步和第八步,使用BeanPostProcessor 就是钩子函数,作用用来对Bean对象进行扩展。
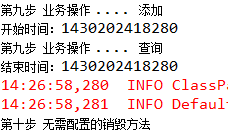
问题: 在userDAO对象所有方法上 添加运行时间监控 【用后处理bean对目标bean在构造时进行代理,对原有方法进行扩展增强!】
我们可以利用后处理bean(BeanPostProcessor)与动态代理一起完成此功能,我们只需要在后处理bean的postProcessAfterInitialization方法里面改动代码即可
/*** bean 就是对象实例 beanName 就是xml 配置Bean的id 或者 name*/publicObject postProcessAfterInitialization(finalObject bean,String beanName)throwsBeansException{System.out.println("第八步 执行后处理Bean 的初始化完成后方法...");if(beanName.equals("userDAO")){// 需要进行时间监控BeanObject proxy =Proxy.newProxyInstance(bean.getClass().getClassLoader(), bean.getClass().getInterfaces(),newInvocationHandler(){publicObject invoke(Object proxy,Method method,Object[] args)throwsThrowable{if(method.getName().equals("search")){// 增强search方法System.out.println("开始时间:"+System.currentTimeMillis());Object result = method.invoke(bean, args);System.out.println("结束时间:"+System.currentTimeMillis());return result;}else{// 不加强return method.invoke(bean, args);}}});return proxy;- }
return bean;- }
==========================================================================================================================
4.Spring的Bean属性的依赖注入
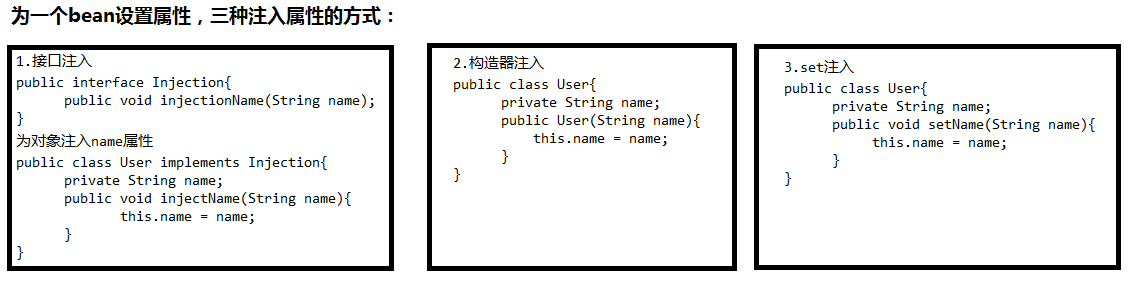
*spring支持构造器注入和setter方法注入
第一种 构造器注入,通过 <constructor-arg> 元素完成注入
/*** 轿车 (构造函数注入属性)*/publicclassCar{privateString name;privatedouble price;publicCar(String name,double price){super();this.name = name;this.price = price;}@OverridepublicString toString(){return"Car [name="+ name +", price="+ price +"]";}}
<!-- 构造器注入 --><beanid="car"class="cn.itcast.spring.e_di.Car"><!-- 通过构造器参数,完成属性注入 --><constructor-argindex="0"type="java.lang.String"value="保时捷"></constructor-arg><!-- 第一个参数 String类型参数 --><constructor-argindex="1"type="double"value="1000000"></constructor-arg></bean>
第二种 setter方法注入, 通过<property> 元素完成注入 【开发中常用方式】
/*** 通过setter方法完成属性注入*/publicclassCar2{privateString name;privatedouble price;// 注入属性时 只需要提供set方法publicvoid setName(String name){this.name = name;}publicvoid setPrice(double price){this.price = price;}@OverridepublicString toString(){return"Car2 [name="+ name +", price="+ price +"]";}}
<!-- setter方法注入 --><beanid="car2"class="cn.itcast.spring.e_di.Car2"><!-- 通过 property 元素完成属性注入 --><propertyname="name"value="宝马"></property><propertyname="price"value="500000"></property></bean>
// 员工类publicclassEmployee{privateString name;// 引入Car2对象privateCar2 car2;publicvoid setName(String name){this.name = name;}publicvoid setCar2(Car2 car2){this.car2 = car2;}@OverridepublicString toString(){return"Employee [name="+ name +", car2="+ car2 +"]";}}
<beanid="employee"class="cn.itcast.spring.e_di.Employee"><propertyname="name"value="张三"></property><!--ref引用其他Bean的id或者name--><propertyname="car2"ref="car2"></property></bean>
* 名称空间 p的使用 (Spring2.5 新特性)
spring2.5版本 引入名称空间p, 简化属性注入的配置
p:<属性名>="xxx" 引入常量值
p:<属性名>-ref="xxx" 引用其它Bean对象
1)引入p名称空间
<beansxmlns="http://www.springframework.org/schema/beans"xmlns:p="http://www.springframework.org/schema/p"xmlns:xsi="http://www.w3.org/2001/XMLSchema-instance"xsi:schemaLocation="http://www.springframework.org/schema/beans http://www.springframework.org/schema/beans/spring-beans.xsd">
<bean id="car2" class="cn.itcast.spring.e_di.Car2"><!-- 通过 property 元素完成属性注入 --><property name="name" value="宝马"></property><property name="price" value="500000"></property></bean><bean id="employee" class="cn.itcast.spring.e_di.Employee"><property name="name" value="张三"></property><property name="car2" ref="car2"></property> <!-- ref引用其他Bean的id或者name --></bean>
<bean id="car2" class="cn.itcast.spring.e_di.Car2" p:name="宝马" p:price="1000000"></bean><bean id="employee" class="cn.itcast.spring.e_di.Employee" p:name="李四" p:car2-ref="car2"></bean>
* spring3.0之后引入 spEL 表达式
1) 完成对象之间注入
<property name="car2" ref="car2"></property>
<property name="car2" value="#{car2}"></property>
// 单独数据BeanpublicclassCarInfo{publicString getName(){return"奇瑞QQ";}publicdouble caculatePrice(){return200000;}}
<bean id="carInfo" class="cn.itcast.spring.e_di.CarInfo"></bean>
<bean id="car2_2" class="cn.itcast.spring.e_di.Car2"><property name="name" value="#{carInfo.name}"></property></bean>
3) 使用另一个Bean方法完成注入
<bean id="carInfo" class="cn.itcast.spring.e_di.CarInfo"></bean><bean id="car2_2" class="cn.itcast.spring.e_di.Car2"><property name="name" value="#{carInfo.name}"></property><property name="price" value="#{carInfo.caculatePrice()}"></property></bean>
5. 集合属性的注入
spring提供专门标签完成 List、Set、Map、Properties 等集合元素属性注入
1) 注入List (数组)
<property name="hobbies"><list><!-- <value>注入简单类型,<ref />注入复杂类型 --><value>音乐</value><value>体育</value></list></property>
2) 注入Set
<property name="numbers"><set><value>10</value><value>6</value><value>15</value></set></property>
3) 注入Map
<property name="map"><map><!-- 复杂类型<entry key-ref="" value-ref=""></entry> --><entry key="name" value="itcast"></entry><entry key="address" value="北京"></entry></map></property>
4) 注入Properties
* java.utils.Properties 类继承 java.utils.HashTable
Properties key和value都是String类型
例如:
<property name="properties"><props><prop key="company">传智播客</prop><prop key="pnum">100</prop></props></property>
6.在Spring框架中引入多个XML配置文件
第一种 并列引入多个XML
ApplicationContext applicationContext = new ClassPathXmlApplicationContext("beans1.xml", "beans2.xml");
ApplicationContext applicationContext = new ClassPathXmlApplicationContext("applicationContext.xml");
<import resource="classpath:bean1.xml"/><import resource="classpath:bean2.xml"/>
在开发中主要使用第二种 , 将配置文件分离配置,便于维护管理