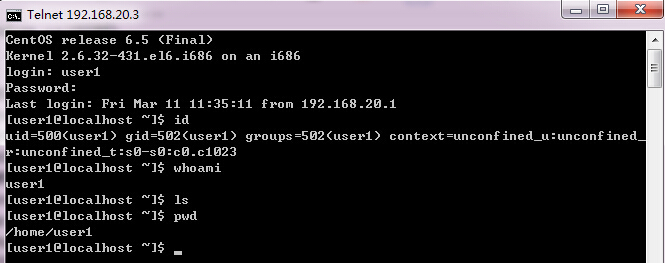
windows客户端如果通过cmd窗口连接到远程linux服务器,可以使用telnet;
centos系统默认telnet 23端口是关闭的。
服务器本地使用nmap ip地址 -p 23 查看telnet状态是关闭的;
[root@localhost ~]# nmap 192.168.20.3 -p 23
Starting Nmap 5.51 ( http://nmap.org ) at 2016-03-11 09:04 CST
Nmap scan report for 192.168.20.3
Host is up (0.00014s latency).
PORT STATE SERVICE
23/tcp closed telnet
打开telnet端口的步骤如下:
1、服务器安装telnet包(telnet-server包依赖xinetd包)
|
1
|
# yum install telnet telnet-server -y |
2、修改telnet配置文件
|
1
|
# vi /etc/xinetd.d/telnet |
修改disable=yes 改为no
service telnet
{
flags = REUSE
socket_type = stream
wait = no
user = root
server = /usr/sbin/in.telnetd
log_on_failure += USERID
disable = no
}
保存退出,重启xinted服务
|
1
2
3
|
[root@localhost ~]# /etc/init.d/xinetd restartStopping xinetd: [ OK ]Starting xinetd: [ OK ] |
再次扫描发现状态变为open
[root@localhost ~]# nmap 192.168.20.3 -p 23
Starting Nmap 5.51 ( http://nmap.org ) at 2016-03-11 10:08 CST
Nmap scan report for 192.168.20.3
Host is up (0.00051s latency).
PORT STATE SERVICE
23/tcp open telnet
查看监听的端口23也有了
[root@localhost ~]# netstat -nlt
Active Internet connections (only servers)
Proto Recv-Q Send-Q Local Address Foreign Address State
tcp 0 0 0.0.0.0:3306 0.0.0.0:* LISTEN
tcp 0 0 0.0.0.0:22 0.0.0.0:* LISTEN
tcp 0 0 127.0.0.1:25 0.0.0.0:* LISTEN
tcp 0 0 :::22 :::* LISTEN
tcp 0 0 :::23 :::* LISTEN
tcp 0 0 ::1:25 :::* LISTEN
3、iptables添加规则允许23端口通过,保存规则,并重启iptables服务
|
1
2
3
|
# iptables -A INPUT -m state --state NEW -m tcp -p tcp --dport 23 -j ACCEPT# /etc/init.d/iptables save# /etc/init.d/iptables restart |
4、windows本地打开cmd窗口
输入命令:telnet ip地址 连接到远程linux服务器
默认情况下telnet连接后不能使用超级用户,如果要使用超级用户root登录,有2种方法可以实现:
第一种:# mv /etc/securetty /etc/securetty.bak 这样就可以使用root登录,非常不建议这样操作!!!!
第二种:# vi /etc/securetty
添加
pts/0
pts/ 1
pts/2
pts/3
如果登录的用户比较多,可以添加更多的pts/**
这样添加的作用,是允许root从pts/0到pts/3这几个终端登录;
相比网上其他的方法彻底移除认证的方法,此方法没有破坏linux安全验证机制,较为安全!
建议使用普通用户登录,su - root 进行切换,为了安全起见,不直接使用root登录;
如果非要使用root登录,建议使用SSH工具;
|
1
2
3
4
5
6
7
8
9
10
|
CentOS release 6.5 (Final)Kernel 2.6.32-431.el6.i686 on an i686login: user1Password:Last login: Fri Mar 11 11:35:11 from 192.168.20.1[user1@localhost ~]$ iduid=500(user1) gid=502(user1) groups=502(user1) context=unconfined_u:unconfined_r:unconfined_t:s0-s0:c0.c1023[user1@localhost ~]$ whoamiuser1 |

