写在开头:这个实验和matlab手写神经网络实现识别手写数字一样。
实验说明
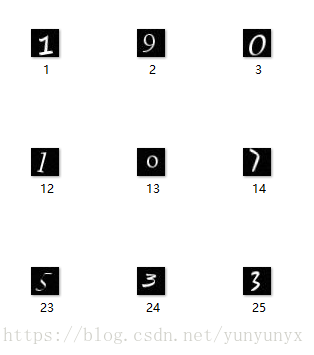
一直想自己写一个神经网络来实现手写数字的识别,而不是套用别人的框架。恰巧前几天,有幸从同学那拿到5000张已经贴好标签的手写数字图片,于是我就尝试用matlab写一个网络。
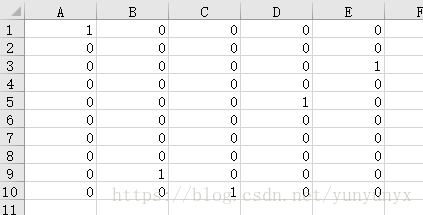
实验数据:5000张手写数字图片(.jpg),图片命名为1.jpg,2.jpg…5000.jpg。还有一个放着标签的excel文件。
数据处理:前4000张作为训练样本,后1000张作为测试样本。
图片处理:用matlab的imread()函数读取图片的灰度值矩阵(28,28),然后把每张图片的灰度值矩阵reshape为(28*28,1),然后把前4000张图片的灰度值矩阵合并为x_train,把后1000张图片的灰度值矩阵合并为x_test。
神经网络设计
网络层设计:一层隐藏层,一层输出层
输入层:一张图片的灰度值矩阵reshape后的784个数,也就是x_train中的某一列
输出层:(10,1)的列向量,其中列向量中最大的数所在的索引+1就是预测的数字
激励函数:sigmoid函数(公式)
更新法则:后向传播算法(参考)
测试:统计预测正确的个数
网络实现
- 函数说明:读图片的函数(read_photo() )、读excel的函数(read_excel(path) )、修正函数(layerout(w,b,x) )、训练函数(mytrain(x_train,y_train) )、测试函数(mytest(x_test,y_test,w,b,w_h,b_h) )、主函数(main() )
具体代码如下:
# -*- coding: utf-8 -*-

from PIL import Image

from pylab import *

import numpy as np

import xlrd


#读取图片的灰度值矩阵
def read_photo():
    for i in range(5000):
        j = i+1
        j = str(j)
        st = '.jpg'
        j = j+st
        im1 = array(Image.open(j))
        #(28,28)-->(28*28,1)
        im1 = im1.reshape((784,1))
        #把所有的图片灰度值放到一个矩阵中
        #一列代表一张图片的信息
        if i == 0:
            im = im1
        else:
            im = np.hstack((im,im1))
    return im


#读取excel文件内容(path为文件路径)
def read_excel(path):
    # 获取所有sheet
    workbook = xlrd.open_workbook(path)
    sheet_names = workbook.sheet_names()

    # 根据sheet索引或者名称获取sheet内容
    for sheet_name in sheet_names:
        isheet = workbook.sheet_by_name(sheet_name)

        #获取该sheet的列数
        ncols = isheet.ncols
        #获取每一列的内容
        for i in range(ncols):
            if i == 0:
                xl1 = isheet.col_values(i)
                xl1 = np.array(xl1)
                xl1 = xl1.reshape((10,1))
                xl = xl1
            else:
                xl1 = isheet.col_values(i)
                xl1 = np.array(xl1)
                xl1 = xl1.reshape((10,1))
                xl = np.hstack((xl,xl1))
    return xl

#layerout函数
def layerout(w,b,x):
    y = np.dot(w,x) + b
    t = -1.0*y
    # n = len(y)
    # for i in range(n):
        # y[i]=1.0/(1+exp(-y[i]))
    y = 1.0/(1+exp(t))
    return y


#训练函数
def mytrain(x_train,y_train):
    '''
    设置一个隐藏层,784-->隐藏层神经元个数-->10
    '''

    step=int(input('mytrain迭代步数:'))
    a=double(input('学习因子:'))
    inn = 784  #输入神经元个数
    hid = int(input('隐藏层神经元个数:'))#隐藏层神经元个数
    out = 10  #输出层神经元个数

    w = np.random.randn(out,hid)
    w = np.mat(w)
    b = np.mat(np.random.randn(out,1))
    w_h = np.random.randn(hid,inn)
    w_h = np.mat(w_h)
    b_h = np.mat(np.random.randn(hid,1))

    for i in range(step):
        #打乱训练样本
        r=np.random.permutation(4000)
        x_train = x_train[:,r]
        y_train = y_train[:,r]
        #mini_batch
        for j in range(400):
            #取batch为10  更新取10次的平均值
            x = np.mat(x_train[:,j])
            x = x.reshape((784,1))
            y = np.mat(y_train[:,j])
            y = y.reshape((10,1))
            hid_put = layerout(w_h,b_h,x)
            out_put = layerout(w,b,hid_put)

            #更新公式的实现
            o_update = np.multiply(np.multiply((y-out_put),out_put),(1-out_put))
            h_update = np.multiply(np.multiply(np.dot((w.T),np.mat(o_update)),hid_put),(1-hid_put))

            outw_update = a*np.dot(o_update,(hid_put.T))
            outb_update = a*o_update
            hidw_update = a*np.dot(h_update,(x.T))
            hidb_update = a*h_update

            w = w + outw_update
            b = b+ outb_update
            w_h = w_h +hidw_update
            b_h =b_h +hidb_update

    return w,b,w_h,b_h

#test函数
def mytest(x_test,y_test,w,b,w_h,b_h):
    '''
    统计1000个测试样本中有多少个预测正确了
    预测结果表示:10*1的列向量中最大的那个数的索引+1就是预测结果了
    '''
    sum = 0
    for k in range(1000):
        x = np.mat(x_test[:,k])
        x = x.reshape((784,1))

        y = np.mat(y_test[:,k])
        y = y.reshape((10,1))

        yn = np.where(y ==(np.max(y)))
        # print(yn)
        # print(y)
        hid = layerout(w_h,b_h,x);
        pre = layerout(w,b,hid);
        #print(pre)
        pre = np.mat(pre)
        pre = pre.reshape((10,1))
        pren = np.where(pre ==(np.max(pre)))
        # print(pren)
        # print(pre)
        if yn == pren:
            sum += 1

    print('1000个样本,正确的有:',sum)

def main():
    #获取图片信息
    im = read_photo()
    immin = im.min()
    immax = im.max()

    im = (im-immin)/(immax-immin)

    #前4000张图片作为训练样本
    x_train = im[:,0:4000]
    #后1000张图片作为测试样本
    x_test = im[:,4000:5000]

    #获取label信息
    xl = read_excel('./label.xlsx')

    y_train = xl[:,0:4000]
    y_test = xl[:,4000:5000]

    print("---------------------------------------------------------------")
    w,b,w_h,b_h = mytrain(x_train,y_train)
    mytest(x_test,y_test,w,b,w_h,b_h)
    print("---------------------------------------------------------------")


if __name__ == '__main__':
    main()
实验结果
---------------------------------------------------------------
mytrain迭代步数:300
学习因子:0.3
隐藏层神经元个数:28
1000个样本,正确的有: 933
---------------------------------------------------------------
迭代300步,正确率就有93.3%啦,还不错的正确率~