一、NFS服务介绍
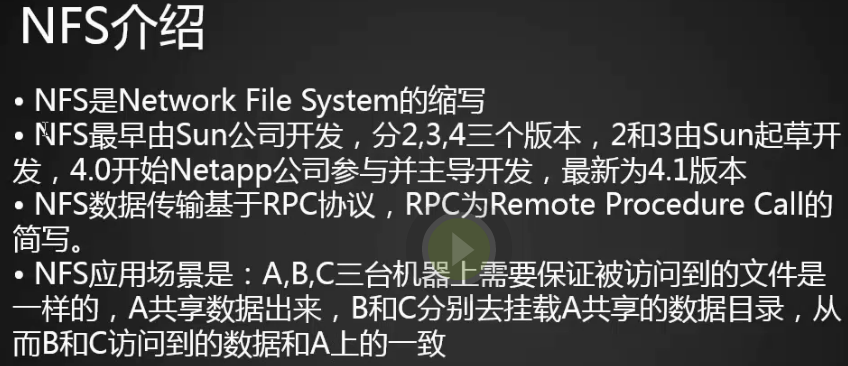
NFS是 Network File system的缩写
分为2.3.4三个版本,2和3由sun公司起草开发,4.0开始netapp公司参与并主导开发
NFS数据传输基于RPC协议:
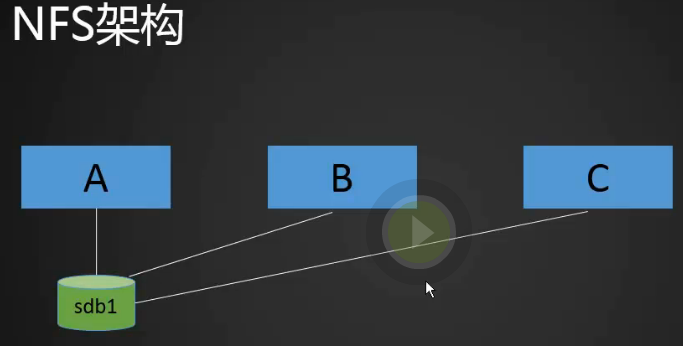
应用场景:A,B,C三台机器上需要保证被访问到的文件是一样的,A共享数据出来,B和C分别取挂载A共享的数据目录,从而B和C访问到的数据和A上的一致。
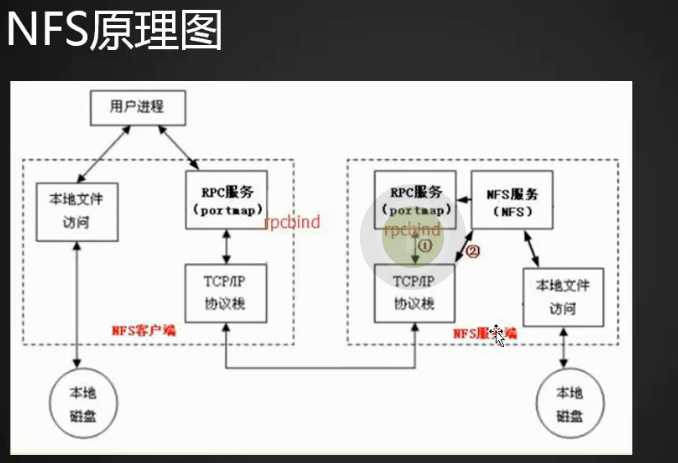
NFS原理图:(NFS服务不监听任何端口,但是RPC服务中的模块,rpcbind默认监听111端口,)
NFS服务端安装配置
1.首先需要两台机器,一个为服务端(ip10.21.95.122)一个为客户端(ip10.21.95.58)。
2.服务端安装两个包
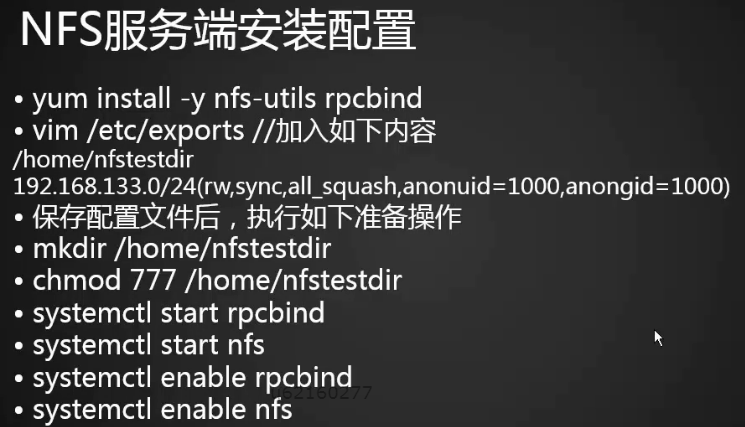
[root@bogon ~]# yum install -y nfs-utils rpcbind
3.客户端安装包
[root@sunyujun02 ~]# yum install -y nfs-utils
4.接下来在服务端编辑:
[root@fuwuduan ~]# vim /etc/exports [root@fuwuduan ~]# /home/nfstestdir 10.21.95.0/24(rw,sync,all_squash,anonuid=1000,anongid=1000)
# 第一段来定义共享目录的绝对路径 第二段指定ip和一些选项
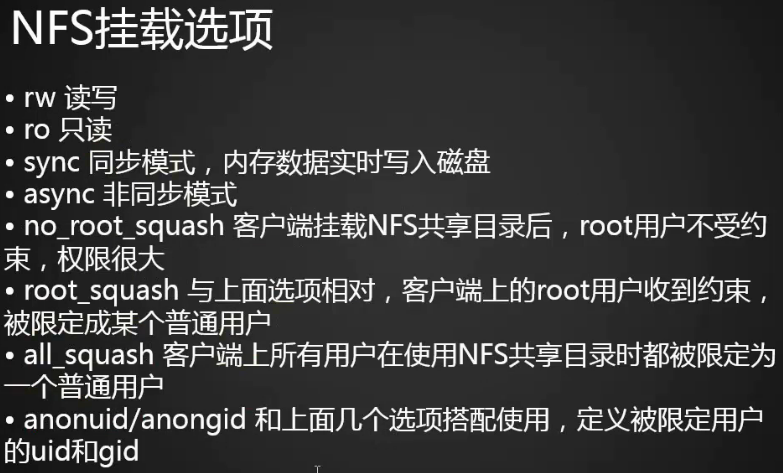
# rw 读写
# ro 只读
# sync 同步模式,内存数据实时写入磁盘
# async 非同步模式
# no_root_squash 客户端挂载NFS共享目录后,root用户不受约束,权限很大
# root_squash 与上面选项相对,客户端上的root用户收到约束,被限定成某个普通用户
# all_squash 客户端上所有用户在使用NFS共享目录时都被限定为一个普通用户
# anonuid/anongid 和上面几个选项搭配使用,定义被限定用户的uid和gid
5.保存配置文件以后,因为共享目录不存在,所以做以下操作。
[root@fuwuduan ~]# mkdir /home/nfstestdir
[root@fuwuduan ~]# chmod 777 /home/nfstestdir/
6.查看rpcbind所用的111端口已经启动
[root@fuwuduan ~]# netstat -lntp
Active Internet connections (only servers)
Proto Recv-Q Send-Q Local Address           Foreign Address         State       PID/Program name
tcp        0      0 0.0.0.0:111             0.0.0.0:*               LISTEN      1/systemd
tcp        0      0 0.0.0.0:80              0.0.0.0:*               LISTEN      75879/nginx: worker
tcp        0      0 192.168.122.1:53        0.0.0.0:*               LISTEN      4161/dnsmasq
tcp        0      0 0.0.0.0:22              0.0.0.0:*               LISTEN      1475/sshd
tcp        0      0 127.0.0.1:631           0.0.0.0:*               LISTEN      1477/cupsd
tcp        0      0 127.0.0.1:25            0.0.0.0:*               LISTEN      2778/master
tcp        0      0 0.0.0.0:443             0.0.0.0:*               LISTEN      75879/nginx: worker
tcp6       0      0 :::3306                 :::*                    LISTEN      3849/mysqld
tcp6       0      0 :::111                  :::*                    LISTEN      1/systemd
tcp6       0      0 :::22                   :::*                    LISTEN      1475/sshd
tcp6       0      0 ::1:631                 :::*                    LISTEN      1477/cupsd
tcp6       0      0 ::1:25                  :::*                    LISTEN      2778/master
[root@fuwuduan ~]#
7.客户端和服务端都启动rpcbind
[root@fuwuduan ~]# systemctl start rpcbind
[root@fuwuduan ~]# ps aux|grep rpc
root        752  0.0  0.0      0     0 ?        S<   2月19   0:00 [rpciod]
rpc       37786  0.6  0.1  64952  1040 ?        Ss   17:20   0:00 /sbin/rpcbind -w
root      37788  0.0  0.0 112684   976 pts/2    S+   17:20   0:00 grep --color=auto rpc
[root@fuwuduan ~]#
[root@sunyujun02 ~]# systemctl start rpcbind
[root@sunyujun02 ~]# ps aux|grep rpc
root        818  0.0  0.0      0     0 ?        S<   2月20   0:00 [rpciod]
rpc       47335  0.2  0.1  64936  1052 ?        Ss   17:20   0:00 /sbin/rpcbind -w
root      47337  0.0  0.0 112668   976 pts/1    R+   17:20   0:00 grep --color=auto rpc
[root@sunyujun02 ~]#
8.服务端启动nfs
[root@fuwuduan ~]# systemctl start nfs
[root@fuwuduan ~]# ps aux|grep nfs
root      37863  0.0  0.0      0     0 ?        S<   17:22   0:00 [nfsd4]
root      37864  0.0  0.0      0     0 ?        S<   17:22   0:00 [nfsd4_callbacks]
root      37872  0.0  0.0      0     0 ?        S    17:22   0:00 [nfsd]
root      37873  0.0  0.0      0     0 ?        S    17:22   0:00 [nfsd]
root      37874  0.0  0.0      0     0 ?        S    17:22   0:00 [nfsd]
root      37875  0.0  0.0      0     0 ?        S    17:22   0:00 [nfsd]
root      37876  0.0  0.0      0     0 ?        S    17:22   0:00 [nfsd]
root      37877  0.0  0.0      0     0 ?        S    17:22   0:00 [nfsd]
root      37878  0.0  0.0      0     0 ?        S    17:22   0:00 [nfsd]
root      37879  0.0  0.0      0     0 ?        S    17:22   0:00 [nfsd]
root      37895  0.0  0.0 112680   972 pts/2    R+   17:22   0:00 grep --color=auto nfs
[root@fuwuduan ~]#
9.启动nfs后发现rpc.statd也自动启动了
[root@fuwuduan ~]# ps aux|grep rpc
root        752  0.0  0.0      0     0 ?        S<   2月19   0:00 [rpciod]
rpc       37786  0.0  0.1  64952  1412 ?        Ss   17:20   0:00 /sbin/rpcbind -w
rpcuser   37852  0.0  0.1  44464  1828 ?        Ss   17:22   0:00 /usr/sbin/rpc.statd
root      37853  0.0  0.0  42560   948 ?        Ss   17:22   0:00 /usr/sbin/rpc.mountd
root      37854  0.0  0.0  21384   416 ?        Ss   17:22   0:00 /usr/sbin/rpc.idmapd
root      37939  0.0  0.0 112684   972 pts/2    R+   17:23   0:00 grep --color=auto rpc
[root@fuwuduan ~]#
10.设置开机启动
[root@fuwuduan ~]# systemctl enable nfs
Created symlink from /etc/systemd/system/multi-user.target.wants/nfs-server.service to /usr/lib/systemd/system/nfs-server.service.
[root@fuwuduan ~]#
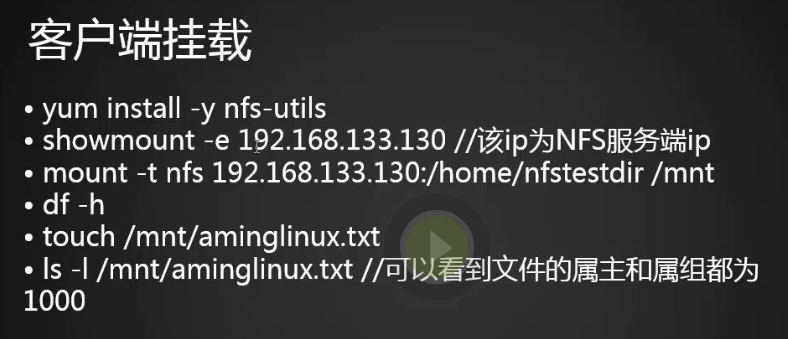
11.客户端挂载
12.客户端测试提示错误
[root@sunyujun02 ~]# showmount -e 10.21.95.122
clnt_create: RPC: Port mapper failure - Unable to receive: errno 113 (No route to host)
我们发现报错,这是由于网络不通造成,是由防火墙导致我,所以我们把客户端和服务端的防火墙和selinux关闭
13.关掉防火墙(最好把服务端和客户端防火墙都关掉)
[root@fuwuduan ~]# systemctl stop firewalld
[root@fuwuduan ~]# setenforce 0
14.再次测试成功
[root@sunyujun02 ~]# showmount -e 10.21.95.122
Export list for 10.21.95.122:
/home/nfstestdir 10.21.95.0/24
[root@sunyujun02 ~]#
15.客户端挂载远程nfs到mnt目录下
[root@sunyujun02 ~]# mount -t nfs 10.21.95.122:/home/nfstestdir /mnt/
[root@sunyujun02 ~]#
16.df 查看下
[root@sunyujun02 ~]# df -h
文件系统                       容量  已用  可用 已用% 挂载点
/dev/mapper/centos-root         18G  7.9G  9.6G   46% /
devtmpfs                       474M     0  474M    0% /dev
tmpfs                          489M  144K  489M    1% /dev/shm
tmpfs                          489M   14M  476M    3% /run
tmpfs                          489M     0  489M    0% /sys/fs/cgroup
/dev/sda1                      497M  157M  341M   32% /boot
tmpfs                           98M   24K   98M    1% /run/user/0
/dev/sr0                       4.1G  4.1G     0  100% /run/media/root/CentOS 7 x86_64
10.21.95.122:/home/nfstestdir   18G   13G  5.0G   72% /mnt
[root@sunyujun02 ~]#
17.在客户端新建一个文件试试看是否可以同步到服务端
[root@sunyujun02 ~]# cd /mnt/
[root@sunyujun02 mnt]# ls
[root@sunyujun02 mnt]# touch linux.111
[root@sunyujun02 mnt]# ls -l
总用量 0
-rw-r--r-- 1 sunyujun sunyujun 0 2月  23 11:36 linux.111
[root@sunyujun02 mnt]#
18.服务端成功同步,太神奇了
[root@fuwuduan ~]# cd /home/nfstestdir/
[root@fuwuduan nfstestdir]# ls
linux.111
[root@fuwuduan nfstestdir]#
19.因为配置文件中配置的是uid gid 1000所以文件的所属组、属主也是1000用户sunyujun
[root@fuwuduan nfstestdir]# id sunyujun
uid=1000(sunyujun) gid=1000(sunyujun) 组=1000(sunyujun)
[root@fuwuduan nfstestdir]#
[root@sunyujun02 mnt]# id sunyujun
uid=1000(sunyujun) gid=1000(sunyujun) 组=1000(sunyujun)
[root@sunyujun02 mnt]#
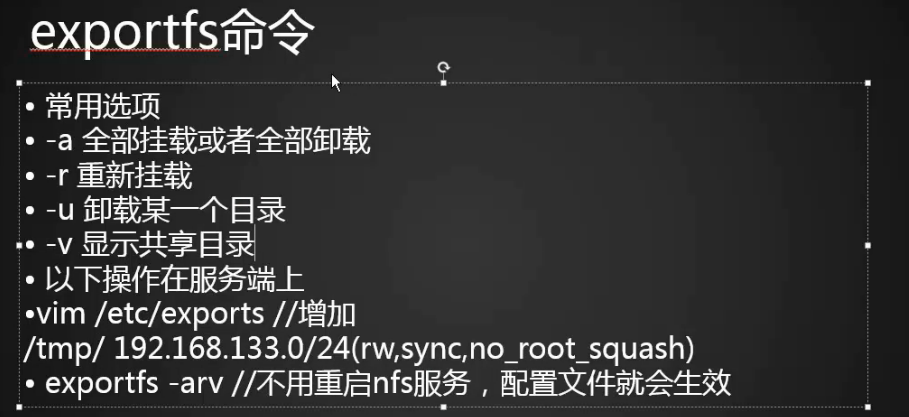
exportfs命令
1. nfs进程不能随便从新启动,如果不得已要重启,必须把客户端的挂载目录卸载,然后在从新启动。这时候就可以用exportfs命令
[root@sunyujun02 mnt]# cd
[root@sunyujun02 ~]# umount /mnt/
[root@sunyujun02 ~]#
2.编辑配置文件,添加tmp目录
[root@fuwuduan nfstestdir]# exportfs -u
/home/nfstestdir
                10.21.95.0/24
[root@fuwuduan nfstestdir]# vim /etc/exports
[root@fuwuduan nfstestdir]#
/home/nfstestdir 10.21.95.0/24(rw,sync,all_squash,anonuid=1000,anongid=1000)
/tmp/ 10.21.95.58/24(rw,sync,no_root_squash)
3.执行命令
[root@fuwuduan nfstestdir]# exportfs -arv
exporting 10.21.95.58/24:/tmp
exporting 10.21.95.0/24:/home/nfstestdir
[root@fuwuduan nfstestdir]#
4.客户端执行showmount发现也生效了
[root@sunyujun02 ~]# !showm
showmount -e 10.21.95.122
Export list for 10.21.95.122:
/tmp             10.21.95.58/24
/home/nfstestdir 10.21.95.0/24
[root@sunyujun02 ~]#
5.客户端重新挂载/tmp/
[root@sunyujun02 ~]# mount -t nfs 10.21.95.122:/tmp/ /mnt/
[root@sunyujun02 ~]# df -h
文件系统                 容量  已用  可用 已用% 挂载点
/dev/mapper/centos-root   18G  7.9G  9.6G   46% /
devtmpfs                 474M     0  474M    0% /dev
tmpfs                    489M  144K  489M    1% /dev/shm
tmpfs                    489M   14M  476M    3% /run
tmpfs                    489M     0  489M    0% /sys/fs/cgroup
/dev/sda1                497M  157M  341M   32% /boot
tmpfs                     98M   24K   98M    1% /run/user/0
/dev/sr0                 4.1G  4.1G     0  100% /run/media/root/CentOS 7 x86_64
10.21.95.122:/tmp         18G   13G  5.0G   72% /mnt
[root@sunyujun02 ~]# ls /mnt/
linux.sock
mysql2.sql
mysql_all.sql
mysqlbak.sql
mysql.sock
php-fcgi.sock
ssh-VkkK9OKJsW89
systemd-private-b091a55929414513a9b7db2f688afef6-colord.service-B5wa5w
systemd-private-b091a55929414513a9b7db2f688afef6-cups.service-RpVATe
systemd-private-b091a55929414513a9b7db2f688afef6-rtkit-daemon.service-gDlUSL
systemd-private-b091a55929414513a9b7db2f688afef6-vmtoolsd.service-TLnArm
test.com.log
test.com.log-20180213
test.com.log-20180222
user.sql
yum_save_tx.2018-02-14.10-18.boB57M.yumtx
yum_save_tx.2018-02-14.10-33.ffqojN.yumtx
[root@sunyujun02 ~]#
6.服务端和客户端同时有了tmp目录
[root@fuwuduan nfstestdir]# ls /tmp/
linux.sock
mysql2.sql
mysql_all.sql
mysqlbak.sql
mysql.sock
php-fcgi.sock
ssh-VkkK9OKJsW89
systemd-private-b091a55929414513a9b7db2f688afef6-colord.service-B5wa5w
systemd-private-b091a55929414513a9b7db2f688afef6-cups.service-RpVATe
systemd-private-b091a55929414513a9b7db2f688afef6-rtkit-daemon.service-gDlUSL
systemd-private-b091a55929414513a9b7db2f688afef6-vmtoolsd.service-TLnArm
test.com.log
test.com.log-20180213
test.com.log-20180222
user.sql
yum_save_tx.2018-02-14.10-18.boB57M.yumtx
yum_save_tx.2018-02-14.10-33.ffqojN.yumtx
[root@fuwuduan nfstestdir]#
7.在客户端新建一个文件1111.txt
[root@sunyujun02 ~]# vim /mnt/1111.txt
[root@sunyujun02 ~]# ls /mnt/
1111.txt
linux.sock
mysql2.sql
mysql_all.sql
mysqlbak.sql
mysql.sock
php-fcgi.sock
ssh-VkkK9OKJsW89
systemd-private-b091a55929414513a9b7db2f688afef6-colord.service-B5wa5w
systemd-private-b091a55929414513a9b7db2f688afef6-cups.service-RpVATe
systemd-private-b091a55929414513a9b7db2f688afef6-rtkit-daemon.service-gDlUSL
systemd-private-b091a55929414513a9b7db2f688afef6-vmtoolsd.service-TLnArm
test.com.log
test.com.log-20180213
test.com.log-20180222
user.sql
yum_save_tx.2018-02-14.10-18.boB57M.yumtx
yum_save_tx.2018-02-14.10-33.ffqojN.yumtx
[root@sunyujun02 ~]#
8.查看服务端同样生成了1111.txt文件并且文件的属组属主都是root就是因为设置了no_root_squash
[root@fuwuduan nfstestdir]# ls /tmp/
1111.txt
linux.sock
mysql2.sql
mysql_all.sql
mysqlbak.sql
mysql.sock
php-fcgi.sock
ssh-VkkK9OKJsW89
systemd-private-b091a55929414513a9b7db2f688afef6-colord.service-B5wa5w
systemd-private-b091a55929414513a9b7db2f688afef6-cups.service-RpVATe
systemd-private-b091a55929414513a9b7db2f688afef6-rtkit-daemon.service-gDlUSL
systemd-private-b091a55929414513a9b7db2f688afef6-vmtoolsd.service-TLnArm
test.com.log
test.com.log-20180213
test.com.log-20180222
user.sql
yum_save_tx.2018-02-14.10-18.boB57M.yumtx
yum_save_tx.2018-02-14.10-33.ffqojN.yumtx
[root@fuwuduan nfstestdir]#
NFS客户端问题
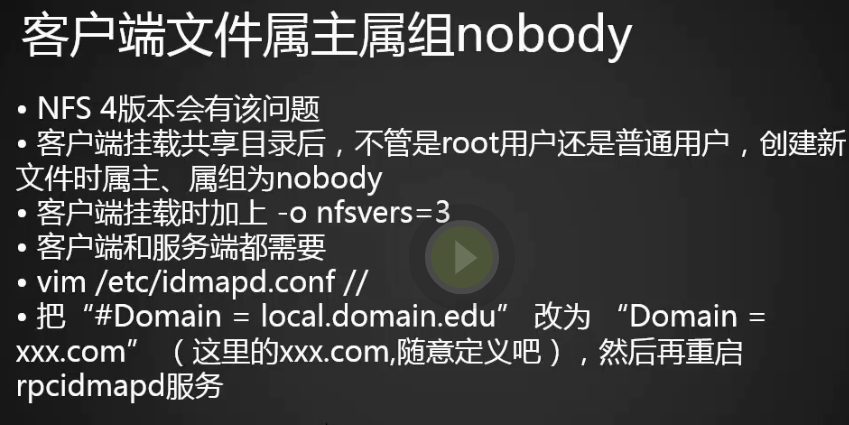
在centos6中遇到的比较多,NFS4版本可能会有该问题
客户端挂载共享目录后,不管是root还是普通用户,创建新文件时所属主,属组为nobody。
解决方法:
第一种:
客户端挂在时加上-o nfsvers=3 (指定NFS版本为3)
[root@sunyujun02 ~]# mount -t nfs -o nfsvers=3 10.21.95.122:/tmp/ /mnt/
[root@sunyujun02 ~]# mount -t nfs -oremount,nfsvers=3 10.21.95.122:/tmp/ /mnt/
[root@sunyujun02 ~]#
第二种:
客户端和服务端都要做:
vim /etc/idmapd.conf //
把“#Domain = local.domain.edu” 改为 “Domain = xxx.com” (这里的xxx.com,随意定义吧),然后再重启rpcidmapd服务