参考:《Mysql高可用实践》------清华大学出版社2020年6月
环境:CentOS Linux release 7.7.1908 (Core)
Mysql:8.0.27
MHA:0.58
说明:本MHA集群搭建从部署mysql开始,不适合于已有mysql集群进行改造的项目,改造项目可参考《Mysql高可用实践》
部署前准备:
mysql-8.0.27下载地址:https://cdn.mysql.com//Downloads/MySQL-8.0/mysql-8.0.27-1.el7.x86_64.rpm-bundle.tar
mha-manager下载地址:https://github.com/yoshinorim/mha4mysql-manager/releases/download/v0.58/mha4mysql-manager-0.58-0.el7.centos.noarch.rpm
mha-node下载地址:https://github.com/yoshinorim/mha4mysql-node/releases/download/v0.58/mha4mysql-node-0.58-0.el7.centos.noarch.rpm
部署架构:

基本配置
4个节点逐台配置hostname和/etc/hosts文件

安装mysql8
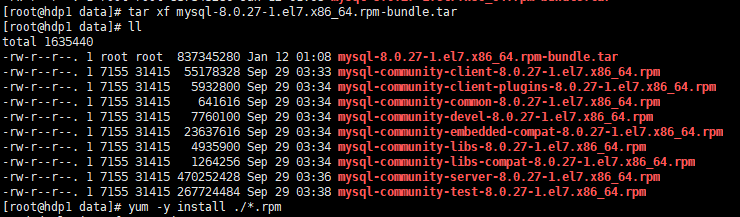
4个节点均创建/data目录,将mysql-8.0.27-1.el7.x86_64.rpm-bundle.tar上传到/data目录下,进行解压安装
我这里使用操作系统镜像制作了本地yum源,用来解决依赖问题,命令见下图
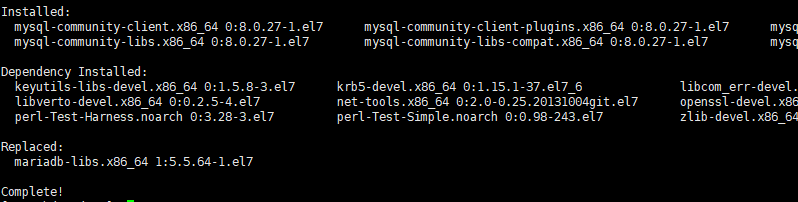
看到如下内容,代表安装完成
配置Mysql异步复制集群
启动hdp2、hdp3、hdp4上的mysql服务,并配置开机自启
systemctl enable mysqld --now
连接3个节点的mysql数据库,数据库默认root密码通过查看日志获取
cat /var/log/mysqld.log |grep password
...... [Server] A temporary password is generated for root@localhost: euBcRQk+3tpa
3个节点数据库修改root用户密码,命令及sql如下
[root@hdp2 data]# mysql -uroot -p
Enter password:
Welcome to the MySQL monitor.  Commands end with ; or \g.
Your MySQL connection id is 20
Server version: 8.0.27

Copyright (c) 2000, 2021, Oracle and/or its affiliates.

Oracle is a registered trademark of Oracle Corporation and/or its
affiliates. Other names may be trademarks of their respective
owners.

Type 'help;' or '\h' for help. Type '\c' to clear the current input statement.

mysql> alter user 'root'@'localhost' identified by '1qaz@WSX123';
Query OK, 0 rows affected (0.01 sec)

mysql> flush privileges;
Query OK, 0 rows affected (0.01 sec)

mysql> exit;
Bye
3个节点配置数据库server_id,以root用户登录mysql进行临时配置,然后将server_id配置在/etc/my.cnf中,防止重启后失效
hdp2
mysql> set global server_id=1;
hdp3
mysql> set global server_id=2;
hdp4
mysql> set global server_id=3;
hdp2
]# echo "server_id=1" >> /etc/my.cnf
hdp3
]# echo "server_id=2" >> /etc/my.cnf
hdp4
]# echo "server_id=3" >> /etc/my.cnf
查看主库hdp2的二进制日志信息
[root@hdp2 data]# mysql -uroot -p
Enter password:
Welcome to the MySQL monitor.  Commands end with ; or \g.
Your MySQL connection id is 23
Server version: 8.0.27 MySQL Community Server - GPL

Copyright (c) 2000, 2021, Oracle and/or its affiliates.

Oracle is a registered trademark of Oracle Corporation and/or its
affiliates. Other names may be trademarks of their respective
owners.

Type 'help;' or '\h' for help. Type '\c' to clear the current input statement.

mysql> show master status;
+---------------+----------+--------------+------------------+-------------------+
| File          | Position | Binlog_Do_DB | Binlog_Ignore_DB | Executed_Gtid_Set |
+---------------+----------+--------------+------------------+-------------------+
| binlog.000003 |      642 |              |                  |                   |
+---------------+----------+--------------+------------------+-------------------+
1 row in set (0.00 sec)

mysql>
在主库hdp2上建立复制专用用户,并授权
mysql> create user 'repl'@'%' identified with mysql_native_password by '1qaz@WSX123';
Query OK, 0 rows affected (0.01 sec)

mysql> grant replication client,replication slave on *.* to 'repl'@'%';
Query OK, 0 rows affected (0.01 sec)

mysql>
在从库hdp3和hdp4上创建主库信息
mysql> change master to
    -> master_host='192.168.244.151',
    ->  master_port=3306,
    -> master_user='repl',
    -> master_password='1qaz@WSX123',
    -> master_log_file='binlog.000003',               #主库状态显示的File
    -> master_log_pos=642;                            #主库状态显示的Position
Query OK, 0 rows affected, 9 warnings (0.02 sec)

mysql>
在从库启动复制并查看从库状态
mysql> start slave;
Query OK, 0 rows affected, 1 warning (0.01 sec)

mysql> show slave status\G
*************************** 1. row ***************************
               Slave_IO_State: Waiting for source to send event
                  Master_Host: 192.168.244.151
                  Master_User: repl
                  Master_Port: 3306
                Connect_Retry: 60
              Master_Log_File: binlog.000003
          Read_Master_Log_Pos: 1165
               Relay_Log_File: hdp3-relay-bin.000002
                Relay_Log_Pos: 844
        Relay_Master_Log_File: binlog.000003
             Slave_IO_Running: Yes
            Slave_SQL_Running: Yes
              Replicate_Do_DB:
          Replicate_Ignore_DB:
           Replicate_Do_Table:
       Replicate_Ignore_Table:
      Replicate_Wild_Do_Table:
  Replicate_Wild_Ignore_Table:
                   Last_Errno: 0
                   Last_Error:
                 Skip_Counter: 0
          Exec_Master_Log_Pos: 1165
              Relay_Log_Space: 1052
              Until_Condition: None
               Until_Log_File:
                Until_Log_Pos: 0
           Master_SSL_Allowed: No
           Master_SSL_CA_File:
           Master_SSL_CA_Path:
              Master_SSL_Cert:
            Master_SSL_Cipher:
               Master_SSL_Key:
        Seconds_Behind_Master: 0
Master_SSL_Verify_Server_Cert: No
                Last_IO_Errno: 0
                Last_IO_Error:
               Last_SQL_Errno: 0
               Last_SQL_Error:
  Replicate_Ignore_Server_Ids:
             Master_Server_Id: 1
                  Master_UUID: 7096d4eb-7378-11ec-8ec4-000c29f7d066
             Master_Info_File: mysql.slave_master_info
                    SQL_Delay: 0
          SQL_Remaining_Delay: NULL
      Slave_SQL_Running_State: Replica has read all relay log; waiting for more updates
           Master_Retry_Count: 86400
                  Master_Bind:
      Last_IO_Error_Timestamp:
     Last_SQL_Error_Timestamp:
               Master_SSL_Crl:
           Master_SSL_Crlpath:
           Retrieved_Gtid_Set:
            Executed_Gtid_Set:
                Auto_Position: 0
         Replicate_Rewrite_DB:
                 Channel_Name:
           Master_TLS_Version:
       Master_public_key_path:
        Get_master_public_key: 0
            Network_Namespace:
1 row in set, 1 warning (0.00 sec)

mysql>
配置Mysql半同步复制
在主库加载插件semisync_master.so,从库加载插件semisync_slave.so
hda2
mysql> install plugin rpl_semi_sync_master soname 'semisync_master.so';
Query OK, 0 rows affected, 1 warning (0.01 sec)
hda3
mysql> install plugin rpl_semi_sync_slave soname 'semisync_slave.so';
Query OK, 0 rows affected, 1 warning (0.01 sec)
hda4
mysql> install plugin rpl_semi_sync_slave soname 'semisync_slave.so';
Query OK, 0 rows affected, 1 warning (0.01 sec)
启用半同步复制
hdp2
mysql> set global rpl_semi_sync_master_enabled=1;
Query OK, 0 rows affected (0.00 sec)
hdp3
mysql> set global rpl_semi_sync_slave_enabled=1;
Query OK, 0 rows affected (0.00 sec)
hdp4
mysql> set global rpl_semi_sync_slave_enabled=1;
Query OK, 0 rows affected (0.00 sec)
将半同步插件配置持久化到配置文件中
hda2
]# echo -e "plugin-load=\"rpl_semi_sync_master=semisync_master.so;rpl_semi_sync_slave=semisync_slave.so\"\nrpl-semi-sync-master-enabled=1\nrpl-semi-sync-slave-enabled=1" >> /etc/my.cnf
hda3
]# echo -e "plugin-load=\"rpl_semi_sync_master=semisync_master.so;rpl_semi_sync_slave=semisync_slave.so\"\nrpl-semi-sync-master-enabled=1\nrpl-semi-sync-slave-enabled=1" >> /etc/my.cnf
hda4
]# echo -e "plugin-load=\"rpl_semi_sync_master=semisync_master.so;rpl_semi_sync_slave=semisync_slave.so\"\nrpl-semi-sync-master-enabled=1\nrpl-semi-sync-slave-enabled=1" >> /etc/my.cnf
重启从库上的IO线程,否则仍然为异步复制模式,查询状态及重启命令如下
hdp3
mysql> show status like 'Rpl_semi_sync_slave_status';
+----------------------------+-------+
| Variable_name              | Value |
+----------------------------+-------+
| Rpl_semi_sync_slave_status | OFF   |
+----------------------------+-------+
1 row in set (0.01 sec)

mysql> stop slave io_thread;
Query OK, 0 rows affected, 1 warning (0.00 sec)

mysql> start slave io_thread;
Query OK, 0 rows affected, 1 warning (0.00 sec)

mysql> show status like 'Rpl_semi_sync_slave_status';
+----------------------------+-------+
| Variable_name              | Value |
+----------------------------+-------+
| Rpl_semi_sync_slave_status | ON    |
+----------------------------+-------+
1 row in set (0.00 sec)

mysql>

hdp4
mysql> show status like 'Rpl_semi_sync_slave_status';
+----------------------------+-------+
| Variable_name              | Value |
+----------------------------+-------+
| Rpl_semi_sync_slave_status | OFF   |
+----------------------------+-------+
1 row in set (0.01 sec)

mysql> stop slave io_thread;
Query OK, 0 rows affected, 1 warning (0.00 sec)

mysql> start slave io_thread;
Query OK, 0 rows affected, 1 warning (0.00 sec)

mysql> show status like 'Rpl_semi_sync_slave_status';
+----------------------------+-------+
| Variable_name              | Value |
+----------------------------+-------+
| Rpl_semi_sync_slave_status | ON    |
+----------------------------+-------+
1 row in set (0.00 sec)

mysql>
查询主库的半同步复制是否在运行
hdp2
mysql> show status like 'Rpl_semi_sync_master_status';
+-----------------------------+-------+
| Variable_name               | Value |
+-----------------------------+-------+
| Rpl_semi_sync_master_status | ON    |
+-----------------------------+-------+
1 row in set (0.00 sec)

mysql>
部署MHA相关组件
环境说明

组件:
mha-manager:部署在hdp1
mha-node:部署在hdp2、hdp3、hdp4
4个节点安装perl相关依赖
下载epel源
wget -O /etc/yum.repos.d/epel-7.repo http://mirrors.aliyun.com/repo/epel-7.repo
安装perl-DBD-MySQL、perl-Log-DIspatch、perl-Parallel-ForkManager、perl-Time-HiRes
yum -y install perl-DBD-MySQL perl-Log-DIspatch perl-Parallel-ForkManager perl-Time-HiRes
安装perl-Config-Tiny,下载地址:http://mirror.centos.org/altarch/7/os/aarch64/Packages/perl-Config-Tiny-2.14-7.el7.noarch.rpm
]# yum -y install http://mirror.centos.org/altarch/7/os/aarch64/Packages/perl-Config-Tiny-2.14-7.el7.noarch.rpm
Loaded plugins: fastestmirror
perl-Config-Tiny-2.14-7.el7.noarch.rpm                                                                     |  25 kB  00:00:00
Examining /var/tmp/yum-root-Zu9UoE/perl-Config-Tiny-2.14-7.el7.noarch.rpm: perl-Config-Tiny-2.14-7.el7.noarch
Marking /var/tmp/yum-root-Zu9UoE/perl-Config-Tiny-2.14-7.el7.noarch.rpm to be installed
Resolving Dependencies
--> Running transaction check
---> Package perl-Config-Tiny.noarch 0:2.14-7.el7 will be installed
--> Finished Dependency Resolution

Dependencies Resolved

==================================================================================================================================
 Package                       Arch                Version                 Repository                                        Size
==================================================================================================================================
Installing:
 perl-Config-Tiny              noarch              2.14-7.el7              /perl-Config-Tiny-2.14-7.el7.noarch               39 k

Transaction Summary
==================================================================================================================================
Install  1 Package

Total size: 39 k
Installed size: 39 k
Downloading packages:
Running transaction check
Running transaction test
Transaction test succeeded
Running transaction
  Installing : perl-Config-Tiny-2.14-7.el7.noarch                                                                             1/1
  Verifying  : perl-Config-Tiny-2.14-7.el7.noarch                                                                             1/1

Installed:
  perl-Config-Tiny.noarch 0:2.14-7.el7

Complete!
4个节点互相配置免密登录
]# ssh-keygen
Generating public/private rsa key pair.
Enter file in which to save the key (/root/.ssh/id_rsa):
Created directory '/root/.ssh'.
Enter passphrase (empty for no passphrase):
Enter same passphrase again:
Your identification has been saved in /root/.ssh/id_rsa.
Your public key has been saved in /root/.ssh/id_rsa.pub.
The key fingerprint is:
SHA256:xOMA98v0Perm0KZ3zwv4TlGqKzzYk3LldUzQaK8f+6M root@hdp1
The key's randomart image is:
+---[RSA 2048]----+
|    . .      o   |
|     o o    + .  |
|      . *  . o.  |
|       * + . oo  |
|        S . =+   |
|         ..+oo+  |
|       +.+*.oo o |
|      o O=++.oo. |
|       o.B+ooE=oo|
+----[SHA256]-----+
]# ssh-copy-id hdp1
/usr/bin/ssh-copy-id: INFO: Source of key(s) to be installed: "/root/.ssh/id_rsa.pub"
The authenticity of host 'hdp1 (192.168.244.150)' can't be established.
ECDSA key fingerprint is SHA256:tPUBu2Mcd9mClNUjaV9EYZNa9g45k2Ksx5xJktP7voo.
ECDSA key fingerprint is MD5:b2:6c:2e:64:d6:76:fc:2d:1d:7d:e3:32:29:6b:1c:ff.
Are you sure you want to continue connecting (yes/no)? yes
/usr/bin/ssh-copy-id: INFO: attempting to log in with the new key(s), to filter out any that are already installed
/usr/bin/ssh-copy-id: INFO: 1 key(s) remain to be installed -- if you are prompted now it is to install the new keys
root@hdp1's password:

Number of key(s) added: 1

Now try logging into the machine, with:   "ssh 'hdp1'"
and check to make sure that only the key(s) you wanted were added.

]# ssh-copy-id hdp2
/usr/bin/ssh-copy-id: INFO: Source of key(s) to be installed: "/root/.ssh/id_rsa.pub"
The authenticity of host 'hdp2 (192.168.244.151)' can't be established.
ECDSA key fingerprint is SHA256:tPUBu2Mcd9mClNUjaV9EYZNa9g45k2Ksx5xJktP7voo.
ECDSA key fingerprint is MD5:b2:6c:2e:64:d6:76:fc:2d:1d:7d:e3:32:29:6b:1c:ff.
Are you sure you want to continue connecting (yes/no)? yes
/usr/bin/ssh-copy-id: INFO: attempting to log in with the new key(s), to filter out any that are already installed
/usr/bin/ssh-copy-id: INFO: 1 key(s) remain to be installed -- if you are prompted now it is to install the new keys
root@hdp2's password:

Number of key(s) added: 1

Now try logging into the machine, with:   "ssh 'hdp2'"
and check to make sure that only the key(s) you wanted were added.

]# ssh-copy-id hdp3
/usr/bin/ssh-copy-id: INFO: Source of key(s) to be installed: "/root/.ssh/id_rsa.pub"
The authenticity of host 'hdp3 (192.168.244.152)' can't be established.
ECDSA key fingerprint is SHA256:tPUBu2Mcd9mClNUjaV9EYZNa9g45k2Ksx5xJktP7voo.
ECDSA key fingerprint is MD5:b2:6c:2e:64:d6:76:fc:2d:1d:7d:e3:32:29:6b:1c:ff.
Are you sure you want to continue connecting (yes/no)? yes
/usr/bin/ssh-copy-id: INFO: attempting to log in with the new key(s), to filter out any that are already installed
/usr/bin/ssh-copy-id: INFO: 1 key(s) remain to be installed -- if you are prompted now it is to install the new keys
root@hdp3's password:

Number of key(s) added: 1

Now try logging into the machine, with:   "ssh 'hdp3'"
and check to make sure that only the key(s) you wanted were added.

]# ssh-copy-id hdp4
/usr/bin/ssh-copy-id: INFO: Source of key(s) to be installed: "/root/.ssh/id_rsa.pub"
The authenticity of host 'hdp4 (192.168.244.153)' can't be established.
ECDSA key fingerprint is SHA256:tPUBu2Mcd9mClNUjaV9EYZNa9g45k2Ksx5xJktP7voo.
ECDSA key fingerprint is MD5:b2:6c:2e:64:d6:76:fc:2d:1d:7d:e3:32:29:6b:1c:ff.
Are you sure you want to continue connecting (yes/no)? yes
/usr/bin/ssh-copy-id: INFO: attempting to log in with the new key(s), to filter out any that are already installed
/usr/bin/ssh-copy-id: INFO: 1 key(s) remain to be installed -- if you are prompted now it is to install the new keys
root@hdp4's password:

Number of key(s) added: 1

Now try logging into the machine, with:   "ssh 'hdp4'"
and check to make sure that only the key(s) you wanted were added.
hdp2、hdp3、hdp4安装mha-node
]# rpm -ivh mha4mysql-node-0.58-0.el7.centos.noarch.rpm
Preparing...                          ################################# [100%]
Updating / installing...
   1:mha4mysql-node-0.58-0.el7.centos ################################# [100%]
hdp1安装mha-manager和mha-node
]# yum -y install mha4mysql-manager-0.58-0.el7.centos.noarch.rpm mha4mysql-node-0.58-0.el7.centos.noarch.rpm
Loaded plugins: fastestmirror
Examining mha4mysql-manager-0.58-0.el7.centos.noarch.rpm: mha4mysql-manager-0.58-0.el7.centos.noarch
Marking mha4mysql-manager-0.58-0.el7.centos.noarch.rpm to be installed
Examining mha4mysql-node-0.58-0.el7.centos.noarch.rpm: mha4mysql-node-0.58-0.el7.centos.noarch
Marking mha4mysql-node-0.58-0.el7.centos.noarch.rpm to be installed
Resolving Dependencies
--> Running transaction check
---> Package mha4mysql-manager.noarch 0:0.58-0.el7.centos will be installed
---> Package mha4mysql-node.noarch 0:0.58-0.el7.centos will be installed
--> Finished Dependency Resolution

Dependencies Resolved

==================================================================================================================================
 Package                    Arch            Version                    Repository                                            Size
==================================================================================================================================
Installing:
 mha4mysql-manager          noarch          0.58-0.el7.centos          /mha4mysql-manager-0.58-0.el7.centos.noarch          328 k
 mha4mysql-node             noarch          0.58-0.el7.centos          /mha4mysql-node-0.58-0.el7.centos.noarch             106 k

Transaction Summary
==================================================================================================================================
Install  2 Packages

Total size: 434 k
Installed size: 434 k
Downloading packages:
Running transaction check
Running transaction test
Transaction test succeeded
Running transaction
Warning: RPMDB altered outside of yum.
  Installing : mha4mysql-node-0.58-0.el7.centos.noarch                                                                        1/2
  Installing : mha4mysql-manager-0.58-0.el7.centos.noarch                                                                     2/2
  Verifying  : mha4mysql-manager-0.58-0.el7.centos.noarch                                                                     1/2
  Verifying  : mha4mysql-node-0.58-0.el7.centos.noarch                                                                        2/2

Installed:
  mha4mysql-manager.noarch 0:0.58-0.el7.centos                      mha4mysql-node.noarch 0:0.58-0.el7.centos

Complete!
配置MHA
在hdp1上创建配置文件目录并创建配置app1.cnf
]# mkdir -p /etc/masterha
]# vim /etc/masterha/app1.cnf
[server default]
manager_log=/var/log/masterha/app1/manager.log
manager_workdir=/var/log/masterha/app1.log
master_binlog_dir=/var/lib/mysql
master_ip_failover_script=/usr/bin/master_ip_failover
master_ip_online_change_script=/usr/bin/master_ip_online_change
password=1qaz@WSX123
ping_interval=1
remote_workdir=/tmp
repl_password=1qaz@WSX123
repl_user=repl
secondary_check_script=/usr/bin/masterha_secondary_check -s hdp2 -s hdp3 -s hdp4 --user=root --master_host=hdp2 --master_ip=192.168.244.151 --master_port=3306
shutdown_script=""
ssh_user=root
user=root

[server1]
hostname=192.168.244.151
ssh_port=22
candidate_master=1

[server2]
candidate_master=1
check_repl_delay=0
hostname=192.168.244.152
port=3306

[server3]
hostname=192.168.244.153
port=3306
在hdp3、hdp4设置从库relay_log_purge参数
MHA在发生主从切换的过程中,从库的恢复过程依赖于relay log,所以这里要将relay log的自动清除设置为OFF,即采用手动清除relay log的方式。
在默认情况下,从服务器上的中继日志会在SQL线程执行完毕后被自动删除。
但是在MHA环境中,这些中继日志在恢复其他从服务器时可能会被用到,因此需要禁用中继日志的自动删除功能。
]# mysql -uroot -p
Enter password:
Welcome to the MySQL monitor.  Commands end with ; or \g.
Your MySQL connection id is 21
Server version: 8.0.27 MySQL Community Server - GPL

Copyright (c) 2000, 2021, Oracle and/or its affiliates.

Oracle is a registered trademark of Oracle Corporation and/or its
affiliates. Other names may be trademarks of their respective
owners.

Type 'help;' or '\h' for help. Type '\c' to clear the current input statement.

mysql> set global relay_log_purge=0;
Query OK, 0 rows affected (0.00 sec)

mysql>
在hdp1上创建自动故障转移脚本
]# vim master_ip_failover
#!/usr/bin/env perl

#  Copyright (C) 2011 DeNA Co.,Ltd.
#  You should have received a copy of the GNU General Public License
#   along with this program; if not, write to the Free Software
#  Foundation, Inc.,
#  51 Franklin Street, Fifth Floor, Boston, MA  02110-1301  USA

## Note: This is a sample script and is not complete. Modify the script based on your environment.

use strict;
use warnings FATAL => 'all';

use Getopt::Long;
use MHA::DBHelper;

my (
  $command,        $ssh_user,         $orig_master_host,
  $orig_master_ip, $orig_master_port, $new_master_host,
  $new_master_ip,  $new_master_port,  $new_master_user,
  $new_master_password
);

my $vip = '192.168.244.154/24';
my $key = '88';
my $ssh_start_vip = "/sbin/ifconfig ens33:$key $vip";
my $ssh_stop_vip = "/sbin/ifconfig ens33:$key down";
GetOptions(
  'command=s'             => \$command,
  'ssh_user=s'            => \$ssh_user,
  'orig_master_host=s'    => \$orig_master_host,
  'orig_master_ip=s'      => \$orig_master_ip,
  'orig_master_port=i'    => \$orig_master_port,
  'new_master_host=s'     => \$new_master_host,
  'new_master_ip=s'       => \$new_master_ip,
  'new_master_port=i'     => \$new_master_port,
  'new_master_user=s'     => \$new_master_user,
  'new_master_password=s' => \$new_master_password,
);

exit &main();

sub main {
    print "\n\nIN SCRIPT TEST====$ssh_stop_vip==$ssh_start_vip===\n\n";
    if ( $command eq "stop" || $command eq "stopssh" ) {
        my $exit_code = 1;
        eval {
            print "Disabling the VIP on old master: $orig_master_host \n";
            &stop_vip();
            $exit_code = 0;
        };
        if ($@) {
            warn "Got Error: $@\n";
            exit $exit_code;
        }
        exit $exit_code;
    }
    elsif ( $command eq "start" ) {
        my $exit_code = 10;
        eval {
            print "Enabling the VIP - $vip on the new master - $new_master_host \n";
            &start_vip();
            $exit_code = 0;
        };
        if ($@) {
            warn $@;
            exit $exit_code;
        }
        exit $exit_code;
    }
    elsif ( $command eq "status" ) {
        print "Checking the Status of the script.. OK \n";
        exit 0;
    }
    else {
        &usage();
        exit 1;
    }
}
sub start_vip() {
    `ssh $ssh_user\@$new_master_host \" $ssh_start_vip \"`;
}
sub stop_vip() {
     return 0  unless  ($ssh_user);
    `ssh $ssh_user\@$orig_master_host \" $ssh_stop_vip \"`;
}
sub usage {
  print
"Usage: master_ip_failover --command=start|stop|stopssh|status --orig_master_host=host --orig_master_ip=ip --orig_master_port=port --new_master_host=host --new_master_ip=ip --new_master_port=port\n";
}
给自动故障转移脚本授权
]# chmod 777 /usr/bin/master_ip_failover
hdp1上检查MHA
1、检查SSH
]# masterha_check_ssh --conf=/etc/masterha/app1.cnf
Wed Jan 12 05:27:26 2022 - [warning] Global configuration file /etc/masterha_default.cnf not found. Skipping.
Wed Jan 12 05:27:26 2022 - [info] Reading application default configuration from /etc/masterha/app1.cnf..
Wed Jan 12 05:27:26 2022 - [info] Reading server configuration from /etc/masterha/app1.cnf..
Wed Jan 12 05:27:26 2022 - [info] Starting SSH connection tests..
Wed Jan 12 05:27:27 2022 - [debug]
Wed Jan 12 05:27:26 2022 - [debug]  Connecting via SSH from root@192.168.244.152(192.168.244.152:22) to root@192.168.244.153(192.168.244.153:22)..
Wed Jan 12 05:27:27 2022 - [debug]   ok.
Wed Jan 12 05:27:28 2022 - [debug]
Wed Jan 12 05:27:27 2022 - [debug]  Connecting via SSH from root@192.168.244.153(192.168.244.153:22) to root@192.168.244.152(192.168.244.152:22)..
Wed Jan 12 05:27:27 2022 - [debug]   ok.
Wed Jan 12 05:27:28 2022 - [info] All SSH connection tests passed successfully.
2、 检查整个复制环境状况
在hdp2执行root的登录授权,以及普通用户repl的登录授权
mysql> update mysql.user set host='%'  where user='root';
Query OK, 1 row affected (0.03 sec)
Rows matched: 1  Changed: 1  Warnings: 0

mysql>  flush privileges;
Query OK, 0 rows affected (0.02 sec)

mysql> alter user 'repl'@'%' identified with mysql_native_password by '1qaz@WSX123';
Query OK, 0 rows affected (0.02 sec)

mysql> FLUSH PRIVILEGES;
Query OK, 0 rows affected (0.00 sec)

mysql> alter user 'root'@'%' identified with mysql_native_password by '1qaz@WSX123';
Query OK, 0 rows affected (0.01 sec)

mysql> FLUSH PRIVILEGES;
Query OK, 0 rows affected (0.01 sec)
进行复制环境检查
]# masterha_check_repl --conf=/etc/masterha/app1.cnf
Wed Jan 12 05:49:57 2022 - [warning] Global configuration file /etc/masterha_default.cnf not found. Skipping.
Wed Jan 12 05:49:57 2022 - [info] Reading application default configuration from /etc/masterha/app1.cnf..
Wed Jan 12 05:49:57 2022 - [info] Reading server configuration from /etc/masterha/app1.cnf..
Wed Jan 12 05:49:57 2022 - [info] MHA::MasterMonitor version 0.58.
Wed Jan 12 05:49:58 2022 - [info] GTID failover mode = 0
Wed Jan 12 05:49:58 2022 - [info] Dead Servers:
Wed Jan 12 05:49:58 2022 - [info] Alive Servers:
Wed Jan 12 05:49:58 2022 - [info]   192.168.244.151(192.168.244.151:3306)
Wed Jan 12 05:49:58 2022 - [info]   192.168.244.152(192.168.244.152:3306)
Wed Jan 12 05:49:58 2022 - [info]   192.168.244.153(192.168.244.153:3306)
Wed Jan 12 05:49:58 2022 - [info] Alive Slaves:
Wed Jan 12 05:49:58 2022 - [info]   192.168.244.152(192.168.244.152:3306)  Version=8.0.27 (oldest major version between slaves) log-bin:enabled
Wed Jan 12 05:49:58 2022 - [info]     Replicating from 192.168.244.151(192.168.244.151:3306)
Wed Jan 12 05:49:58 2022 - [info]     Primary candidate for the new Master (candidate_master is set)
Wed Jan 12 05:49:58 2022 - [info]   192.168.244.153(192.168.244.153:3306)  Version=8.0.27 (oldest major version between slaves) log-bin:enabled
Wed Jan 12 05:49:58 2022 - [info]     Replicating from 192.168.244.151(192.168.244.151:3306)
Wed Jan 12 05:49:58 2022 - [info] Current Alive Master: 192.168.244.151(192.168.244.151:3306)
Wed Jan 12 05:49:58 2022 - [info] Checking slave configurations..
Wed Jan 12 05:49:58 2022 - [info]  read_only=1 is not set on slave 192.168.244.152(192.168.244.152:3306).
Wed Jan 12 05:49:58 2022 - [info]  read_only=1 is not set on slave 192.168.244.153(192.168.244.153:3306).
Wed Jan 12 05:49:58 2022 - [info] Checking replication filtering settings..
Wed Jan 12 05:49:58 2022 - [info]  binlog_do_db= , binlog_ignore_db=
Wed Jan 12 05:49:58 2022 - [info]  Replication filtering check ok.
Wed Jan 12 05:49:58 2022 - [info] GTID (with auto-pos) is not supported
Wed Jan 12 05:49:58 2022 - [info] Starting SSH connection tests..
Wed Jan 12 05:50:00 2022 - [info] All SSH connection tests passed successfully.
Wed Jan 12 05:50:00 2022 - [info] Checking MHA Node version..
Wed Jan 12 05:50:01 2022 - [info]  Version check ok.
Wed Jan 12 05:50:01 2022 - [info] Checking SSH publickey authentication settings on the current master..
Wed Jan 12 05:50:01 2022 - [info] HealthCheck: SSH to 192.168.244.151 is reachable.
Wed Jan 12 05:50:02 2022 - [info] Master MHA Node version is 0.58.
Wed Jan 12 05:50:02 2022 - [info] Checking recovery script configurations on 192.168.244.151(192.168.244.151:3306)..
Wed Jan 12 05:50:02 2022 - [info]   Executing command: save_binary_logs --command=test --start_pos=4 --binlog_dir=/var/lib/mysql --output_file=/tmp/save_binary_logs_test --manager_version=0.58 --start_file=binlog.000003
Wed Jan 12 05:50:02 2022 - [info]   Connecting to root@192.168.244.151(192.168.244.151:22)..
  Creating /tmp if not exists..    ok.
  Checking output directory is accessible or not..
   ok.
  Binlog found at /var/lib/mysql, up to binlog.000003
Wed Jan 12 05:50:02 2022 - [info] Binlog setting check done.
Wed Jan 12 05:50:02 2022 - [info] Checking SSH publickey authentication and checking recovery script configurations on all alive slave servers..
Wed Jan 12 05:50:02 2022 - [info]   Executing command : apply_diff_relay_logs --command=test --slave_user='root' --slave_host=192.168.244.152 --slave_ip=192.168.244.152 --slave_port=3306 --workdir=/tmp --target_version=8.0.27 --manager_version=0.58 --relay_dir=/var/lib/mysql --current_relay_log=hdp3-relay-bin.000003  --slave_pass=xxx
Wed Jan 12 05:50:02 2022 - [info]   Connecting to root@192.168.244.152(192.168.244.152:22)..
  Checking slave recovery environment settings..
    Relay log found at /var/lib/mysql, up to hdp3-relay-bin.000003
    Temporary relay log file is /var/lib/mysql/hdp3-relay-bin.000003
    Checking if super_read_only is defined and turned on.. not present or turned off, ignoring.
    Testing mysql connection and privileges..
mysql: [Warning] Using a password on the command line interface can be insecure.
 done.
    Testing mysqlbinlog output.. done.
    Cleaning up test file(s).. done.
Wed Jan 12 05:50:02 2022 - [info]   Executing command : apply_diff_relay_logs --command=test --slave_user='root' --slave_host=192.168.244.153 --slave_ip=192.168.244.153 --slave_port=3306 --workdir=/tmp --target_version=8.0.27 --manager_version=0.58 --relay_dir=/var/lib/mysql --current_relay_log=hdp4-relay-bin.000003  --slave_pass=xxx
Wed Jan 12 05:50:02 2022 - [info]   Connecting to root@192.168.244.153(192.168.244.153:22)..
  Checking slave recovery environment settings..
    Relay log found at /var/lib/mysql, up to hdp4-relay-bin.000003
    Temporary relay log file is /var/lib/mysql/hdp4-relay-bin.000003
    Checking if super_read_only is defined and turned on.. not present or turned off, ignoring.
    Testing mysql connection and privileges..
mysql: [Warning] Using a password on the command line interface can be insecure.
 done.
    Testing mysqlbinlog output.. done.
    Cleaning up test file(s).. done.
Wed Jan 12 05:50:03 2022 - [info] Slaves settings check done.
Wed Jan 12 05:50:03 2022 - [info]
192.168.244.151(192.168.244.151:3306) (current master)
 +--192.168.244.152(192.168.244.152:3306)
 +--192.168.244.153(192.168.244.153:3306)

Wed Jan 12 05:50:03 2022 - [info] Checking replication health on 192.168.244.152..
Wed Jan 12 05:50:03 2022 - [info]  ok.
Wed Jan 12 05:50:03 2022 - [info] Checking replication health on 192.168.244.153..
Wed Jan 12 05:50:03 2022 - [info]  ok.
Wed Jan 12 05:50:03 2022 - [info] Checking master_ip_failover_script status:
Wed Jan 12 05:50:03 2022 - [info]   /usr/bin/master_ip_failover --command=status --ssh_user=root --orig_master_host=192.168.244.151 --orig_master_ip=192.168.244.151 --orig_master_port=3306


IN SCRIPT TEST====/sbin/ifconfig ens33:88 down==/sbin/ifconfig ens33:88 192.168.244.144/24===

Checking the Status of the script.. OK
Wed Jan 12 05:50:03 2022 - [info]  OK.
Wed Jan 12 05:50:03 2022 - [warning] shutdown_script is not defined.
Wed Jan 12 05:50:03 2022 - [info] Got exit code 0 (Not master dead).

MySQL Replication Health is OK.
3、检查MHA Manager的状态
]# masterha_check_status --conf=/etc/masterha/app1.cnf
app1 is stopped(2:NOT_RUNNING).
启动MHA Manager
]# mkdir -p /var/log/masterha/app1
]# nohup  masterha_manager --conf=/etc/masterha/app1.cnf  --remove_dead_master_conf --ignore_last_failover < /dev/null > /var/log/masterha/app1/manager.log 2>&1 &
[1] 15338
]# masterha_check_status --conf=/etc/masterha/app1.cnf
app1 (pid:15338) is running(0:PING_OK), master:192.168.244.151
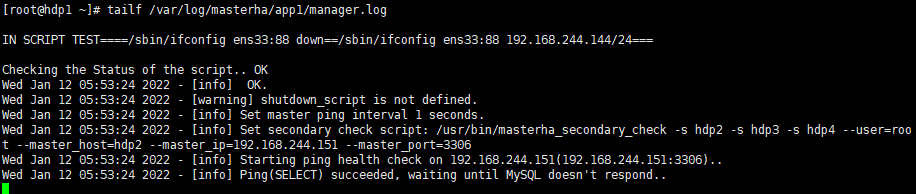
4、查看启动日志:tailf /var/log/masterha/app1/manager.log
功能测试
在 hdp2上初始绑定VIP
]# ifconfig ens33:1 192.168.244.154
]# ip a
1: lo: <LOOPBACK,UP,LOWER_UP> mtu 65536 qdisc noqueue state UNKNOWN group default qlen 1000
    link/loopback 00:00:00:00:00:00 brd 00:00:00:00:00:00
    inet 127.0.0.1/8 scope host lo
       valid_lft forever preferred_lft forever
    inet6 ::1/128 scope host
       valid_lft forever preferred_lft forever
2: ens33: <BROADCAST,MULTICAST,UP,LOWER_UP> mtu 1500 qdisc pfifo_fast state UP group default qlen 1000
    link/ether 00:0c:29:f7:d0:66 brd ff:ff:ff:ff:ff:ff
    inet 192.168.244.151/24 brd 192.168.244.255 scope global noprefixroute ens33
       valid_lft forever preferred_lft forever
    inet 192.168.244.154/24 brd 192.168.244.255 scope global secondary ens33:1
       valid_lft forever preferred_lft forever
    inet6 fe80::20c:29ff:fef7:d066/64 scope link
       valid_lft forever preferred_lft forever
模拟主从延时,关闭hd3的slave IO线程
mysql> stop slave io_thread;
Query OK, 0 rows affected, 1 warning (0.00 sec)
在hdp2上生成数据,这里使用sysbench
hdp2安装sysbench
]# yum -y install sysbench
在hdp2上生成数据
mysql> create database sbtest;
Query OK, 1 row affected (0.01 sec)
]# sysbench /usr/share/sysbench/tests/include/oltp_legacy/oltp.lua --mysql-host=127.0.0.1 --mysql-port=3306 --mysql-user=root --mysql-password=1qaz@WSX123 --oltp-test-mode=complex --oltp-tables-count=10 --oltp-table-size=10000 --threads=10 --time=120 --report-interval=10 --db-driver=mysql prepare
sysbench 1.0.17 (using system LuaJIT 2.0.4)

Creating table 'sbtest1'...
Inserting 10000 records into 'sbtest1'
Creating secondary indexes on 'sbtest1'...
Creating table 'sbtest2'...
Inserting 10000 records into 'sbtest2'
Creating secondary indexes on 'sbtest2'...
Creating table 'sbtest3'...
Inserting 10000 records into 'sbtest3'
Creating secondary indexes on 'sbtest3'...
Creating table 'sbtest4'...
Inserting 10000 records into 'sbtest4'
Creating secondary indexes on 'sbtest4'...
Creating table 'sbtest5'...
Inserting 10000 records into 'sbtest5'
Creating secondary indexes on 'sbtest5'...
Creating table 'sbtest6'...
Inserting 10000 records into 'sbtest6'
Creating secondary indexes on 'sbtest6'...
Creating table 'sbtest7'...
Inserting 10000 records into 'sbtest7'
Creating secondary indexes on 'sbtest7'...
Creating table 'sbtest8'...
Inserting 10000 records into 'sbtest8'
Creating secondary indexes on 'sbtest8'...
Creating table 'sbtest9'...
Inserting 10000 records into 'sbtest9'
Creating secondary indexes on 'sbtest9'...
Creating table 'sbtest10'...
Inserting 10000 records into 'sbtest10'
Creating secondary indexes on 'sbtest10'...
停止主服务器hdp2的MySQL服务
]# systemctl stop mysqld
验证VIP漂移
在hdp3上查看ip
]# ip a
1: lo: <LOOPBACK,UP,LOWER_UP> mtu 65536 qdisc noqueue state UNKNOWN group default qlen 1000
    link/loopback 00:00:00:00:00:00 brd 00:00:00:00:00:00
    inet 127.0.0.1/8 scope host lo
       valid_lft forever preferred_lft forever
    inet6 ::1/128 scope host
       valid_lft forever preferred_lft forever
2: ens33: <BROADCAST,MULTICAST,UP,LOWER_UP> mtu 1500 qdisc pfifo_fast state UP group default qlen 1000
    link/ether 00:0c:29:73:a4:20 brd ff:ff:ff:ff:ff:ff
    inet 192.168.244.152/24 brd 192.168.244.255 scope global noprefixroute ens33
       valid_lft forever preferred_lft forever
    inet 192.168.244.154/24 brd 192.168.244.255 scope global secondary ens33:88
       valid_lft forever preferred_lft forever
    inet6 fe80::20c:29ff:fe73:a420/64 scope link
       valid_lft forever preferred_lft forever
可以看到VIP已经从hdp2(master)漂移到了hdp3(slave1)
通过VIP连接数据库,查看表数据
]# mysql -h192.168.244.154 -uroot -p
Enter password:
Welcome to the MySQL monitor.  Commands end with ; or \g.
Your MySQL connection id is 64
Server version: 8.0.27 MySQL Community Server - GPL

Copyright (c) 2000, 2021, Oracle and/or its affiliates.

Oracle is a registered trademark of Oracle Corporation and/or its
affiliates. Other names may be trademarks of their respective
owners.

Type 'help;' or '\h' for help. Type '\c' to clear the current input statement.

mysql> use sbtest;
Reading table information for completion of table and column names
You can turn off this feature to get a quicker startup with -A

Database changed
mysql> show tables;
+------------------+
| Tables_in_sbtest |
+------------------+
| sbtest1          |
| sbtest10         |
| sbtest2          |
| sbtest3          |
| sbtest4          |
| sbtest5          |
| sbtest6          |
| sbtest7          |
| sbtest8          |
| sbtest9          |
+------------------+
10 rows in set (0.00 sec)

mysql> select count(*) from sbtest5;
+----------+
| count(*) |
+----------+
|    10000 |
+----------+
1 row in set (0.01 sec)
至此,MHA基本搭建完毕!!!
彩蛋:
检查MHA-manager状态
]# masterha_check_status --conf=/etc/masterha/app1.cnf
app1 is stopped(2:NOT_RUNNING).
发现在执行了一次自动故障转移后,MHAManager进程停止了。官网上对这种情况的解释如下:
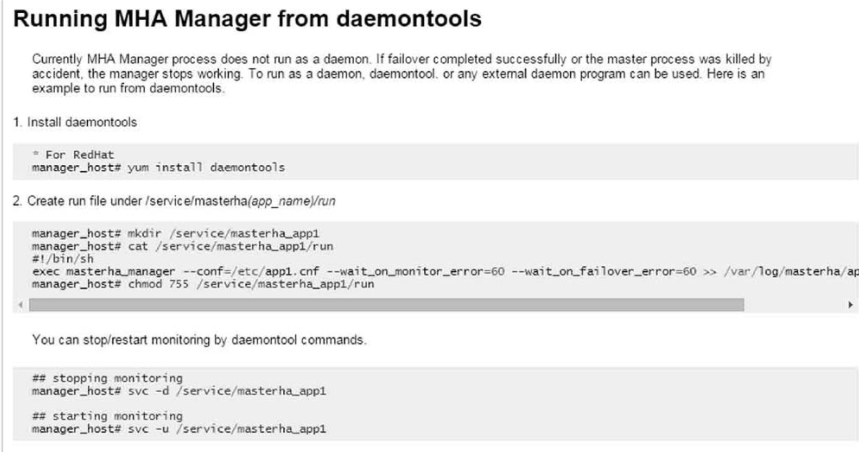
意思是安装一个进程工具,通过该工具结合脚本来管理进程。