终端输入命令pip3 install django
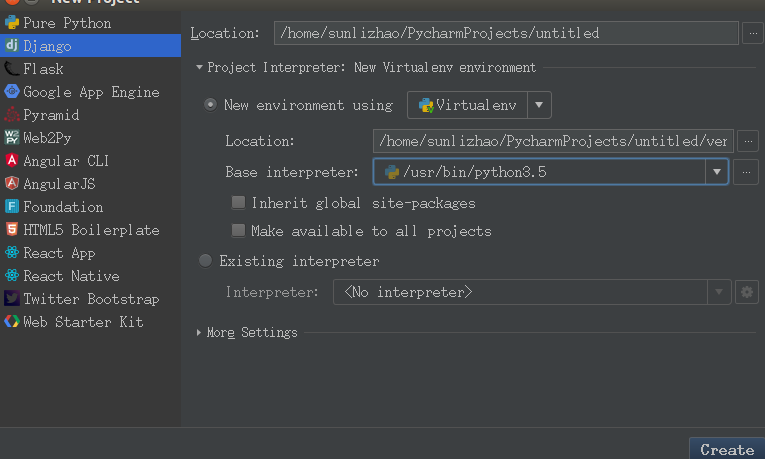
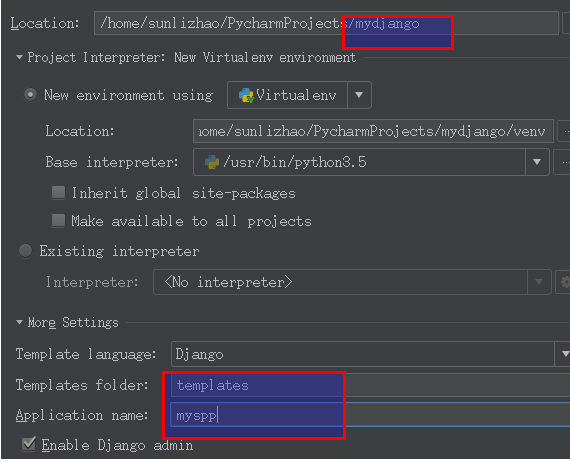
使用pycharm新建django项目

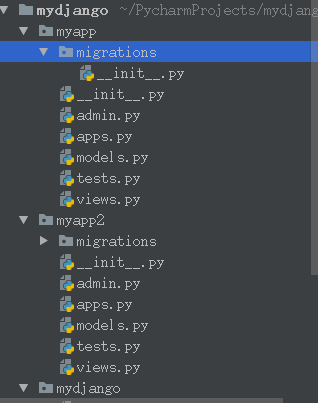
新建项目之后的文件的路径

mydjango
-mydjango 对整个程序进行配置
-setting 配置文件
-urls url对应关系
-wsgi wsgi是一套规则接口
-manage 管理django程序
通过cmd创建django项目: django-admin startproject mydjango
创建项目的时候已经创建app程序了,
要创建app可以在django目录里终端输入 :python manage.py startapp myapp2


-migrations 数据修改表结构
-admin.py django为我们提供的后台管理
-apps.py 配置当前apps
-models.py orm,写指定的类, 通过命令可以创建数据库结构
-tests.py 单元测试
-views.py 业务代码
基本配置
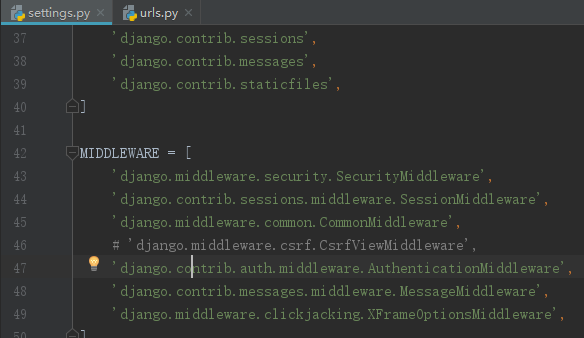
注释

添加templates路径

当时我加载静态文件没有效果,网上查了好多都没有效果,最后找到了一篇对我有用的(注明出处http://blog.csdn.net/u013378306/article/details/55188468)
- nlp_server
- ├── db.sqlite3
- ├── manage.py
- ├── nlp_server
- │ ├── __init__.py
- │ ├── __init__.pyc
- │ ├── nlp
- │ │ ├── __init__.py
- │ │ ├── __init__.pyc
- │ │ └── qg
- │ │ ├── index.py
- │ │ ├── index.pyc
- │ │ ├── __init__.py
- │ │ ├── __init__.pyc
- │ │ ├── QgService.py
- │ │ ├── QgService.pyc
- │ │ ├── stop.txt
- │ │ ├── test.py
- │ │ └── test.txt
- │ ├── settings.py
- │ ├── settings.pyc
- │ ├── static
- │ │ └── js
- │ │ └── jquery.js
- │ ├── urls.py
- │ ├── urls.pyc
- │ ├── wsgi.py
- │ └── wsgi.pyc
- └── templates
- └── nlp
- └── qg
- └── index.html
static下存放静态文件,templates下存放网页模板文件
2.修改setting.py
找到 STATIC_URL = '/static/' ,把 "/static/" 改为 "static/" 并在后面追加一行,然后保存
|
1
|
STATIC_ROOT = os.path.join(BASE_DIR, 'static') |
最后保存好的样子是这样的:
- # Static files (CSS, JavaScript, Images)
- # https://docs.djangoproject.com/en/1.10/howto/static-files/
- STATIC_URL = 'static/'
- STATIC_ROOT = os.path.join(BASE_DIR, 'static')
3.修改 urls.py
在urls.py中导入2个库
- from django.conf import settings
- from django.conf.urls.static import static
并在结尾追加
- + static(settings.STATIC_URL, document_root = settings.STATIC_ROOT)
最后保存好是这个样子的(红色部分为修改的):
- from django.conf.urls import url
- from django.contrib import adminform blogs import views as blogs_views
- from django.conf import settings
- from django.conf.urls.static import static
- urlpatterns = [
- url(r'^admin/', admin.site.urls), url(r'^$', blogs_views.index),
- ] + static(settings.STATIC_URL, document_root = settings.STATIC_ROOT)
4.重新运行你的项目
切记静态文件全都放在 static下面,网页模板文件全都放在 templates下面
最后网页里引用
- <script type="text/javascript" src="/static/js/jquery.js"></script>
-