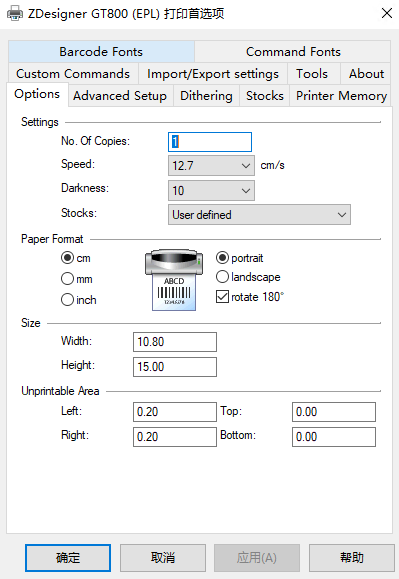
打印机型号是:Zebra GT820,需要先从网上下载驱动程序,然后在自己电脑上面安装。
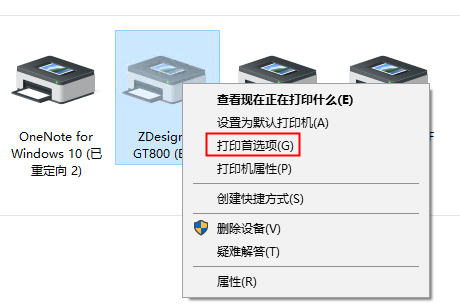
通过打印机首选项,调整好打印机的打印尺寸,即Size中的Width和Height。
客户端打印机接入流程
主进程文件:/src/main/index.js引入electron
import { app, BrowserWindow, ipcMain} from 'electron'
主进程获取打印机列表
我在主进程写了个方法createWindow创建BrowserWindow,可将这段代码放在createWindow里面
// 斑马打印机,在主线程下,通过ipcMain对象监听渲染线程传过来的getPrinterList事件
ipcMain.on('getPrinterList', (event) => {
// 主线程获取打印机列表
const list = mainWindow.webContents.getPrinters()
// 通过webContents发送事件到渲染线程,同时将打印机列表也传过去
mainWindow.webContents.send('getPrinterList', list)
})
渲染进程获取打印机列表,可在具体的vue文件里面,create生命周期里,或者触发某个事件时
    // 获取本地打印机列表,可在vue的created方法里获取,也可以某个事件触发获取
    getLocalPrinterList () {
      this.printerSelection = []
      console.log('getLocalPrinterList')
      // 打印机
      // 渲染线程主动发送getPrinterList事件到主线程请求打印机列表
      ipc.send('getPrinterList')
      // 监听主线程获取到打印机列表后的回调
      ipc.once('getPrinterList', (event, data) => {
        // data就是打印机列表]
        for (var i = 0; i < data.length; i++) {
          var printer = {
            id: data[i].name,
            value: data[i].name
          }
          this.printerSelection.push(printer)
        }
      })
    },
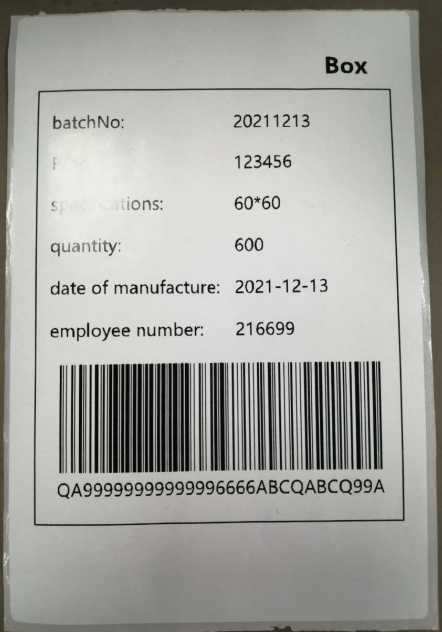
创建打印页面:print-boxcode.html
需要注意的是,这个文件要放在electron的静态目录里面,即static目录。如果不放在static目录,.html文件是不会打包到dist下的。
<!DOCTYPE html>
<html lang="en">
<head>
 <meta charset="UTF-8">
 <meta name="viewport" content="width=device-width, initial-scale=1.0">
 <meta http-equiv="X-UA-Compatible" content="ie=edge">
 <title>Document</title>
 <style type="text/css">
     body {
        margin: 0px;
        padding: 0px;
         320px;
     }
     .title {
         100%;
        margin-top: 10px;
        margin-bottom: 10px;
        text-align: right;
        font-size: 22px;
        font-weight: bold;
     }
     .content {
         100%;
        border: 1px solid #000;
        margin: 0px;
        padding: 10px;
     }
     table tr td{
         line-height: 36px;
     }
 </style>
</head>
<body>
    <div class="title">Box</div>
    <div class="content">
        <table>
            <tr>
                <td width="54%">batchNo:</td>
                <td width="46%">{{batchNo}}</td>
            </tr>
            <tr>
                <td>P/N:</td>
                <td>{{pn}}</td>
            </tr>
            <tr>
                <td>specifications:</td>
                <td>{{specifications}}</td>
            </tr>
            <tr>
                <td>quantity:</td>
                <td>{{quantity}}</td>
            </tr>
            <tr>
                <td>date of manufacture:</td>
                <td>{{date}}</td>
            </tr>
            <tr>
                <td>employee number:</td>
                <td>{{employee}}</td>
            </tr>
            <tr>
                <td colspan="2" align="center">
                    <img id="barCode" />
                    <div style="margin-top: -25px;">{{barCode}}</div>
                </td>
            </tr>
        </table>
    </div>
</body>
<script>
    // ★★★★★★因为打印机的大小未做调整,搞了好久没搞好,需要到系统里面设置打印机的纸张大小★★★★★★
    //引入ipcRenderer对象
    const {ipcRenderer} = require('electron')
    const JsBarcode = require('jsbarcode')

    //监听渲染线程传过来的webview-print-render事件
    ipcRenderer.on('webview-print-render', (event, data) => {
        var width = data.barCode.length > 14 ? 1 : 2
        // 生成条形码
        JsBarcode('#barCode', data.barCode, {
             width,//条形码中每条线的宽度
            height: 100,//条形码高度
            displayValue: false//条形码下面是否显示对应的值
        })
        // 替换占位符
        var html = document.getElementsByClassName('content')[0].innerHTML
        html = html.replace("{{batchNo}}", data.batchNo)
        html = html.replace("{{pn}}", data.pn)
        html = html.replace("{{specifications}}", data.specifications)
        html = html.replace("{{quantity}}", data.quantity)
        html = html.replace("{{date}}", data.date)
        html = html.replace("{{employee}}", data.employee)
        html = html.replace("{{barCode}}", data.barCode)
        //var obj = document.getElementById('bd')
        document.getElementsByClassName('content')[0].innerHTML = html
        //通过ipcRenderer对象的sendToHost方法和渲染线程通讯,告诉渲染线程打印的内容已经准备完毕
        ipcRenderer.sendToHost('webview-print-do')
    })
</script>
</html>
在具体的vue文件里面使用WebView引入print-boxcode.html文件,注意src路径
<webview ref="printWebview" src="./static/print-boxcode.html" nodeintegration="true" style="1000px; height:650px; display:none;"></webview>
在具体的vue文件里面添加对WebView的监听事件
created生命周期添加如下代码:
    // 打印机
    window.setTimeout(() => {
      var webview = this.$refs.printWebview
      // 监听<webview>里面的消息,也就是监听print.html里面的ipcRenderer.sendToHost发送的事件,当该事件发送成功后就会进入下面的回调事件中执行打印操作。
      webview.addEventListener('ipc-message', (event) => {
    if (event.channel === 'webview-print-do') {// 如果收到<webview>传过来的事件,名为"webview-print-do",就执行 webview.print打印方法,打印<webview>里面的内容。
          webview.print(
            {
              // 是否是静默打印
              silent: true,
              printBackground: false,
              // 打印机的名称
              deviceName: this.localPrinter
            }
          )
          window.setTimeout(() => {
            this.boxCodeClickLoading = false
            this.reprintBoxCodeBtnLoading = false
          }, 2000)
        }
      })
    }, 1000)
在具体的vue文件里面的某个按钮的打印事件:
    // 打印箱码
    printBoxCode (boxCode, goodsCode, batchNo, qty, manufactureDate, employeeNumber, specifications) {
      this.reprintBoxCodeBtnLoading = true
      // 发送数据
      var data = {
        batchNo: batchNo,
        pn: goodsCode,
        specifications: specifications,
        quantity: qty,
        date: manufactureDate,
        employee: employeeNumber,
        barCode: boxCode
      }
      // 告诉渲染进程,开始渲染打印内容
      var webview = this.$refs.printWebview
      webview.send('webview-print-render', data)
    }
解释:打印事件触发后,发送webview-print-render命令给print-boxcode.html,print-boxcode.html收到后发送webview-print-do命令给vue文件中的监听者。vue文件监听到命令再发送打印命令给打印机。
上张图:
参考文献:
https://gitcode.net/mirrors/ConardLi/electron-print-demo?utm_source=csdn_github_accelerator
https://blog.csdn.net/qq_34149805/article/details/82920566
https://blog.csdn.net/qq_31001061/article/details/120087603
https://www.jb51.net/article/151354.htm,有打印回调方法
https://segmentfault.com/a/1190000015842187,參考第三種封裝工具類
https://blog.csdn.net/xidianyueyong/article/details/98182687,解决发布后,webview无法加载.html文件的问题。因为目录不对,应该把.html文件放在static目录下。然后打包的时候,会从这个目录下找相关的.html文件。