一、路由相关对象
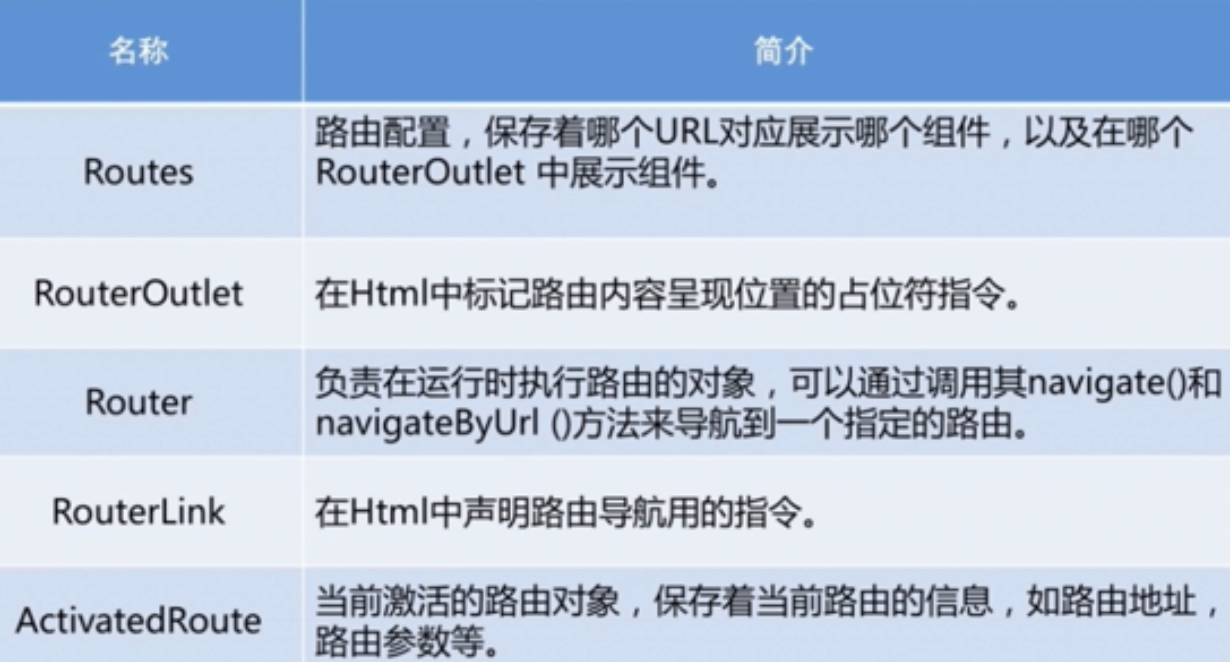
Router和RouterLink作用一样,都是导航。Router是在Controller中用的,RouterLink是在模版中用到。
二、路由对象的位置
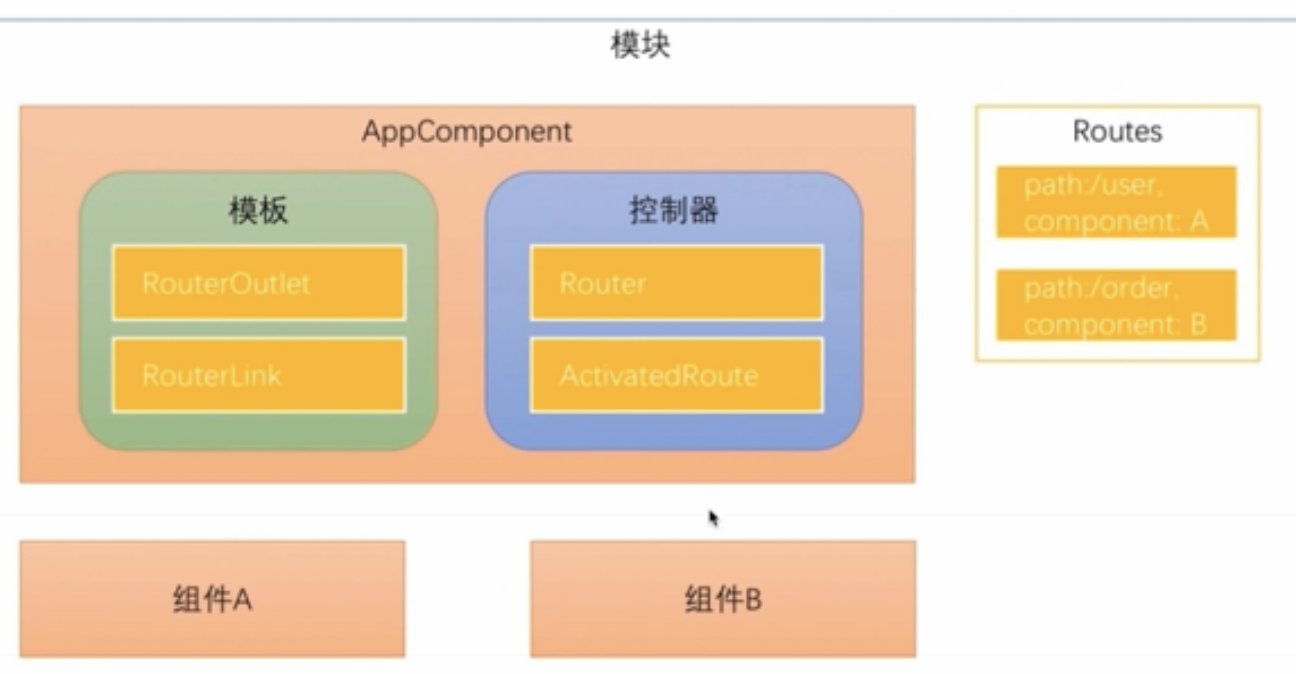
1、Routes对象
配置在模块中。Routes由一组配置信息组成,每个配置信息至少包含两个属性,Path和Component。
2、RouterOutlet
在模版中
3、RouterLink
指令,在模版中生成链接改变URL
4、Router
在Controller中,调用Router对象的navigate方法,路由切换。
5、ActivatedRoute
路由时候通过URL传递数据,数据会保存在ActivatedRoute对象中。
三、路由配置
使用ng new --routing参数时候会多生成出来一个app-routing.module.ts文件
import { NgModule } from '@angular/core';
import { Routes, RouterModule } from '@angular/router';

const routes: Routes = [];

@NgModule({
  imports: [RouterModule.forRoot(routes)],
  exports: [RouterModule]
})
export class AppRoutingModule { }
会自动imports到app.module.ts中。
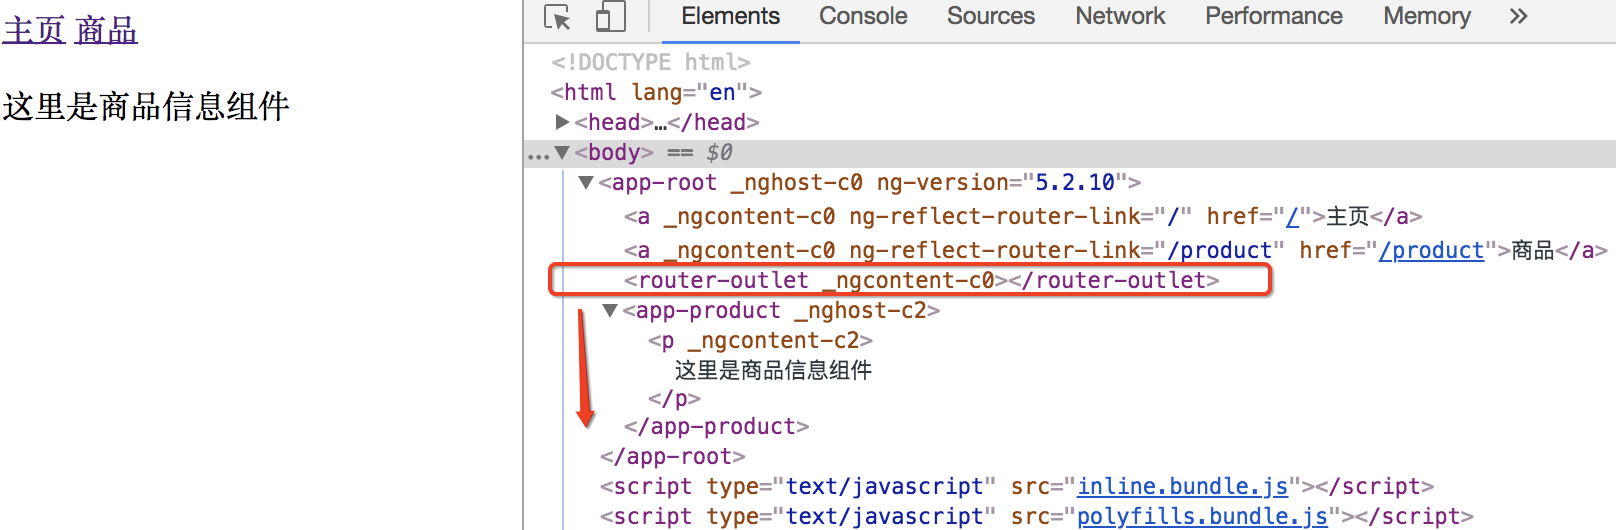
生成两个组件home组件和component组件。
const routes: Routes = [
  {path: '', component : HomeComponent}, //路径为空
  {path: 'product', component: ProductComponent}
];
注意:
1、path路径配置不能以斜杠开头,不能配置成path:'/product'。
因为Angular路由器会解析和生成url,不用/开头是为了在多个视图之间导航时能自由的使用相对路径和绝对路径。
2、在模版中写路径时,必须用/开头。
因为用斜杠加.表示要导航到根路由(/)还是子路由(./)。
/就是导航到根路由,从配置根路由那一层找。
<a [routerLink]="['/']">主页</a>
3、在<router-outlet>下面显示组件内容
4、routerLink参数是一个数组而不是字符串
因为在路由时候可以传递参数。
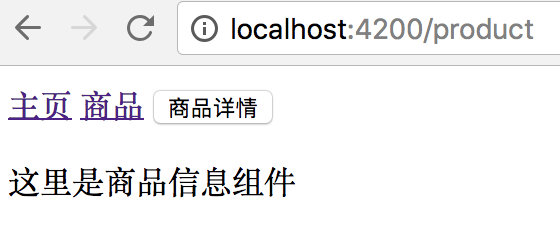
四、代码中通过Router对象导航
模版上加一个按钮
<input type="button" value="商品详情" (click)="toProductDetails()">
controller中使用router.navigate导航。
navigate参数和routerLink参数配置一样。
import { Component } from '@angular/core';
import { Router } from '@angular/router';

@Component({
  selector: 'app-root',
  templateUrl: './app.component.html',
  styleUrls: ['./app.component.css']
})
export class AppComponent {
  constructor(private router:Router){
  }
  toProductDetails(){
    this.router.navigate(['/product']);
  }
}
点按钮和点链接效果一样。
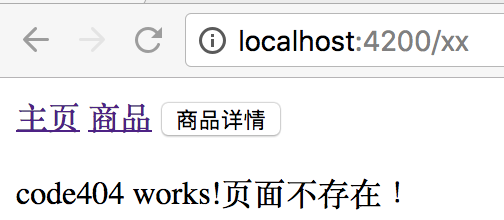
五、配置不存在的路径
生成code404组件显示页面不存在。
路由匹配先匹配者优先,所以**通配符路由要放最后。
const routes: Routes = [
  { path: '', component: HomeComponent }, //路径为空
  { path: 'product', component: ProductComponent },
  { path: '**', component: Code404Component }
];
六、重定向路由
一个地址重定向到另一个指定组件
www.aaa.com => www.aaa.com/products
www.aaa.com/x => www.aaa.com/y 用户可能已经收藏了x地址。
用重定向路由
const routes: Routes = [
  { path: '', redirectTo : 'home', pathMatch:'full' }, //路径为空
  { path: 'home', component: HomeComponent },
  { path: 'product', component: ProductComponent },
  { path: '**', component: Code404Component }
];
七、在路由时候传递数据
有3种方式
1、在查询参数中传递数据

2、在路由路径中传递数据
定义路由路径时就要指定参数名字,在实际路径中携带参数。

3、在路由配置中传递数据

在路由时传递参数实例看:http://www.cnblogs.com/starof/p/9006185.html
本文作者starof,因知识本身在变化,作者也在不断学习成长,文章内容也不定时更新,为避免误导读者,方便追根溯源,请诸位转载注明出处:http://www.cnblogs.com/starof/p/9000780.html 有问题欢迎与我讨论,共同进步。