Docker中部署InfluxDB
1、运行容器
$ docker run --rm
      -e INFLUXDB_DB=db0 -e INFLUXDB_ADMIN_ENABLED=true
      -e INFLUXDB_ADMIN_USER=admin -e INFLUXDB_ADMIN_PASSWORD=supersecretpassword
      -e INFLUXDB_USER=telegraf -e INFLUXDB_USER_PASSWORD=secretpassword
      -v $PWD:/var/lib/influxdb
      influxdb /init-influxdb.sh
2、Stack部署
(1)先新建一个Config,名称为influxdb.conf,内容如下:
[meta]
dir = "/var/lib/influxdb/meta"
retention-autocreate = true
logging-enabled = true

[data]
dir = "/var/lib/influxdb/data"
index-version = "inmem"
wal-dir = "/var/lib/influxdb/wal"
wal-fsync-delay = "0s"
query-log-enabled = true
cache-max-memory-size = 1073741824
cache-snapshot-memory-size = 26214400
cache-snapshot-write-cold-duration = "10m0s"
compact-full-write-cold-duration = "4h0m0s"
max-series-per-database = 1000000
max-values-per-tag = 100000
max-concurrent-compactions = 0
trace-logging-enabled = false
[http]
enabled = true
bind-address = ":8086"
auth-enabled = false
log-enabled = true
write-tracing = false
pprof-enabled = true
https-enabled = false
https-certificate = "/etc/ssl/influxdb.pem"
https-private-key = ""
max-row-limit = 0
max-connection-limit = 0
shared-secret = ""
realm = "InfluxDB"
unix-socket-enabled = false
bind-socket = "/var/run/influxdb.sock"
(2) docker swarm角本
version: '3.3'
services:
  influxdb:
    image: influxdb:1.2.0
    ports:
      - 8086:8086
      - 8083:8083
      - 2003:2003
    environment:
      INFLUXDB_DB: db0
      INFLUXDB_ADMIN_ENABLED: 1
      INFLUXDB_ADMIN_USER: admin
      INFLUXDB_ADMIN_PASSWORD: admin
      INFLUXDB_USER: user
      INFLUXDB_USER_PASSWORD: user
    volumes:
      - /opt/docker/influxdb/data:/var/lib/influxdb
    configs:
      - source: influxdb.conf
        target: /etc/influxdb/influxdb.conf
configs:
  influxdb.conf:
    external: true
说明:InfluxDB自1.2.0之后,取消了WEB管理页面。因此我们部署的是1.2.0版本,部署完后可以访问:http://<ip>:8083来访问管理端。
3、使用JAVA插入测试
(1)引入Maven包:
<!-- https://mvnrepository.com/artifact/org.influxdb/influxdb-java -->
<dependency>
    <groupId>org.influxdb</groupId>
    <artifactId>influxdb-java</artifactId>
    <version>2.15</version>
</dependency>
(2)编写测试插入代码(网上粘一段):
import org.influxdb.InfluxDB;
import org.influxdb.InfluxDBFactory;
import org.influxdb.dto.Point;
import org.influxdb.dto.Point.Builder;
import org.influxdb.dto.Query;
import org.influxdb.dto.QueryResult;

import java.util.Map;

/**
 * 时序数据库 InfluxDB 连接
*/
public class InfluxDBConnect {

    private String username;
    private String password;
    private String url;
    private String database;

    private InfluxDB influxDB;


    public InfluxDBConnect(String username, String password, String url, String database) {
        this.username = username;
        this.password = password;
        this.url = url;
        this.database = database;
    }

    /** 连接时序数据库;获得InfluxDB **/
    public InfluxDB connection() {
        if (influxDB == null) {
            influxDB = InfluxDBFactory.connect(url, username, password);
        }
        return influxDB;
    }

    /**
     * 设置数据保存策略
     * defalut 策略名 /database 数据库名/ 30d 数据保存时限30天/ 1  副本个数为1/ 结尾DEFAULT 表示 设为默认的策略
     */
    public void createRetentionPolicy(int retentionDay, int replicationCount) {
        String command = String.format("CREATE RETENTION POLICY "%s" ON "%s" DURATION %s REPLICATION %s DEFAULT",
                "defalut", database, retentionDay + "d", replicationCount);
        this.query(command);
    }

    /**
     * 查询
     * @param command 查询语句
     * @return
     */
    public QueryResult query(String command) {
        return influxDB.query(new Query(command, database));
    }

    /**
     * 插入
     * @param measurement 表
     * @param tags        标签
     * @param fields      字段
     */
    public void insert(String measurement, Map<String, String> tags, Map<String, Object> fields) {
        Builder builder = Point.measurement(measurement);
        builder.tag(tags);
        builder.fields(fields);

        influxDB.write(database, "", builder.build());
    }

    /**
     * 删除
     * @param command 删除语句
     * @return 返回错误信息
     */
    public String deleteMeasurementData(String command) {
        QueryResult result = influxDB.query(new Query(command, database));
        return result.getError();
    }

    /**
     * 创建数据库
     * @param dbName 库名称
     */
    public void createDB(String dbName) {
        this.query("create database " + dbName);
    }

    /**
     * 删除数据库
     * @param dbName
     */
    public void deleteDB(String dbName) {
        this.query("drop database " + dbName);
    }
    /**
     * 插入
    */
    public void insert(InfluxDbRow influxDbRow) {
    if (influxDbRow == null) {
        return;
    }
    Point.Builder builder = Point.measurement(influxDbRow.getMeasurement());
    builder.tag(influxDbRow.getTags());
    builder.fields(influxDbRow.getFields());
    if (influxDbRow.getTimeSecond() != null) {
        builder.time(influxDbRow.getTimeSecond(), TimeUnit.SECONDS);
    }
    influxDB.write(database, "default", builder.build());
   }
}
(3)调用插入监控数据
import com.alibaba.fastjson.JSON;
import com.alibaba.fastjson.JSONArray;
import com.alibaba.fastjson.JSONObject;
import com.alibaba.fastjson.util.TypeUtils;
import org.junit.Before;
import org.junit.Test;

import java.io.IOException;
import java.nio.file.Files;
import java.nio.file.Paths;
import java.util.HashMap;
import java.util.Map;

/**
 * @author song 2019/8/27 16:28
 */
public class InsertTest {
    private InfluxDBConnect influxdb;
    private String username = "admin";//用户名
    private String password = "admin";//密码
    private String openurl = "http://54.222.182.173:8086";//连接地址
    private String database = "db0";//数据库
    private String measurement = "sys_code";

    @Before
    public void setUp() {
        influxdb = new InfluxDBConnect(username, password, openurl, database);
        influxdb.connection();
        influxdb.createRetentionPolicy(30, 1);
    }

    @Test
    public void testInsert() throws IOException {
        String data = new String(Files.readAllBytes(Paths.get("C:\Aliyun\实例监控数据.json")));
        JSONObject jobj = JSON.parseObject(data);
        JSONArray array = jobj.getJSONObject("MonitorData").getJSONArray("InstanceMonitorData");
        for (Object o : array) {
            JSONObject obj = (JSONObject) o;
            Map<String, Object> fields = new HashMap<>();
            long time = TypeUtils.castToDate(obj.get("TimeStamp")).getTime() / 1000;
            fields.put("TimeStamp", time);
            fields.put("IOPSRead", obj.get("IOPSRead"));
            fields.put("IOPSWrite", obj.get("IOPSWrite"));
            fields.put("IntranetBandwidth", obj.get("IntranetBandwidth"));
            fields.put("BPSRead", obj.get("BPSRead"));
            fields.put("BPSWrite", obj.get("BPSWrite"));
            fields.put("IntranetTX", obj.get("IntranetTX"));
            fields.put("IntranetRX", obj.get("IntranetRX"));
            fields.put("CPU", obj.get("CPU"));
            fields.put("InternetRX", obj.get("InternetRX"));
            fields.put("InternetTX", obj.get("InternetTX"));
            Map<String, String> tags = new HashMap<>();
            tags.put("InstanceId", obj.get("InstanceId").toString());
            influxdb.insert("ecs_time2", tags, fields);
        }
    }

}
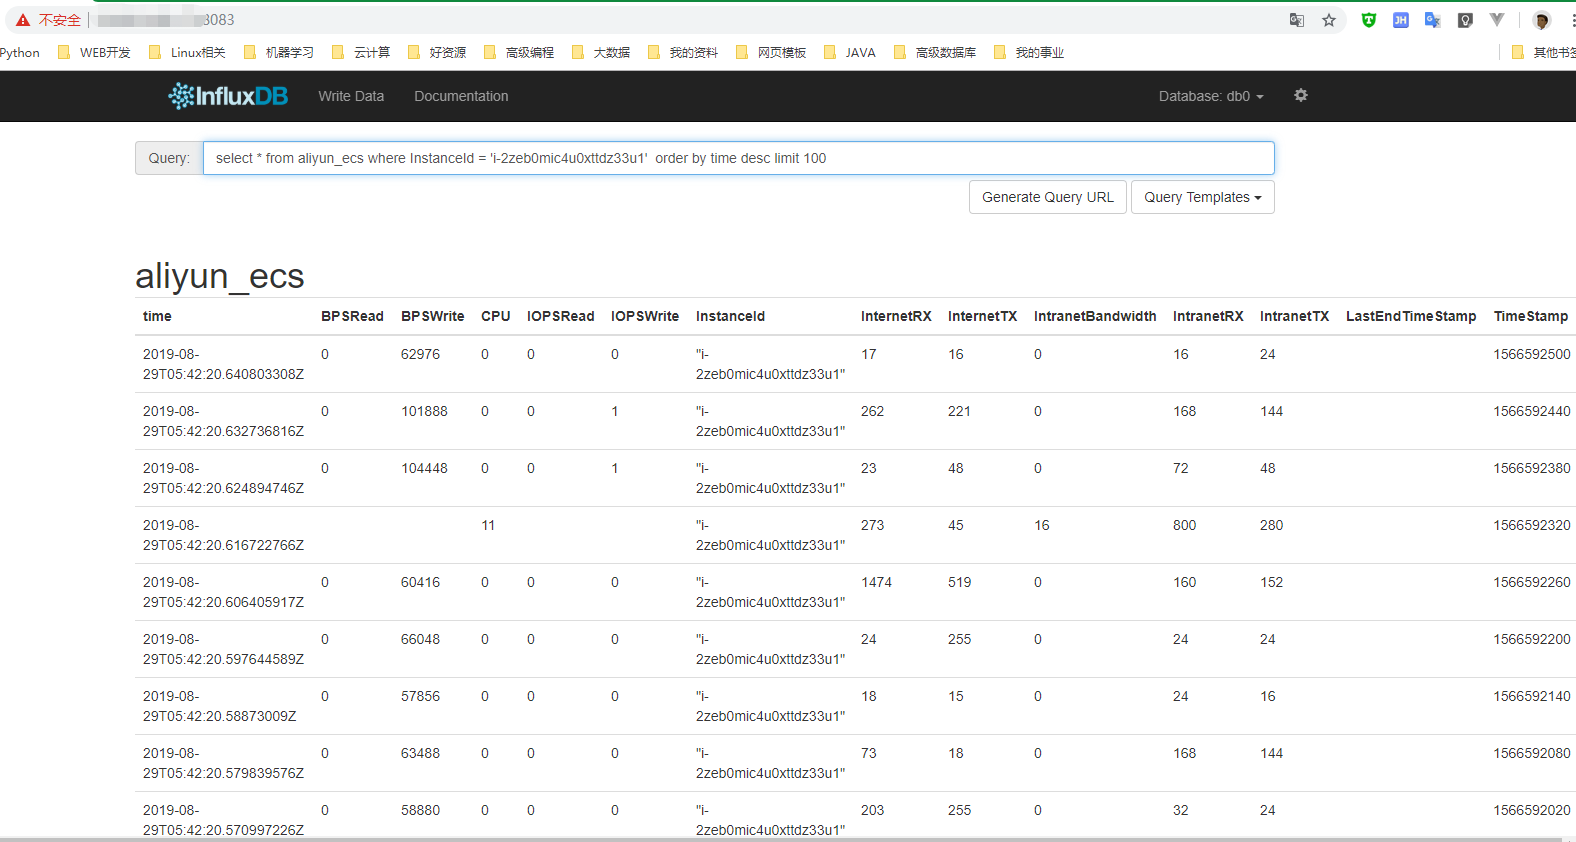
(4)效果:

按时间的查询,可以是:SELECT * FROM "aliyun_ecs" WHERE time >'2019-08-27T14:39:00Z' and time < '2019-08-27T15:39:00Z'