PointAnimation也是很简单的,与前面说到的两个Animation是差不多的,属性也是一样的,如By、From、To,不同的是,PointAnimation是目标值从一点到另一个点。
我有理由相信,大家一定懂的,所以,我不多介绍了,给两个例了热一下身就行了。
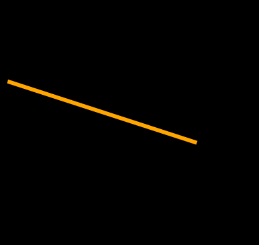
例一,让直线动起来。
这个例子,以LineGeometry作为动画的目标对象,通过对StartPoint属性和EndPoint属性进行动画来让直线(其实是线段)动起来。
- <Grid>
- <Path HorizontalAlignment="Stretch" VerticalAlignment="Stretch"
- Stroke="Orange" StrokeThickness="6">
- <Path.Data>
- <LineGeometry x:Name="lg" StartPoint="25,32" EndPoint="185,97"/>
- </Path.Data>
- </Path>
- <Grid.Resources>
- <Storyboard x:Name="std" RepeatBehavior="Forever" AutoReverse="True">
- <PointAnimation Duration="0:0:5"
- Storyboard.TargetName="lg"
- Storyboard.TargetProperty="StartPoint"
- To="20,375"/>
- <PointAnimation Duration="0:0:5"
- Storyboard.TargetName="lg"
- Storyboard.TargetProperty="EndPoint"
- To="407,490"/>
- </Storyboard>
- </Grid.Resources>
- </Grid>
记得了,在页面的Loaded事件中激活动画。
- // 构造函数
- public MainPage()
- {
- InitializeComponent();
- this.Loaded += (sender, e) =>
- {
- this.std.Begin();
- };
- }
例二,对曲线进行动画。
本例对BezierSegment的三个点进行动画,即使贝塞尔曲线“游动”起来。
- <Grid>
- <Path HorizontalAlignment="Stretch" VerticalAlignment="Stretch"
- Stroke="LightGreen" StrokeThickness="12">
- <Path.Data>
- <PathGeometry>
- <PathFigure StartPoint="180,35">
- <BezierSegment x:Name="pbm"
- Point1="28,180"
- Point2="200,270"
- Point3="412,700"/>
- </PathFigure>
- </PathGeometry>
- </Path.Data>
- </Path>
- <Grid.Resources>
- <Storyboard x:Name="std" RepeatBehavior="Forever" AutoReverse="True">
- <PointAnimation Duration="0:0:3"
- Storyboard.TargetName="pbm"
- Storyboard.TargetProperty="Point1"
- From="27,162" To="415,145"/>
- <PointAnimation Duration="0:0:3"
- Storyboard.TargetName="pbm"
- Storyboard.TargetProperty="Point2"
- To="600,400"/>
- <PointAnimation Duration="0:0:3"
- Storyboard.TargetName="pbm"
- Storyboard.TargetProperty="Point3"
- To="10,700"/>
- </Storyboard>
- </Grid.Resources>
- </Grid>
后台代码就是在Loaded事件中激活动画,这个大家应该会了。

好了,这节课就这样很轻松地过了。