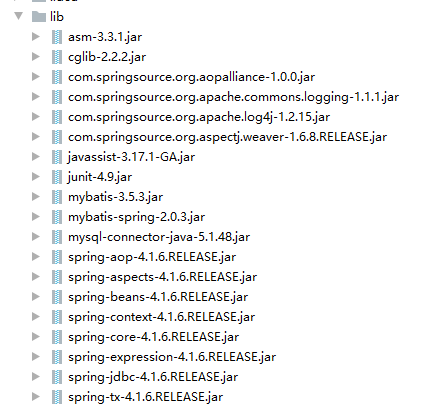
1.导包
所有和spring有关的包(有mybatis包的忽略),后期会使用maven引入

2. 引入spring的配置文件
可命名为applicationContext-service.xml或spring.xml
- 注意:这个文件要放在src目录下!
<?xml version="1.0" encoding="UTF-8"?>
<beans xmlns="http://www.springframework.org/schema/beans"
       xmlns:xsi="http://www.w3.org/2001/XMLSchema-instance"
       xsi:schemaLocation="http://www.springframework.org/schema/beans
        https://www.springframework.org/schema/beans/spring-beans.xsd">

    <bean id="..." class="..."></bean>

</beans>
3. 创建service层的类
接口:UserService.java
public interface UserService {
    //获取信息的方法
    public void getMsg(String msg);
}
实现类:UserServiceImpl.java
public class UserServiceImpl implements UserService {
    @Override
    public void getMsg(String msg) {
        System.out.println(msg);
    }
}
4. 修改配置文件

5. 运行代码
public class Demo {
    public static void main(String[] args) {
        //获取spring配置文件生成的对象
        ApplicationContext ac = new ClassPathXmlApplicationContext("spring.xml");
        //通过bean的id,获取bean对象
        UserServiceImpl userService = (UserServiceImpl)ac.getBean("userService");
        //使用方法
        userService.getMsg("Hello,Spring!");
    }
}
运行结果:

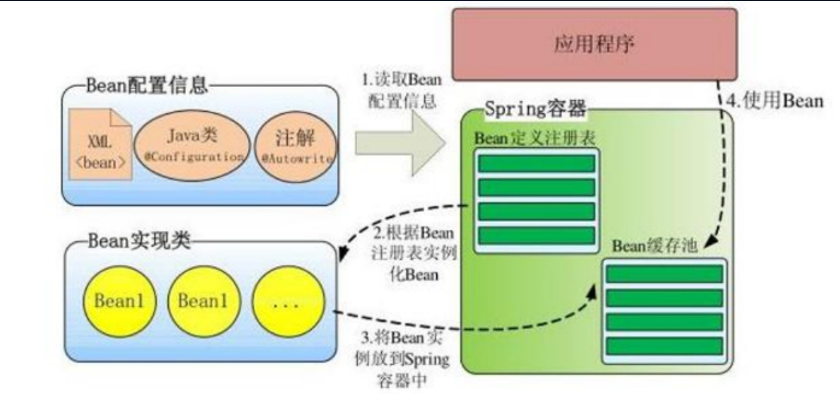
6. 解析Spring运行原理
控制反转IOC:

7. Spring容器中管理的bean对象:单态VS原型
7.1 单态模式 singleton(单例模式)(默认)
public class Demo {
    public static void main(String[] args) {
        //获取spring配置文件生成的对象
        ApplicationContext ac = new ClassPathXmlApplicationContext("spring.xml");
        //通过bean的id,获取bean对象
        UserServiceImpl userService = (UserServiceImpl)ac.getBean("userService");
        //比较连个对象的哈希值
        System.out.println(userService.hashCode());
        System.out.println("--------------------");
        UserServiceImpl userService2 = (UserServiceImpl)ac.getBean("userService");
        System.out.println(userService2.hashCode());
    }
}
运行结果:

7.2 原型模式 prototype
在配置文件中对应的<bean>标签中添加 scope=prototype 属性
<bean id="userService" class="com.yd.service.impl.UserServiceImpl" scope="prototype"></bean>
运行7.1中的代码结果:

总结:
- 当<bean>中加入scope="prototype",表示该对象使用原型模式
- 当<bean>中加入scope="singleton",或不加该属性,表示该对象使用单态模式(单例模式)
- 原型模式:每次获取的对象不是同一个对象
- 单态(单例)模式:每次获取的对象是同一个对象