一:使用swagger基本使用后台API
使用NuGet 包管理器下载Swashbuckle.AspNetCore
在Startup类的ConfigureServices方法里面注入服务:
 public void ConfigureServices(IServiceCollection services)
   {
       services.AddSwaggerGen(m =>
        {
          m.SwaggerDoc("v1", new OpenApiInfo { Title = "Web API", Version = "v1" });
        });
        services.AddControllers();
   }
在Startup类的Configure方法里面添加Swagger有关的中间件:
     public void Configure(IApplicationBuilder app, IWebHostEnvironment env)
        {
            if (env.IsDevelopment())
            {
                app.UseDeveloperExceptionPage();
            }

            app.UseHttpsRedirection();

            app.UseRouting();

            app.UseAuthorization();

            // 添加Swagger有关中间件
            app.UseSwagger();
            app.UseSwaggerUI(m =>
            {
                m.SwaggerEndpoint("/swagger/v1/swagger.json", "Web API");
            });

            app.UseEndpoints(endpoints =>
            {
                endpoints.MapControllers();
            });
        }
默认启用swagger ui页面,需要修改launchSettings.json中的profiles:launchUrl:"swagger/index.html"

如果想直接在域名的根目录直接加载 swagger 比如访问:localhost:8001 就能访问,可以这样设置:
app.UseSwaggerUI(c =>
{
    c.SwaggerEndpoint("/swagger/v1/swagger.json", "Web API");
    c.RoutePrefix = "";//路径配置,设置为空,表示直接访问该文件,
      //路径配置,设置为空,表示直接在根域名(localhost:8001)访问该文件,注意localhost:8001/swagger是访问不到的,
      //这个时候去launchSettings.json中把"launchUrl": "swagger/index.html"去掉, 然后直接访问localhost:8001/index.html即可
});
如果需要方法的注释和方法参数的注释,需要对接口做XML注释:
//安装Microsoft.Extensions.PlatformAbstractions包
项目右键,选择属性----生成,勾选“XML文档文件”,不想每一个方法都这么加注释,可以忽略警告,加上分号 ;1591:

修改ConfigureServices方法,增加下面的方法:
    public void ConfigureServices(IServiceCollection services)
        {
            // 添加Swagger
            services.AddSwaggerGen(m =>
            {
                m.SwaggerDoc("v1", new OpenApiInfo { Title = "Web API", Version = "v1" });
                // 获取xml文件名
                var xmlFile = $"{Assembly.GetExecutingAssembly().GetName().Name}.xml";
                // 获取xml文件路径
                var xmlPath = Path.Combine(AppContext.BaseDirectory, xmlFile);
                // 添加控制器层注释,true表示显示控制器注释
                m.IncludeXmlComments(xmlPath, true);
            });

            services.AddControllers();
        }
使用JWT进行用户认证,Swagger中开启JWT服务
安装包:Microsoft.AspNetCore.Authentication.JwtBearer
在ConfigureServices方法中修改swagger配置:
 //swagger配置
 services.AddSwaggerGen(c =>
 {
     c.SwaggerDoc("v1", new OpenApiInfo { Title = "Web API", Version = "v1" });
     c.AddSecurityDefinition("Bearer", new OpenApiSecurityScheme
     {
         Description = "JWT授权(数据将在请求头中进行传递)直接在下面框中输入Bearer {token}(注意两者之间是一个空格) "",
         Name = "Authorization",//jwt默认的参数名称
         In = ParameterLocation.Header,//jwt默认存放Authorization信息的位置(请求头中)
         Type = SecuritySchemeType.ApiKey
     });
     c.AddSecurityRequirement(new OpenApiSecurityRequirement
     {
         {
             new OpenApiSecurityScheme
             {
                 Reference = new OpenApiReference {
                     Type = ReferenceType.SecurityScheme,
                     Id = "Bearer"
                 }
             },
            Array.Empty<string>()
         }
     });

 });
在appsetting.json里设置JWT Token需要的一些参数:
"tokenParameter": {
    "secret": "D96BFA5B-F2AF-45BC-9342-5A55C3F9BBB0", //JWT加密的密钥。
    "issuer": "WebServer", //签发人的名称
    "audience": "WebClient", //订阅人的名称
    "accessExpiration": 120, //Token的有效分钟数。过了这个时间,这个Token会过期。
    "refreshExpiration": 1440 // refreshToken的有效分钟数。过了这个时间,用户需要重新登录。
  }
创建一个映射tokenParameter的类,也可以直接读配置,再转成数据:
public class TokenParameter
{
    public string Secret { get; set; }

    public string Issuer { get; set; }

    public string Audience { get; set; }

    public int AccessExpiration { get; set; }

    public int RefreshExpiration { get; set; }
}
在Startup类的ConfigureServices方法里面添加JWT认证:
 services.AddAuthentication(x =>
 {
     x.DefaultAuthenticateScheme = JwtBearerDefaults.AuthenticationScheme;
     x.DefaultChallengeScheme = JwtBearerDefaults.AuthenticationScheme;
 }).AddJwtBearer(option =>
 {
     option.RequireHttpsMetadata = false;
     option.SaveToken = true;
     var token = Configuration.GetSection("TokenParameter").Get<TokenParameter>();
     option.TokenValidationParameters = new TokenValidationParameters
     {
         ValidateIssuer = true,//是否验证Issuer
         ValidateAudience = true,//是否验证Audience
         ValidateLifetime = true,//是否验证失效时间
         ValidateIssuerSigningKey = true,//是否验证SecurityKey
         ValidAudience = token.Audience,//Audience
         ValidIssuer = token.Issuer,//Issuer,这两项和签发jwt的设置一致
         IssuerSigningKey = new SymmetricSecurityKey(Encoding.UTF8.GetBytes(token.Secret))//拿到SecurityKey
     };
 });
在Startup类的Configure方法里面添加有关认证:
app.UseAuthentication();
app.UseAuthorization();
在Controllers添加AuthenticationController控制器,需要token认证的 [Authorize],不需要加增加 [AllowAnonymous] 特性:
 [Route("[controller]/[Action]")]
 [ApiController]
 public class AuthenticationController : ControllerBase
 {
     private readonly IConfiguration _configuration;
     public AuthenticationController(IConfiguration configuration)
     {
         _configuration = configuration;
     }
     [HttpPost]
     public ActionResult RequestToken(string name, string password)
     {
         if (name == null && password == null)
             return BadRequest("Invalid Request");
         var tokenParameter = _configuration.GetSection("tokenParameter").Get<TokenParameter>();
         var claims = new Claim[]
         {
                 new Claim(ClaimTypes.Name,name),
                 new Claim(ClaimTypes.Role,"Root"),
         };
         var key = new SymmetricSecurityKey(System.Text.Encoding.UTF8.GetBytes(tokenParameter.Secret));
         var token = new JwtSecurityToken(
                     issuer: tokenParameter.Issuer,
                     audience: tokenParameter.Audience,
                     claims: claims,
                     notBefore: DateTime.Now,
                     expires: DateTime.Now.AddMinutes(tokenParameter.AccessExpiration),
                     signingCredentials: new SigningCredentials(key, SecurityAlgorithms.HmacSha256));

         //生成Token
         string jwtToken = new JwtSecurityTokenHandler().WriteToken(token);
         return Ok(jwtToken);
     }
 }
测试:
先直接调用WeatherForecast/Get方法,会返回结果401错误,然后调用/Authentication/RequestToken方法,获取token:
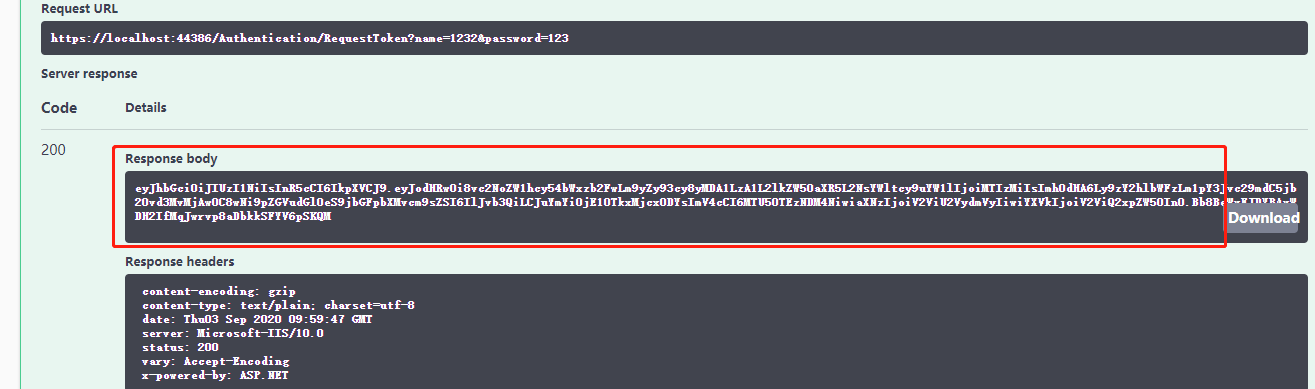
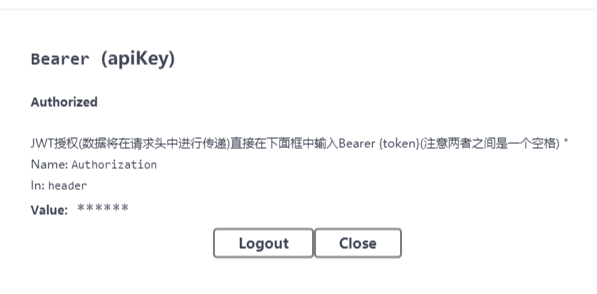
点击swagger文档右上角:Authorize
输入:Bearer {token}(注意两者之间是一个空格) :
再次测试WeatherForecast/Get方法:
