1.新建一个文件,在当前目录下执行
npm init -y
系统会生成一个package.json文件
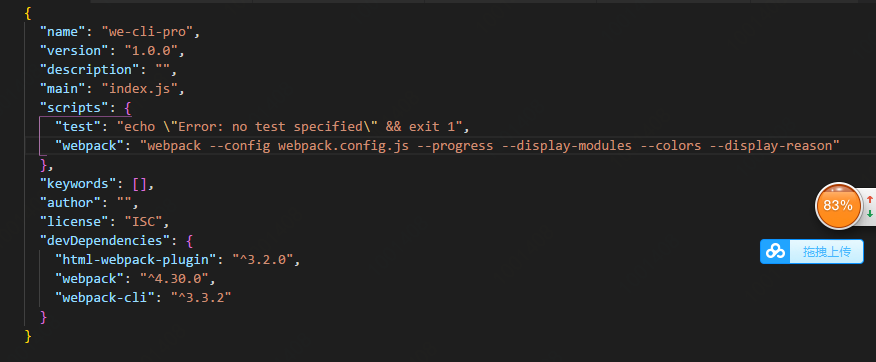
{
"name": "demo",
"version": "1.0.0",
"description": "",
"main": "index.js",
"scripts": {
"test": "echo "Error: no test specified" && exit 1"
},
"author": "",
"license": "ISC"
}
2.执行 npm install,这时候你的日志可能会报错,那我们换一种方法用cnpm install.按照完成之后页面会有一个node_modules文件夹

3.安装项目依赖
npm install webpack --save-dev
4.新建一个文件 webpack.config.js,之后的配置基本都写在这个文件中。
为了使webpack启动方便,我们在package.json 中写以下代码:
"webpack": "webpack --config webpack.config.js --progress --display-modules --colors --display-reason"
然后在webpack.config.js中写以下代码:
const HtmlWebpackPlugin = require('html-webpack-plugin'); //引入插件,不可漏掉!!!
module.exports = {
mode: 'production',
entry: {
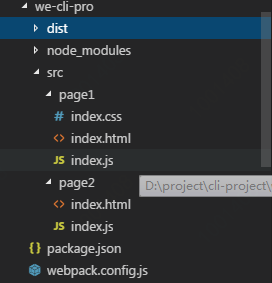
page1: __dirname + '/src/page1/index.js', // page1的入口文件,webpack是以js为入口文件的
page2: __dirname + '/src/page2/index.js',
},
output: {
path: __dirname + '/dist', //产出路径,一般放在dist目录下
filename: 'js/[name]-[chunkhash].js',
//把为入口文件放在dist目录的js文件夹下,
//name是文件名,chunkhash是每次打包文件的hash值,
//目的是如果哪个文件修改,chunkhash会改变,可以只上线修改过的文件
// publicPath: 'http://cdn.com/' //如果上线,可以改为线上地址
},
plugins: [
new HtmlWebpackPlugin({
filename: 'page1.html', //入口html
template: './src/page1/index.html',
minify: {
// removeComments:true, //删除注释
// collapseWhitespace: true //删除空格,压缩
},
chunks: ['page1'] //对应entry的入口js.这样可以按需加载js
}),
new HtmlWebpackPlugin({
filename: 'page2.html',
template: './src/page2/index.html',
minify: {
// removeComments:true, //删除注释
// collapseWhitespace: true //删除空格,压缩
},
chunks: ['page2']
}),
]
}
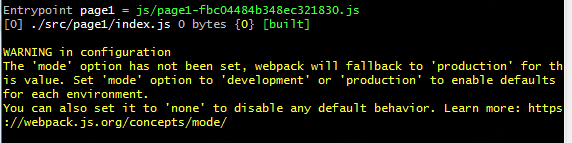
注:如果mode不加的话会报如下的错误:
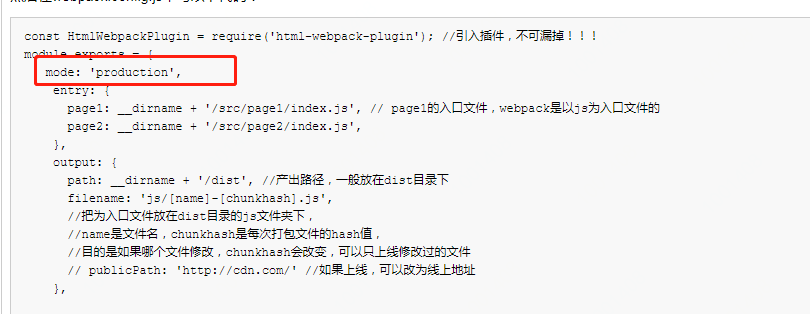
错误:
安装插件:
npm install webpack-cli --save-dev
npm install html-webpack-plugin --save-dev
在命令窗口运行 npm run webpack 可以看到文件在进行打包,dist目录下生成的文件
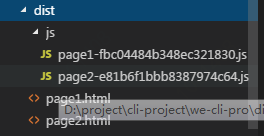
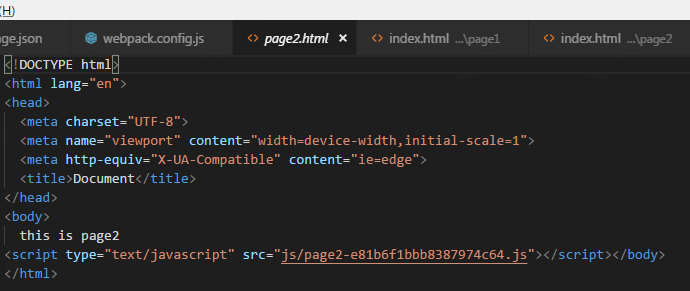
打包完成生成一个page1.html,page2.html文件