文章如果比较长的话,子标题很难找,文章结构没法一目了然,如果有一个导航目录靠在边栏就好了
看了很多园子里其他的文章,js和css挺长的,怕用不好,干脆自己尝试写一个
一、要实现的功能
1、自动生成
不限定某几个h标签,最好h1-h6都可以支持
2、靠在侧边栏
我的边栏内容比较少,我就把导航目录直接加在边栏下面了,这样会和原先的风格结构比较搭,如果边栏内容比较多的,可能要改成绝对定位在右下角了
这里需要引入stickUp.js插件,在滚动条下滑的时候将导航栏固定在页面顶端
3、简单的风格
不同皮肤显示可以融入的比较好,这里会借用catListPostArchive随笔档案的css类,导航目录的样式会和随笔档案的样式一样,自己就不用加样式了
4、目录滚动监听
当页面滑动到某个h标签时,导航目录中需要高亮显示那一条,需要引用bootstrap的scrollspy.js插件来实现
5、优化
最好能平滑的滚动
二、实现代码
1、cnblog-scroller.js
jQuery(function($) { $(function() { //延迟1秒加载, 等博客园的侧栏加载完毕, 不然导航目录距离顶部的高度会不对 setTimeout(function () {loadScroller();}, 1000); }); //加载导航目录 function loadScroller() { //先获取第一个h标签, 之后循环时作为上一个h标签 var $ph = $('#cnblogs_post_body :header:eq(0)'); if($ph.length > 0) { //设置层级为1 $ph.attr('offset', '1'); //添加导航目录的内容 $('#blog-sidecolumn').append('<div id="sidebar_scroller" class="catListPostArchive sidebar-block"><h3 class="catListTitle">导航目录</h3><ul class="nav"></ul></div>'); //取当前边栏的宽度 $('#sidebar_scroller').css('width', $('#blog-sidecolumn').width()); //让导航目录停留在页面顶端 $('#sidebar_scroller').stickUp(); //遍历文章里每个h标签 $('#cnblogs_post_body :header').each(function(i) { var $h = $(this); //设置h标签的id, 编号从0开始 $h.attr('id', 'scroller-' + i); //比上一个h标签层级小, 级数加1 if($h[0].tagName > $ph[0].tagName) { $h.attr('offset', parseInt($ph.attr('offset')) + 1); } //比上一个h标签层级大, 级数减1 else if($h[0].tagName < $ph[0].tagName) { var h = parseInt($h[0].tagName.substring(1)); var ph = parseInt($ph[0].tagName.substring(1)); var offset = parseInt($ph.attr('offset')) - (ph-h); if(offset < 1) { offset = 1 }; $h.attr('offset', offset); } //和上一个h标签层级相等时, 级数不变 else { $h.attr('offset', $ph.attr('offset')); } //添加h标签的目录内容 $('#sidebar_scroller ul').append('<li class="scroller-offset' + $h.attr('offset') + '"><a href="#scroller-' + i + '">' + $h.text() + '</a></li>'); //最后设置自己为上一个h标签 $ph = $h; }); //开启滚动监听, 监听所有在.nav类下的li $('body').scrollspy(); //让页面的滚动更平滑 $('#sidebar_scroller a').on('click', function() { var targetOffset = $(this.hash).offset().top; $('html, body').animate({scrollTop: targetOffset}, 400); return false; }); } }}); |
stickUp.js插件的使用只有"$('#sidebar_scroller').stickUp();"一句,不过需要这个元素距离页顶部的高度已经确定(代码中延迟了1秒,等日历和侧栏控件加载好再加载,如果是绝对定位就不用等1秒了),github里最新的stickUp.js有一点小问题,这里附件中的已经修复了
scrollspy.js插件有两种初始化方式,一种是直接在body中增加"data-spy='scroll'",是马上加载的,因为我们要延迟,所以用第二种js手动初始化"$('body').scrollspy();",需要注意的是被监测的ul要附加"nav"的css类,scrollspy.js的代码中是通过".nav li > a"的结构去查找的
我习惯自己给h标签里添加序号的,所以代码中没有增加自动编号的功能,需要的话请在代码中增加
2、cnblog-scroller.css
|
1
2
3
4
5
6
7
|
.scroller-offset1 {text-indent: 0 /* !important */;}.scroller-offset2 {text-indent: 1.5em;}.scroller-offset3 {text-indent: 3em;}.scroller-offset4 {text-indent: 4.5em;}.scroller-offset5 {text-indent: 6em;}.scroller-offset6 {text-indent: 7.5em;}.nav .active {background-color:#f5f5f5;} |
如果皮肤有自己设定text-indent缩进的话,需要用自己!important来强制设定,具体距离根据皮肤调整一下
三、使用方法
1、申请开通博客园js权限
在博客园 -> 管理 -> 设置 -> 博客侧边栏公告(支持HTML代码)
右边有申请js权限的按钮,理由写希望使用js来自动生成文章的导航目录就可以了
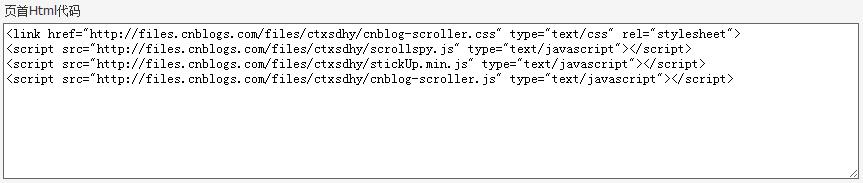
2、在页首Html代码中增加
将附件中的的4个文件上传到自己的博客园里,在博客园 -> 管理 -> 文件 -> 选择文件 上传
在博客园 -> 管理 -> 设置 -> 页首Html代码 中增加以下内容(如果没有开通js权限,js文件会被过滤掉)
|
1
2
3
4
|
<link href="http://files.cnblogs.com/files/你的用户名/cnblog-scroller.css" type="text/css" rel="stylesheet"><script src="http://files.cnblogs.com/files/你的用户名/scrollspy.js" type="text/javascript"></script><script src="http://files.cnblogs.com/files/你的用户名/stickUp.min.js" type="text/javascript"></script><script src="http://files.cnblogs.com/files/你的用户名/cnblog-scroller.js" type="text/javascript"></script> |
(直接用我的用户名也可以~不用下载了)
3、效果
请看这里博客左侧的导航目录
四、附件下载
最新的代码地址:https://github.com/ctxsdhy/cnblogs-example
好久没去看了,可以直接下载这4个地址的文件
http://files.cnblogs.com/files/ctxsdhy/cnblog-scroller.csshttp://files.cnblogs.com/files/ctxsdhy/scrollspy.jshttp://files.cnblogs.com/files/ctxsdhy/stickUp.min.jshttp://files.cnblogs.com/files/ctxsdhy/cnblog-scroller.js |
因为没有增加滚动条,为了防止太长我后来把二级以后的行高减小了
五、我的主题分享
1、设置——页面定制 CSS 代码
|
1
2
3
4
5
6
7
8
9
10
11
12
13
14
15
16
17
18
19
20
21
22
23
24
25
26
27
28
29
30
31
32
33
34
35
36
37
38
39
40
41
42
43
44
45
46
47
48
49
50
51
52
53
54
55
56
57
|
body {background:url('data:image/png;base64,iVBORw0KGgoAAAANSUhEUgAAAGQAAABjBAMAAACfybjfAAAAKlBMVEXr6+vt7e3u7u7v7+/w8PDy8vLz8/P09PT19fX29vb39/f4+Pj5+fn6+vrbLiygAAAC9UlEQVRYw6VWy3HbMBDVOQ0oHShpwLr6ZGfcQgrBzkj31YzVADFpYNlBcnIDnmEBUi8BSIDcBRYEKO9BFi08vt23P+x6b7YPRv9+dtKG5PnP665fzAPbIdR3E1UdcnQQshMB+T9tEGuZbzqESrGsOmYj5JeA2CKEMhZ3tquwZI51k2zOtuUlYbEMYhWI3cTiThJVFSs4RgWIZaqlEFIdY4nsKEK6CGh3zNZSuXjma8z2VM++Hr71yjkINffLBpGt0Nj+bekX23Miz0LVFpvCeDD7HEKrLLalKyWENkEWkUNjfiWWSl5oUTmDfGgslqWFmns/ywuVRQ6NHAuZmnp/q3173t3v98+7t9u9ZLf4MR582yVjqj8YMMHQfwzmEr7i+Hx93SWuOggz8JAInuxcglzmIwOn1CF7I20IbBF2rjjGWFYc2+P01vBiGFhg6P55qrA4kRIWzFnsHoRAEYIGcF2xcizvWyAAkcWm4cPkB4NwR0/HFpZFPzUWOgCTpzEv/iDMJRYgqDhmZ8dAvvXDyDot1BjMb4XEsRFCalkCg/DcolYwe94sWfhgTk+ayMg1G/gz5l1pnchC4okFGPGpoWCgmpcDj37sFxSg80uRJQSAwjH3vOrYWLkw94sp9wsKjYXI/qdr0bHLMvqawo8zCGGBQPDtnKfyuyoyYIUF1UbGmsj6uIAVFuQQkOE/tpK0DVS23+VYwlwKis2uxliWWUY/pp9mVQcZSqH4MRWZY67Z6KNsJYnah9oWG+eYK2gh8tqA5eNinoV5v5C+K9mOWl3iqO/Ko74r2SIfUA7lPPzukPT6wGe6mhdSKhnZW+b1SpWrQq2RcTMEDXJUClFjAZOMcfG8sl5D7UPMPrTclFBZfHoqWYXhvPjwkdsFBOS5lErcdB97JJVy1A08SU44ZSbvjbosELY5hmn2qeGmhKL4KYkFYKkxnMZFW/iojgvTercUt4uV8KF0VVArGfiNPeuXlwLE8OsoEwO+uJJuciV9FlfS23+wcVT7sEin5AAAAABJRU5ErkJggg==')}.postTitle a:hover, .entrylistPosttitle a:hover {margin-left:0 !important;}.postBody h6, .postBody h5, .postBody h4, .postBody h3, .postBody h2, .postBody h1 {color:#444;}.syntaxhighlighter .line.alt1 { padding: 0px 1em !important; border-radius: 0px !important; background: none rgb(248, 248, 248) !important; border: 0px !important; bottom: auto !important; float: none !important; height: auto !important; left: auto !important; line-height: 1.8em !important; outline: 0px !important; overflow: visible !important; position: static !important; right: auto !important; top: auto !important; vertical-align: baseline !important; auto !important; box-sizing: content-box !important; min-height: auto !important; white-space: nowrap !important;"> |
公告里的调用次数统计是在这里https://s05.flagcounter.com/申请的,你如果申请到了应该只要替换我链接里的"d5Xi"就好了,我调整了下样式,只显示前3个国家然后隐藏了广告..
我隐藏了文章页的日历组件,如果不想隐藏的话去掉"#blog-calendar {display: none!important;}"这段就好
还隐藏了博客园爸爸的文字广告"#ad_t2 {display: none;}"..
加了自适应,手机上看也还行
2、设置——博客侧边栏公告
|
1
2
3
4
|
<a href="https://github.com/ctxsdhy" target="_blank">GitHub</a> | <a href="http://weibo.com/ctxsdhy" target="_blank">新浪微博</a> | <a href="http://www.ctxsdhy.com" target="_blank">博客</a><div id="flagcounterdiv"></div> |
3、设置——页首 HTML 代码
|
1
2
3
4
5
6
7
8
9
10
11
12
13
14
15
16
|
<link href="http://files.cnblogs.com/files/ctxsdhy/cnblog-scroller.css" type="text/css" rel="stylesheet"><script src="http://files.cnblogs.com/files/ctxsdhy/scrollspy.js" type="text/javascript"></script><script src="http://files.cnblogs.com/files/ctxsdhy/stickUp.min.js" type="text/javascript"></script><script src="http://files.cnblogs.com/files/ctxsdhy/cnblog-scroller.js" type="text/javascript"></script><script src="http://files.cnblogs.com/files/ctxsdhy/ctxsdhy.js" type="text/javascript"></script><script>$(function(){$("#navList").append('<li><a class="menu" rel="nofollow" href="https://www.cnblogs.com/ctxsdhy/p/9104080.html">开发&测试</a></li>');$("#navList").append('<li><a class="menu" rel="nofollow" href="https://www.cnblogs.com/ctxsdhy/p/9104085.html">架构&项目</a></li>');$("#navList").append('<li><a class="menu" rel="nofollow" href="https://www.cnblogs.com/ctxsdhy/p/9104086.html">运维</a></li>');$("#navList").append('<li><a class="menu" rel="nofollow" href="https://www.cnblogs.com/ctxsdhy/p/9104089.html">读书&源码</a></li>');//$("#navList").append('<li><a class="menu" rel="nofollow" href="http://www.cnblogs.com/ctxsdhy/p/5701822.html">最近计划</a></li>');$("#navList").append('<li><a class="menu" rel="nofollow" href="http://www.cnblogs.com/ctxsdhy/p/12009317.html">知识卡片</a></li>');$("#navList").append('<li><a style="color:white" class="menu" rel="nofollow" href="https://i.cnblogs.com" target="_blank">管理</a></li>');});</script> |
最后一个按钮"管理"鼠标移上去才会看到