From: http://www.galloway.me.uk/tutorials/ios-library-with-resources/
The other day I was finding myself wondering why it was so complicated to create a “framework” for iOS which contained XIBs, graphics, etc. People are using techniques such as iOS Universal Framework which I tried but had problems with setting a breakpoint in the framework project. I thought there must be a better way to do it when I thought about the idea of having a simple static library and a resources bundle. It worked! And in this tutorial I show how you can do it for yourself.
If you want to just skip to download the sample project then please do so, or carry on reading for a full description of what to do.
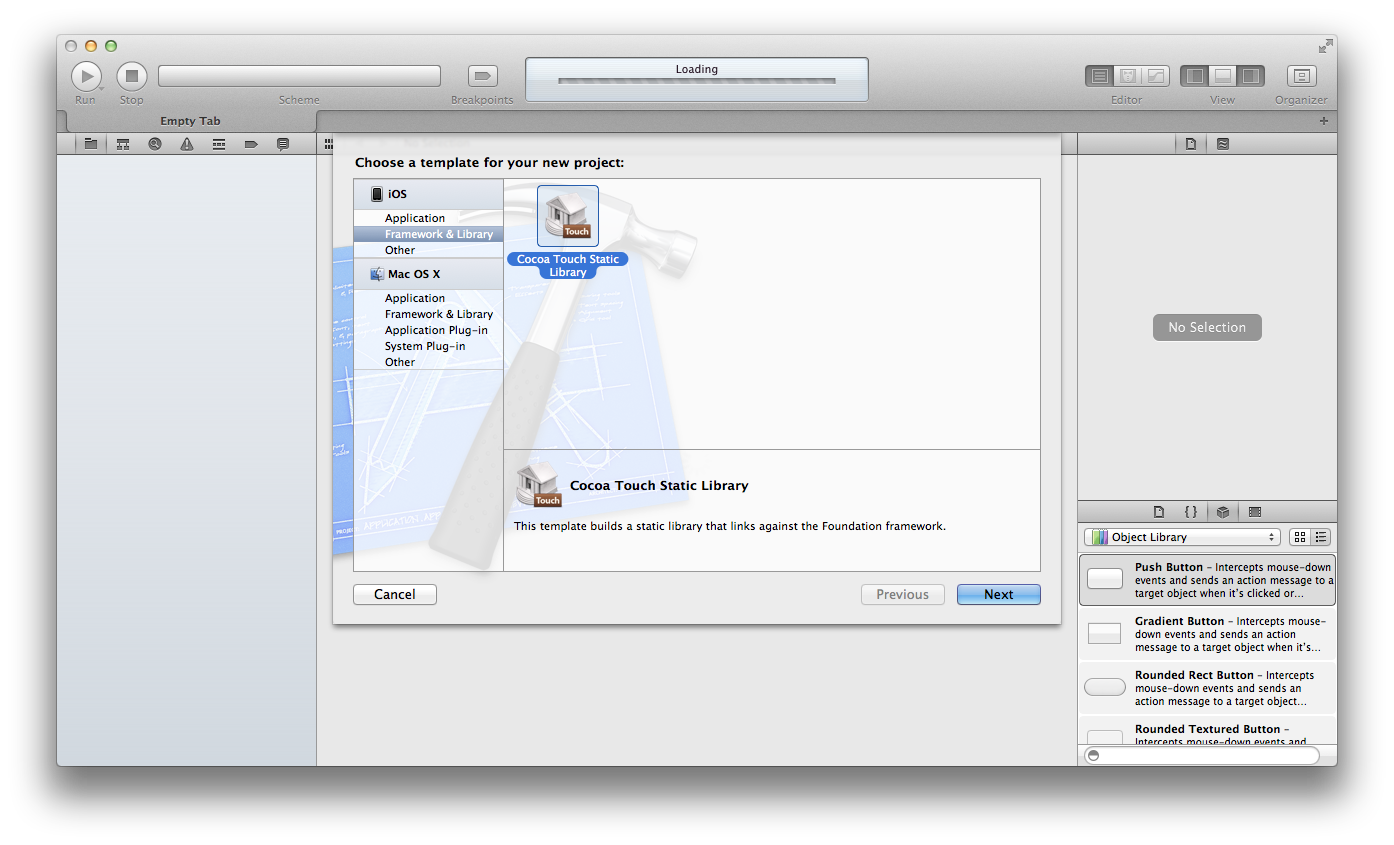
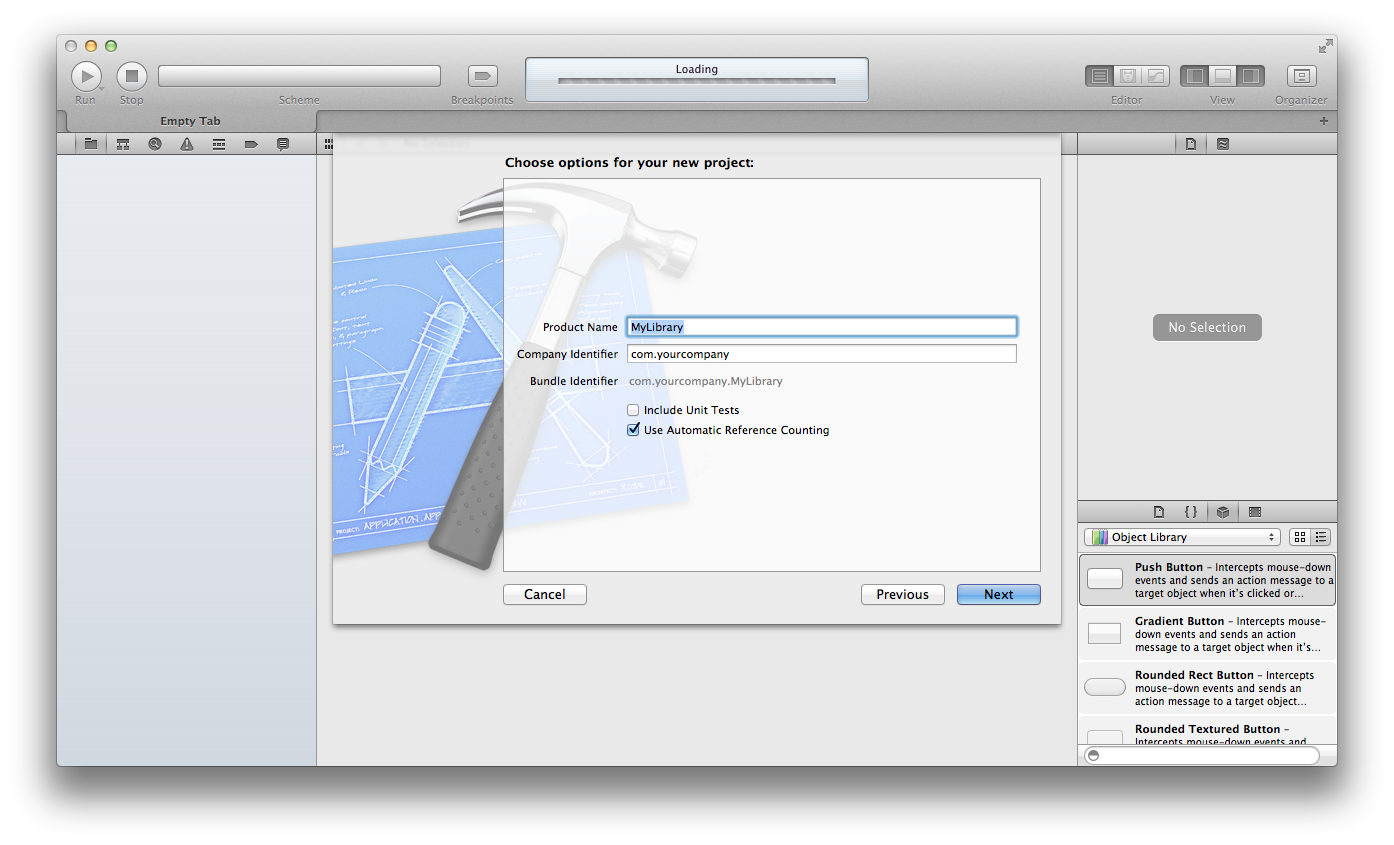
Step 1: Create the library project
First of all you need to create a library project which will be a standard Cocoa Touch static library first of all. So go ahead and create a new project from the “Cocoa Touch Static Library” template as shown in the following two screenshots.
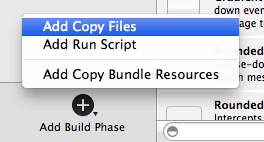
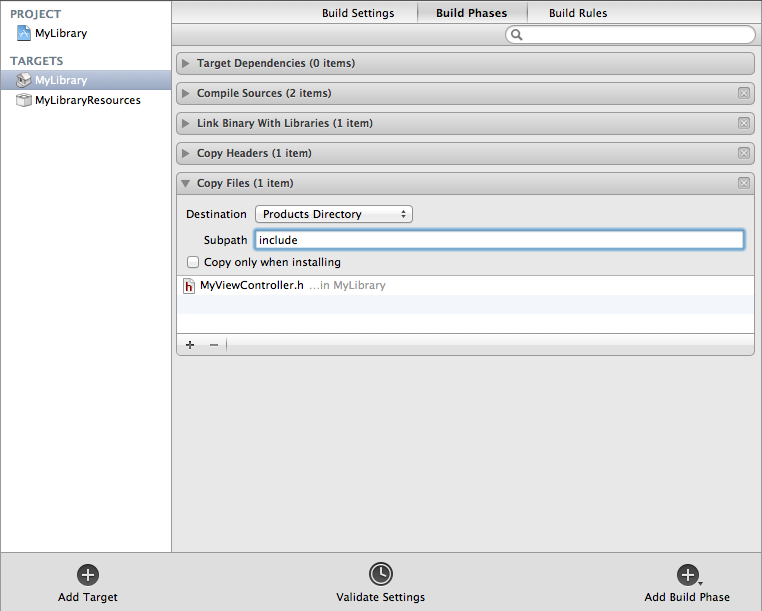
Step 2: Adding a copy files phase
In order for the headers from the static library to be picked up by a project which includes it, we need to add a copy files phase to the library to copy the headers to a certain directory. From a bit of trial and error and some other blog posts I found that we need to put these into the “Products Directory” under a subpath of include.
To add the phase you need to go to the build settings of the library project and under the “Build Phases” tab you’ll see a button called “Add Build Phase”. Click that and set it up as per the screenshots below.
Step 3: Adding the resources bundle target
The magic for getting the resources to play nicely is to put all the resources into a bundle which we’ll include from another project. So we need to add a target to the library project of type “Bundle”. From the build settings of your library project click the “Add Target” button and use the screenshot below to help you set it up.

Step 4: Fixing the resources bundle target
When the resources bundle target is added, it will default to being set up with a Mac OS X build target. This is wrong because we want an iOS one so you just need to change the relevant settings to whatever you want your iOS target to be (probably “Latest iOS”). Use the screenshot below to guide you in doing this.

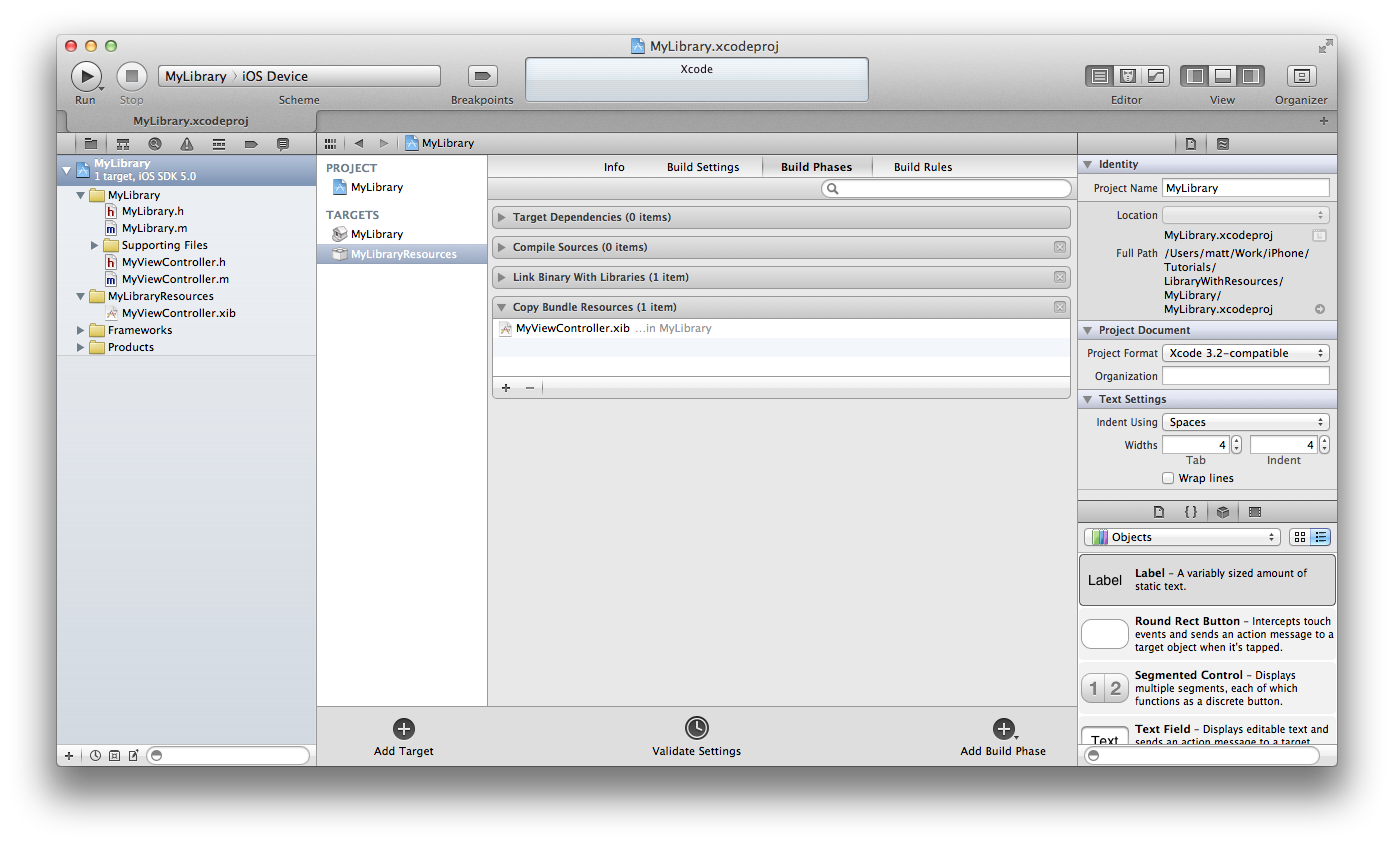
Step 5: Adding a XIB to the bundle target
In order to get resources to be put into the bundle all you have to do is add them to the “Copy Bundle Resources” build phase of the target. The following screenshot shows an example of MyViewController.xib being put into the bundle.
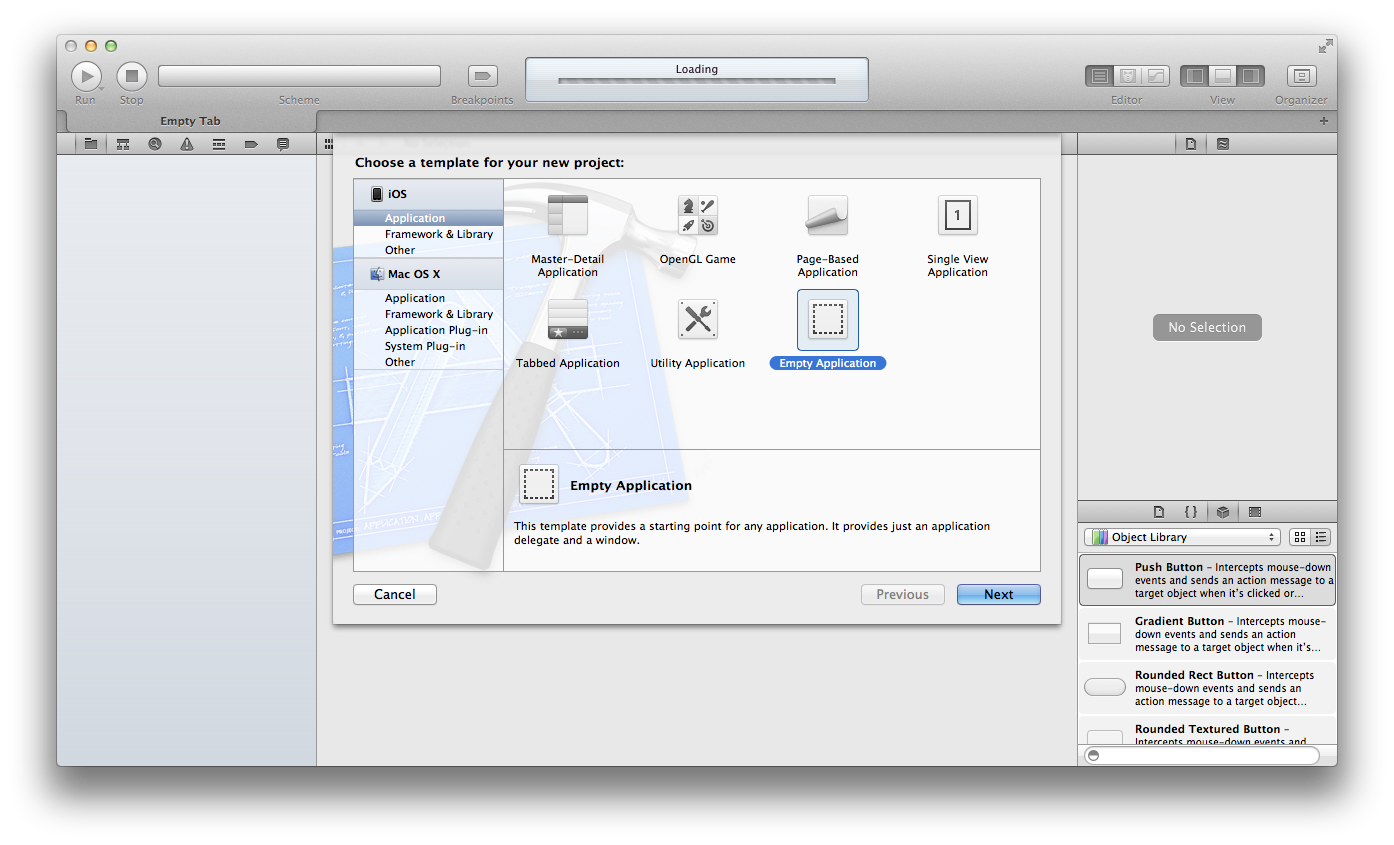
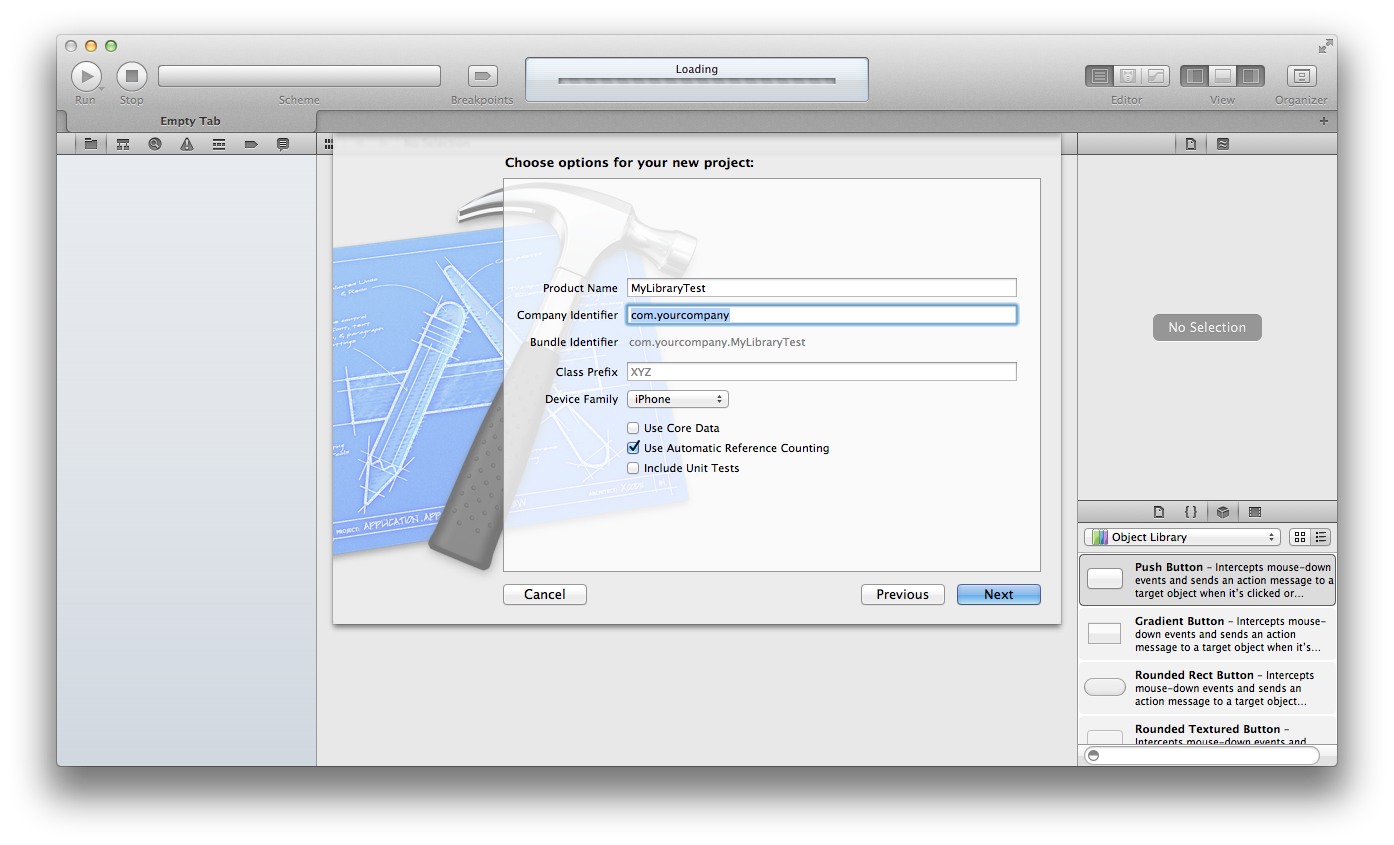
Step 6: Creating the app project
Now we’re ready to create an app which will use the library. So let’s go ahead and do that. Just create an empty application for now. The following screenshots show an example of doing that.
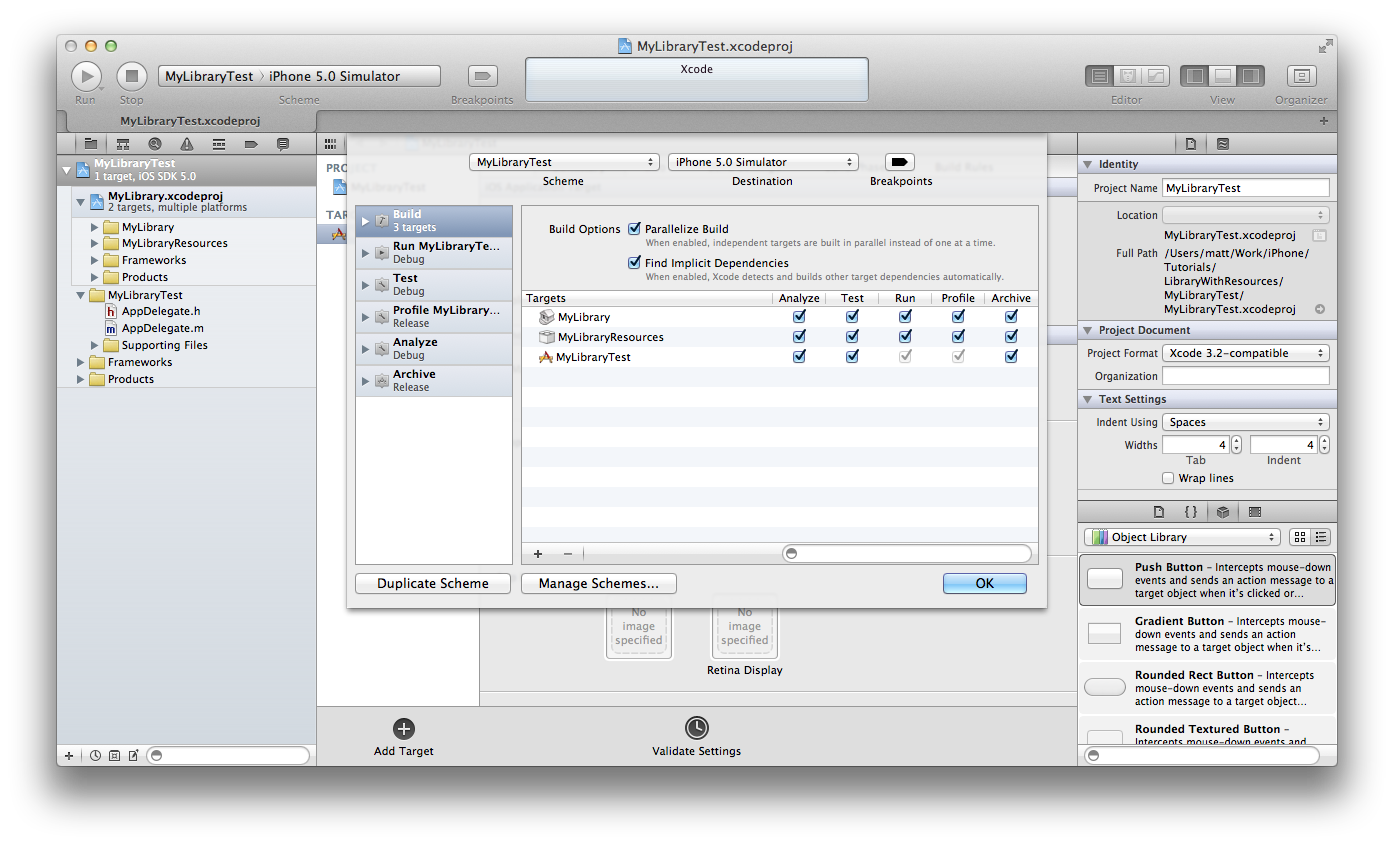
Step 7: Linking with the library
In order to get the static library to be linked with the main app project you just need to drag the library project from Finder into the navigator pane in Xcode and drop it next to the project. It doesn’t really matter if it’s a sub project or a sibling project in a workspace – do whichever you feel most comfortable with.
Then we need to edit the app’s scheme to make it build the library project’s targets first. So edit the scheme and under the “Build” tab click the plus at the bottom and add the library target and library resources target. You should then have something which looks like the following screenshot.
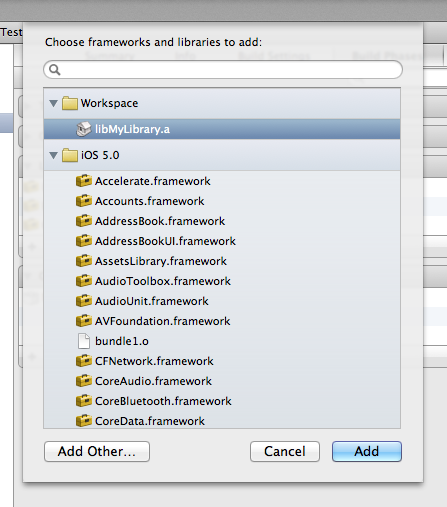
Step 8: Linking against the library
We now need to tell the app project to link against the static library from the library project. To do this you just need to add it to the list of linked frameworks in the target. The following screenshot shows an example of doing this.
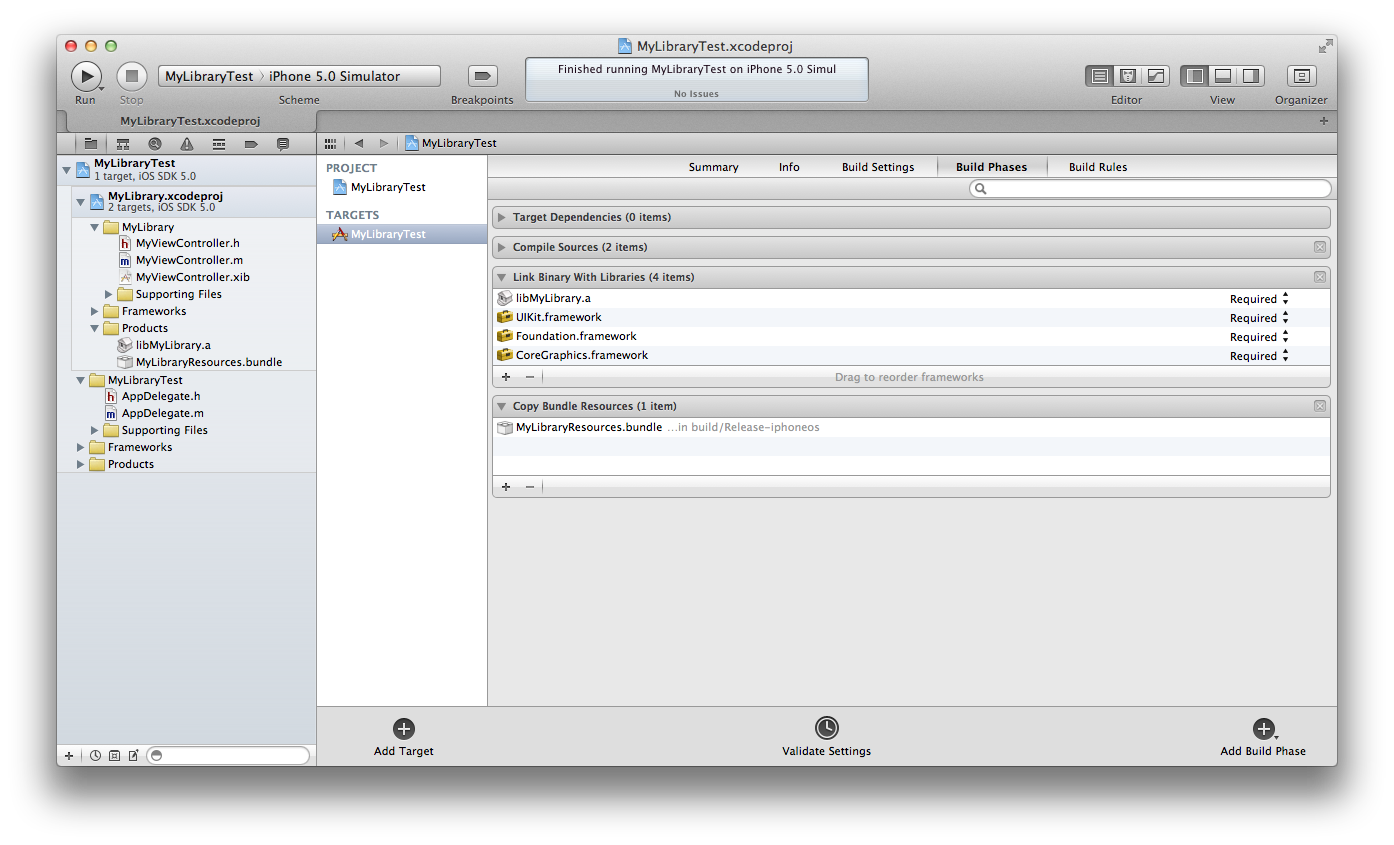
We also need to add the bundle from the library project to the main app project. To do this we just need to drag it across from the navigator pane to the “Copy Bundle Resources” phase of the application project. Once done it should look something like the following screenshot.
Step 9: Final setup of app project
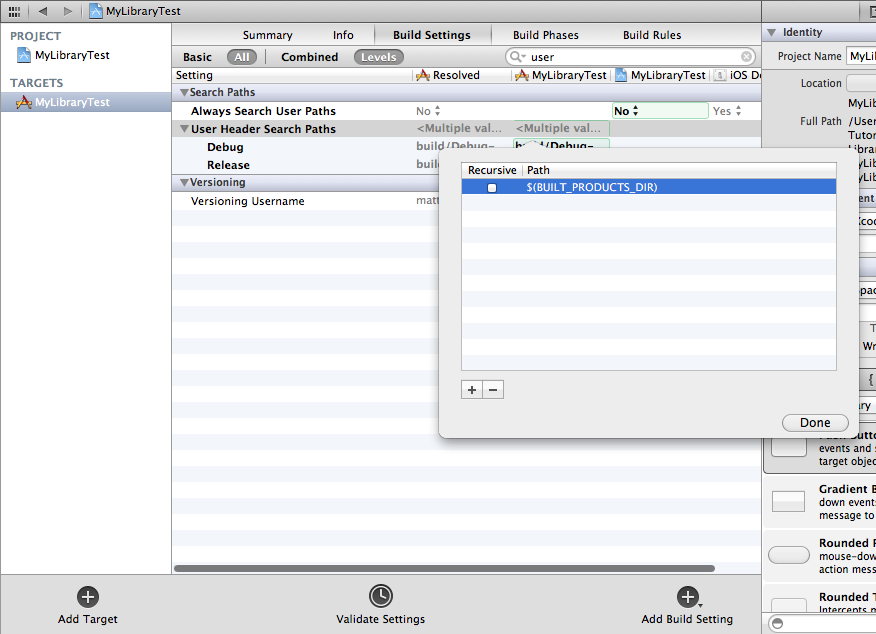
The last bit to do is to set up the header search paths of the app project. Go to the build settings of the app project and look for “User Header Search Paths”. Then set the target setting to $(BUILT_PRODUCTS_DIR) so that it looks something like the following screenshot.
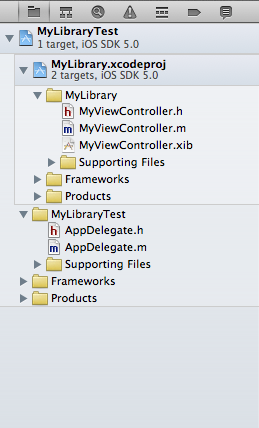
After you’ve done that you’re ready to go! The finished project should look something like the following screenshot in the navigator pane.
Step 10: Coding the example view controller
In my example I created a view controller called MyViewController with a XIB that gets put into the library bundle. The code for this just has to be a bit different to normal to pick up the XIB from our library bundle. So here is the code:
1 2 3 4 5 6 7 8 9 10 11 12 13 14 15 16 |
|
The only difference here is that we’re picking the XIB from the MyLibraryResources bundle that is built in the library project. It really is as simple as that. Graphics which are included in that bundle will be immediately accessible from the XIBs included in the library bundle as well.
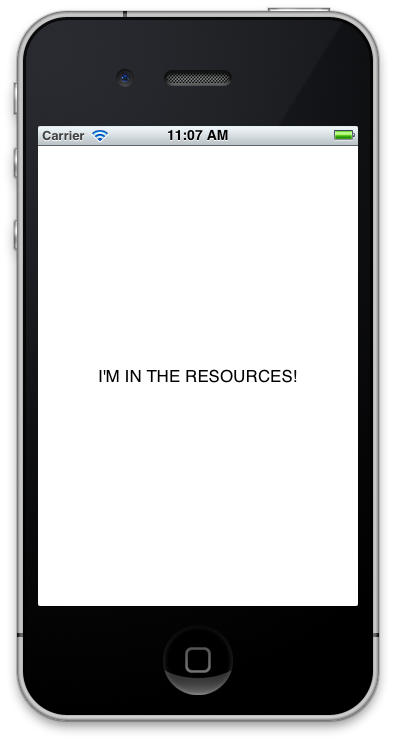
Here’s an example screenshot just to show it really does work:
Extras
I found it useful to add a category on NSBundle which enables me to access the library bundle without having to type a lot of code each time. So something like this would suffice:
1 2 3 4 5 6 7 8 9 10 11 12 13 14 15 16 |
|
Then you can change the code in your view controller initialisers to be:
1 2 |
|
Another useful trick is to have a category on UIImage so that loading images from the bundle is easy. I use something like the following which first looks for the image using the normal imageNamed: method and if that fails then it looks it up in the resources bundle. This is useful because then the app can override graphics as it wishes.
1 2 3 4 5 6 7 8 9 10 11 12 13 14 15 16 17 |
|