.NET Core微服务三:polly熔断与降级
本文的项目代码,在文章结尾处可以下载。
本文使用的环境:Windows10 64位 + VS 2019 + .NET Core 3.1
Consul有关介绍:https://www.jianshu.com/p/32dc52f28a14
Consul官方网址:https://www.consul.io/
一、安装Consul
1.官网下载对应版本,并解压出来

2.打开cmd,cd到解压的目录,运行如下其中一条命令
本次演示都在同一台计算机上,所以本文选择命令一;这两条命令请在开发环境使用,生产环境不要使用。
命令一:“consul.exe agent -dev”服务中心的ip地址,将会使用127.0.0.1
命令二:“consul.exe agent -dev -client x.x.x.x”指定服务中心的ip地址
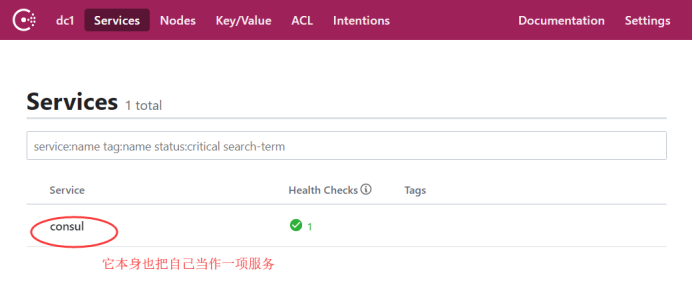
3.命令运行成功后,打开“http://127.0.0.1:8500/”,出现如下画面
二、创建服务
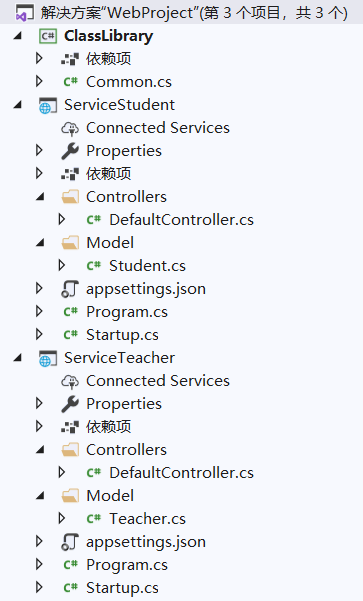
1.服务端项目大体结构:
2.新建.NET Core类库项目,命名为“ClassLibrary”,然后NuGet搜索并安装
“Consul”、“Microsoft.Extensions.Configuration”、“Microsoft.Extensions.Configuration.Json”
Common.cs代码:
 1 using Consul;
 2 using Microsoft.Extensions.Configuration;
 3 using System;
 4
 5 namespace ClassLibrary
 6 {
 7     public class Common
 8     {
 9         public static IConfiguration Configuration { get; }
10         static Common()
11         {
12             Configuration = new ConfigurationBuilder().AddJsonFile("appsettings.json", false, true).Build();
13         }
14
15         /// <summary>
16         /// 需要注册的服务地址
17         /// </summary>
18         public static string ConsulServiceIP
19         {
20             get
21             {
22                 return Configuration["Consul:ServiceIP"];
23             }
24         }
25
26         /// <summary>
27         /// 需要注册的服务端口
28         /// </summary>
29         public static int ConsulServicePort
30         {
31             get
32             {
33                 string str = Configuration["Consul:ServicePort"];
34                 return int.Parse(str);
35             }
36         }
37
38         /// <summary>
39         /// 服务注册
40         /// </summary>
41         public static void ConsulRegister()
42         {
43             ConsulClient client = new ConsulClient(
44                 (ConsulClientConfiguration c) =>
45                 {
46                     c.Address = new Uri(Configuration["Consul:Address"]); //Consul服务中心地址
47                     c.Datacenter = Configuration["Consul:DataCenter"]; //指定数据中心,如果未提供,则默认为代理的数据中心。
48                 }
49             );
50             string checkUrl = Configuration["Consul:CheckUrl"];
51             client.Agent.ServiceRegister(new AgentServiceRegistration()
52             {
53                 ID = Guid.NewGuid().ToString(), //服务编号,不可重复
54                 Name = Configuration["Consul:ServiceName"], //服务名称
55                 Port = ConsulServicePort, //本程序的端口号
56                 Address = ConsulServiceIP, //本程序的IP地址
57                 Check = new AgentServiceCheck()
58                 {
59                     DeregisterCriticalServiceAfter = TimeSpan.FromMilliseconds(1), //服务停止后多久注销
60                     Interval = TimeSpan.FromSeconds(5), //服务健康检查间隔
61                     Timeout = TimeSpan.FromSeconds(5), //检查超时的时间
62                     HTTP = $"http://{ConsulServiceIP}:{ConsulServicePort}{checkUrl}" //检查的地址
63                 }
64             });
65         }
66
67     }
68 }
3.新建.NET Core的webapi项目,命名为“ServiceStudent”,把“为HTTPS配置”的勾选去掉
Controller代码:
1 using Microsoft.AspNetCore.Mvc;
2 using System;
3 using System.Collections.Generic;
4
5 namespace ServiceStudent.Controllers
6 {
7 [Route("api/[controller]/[action]")]
8 [ApiController]
9 public class DefaultController : ControllerBase
10 {
11 static List<Student> list = new List<Student>() {
12 new Student(){ ID = "001", StudentName = "学生1", StudentAge = 16 },
13 new Student(){ ID = "002", StudentName = "学生2", StudentAge = 18 },
14 new Student(){ ID = "003", StudentName = "学生3", StudentAge = 17 }
15 };
16
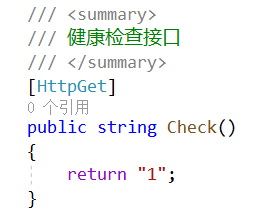
17 /// <summary>
18 /// 健康检查接口
19 /// </summary>
20 [HttpGet]
21 public string Check()
22 {
23 return "1";
24 }
25
26 [HttpGet]
27 public List<Student> GetList()
28 {
29 Console.WriteLine(DateTime.Now.ToString());
30 return list;
31 }
32
33 [HttpGet]
34 public Student GetModel(string id)
35 {
36 Console.WriteLine(DateTime.Now.ToString());
37 return list.Find(t => t.ID == id);
38 }
39 }
40 }
其中有一段健康检查的接口,作用是让服务中心知道服务没有挂掉还能访问,不需要什么业务,所以怎么简单怎么来:
Model代码:
    public class Student
    {
        public string ID { get; set; }
        public string StudentName { get; set; }
        public int StudentAge { get; set; }
    }
appsettings.json的配置,加入"Consul",注意ServiceIP改为自己电脑的IP(这个不要配置为127.0.0.1,后面访问会不正常)
 1 {
 2   "Logging": {
 3     "LogLevel": {
 4       "Default": "Information",
 5       "Microsoft": "Warning",
 6       "Microsoft.Hosting.Lifetime": "Information"
 7     }
 8   },
 9   "AllowedHosts": "*",
10   "Consul": {
11     "Address": "http://127.0.0.1:8500",
12     "CheckUrl": "/api/Default/Check",
13     "DataCenter": "dc1",
14     "ServiceIP": "192.168.2.119",
15     "ServicePort": 551,
16     "ServiceName": "Student"
17   }
18 }
Program.cs的CreateHostBuilder方法改为:
1 public static IHostBuilder CreateHostBuilder(string[] args) =>
2     Host.CreateDefaultBuilder(args)
3         .ConfigureWebHostDefaults(webBuilder =>
4         {
5             string ip = Common.ConsulServiceIP;
6             int port = Common.ConsulServicePort;
7             webBuilder.UseStartup<Startup>().UseUrls($"http://{ip}:{port}");
8         });
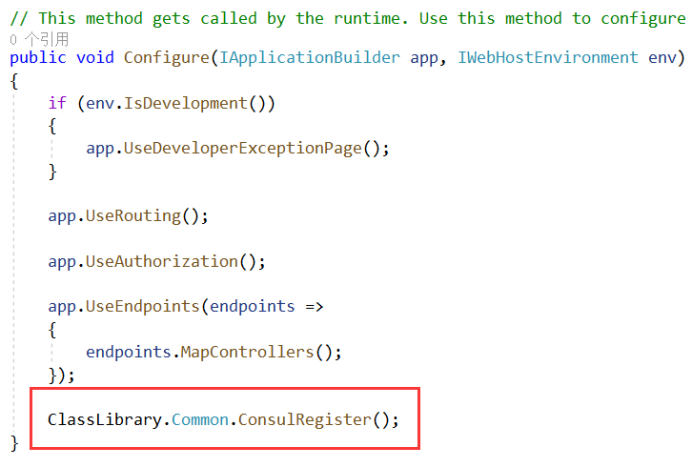
在Startup.cs的Configure方法中加入“ClassLibrary.Common.ConsulRegister();”
这样一个“Student”服务就创建好了,“Teacher”服务也是如法炮制,但是需要改appsettings.json的服务名和端口号,代码就不贴了,请到文章结尾处下载。
三、启动服务
通过命令行来启动,打开cmd,cd到Debug目录,各自运行“dotnet ServiceStudent.dll”和“dotnet ServiceTeacher.dll”。
请检查端口有没有被占用或超出范围,如果失败了,在配置文件中换成其它端口试试。


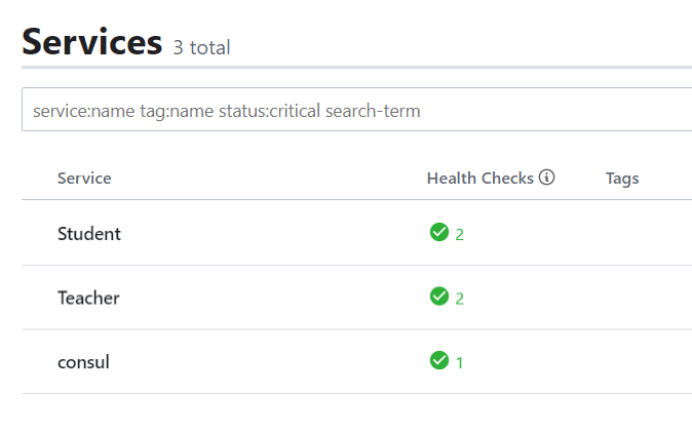
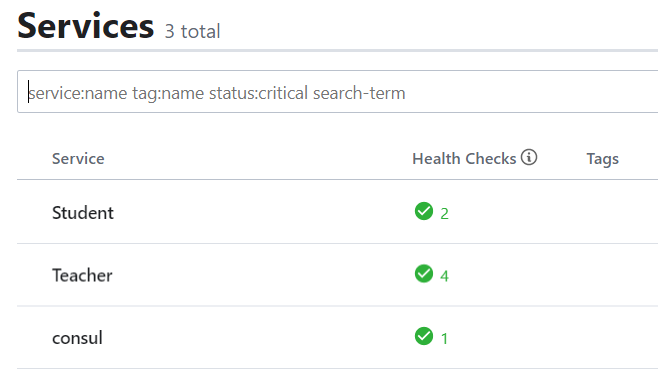
服务运行成功后,打开“http://127.0.0.1:8500/”,如下画面注册成功
如果出现一项打X,那就是失败,这个服务会在1分钟之后被踢出列表
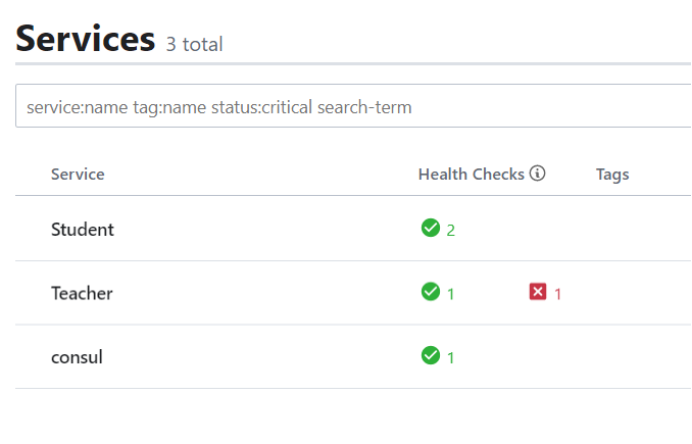
一个服务可能会部署到多个服务器上,用“Teacher”来模拟下多台机器运行。
前面运行好的服务不要关闭,打开Teacher的Debug目录下的配置文件,
修改它的端口号,服务名不用改,再新开一个cmd,运行“dotnet ServiceTeacher.dll”

那么服务中心就会有变化
四、使用服务
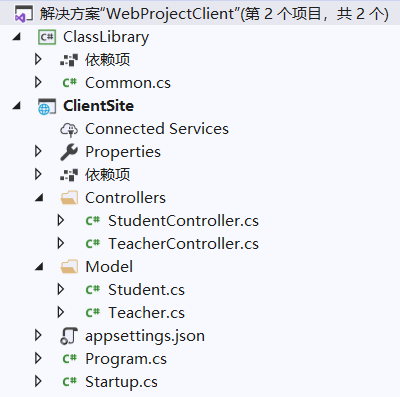
1.客户端项目大体结构:
2.新建.net core类库项目,命名为“ClassLibrary”,然后NuGet搜索并安装
“Consul”、“Microsoft.Extensions.Configuration”
Common.cs代码:
using Consul;
using Microsoft.Extensions.Configuration;
using System;
using System.Linq;
using System.Net.Http;
using System.Threading.Tasks;

namespace ClassLibrary
{
    public class Common
    {
        public static IConfiguration Configuration { get; }
        static Common()
        {
            Configuration = new ConfigurationBuilder().AddJsonFile("appsettings.json", false, true).Build();
        }

        public static string ConsulAddress
        {
            get { return Configuration["ConsulAddress"]; }
        }

        /// <summary>
        /// 获取服务
        /// </summary>
        public static string GetService(string serviceName)
        {
            ConsulClient client = new ConsulClient(c => c.Address = new Uri(ConsulAddress));

            var response = client.Agent.Services().Result.Response;

            //服务名称区分大小写,若要不区分:Equals(serviceName, StringComparison.OrdinalIgnoreCase)
            var services = response.Where(s => s.Value.Service.Equals(serviceName)).Select(s => s.Value);

            //进行取模,随机取得一个服务器,或者使用其它负载均衡策略
            var service = services.ElementAt(Environment.TickCount % services.Count());

            return service.Address + ":" + service.Port;
        }

        /// <summary>
        /// 获取服务(异步方法)
        /// </summary>
        public async Task<string> GetService2(string serviceName)
        {
            ConsulClient client = new ConsulClient(c => c.Address = new Uri(ConsulAddress));

            var response = (await client.Agent.Services()).Response;

            //服务名称区分大小写,若要不区分:Equals(serviceName, StringComparison.OrdinalIgnoreCase)
            var services = response.Where(s => s.Value.Service.Equals(serviceName)).Select(s => s.Value);

            //进行取模,随机取得一个服务器,或者使用其它负载均衡策略
            var service = services.ElementAt(Environment.TickCount % services.Count());

            return service.Address + ":" + service.Port;
        }

        public static string HttpGetString(string url)
        {
            HttpClient httpClient = new HttpClient();
            string result = httpClient.GetAsync(url)
            .Result.Content.ReadAsStringAsync().Result;
            httpClient.Dispose();
            return result;
        }

        public static T HttpGetObject<T>(string url)
        {
            string result = HttpGetString(url);
            return Newtonsoft.Json.JsonConvert.DeserializeObject<T>(result);
        }

    }
}
3.新建.NET Core的webapi项目,命名为“ClientSite”,把“为HTTPS配置”的勾选去掉
StudentController代码:
 1 using ClassLibrary;
 2 using Microsoft.AspNetCore.Mvc;
 3 using System.Collections.Generic;
 4
 5 namespace ClientSite.Controllers
 6 {
 7     [Route("api/[controller]/[action]")]
 8     [ApiController]
 9     public class StudentController : ControllerBase
10     {
11         [HttpGet]
12         public object GetList()
13         {
14             string ip = Common.GetService("Student");
15             List<Student> list = Common.HttpGetObject<List<Student>>($"http://{ip}/api/Default/GetList");
16             return new
17             {
18                 address = ip,
19                 data = list
20             };
21         }
22
23         [HttpGet]
24         public object GetModel(string id)
25         {
26             string ip = Common.GetService("Student");
27             Student model = Common.HttpGetObject<Student>($"http://{ip}/api/Default/GetModel?id={id}");
28             return new
29             {
30                 address = ip,
31                 data = model
32             };
33         }
34     }
35 }
TeacherController代码:
 1 using ClassLibrary;
 2 using Microsoft.AspNetCore.Mvc;
 3 using System.Collections.Generic;
 4
 5 namespace ClientSite.Controllers
 6 {
 7     [Route("api/[controller]/[action]")]
 8     [ApiController]
 9     public class TeacherController : ControllerBase
10     {
11         [HttpGet]
12         public object GetList()
13         {
14             string ip = Common.GetService("Teacher");
15             List<Teacher> list = Common.HttpGetObject<List<Teacher>>($"http://{ip}/api/Default/GetList");
16             return new
17             {
18                 address = ip,
19                 data = list
20             };
21         }
22
23         [HttpGet]
24         public object GetModel(string id)
25         {
26             string ip = Common.GetService("Teacher");
27             Teacher model = Common.HttpGetObject<Teacher>($"http://{ip}/api/Default/GetModel?id={id}");
28             return new
29             {
30                 address = ip,
31                 data = model
32             };
33         }
34     }
35 }
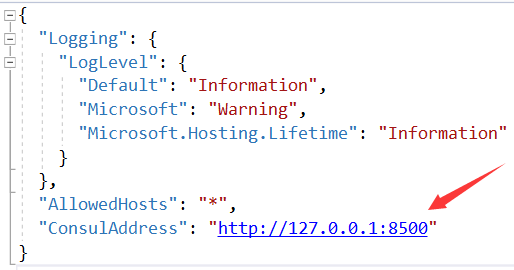
appsettings.json加入:
"ConsulAddress": "http://127.0.0.1:8500"
4.用VS启动站点,然后用postman访问
“http://ip:port/api/Student/GetList”
“http://ip:port/api/Student/GetModel?id=002”

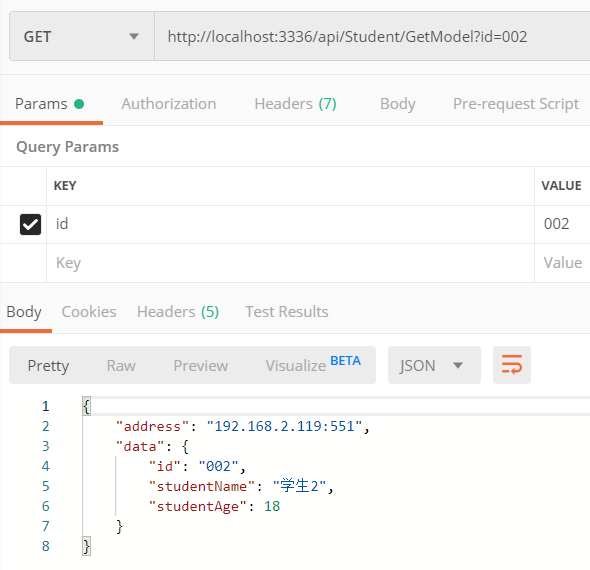
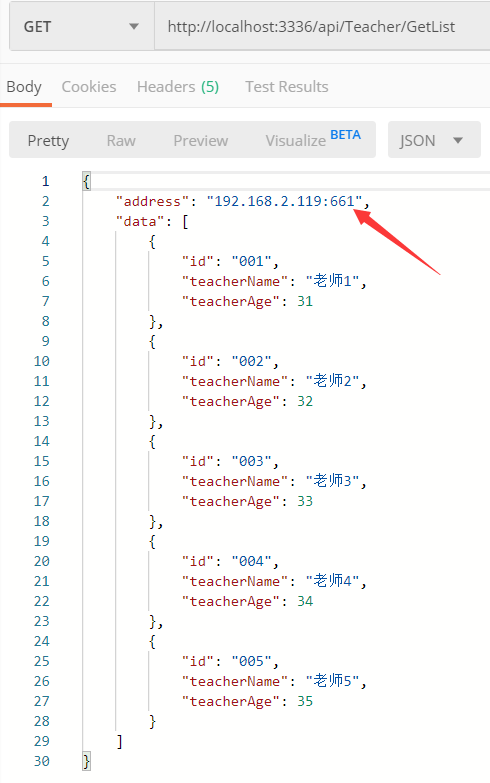
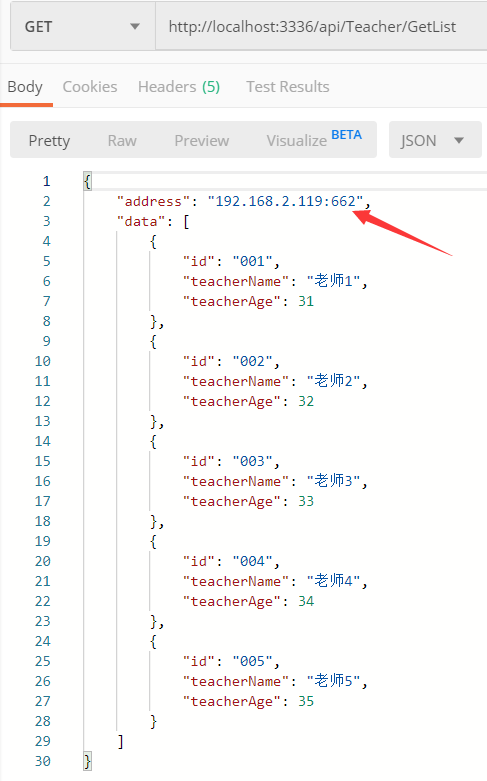
多次访问“http://ip:port/api/Teacher/GetList”,则address会随机切换,注意看返回的端口号