- 起因
- 在Android studio 刚出。本人就想弄单元测试,可惜当时Android studio不知道抽什么风(准确来说,应该是我不会弄而已)。无法执行到相应的代码。
后来今天突然自己又抽风。又想去弄一下Android junit。 - 本文基于做过Eclipse开发使用过Android junit,如果Eclipse的Android Junit没有使用过,就我没有说过吧!
- 准备环境,配置
- 官网Demo地址:https://github.com/googlesamples/android-testing-templates.git
- 环境
- 根据demo中


- 单纯想运行java的单元测试就引入
// Dependencies for local unit tests
testCompile 'junit:junit:' + rootProject.ext.junitVersion
testCompile 'org.mockito:mockito-all:' + rootProject.ext.mockitoVersion
testCompile 'org.hamcrest:hamcrest-all:' + rootProject.ext.hamcrestVersion - 想运行Android的Junit得引入
// Android Testing Support Library's runner and rules
androidTestCompile 'com.android.support.test:runner:' + rootProject.ext.runnerVersion
androidTestCompile 'com.android.support.test:rules:' + rootProject.ext.rulesVersion - 最后在 defaultConfig 节点添加
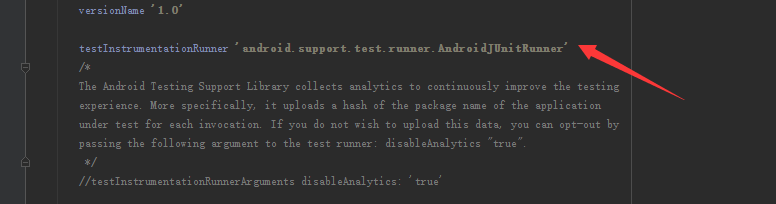

defaultConfig {
    testInstrumentationRunner 'android.support.test.runner.AndroidJUnitRunner'
} - 以上配置要配置在“启动项目中”build.gradle文件中,方可自动关联上启动项目
- Android Studio本来启动项目中的测试代码分为两个目录

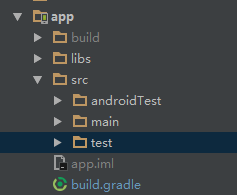
- 如果是通过更改“sourceSets”的话。那就要得重新配置注明相应的文件夹(这是Eclipse转AS导出的配置)
 sourceSets{
sourceSets{
    main{
        java.srcDirs = ['src']
    }
    androidTest{
        java.srcDirs = ['androidTest/src']
    }
    test{
        java.srcDirs = ['test/src']
    }
} - 最后就把相应的文件放入具体目录
- androidTest “Android的Junit”
- test “java的单元测试”
- 代码
- junit
public class ExampleUnitTest {
    @Test
    public void addition_isCorrect() throws Exception {
        System.out.println("123");

    }
} - Android junit
public class AndroidRuntimeCodeTest extends AndroidTestCase {

    public void testHello() throws Exception {
        System.out.println("testHello");
    }
} - 结论
- 注意事项
- 以前Eclipse做单元测试得往AndroidManifest.xml标明
<manifest ><instrumentationandroid:name="android.test.InstrumentationTestRunner"android:targetPackage="com.example.viewtest" />
</manifest>-
<application>
<uses-library android:name="android.test.runner" /></application> - Android studio就要在build.gradle
- 导入相应的包
- 在
android{defaultConfig {testInstrumentationRunner 'android.support.test.runner.AndroidJUnitRunner'}} - 还有一点:就是“测试使用的需要的包”遇到与“启动项目的包”冲突时,使用
configurations.all {
    resolutionStrategy {
        androidTestCompile 'com.android.support.test:runner:0.4.1'
        androidTestCompile 'com.android.support.test:rules:0.4.1'

        forcedModules = ['com.android.support:support-annotations:23.0.1']

    }
}