一、前言
本文承接上一节:Java_脚本引擎_01_用法入门
这一节我们来看下怎么在idea中进行Nashorn的Debug ,又或者说怎么在Idea中进行js的Debug
注:idea本身就支持js的debug,无需额外的配置。
二、实例
1.js
在resources/js 目录下创建 hello.js

function testScript() {
    var name = $name;
    print("name is " + name);
}

testScript();
2.测试类
随便找个目录创建测试类

package com.ray.jsdebug;

import org.junit.Test;

import javax.script.ScriptEngine;
import javax.script.ScriptEngineManager;
import javax.script.ScriptException;

/**
 * @author : shira
 * @date : 2018/8/8
 * @time : 15:44
 * @desc :
 **/

public class HelloTest {

    @Test
    public void testHello() throws ScriptException {
        //1..创建引擎
        ScriptEngineManager scriptEngineManager = new ScriptEngineManager();
        ScriptEngine engine = scriptEngineManager.getEngineByName("nashorn");

        //2.设置参数
        engine.put("$name", "Tom");

        //3.执行脚本
        //3.1 可以进行 nashorn debug
        String jsFilePath1 = "src/main/resources/static/hello.js";

        //3.2 不能进行 nashorn debug
        String jsFilePath2 = "classpath:static/hello.js";

        //3.3 不能进行 nashorn debug
        String jsFilePath3 =  this.getClass().getClassLoader().getResource("static/hello.js").getPath();

        engine.eval("load('"+jsFilePath1+"')");


    }
}
注:在此处执行脚本时,必须通过load去加载脚本,才能正常debug
道理很简单,若使用文件流读取脚本,然后再执行脚本文本,这时,执行的是这个脚本文本,而不是js文件。
3.测试
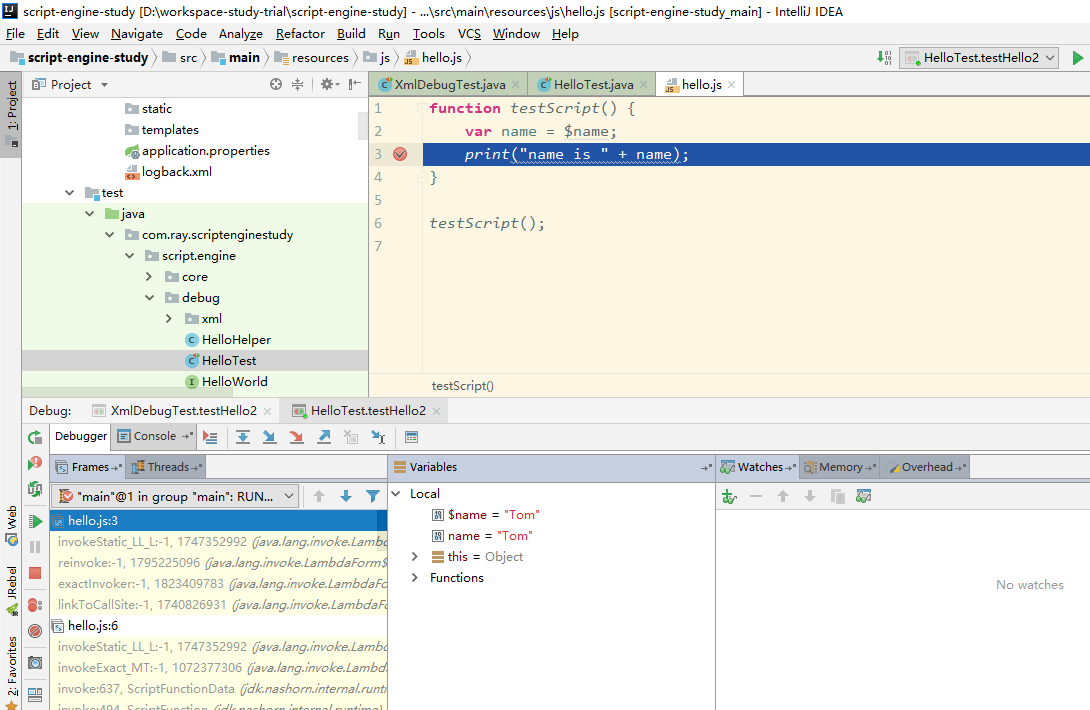
在js中打个断点,然后再运行测试用例
如下图,可以看到程序已经成功走到断点处。

