Glance介绍
创建虚拟机我们需要有glance的支持,因为glance是提供镜像的服务。
Glance有两个比较重要的服务:
- Glance-api:接受云系统镜像的构建、删除、读取请求
- Glance-Registry:云系统的镜像注册服务
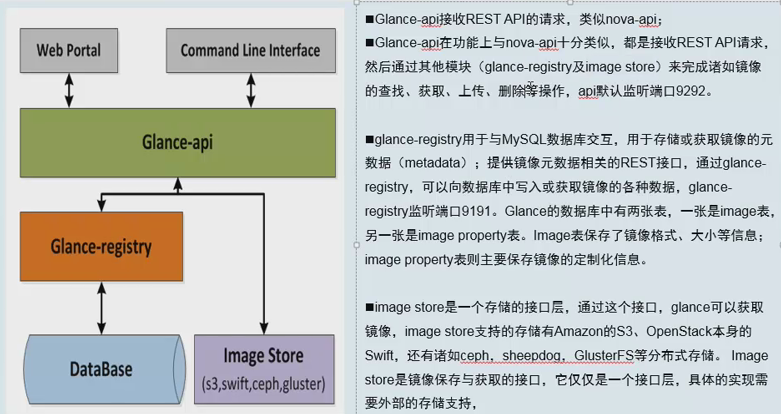
我们需要配置glance-api的配置文件和glance-registry配置文件 。glance不需要配置消息队列,但是glance需要配置keystone(认证中心)。
提示:默认情况下上传镜像存放在/var/lib/glance/images下
Glance部署
1、安装软件包
yum install openstack-glance -y
2、数据库配置
- 编辑文件/etc/glance/glance-api.conf
[root@linux-node1 ~]# vim /etc/glance/glance-api.conf
[database]
connection = mysql+pymysql://glance:glance@192.168.137.11/glance
- 编辑文件/etc/glance/glance-registry.conf
[root@linux-node1 ~]# vim /etc/glance/glance-registry.conf
[database]
connection = mysql+pymysql://glance:glance@192.168.137.11/glance
- 同步数据库
su -s /bin/sh -c "glance-manage db_sync" glance
- 检查
mysql -h 192.168.137.11 -u glance -pglance -e "use glance;show tables;"
3、设置keystone
- 配置/etc/glance/glance-api.conf
在[keystone_authtoken]进行设置
[root@linux-node1 ~]# vim /etc/glance/glance-api.conf
[keystone_authtoken]
auth_uri = http://192.168.137.11:5000
auth_url = http://192.168.137.11:35357
memcached_servers = 192.168.137.11:11211
auth_type = password                    # 验证类型为密码
project_domain_name = default           # 默认域
user_domain_name = default              # 用户默认域
project_name = service                  # 项目名称
username = glance                       # 用户
password = glance                       # 密码
在[paste_deploy]进行设置
[paste_deploy]
flavor = keystone
- 配置/etc/glance/glance-registry.conf
在[keystone_authtoken]进行设置
[root@linux-node1 ~]# vim /etc/glance/glance-registry.conf
[keystone_authtoken]
auth_uri = http://192.168.137.11:5000
auth_url = http://192.168.137.11:35357
memcached_servers = 192.168.137.11:11211
auth_type = password
project_domain_name = default
user_domain_name = default
project_name = service
username = glance
password = glance
在[paste_deploy]进行设置
[paste_deploy]
flavor = keystone
4、配置镜像路径
配置/etc/glance/glance-api.conf
[root@linux-node1 ~]# vim /etc/glance/glance-api.conf
[glance_store]
stores = file,http
default_store = file
filesystem_store_datadir = /var/lib/glance/images
5、启动服务并设置开机自启动
systemctl enable openstack-glance-api.service
systemctl enable openstack-glance-registry.service
systemctl start openstack-glance-api.service
systemctl start openstack-glance-registry.service

提示:9292是glance-api的端口,9191是glance-registry的端口
6、在keystone上服务注册
- 创建glance服务实体
source /root/admin-openstack.sh
openstack service create --name glance --description "OpenStack Image" image

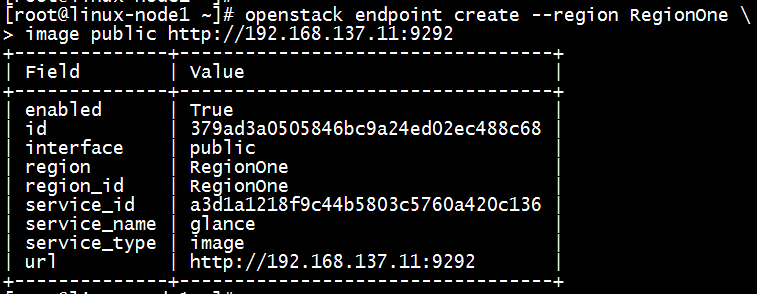
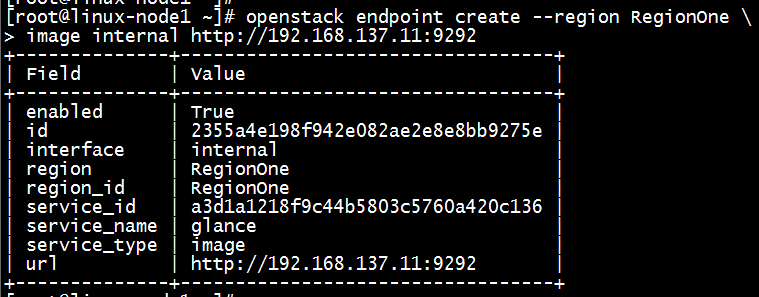
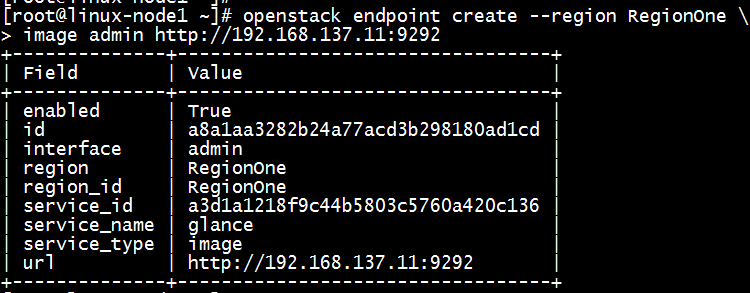
- 创建镜像服务的三个API端点(公有、私有、admin)
openstack endpoint create --region RegionOne
image public http://192.168.137.11:9292
openstack endpoint create --region RegionOne
image internal http://192.168.137.11:9292
openstack endpoint create --region RegionOne
image admin http://192.168.137.11:9292
7、测试
使用openstack image list或者glance image-list进行查看

Glance验证操作
yum install wget -y
下载测试镜像源
wget http://download.cirros-cloud.net/0.3.4/cirros-0.3.4-x86_64-disk.img
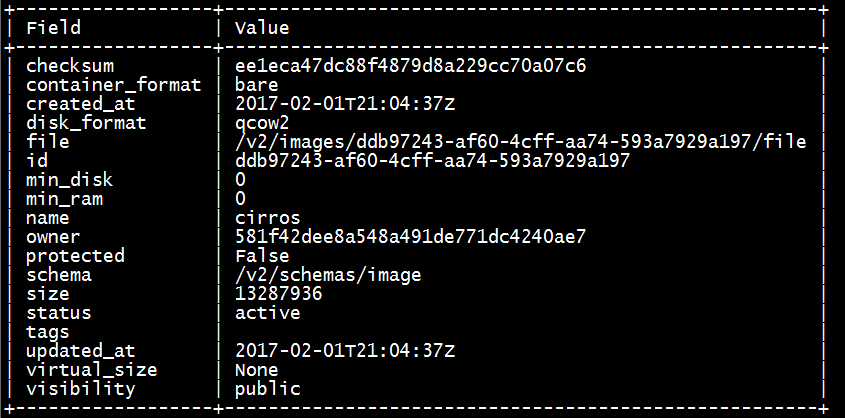
使用 QCOW2 磁盘格式, bare 容器格式上传镜像到镜像服务并设置公共可见,这样所有的项目都可以访问它
source /root/admin-openstack.sh

openstack image create "cirros"
--file /root/cirros-0.3.4-x86_64-disk.img
--disk-format qcow2 --container-format bare
--public
检查是否上传成功
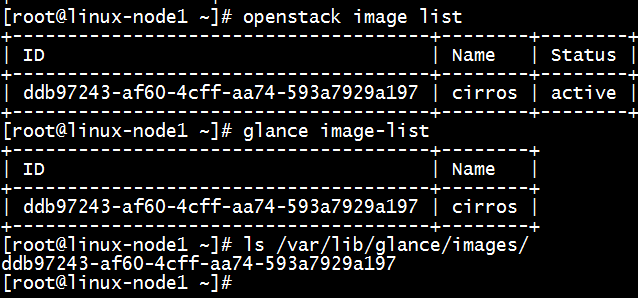
openstack image list
glance image-list
ls /var/lib/glance/images/
备注:镜像存放在/var/lib/glance/images下
