linux 安装tengine
tengine是什么
- tengine是由淘宝网发起的Web服务器项目。它在Nginx的基础上,针对大访问量网站的需求,添加了很多高级功能和特性。Tengine的性能和稳定性已经在大型的网站如淘宝网,天猫商城等得到了很好的检验。它的最终目标是打造一个高效、稳定、安全、易用的Web平台。
- Nginx是异步框架的网页服务器,也可以用作反向代理、负载平衡器和HTTP缓存。
安装必要依赖
依赖 gcc openssl-devel pcre-devel zlib-devel
安装:yum install gcc openssl-devel pcre-devel zlib-devel -y
切换为root用户
[shaofei@hadoop137 tengine-2.3.1]$ su root
密码:
[root@hadoop137 tengine-2.3.1]#
[root@hadoop137 tengine-2.3.1]# yum install gcc openssl-devel pcre-devel zlib-devel -y


完毕!
[root@hadoop137 tengine-2.3.1]# exit
exit
[shaofei@hadoop137 tengine-2.3.1]$ whoami
shaofei
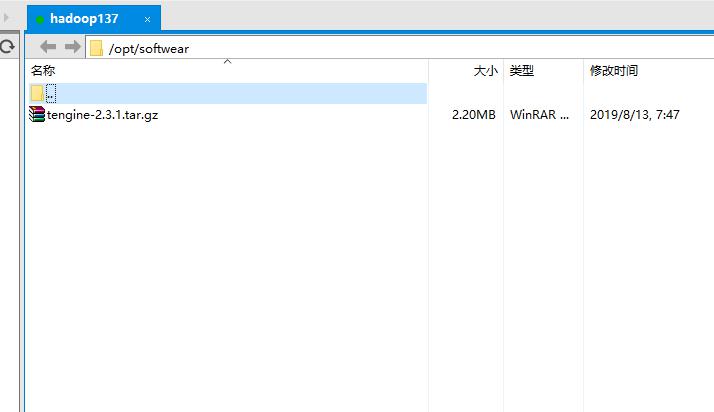
上传安装文件到linux服务器

解压安装包
[shaofei@hadoop137 softwear]$ pwd
/opt/softwear
[shaofei@hadoop137 softwear]$ ll
总用量 2260
-rw-rw-r--. 1 shaofei shaofei 2312076 8月  13 07:47 tengine-2.3.1.tar.gz
[shaofei@hadoop137 softwear]$ tar -zxvf tengine-2.3.1.tar.gz -C /opt/module/
配置文件、编译安装(使用root用户)
[root@hadoop137 tengine-2.3.1]# pwd
/opt/module/tengine-2.3.1
[root@hadoop137 tengine-2.3.1]# ./configure && make &&  make install
安装成功
默认安装位置为: /usr/local/nginx


[root@hadoop137 nginx]# pwd
/usr/local/nginx
[root@hadoop137 nginx]# ll
总用量 16
drwxr-xr-x. 2 root root 4096 8月  13 07:56 conf
drwxr-xr-x. 2 root root 4096 8月  13 07:56 html
drwxr-xr-x. 2 root root 4096 8月  13 07:56 logs
drwxr-xr-x. 2 root root 4096 8月  13 07:56 sbin
配置Nginx为系统服务,以方便管理
- 在/etc/rc.d/init.d/目录中建立文本文件nginx
- 在文件中粘贴下面的内容:
#!/bin/sh
#
# nginx - this script starts and stops the nginx daemon
#
# chkconfig:   - 85 15
# description:  Nginx is an HTTP(S) server, HTTP(S) reverse
#               proxy and IMAP/POP3 proxy server
# processname: nginx
# config:      /etc/nginx/nginx.conf
# config:      /etc/sysconfig/nginx
# pidfile:     /var/run/nginx.pid

# Source function library.
. /etc/rc.d/init.d/functions

# Source networking configuration.
. /etc/sysconfig/network

# Check that networking is up.
[ "$NETWORKING" = "no" ] && exit 0

nginx="/usr/local/nginx/sbin/nginx"
prog=$(basename $nginx)

NGINX_CONF_FILE="/usr/local/nginx/conf/nginx.conf"

[ -f /etc/sysconfig/nginx ] && . /etc/sysconfig/nginx

lockfile=/var/lock/subsys/nginx

make_dirs() {
   # make required directories
   user=`nginx -V 2>&1 | grep "configure arguments:" | sed 's/[^*]*--user=([^ ]*).*/1/g' -`
   options=`$nginx -V 2>&1 | grep 'configure arguments:'`
   for opt in $options; do
       if [ `echo $opt | grep '.*-temp-path'` ]; then
           value=`echo $opt | cut -d "=" -f 2`
           if [ ! -d "$value" ]; then
               # echo "creating" $value
               mkdir -p $value && chown -R $user $value
           fi
       fi
   done
}

start() {
    [ -x $nginx ] || exit 5
    [ -f $NGINX_CONF_FILE ] || exit 6
    make_dirs
    echo -n $"Starting $prog: "
    daemon $nginx -c $NGINX_CONF_FILE
    retval=$?
    echo
    [ $retval -eq 0 ] && touch $lockfile
    return $retval
}

stop() {
    echo -n $"Stopping $prog: "
    killproc $prog -QUIT
    retval=$?
    echo
    [ $retval -eq 0 ] && rm -f $lockfile
    return $retval
}

restart() {
    configtest || return $?
    stop
    sleep 1
    start
}

reload() {
    configtest || return $?
    echo -n $"Reloading $prog: "
    killproc $nginx -HUP
    RETVAL=$?
    echo
}

force_reload() {
    restart
}

configtest() {
  $nginx -t -c $NGINX_CONF_FILE
}

rh_status() {
    status $prog
}

rh_status_q() {
    rh_status >/dev/null 2>&1
}

case "$1" in
    start)
        rh_status_q && exit 0
        $1
        ;;
    stop)
        rh_status_q || exit 0
        $1
        ;;
    restart|configtest)
        $1
        ;;
    reload)
        rh_status_q || exit 7
        $1
        ;;
    force-reload)
        force_reload
        ;;
    status)
        rh_status
        ;;
    condrestart|try-restart)
        rh_status_q || exit 0
            ;;
    *)
        echo $"Usage: $0 {start|stop|status|restart|condrestart|try-restart|reload|force-reload|configtest}"
        exit 2
esac
3、修改nginx文件的执行权限
chmod 777 nginx
4、添加该文件到系统服务中去
chkconfig --add nginx
- 查看是否添加成功
chkconfig --list nginx
- 启动,停止,重新装载
service nginx start|stop
[root@hadoop137 nginx]# chkconfig --add nginx
[root@hadoop137 nginx]# chkconfig --list nginx
nginx          	0:关闭	1:关闭	2:关闭	3:关闭	4:关闭	5:关闭	6:关闭
[root@hadoop137 nginx]# service nginx start
正在启动 nginx:                                           [确定]
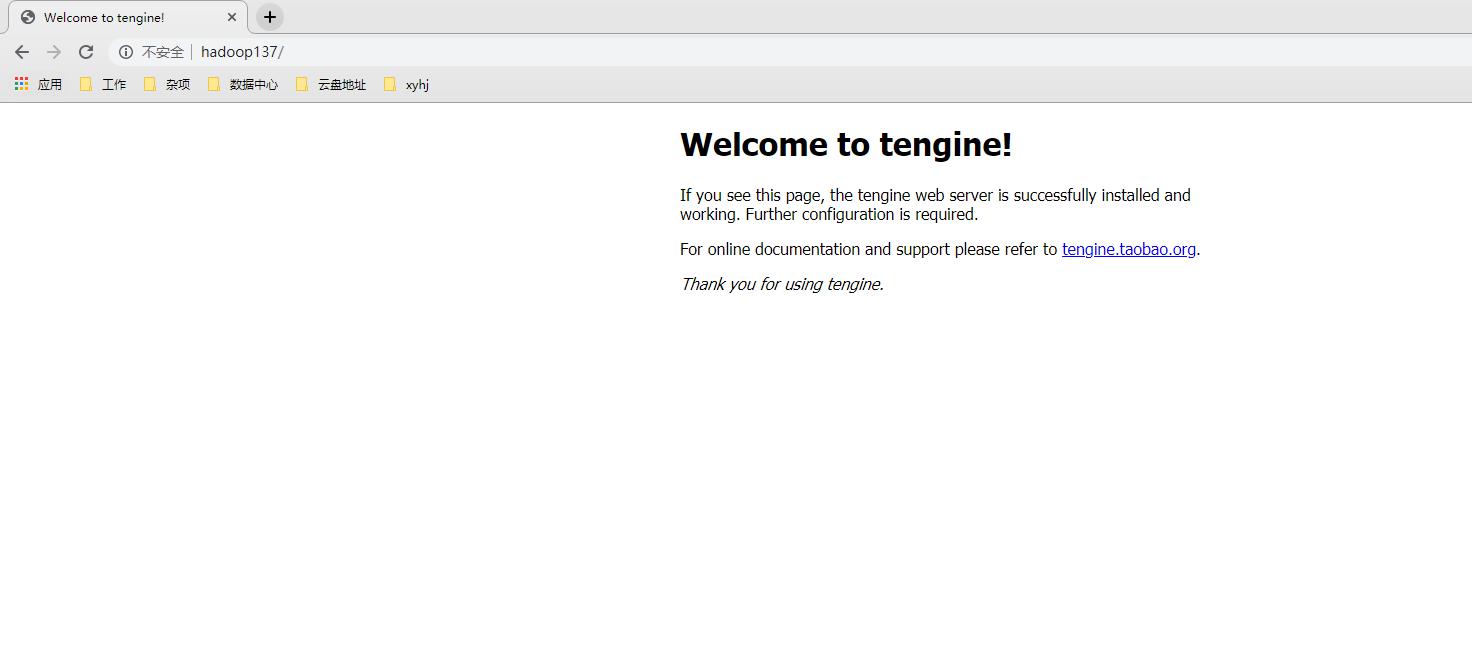
验证是否成功
浏览器访问linux的ip,看到下面页面即可完成
