Rsync(remote synchronize)是一个远程数据同步工具,简要的概括就是主机于主机之间的文件目录数据的一个同步。下面就是rsync服务器的搭建过程。
系统环境
平台:Centos 6.5
rsync版本:rsync-3.0.6-12.el6.x86_64
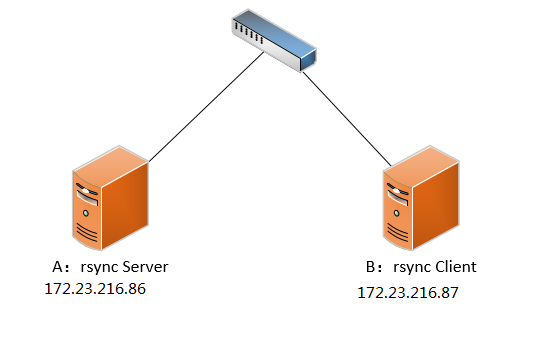
rsync服务器:172.23.216.86
rsync客户端:172.23.216.87
服务端安装rsync服务
1.检查rsync是否已经安装,若已安装,使用rpm -e 命令卸载。
[root@021rjsh216087s ~]# rpm -qa|grep rsync
rsync-3.0.6-12.el6.x86_64
2.安装这里我们选择yum安装。
yum -y install rsync
3.安装完成后,我们要在/etc目录下创建并编辑这三个文件。
[root@021rjsh216086s run]# ll /etc/rsyncd*
-rw-r--r-- 1 root root 569 Jan  5 11:25 /etc/rsyncd.conf        --配置文件
-rw-r--r-- 1 root root   0 Jan  4 15:23 /etc/rsyncd.motd         --欢迎文件(不重要)
-rw------- 1 root root  12 Jan  4 16:27 /etc/rsyncd.password      --用户的密码文件
4.修改/etc/rsyncd.conf 文件
#This is rsync conf######
uid = root                          #必须是系统的用户,可以不是root
gid = root                #必须是系统用用户,可以不是root
max connections = 200
timeout = 300
pid file = /var/run/rsyncd.pid
lock file = /var/run/rsync.lock
log file = /var/log/rsyncd.log
motd file = /etc/rsyncd.motd
[hellowhome]                 #同步的模块的名称
path = /home/hello            #模块的家目录,
read only = false              #true表示只读,false表示非只读
list = yes
hosts allow = *               #允许访问的ip
hosts deny = 10.10.10.10         #拒绝访问的ip
auth users = hello            #访问的用户(可以不是系统用户)
secrets file = /etc/rsyncd.password   #密码文件
exclude =  www/ xxx/            #这是除了home目录的下www  跟xxx目录
comment = ...Hello..            #欢迎内容
注意:在搭建服务时,要把注释删除,或者另起一行,因为当有些配置项(auth users...)后面有空格,rsync会无法使用,这种空格问题很隐蔽,很难发现,所以要避免。
5.修改/etc/rsyncd.password 文件,修改完成之后,要把文件权限赋成600,否则无法访问。
hello:123456 #格式【用户名(auth users):密码】
[root@021rjsh216086s run]# chmod 600 /etc/rsyncd.password
[root@021rjsh216086s run]# ll /etc/rsyncd.password
-rw------- 1 root root 12 Jan  4 16:27 /etc/rsyncd.password
6.启动rsync 服务。
rsync --daemon --config=/etc/rsyncd.conf                #启动服务
cat /var/run/rsyncd.pid|xargs kill -9 && rm -rf  /var/run/rsyncd.pid      #停止服务
7.查看873端口是否成功启动
[root@021rjsh216086s run]#  netstat -an | grep 873                #查873端口状态
tcp        0      0 0.0.0.0:873                 0.0.0.0:*                   LISTEN
tcp        0      0 :::873                      :::*                        LISTEN
[root@021rjsh216086s run]# lsof -i tcp:873                         #根据端口查服务
COMMAND   PID USER   FD   TYPE  DEVICE SIZE/OFF NODE NAME
rsync   31537 root    4u  IPv4 1110177      0t0  TCP *:rsync (LISTEN)
rsync   31537 root    5u  IPv6 1110178      0t0  TCP *:rsync (LISTEN)
客户端操作
服务端装完之后,在客户端也需要进行一些配置。
1.先用yum装一下rsync这个软件。
yum -y install rsync
2.测试一下是否成功
[root@021rjsh216087s ~]# rsync -avz -P hello@172.23.216.86::
*****************************************
*                                       *
*                Rsync                  *
*                                       *
*                                       *
*****************************************

hellohome        loading...Hello..
3.列出服务器上的文件信息
[root@021rjsh216087s ~]# rsync -a hello@172.23.216.86::hellohome       #hello为auth users,hellohome为模块名字,密码在/etc/rsyncd.password中,列出的信息是/home/hello下的内容
*****************************************
*                                       *
*                Rsync                  *
*                                       *
*                                       *
*****************************************

Password:
drwx------        4096 2018/01/04 18:03:28 .
-rw-r--r--          18 2016/05/11 07:21:42 .bash_logout
-rw-r--r--         176 2016/05/11 07:21:42 .bash_profile
-rw-r--r--         124 2016/05/11 07:21:42 .bashrc
-rw-r--r--         569 2018/01/04 17:53:57 rsyncd.conf
drwxr-xr-x        4096 2010/11/12 09:04:19 .gnome2
drwxr-xr-x        4096 2017/04/17 14:24:01 .mozilla
drwxr-xr-x        4096 2010/08/18 23:44:21 .mozilla/extensions
drwxr-xr-x        4096 2010/08/18 23:44:21 .mozilla/plugins
drwxr-xr-x        4096 2018/01/04 18:03:28 newdir
drwxr-xr-x        4096 2018/01/04 17:58:18 newdir/test
drwxr-xr-x        4096 2018/01/04 17:55:57 newdir/test/newdir
4.下载服务器上的文件
[root@021rjsh216087s ~]# rsync -avzP hello@172.23.216.86::hellohome/newdir /tmp/tmp    #将hello用户家目录下的newdir文件夹拷贝到 本地/tmp/tmp 文件夹下
Password:
receiving incremental file list
created directory /tmp/tmp
newdir/
newdir/test/
newdir/test/newdir/

sent 74 bytes  received 411 bytes  194.00 bytes/sec
total size is 0  speedup is 0.00
[root@021rjsh216087s ~]# ll /tmp/tmp                           #查看下载的内容
total 4
drwxr-xr-x 3 504 505 4096 Jan  4 18:03 newdir
5.上传文件到服务器
[root@021rjsh216087s ~]# rsync -avzP /tmp/abc hello@172.23.216.86::hellohome # 将本地tmp/abc文件下的内容上传到hello用户的家目录下
注意:在上传时,若写成【 /tmp/abc 】,上传的是tmp目录下的abc文件夹,连abc一同上传;
若写成【 /tmp/abc/ 】,上传的是tmp目录下的abc目录下的内容,abc这个文件夹不会上传。下载时情况也一样。
6.客户端配置密码文件登录
在客户端上的新建一个密码文件/etc/rsyncd.password,在文件内只写登录用户(auth users)的密码,例如用户hello,其密码是123,那么只在文件中写123.
[root@021rjsh216087s ~]# chmod 600 /etc/rsyncd.password            #也要将密码文件的权限赋成600,要不会失败
[root@021rjsh216087s ~]# ll /etc/rsyncd.password
-rw------- 1 root root 4 Jan 4 17:00 /etc/rsyncd.password
之后,再用rsync时,加上--password-file=/etc/rsyncd.password,就可以不用输入密码登录了。
[root@021rjsh216087s ~]# rsync -avzP --password-file=/etc/rsyncd.password hello@172.23.216.86::hellohome/newdir /tmp/tmp

receiving incremental file list

sent 65 bytes  received 402 bytes  311.33 bytes/sec
total size is 0  speedup is 0.00
至此,算是完成。
参考文档:rsync服务与搭建详解