前端的MVC,近几年一直很火,大家也都纷纷讨论着,于是乎,抽空总结一下这个知识点。看了些文章,结合实践略作总结并发表一下自己的看法。
最初接触MVC是后端Java的MVC架构,用一张图来表示之——

MVC是一种设计模式,它将应用划分为3个部分:数据(模型)、展现层(视图)和用户交互(控制器)。换句话说,一个事件的发生是这样的过程:
1. 用户和应用产生交互。
2. 控制器的事件处理器被触发。
3. 控制器从模型中请求数据,并将其交给视图。
4. 视图将数据呈现给用户。
我们不用类库或框架就可以实现这种MVC架构模式。关键是要将MVC的每部分按照职责进行划分,将代码清晰地分割为若干部分,并保持良好的解耦。这样可以对每个部分进行独立开发、测试和维护。
模型用来存放应用的所有数据对象。比如,可能有一个User模型,用以存放用户列表、他们的属性及所有与模型有关的逻辑。
模型不必知道视图和控制器的逻辑。任何事件处理代码、视图模板,以及那些和模型无关的逻辑都应当隔离在模型之外。
将模型的代码和视图的代码混在一起,是违反MVC架构原则的。模型是最应该从你的应用中解耦出来的部分。
当控制器从服务器抓取数据或创建新的记录时,它就将数据包装成模型实例。也就是说,我们的数据是面向对象的,任何定义在这个数据模型上的函数或逻辑都可以直接被调用。
视图层是呈现给用户的,用户与之产生交互。在JavaScript应用中,视图大都是由HTML、CSS、JavaScript模板组成的。除了模板中简单的条件语句之外,视图不应当包含任何其他逻辑。
将逻辑混入视图之中是编程的大忌,这并不是说MVC不允许包含视觉呈现相关的逻辑,只要这部分逻辑没有定义在视图之内即可。我们将视觉呈现逻辑归类为“视图助手”(helper):和视图相关的独立的小工具函数。
来看下面的例子,骑在视图中包含了逻辑,这是一个范例,平时不应当这样做:<div> <script> function formatDate(date) { /* ... */ } </script> ${ formateDate(this.date) } </div>在这段代码中,我们把formatDate()函数直接插入视图中,这违反了MVC的原则,结果导致标签看上去像大杂烩一样不可维护。可以将视觉呈现逻辑剥离出来放入试图助手中,正如下面的代码就避免了这个问题,可以让这个应用的结构满足MVC。
// helper.js
var helper = {};
helper.formateDate(date) {
/* ... */
};

// template.html
<div>
    ${ helper.formate(this.date) }
</div>
此外,所有视觉呈现逻辑都包含在helper变量中,这是一个命名空间,可以防止冲突并保持代码清晰、可扩展。
控制器是模型和视图之间的纽带。控制器从视图获取事件和输入,对它们(很可能包含模型)进行处理,并相应地更新视图。当页面加载时,控制器会给视图添加事件监听,比如监听表单提交或按钮点击。然后,当用户和你的应用产生交互时,控制器中的事件触发器就开始工作了。
我们用简单的jQuery代码来实现控制器——var Controller = {}; (Controller.users = function($) { var nameClick = function() { /* ... */ }; // 在页面加载时绑定事件监听 $(function() { $('#view .name').click(nameClick); }); })(jQuery);
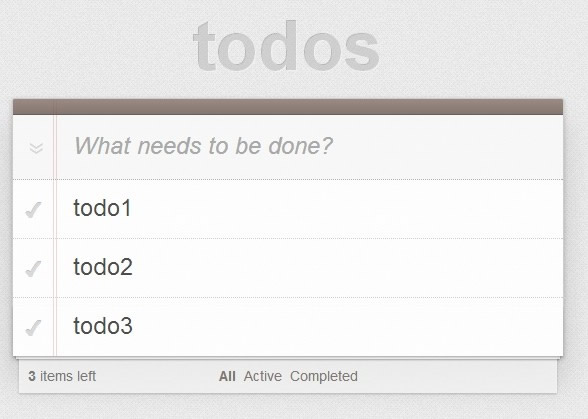


<section id="todoapp">
    <header id="header">
        <h1>todos</h1>
        <input id="new-todo" placeholder="What needs to be done?" autofocus>
    </header>
    <section id="main">
        <input id="toggle-all" type="checkbox">
        <label for="toggle-all">Mark all as complete</label>
        <ul id="todo-list"></ul>
    </section>
    <footer id="footer">
        <span id="todo-count"><strong>0</strong> item left</span>
        <button id="clear-completed">Clear completed</button>
    </footer>
</section>
<footer id="info">
    <p>Double-click to edit a todo</p>
    <p>Created by <a href="http://github.com/sindresorhus">Sindre Sorhus</a></p>
    <p>Part of <a href="http://todomvc.com">TodoMVC</a></p>
</footer>

<!-- ************************************* template begin *********************************** -->
<!-- 针对模型的模板 -->
<script id="todo-template" type="text/x-handlebars-template">
    <!-- 这里对todo模型数组进行迭代循环 -->
    {{#this}}
    <!-- 会看到,这里具有简单的if语句,即这里具备显示逻辑 -->
    <li {{#if completed}}class="completed"{{/if}} data-id="{{id}}">
        <div class="view">
            <input class="toggle" type="checkbox" {{#if completed}}checked{{/if}}>
            <label>{{title}}</label>
            <button class="destroy"></button>
        </div>
        <input class="edit" value="{{title}}">
    </li>
    {{/this}}
</script>
<!-- /针对模型的模板 -->
<!-- footer模板,记录还剩下多少没有完成等 -->
<script id="footer-template" type="text/x-handlebars-template">
    <span id="todo-count"><strong>{{activeTodoCount}}</strong> {{activeTodoWord}} left</span>
    {{#if completedTodos}}
        <button id="clear-completed">Clear completed ({{completedTodos}})</button>
    {{/if}}
</script>
<!-- /footer模板 -->
<!-- ************************************* template end *********************************** -->

<script src="js/base/base.js"></script>
<script src="js/lib/jquery.js"></script>
<script src="js/lib/handlebars.js"></script>

<!-- app begin -->
<script src="js/app.js"></script>
2> app.js
jQuery(function() {
    'use strict';

    // 这里是一些工具函数的抽取,包括
    // 1.ID生成器
    // 2.显示格式化
    // 3.localStorage存储
    var Utils = {
        uuid : function() {
            /*jshint bitwise:false */
            var i, random;
            var uuid = '';

            for ( i = 0; i < 32; i++) {
                random = Math.random() * 16 | 0;
                if (i === 8 || i === 12 || i === 16 || i === 20) {
                    uuid += '-';
                }
                uuid += (i === 12 ? 4 : (i === 16 ? (random & 3 | 8) : random)).toString(16);
            }

            return uuid;
        },
        pluralize : function(count, word) {
            return count === 1 ? word : word + 's';
        },
        store : function(namespace, data) {
            if (arguments.length > 1) {
                return localStorage.setItem(namespace, JSON.stringify(data));
            } else {
                var store = localStorage.getItem(namespace);
                return (store && JSON.parse(store)) || [];
            }
        }
    };

    var Todo = function(id, title, completed) {
        this.id = id;
        this.title = title;
        this.completed = completed;
    }

    var App = {

        init: function() {
            this.ENTER_KEY = 13;
            this.todos = Utils.store('todos-jquery');
            this.cacheElements();
            this.bindEvents();
        },

        // 这里是缓存一些必要的dom节点,提高性能
        cacheElements: function() {
            this.todoTemplate = Handlebars.compile($('#todo-template').html());
            this.footerTemplate = Handlebars.compile($('#footer-template').html());
            this.$todoApp = $('#todoapp');
            this.$header = this.$todoApp.find('#header');
            this.$main = this.$todoApp.find('#main');
            this.$footer = this.$todoApp.find('#footer');
            this.$newTodo = this.$header.find('#new-todo');
            this.$toggleAll = this.$main.find('#toggle-all');
            this.$todoList = this.$main.find('#todo-list');
            this.$count = this.$footer.find('#todo-count');
            this.$clearBtn = this.$footer.find('#clear-completed');
        },

        // 模拟Controller实现:所有的事件监听在这里绑定
        bindEvents: function() {
            var list = this.$todoList;
            this.$newTodo.on('keyup', this.create);
            this.$toggleAll.on('change', this.toggleAll);
            this.$footer.on('click', '#clear-completed', this.destroyCompleted);
            list.on('change', '.toggle', this.toggle);
            list.on('dblclick', 'label', this.edit);
            list.on('keypress', '.edit', this.blurOnEnter);
            list.on('blur', '.edit', this.update);
            list.on('click', '.destroy', this.destroy);
        },

        // 渲染记录列表:当模型数据发生改变的时候,对应的事件处理程序调用该方法,从而实现对应DOM的重新渲染
        render: function() {
            this.$todoList.html(this.todoTemplate(this.todos));
            this.$main.toggle(!!this.todos.length);
            this.$toggleAll.prop('checked', !this.activeTodoCount());
            this.renderFooter();
            Utils.store('todos-jquery', this.todos);
        },

        // 渲染底部
        renderFooter: function () {
            var todoCount = this.todos.length;
            var activeTodoCount = this.activeTodoCount();
            var footer = {
                activeTodoCount: activeTodoCount,
                activeTodoWord: Utils.pluralize(activeTodoCount, 'item'),
                completedTodos: todoCount - activeTodoCount
            };

            this.$footer.toggle(!!todoCount);
            this.$footer.html(this.footerTemplate(footer));
        },

        // 创建记录
        create: function (e) {
            var $input = $(this);
            var val = $.trim($input.val());

            if (e.which !== App.ENTER_KEY || !val) {
                return;
            }

            App.todos.push({
                id: Utils.uuid(),
                title: val,
                completed: false
            });

            // 记录添加后,通知重新渲染页面
            App.render();
        },

        // 其他业务逻辑函数
        edit: function() {},
        destroy: function() {}
        /* ... */

    }

    App.init();

});
1.维护的model是todo实例的列表,这样,我们对增加记录、删改某一条记录,都要重新渲染整个列表,这样,导致性能的拙劣行。当然,改进的方式是对每一个实例进行对应dom的绑定。
2.这里的View中,我们看到其中参杂了一些显示逻辑,显然,我提倡这样去做,而非在js中去控制业务逻辑。然而,我们在实际开发的过程当中,我们必然涉及到复杂的显示逻辑,这样,我们可以向之前所说的那样,利用单独编写显示逻辑helper,这与MVC的设计思想并不违背,确保高维护性及扩展性。
3.这里有关模型todos的业务逻辑,并没有严格抽象出来,而是写入对应的事件当中。
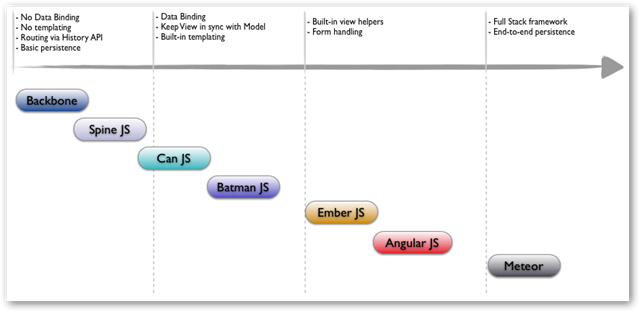
接下来,看看其他优秀的框架如何去做的。
三、前端MVC框架
相信大家都听过MVC、MVP、MVVM了,三者的简单定义——
(1)MVC: 模型-视图-控制器(Model View Controller)
(2)MVP: 模型-视图-表现类(Model-View-Presenter)
(3)MVVM:模型-视图-视图模型(Model-View-ViewModel)
它们三者的发展过程是MVC->MVP->MVVM,我们分别来看这三者——
1> Ember.js(MVC)
先看看项目整体文件架构——
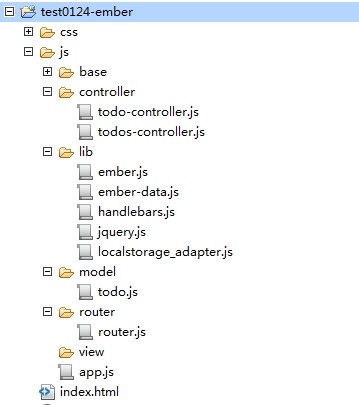
会发现,主要是有controller、model、router,先引入index.html中的模板(同样使用的是Handlebars)——
<script type="text/x-handlebars" data-template-name="todos">
    <section id="todoapp">
        <header id="header">
            <h1>todos</h1>
            <!-- 这里的action属性指定了对应的TodosController中的createTodo方法 -->
            {{input id="new-todo" type="text" value=newTitle action="createTodo" placeholder="What needs to be done?"}}
        </header>
        {{#if length}}
            <section id="main">
                <ul id="todo-list">
                    {{#each filteredTodos itemController="todo"}}
                        <li {{bind-attr class="isCompleted:completed isEditing:editing"}}>
                            {{#if isEditing}}
                                {{edit-todo class="edit" value=bufferedTitle focus-out="doneEditing" insert-newline="doneEditing" escape-press="cancelEditing"}}
                            {{else}}
                                {{input type="checkbox" class="toggle" checked=isCompleted}}
                                <label {{action "editTodo" on="doubleClick"}}>{{title}}</label>
                                <button {{action "removeTodo"}} class="destroy"></button>
                            {{/if}}
                            </li>
                    {{/each}}
                </ul>
                {{input type="checkbox" id="toggle-all" checked=allAreDone}}
            </section>
            <footer id="footer">
                <span id="todo-count">{{{remainingFormatted}}}</span>
                <ul id="filters">
                    <li>
                        {{#link-to "todos.index" activeClass="selected"}}All{{/link-to}}
                    </li>
                    <li>
                        {{#link-to "todos.active" activeClass="selected"}}Active{{/link-to}}
                    </li>
                    <li>
                        {{#link-to "todos.completed" activeClass="selected"}}Completed{{/link-to}}
                    </li>
                </ul>
                {{#if hasCompleted}}
                    <button id="clear-completed" {{action "clearCompleted"}}>
                        Clear completed ({{completed}})
                    </button>
                {{/if}}
            </footer>
        {{/if}}
    </section>
    <footer id="info">
        <p>Double-click to edit a todo</p>
        <p>
            Created by
            <a href="http://github.com/tomdale">Tom Dale</a>,
            <a href="http://github.com/addyosmani">Addy Osmani</a>
        </p>
        <p>Part of <a href="http://todomvc.com">TodoMVC</a></p>
    </footer>
</script>
会发现,模板代码添加了一些晦涩的属性标签。对于Ember.js的使用,我们需要创建一个Ember应用程序实例(app.js文件中)——
window.Todos = Ember.Application.create();
Todos.Router.map(function () {
    this.resource('todos', { path: '/' }, function () {
        this.route('active');
        this.route('completed');
    });
});
// 这里进行了硬绑定,即对应的模板名字为data-template-name="todos"
Todos.TodosRoute = Ember.Route.extend({
    model: function () {
        // 显示设定该路由的的model数据
        // return this.store.find('todo');
        return [{
            id: 1,
            title: 'todo1',
            compeled: false
        }];
    }
});

// 下面定义了三个子路由
// #/index
Todos.TodosIndexRoute = Ember.Route.extend({
    setupController: function () {
        // 显示定义对应的controller程序
        this.controllerFor('todos').set('filteredTodos', this.modelFor('todos'));
    }
});

// #/active
Todos.TodosActiveRoute = Ember.Route.extend({
    setupController: function () {
        var todos = this.store.filter('todo', function (todo) {
            return !todo.get('isCompleted');
        });

        this.controllerFor('todos').set('filteredTodos', todos);
    }
});

// #/completed
Todos.TodosCompletedRoute = Ember.Route.extend({
    setupController: function () {
        var todos = this.store.filter('todo', function (todo) {
            return todo.get('isCompleted');
        });

        this.controllerFor('todos').set('filteredTodos', todos);
    }
});
1. 模板文件的模板名称data-template-name="todos"对应的路由模板便是Todos.TodosRoute;
2. 对该路由显示指定对应模板的数据模型。当然对这里的数据模型(即上面的model属性)同样进行了硬绑定(即对应的todo.js)——
Todos.todo = DS.Model.extend({
    title: DS.attr('string'),
    isCompleted: DS.attr('boolean'),
    saveWhenCompletedChanged: function() {
        this.save();
    }.observes('isCompleted')
});
3. 对该路由同样能够指定对应的controller(上面的setController属性)。这里主要侦听对hash改变,对数据进行过滤操作。
下面我们看一看对Controller的定义,当然存在一定的硬绑定(潜规则)——todos-controller.js
Todos.TodosController = Ember.ArrayController.extend({

    // 针对model集合的的交互在这里定义
    actions: {
        // 该方法的调用时在对应的dom节点中进行绑定,即对应模板中的下列语句
        // {{input id="new-todo" type="text" value=newTitle action="createTodo" placeholder="What needs to be done?"}}
        createTodo: function() {
            var title, todo;

            title = this.get('newTitle').trim();
            if (!title) {
                return;
            }

            todo = {
                title: title,
                isCompleted: false
            };

            todo.save();

            this.set('newTitle', '');

        },
        /* ... */
    },

    // 以下主要定义显示逻辑
    remaining: function () {
        return this.filterProperty('isCompleted', false).get('length');
    }.property('@each.isCompleted'),

    // 对应的dom调用时<span id="todo-count">{{{remainingFormatted}}}</span>
    remainingFormatted: function () {
        var remaining = this.get('remaining');
        var plural = remaining === 1 ? 'item' : 'items';
        return '<strong>%@</strong> %@ left'.fmt(remaining, plural);
    }.property('remaining'),
    /* ... */

});
会发现上面的这个controller是针对model集合的,对单条model记录的controller,放在todo-controller.js文件中——
Todos.TodoController = Ember.ObjectController.extend({

    isEditing: false,

    // 缓存title
    bufferedTitle: Ember.computed.oneWay('title'),

    // 这里包含了对单条记录的所有增删改查的操作
    actions: {

        editTodo: function() {
            this.set('isEditing', true);
        },

        doneEditing: function() {
            var bufferedTitle = this.get('bufferedTitle').trim();

            if (Ember.isEmpty(bufferedTitle)) {
                Ember.run.debounce(this, this.send, 'removeTodo', 0);
            } else {
                var todo = this.get('model');
                todo.set('title', bufferedTitle);
                todo.save();
            }

            this.set('bufferedTitle', bufferedTitle);
            this.set('isEditing', false);
        },

        cancelEditing: function() {
            this.set('bufferedTitle', this.get('title'));
            this.set('Editing', false);
        },

        removeTodo: function() {
            var todo = this.get('model');

            todo.deleteRecord();
            todo.save();
        }
    }
});
对这些方法的调用,看一看对应的模板文件就知道了——
<ul id="todo-list">
    {{#each filteredTodos itemController="todo"}}
        <li {{bind-attr class="isCompleted:completed isEditing:editing"}}>
            {{#if isEditing}}
                {{edit-todo class="edit" value=bufferedTitle focus-out="doneEditing" insert-newline="doneEditing" escape-press="cancelEditing"}}
            {{else}}
                {{input type="checkbox" class="toggle" checked=isCompleted}}
                <label {{action "editTodo" on="doubleClick"}}>{{title}}</label>
                <button {{action "removeTodo"}} class="destroy"></button>
            {{/if}}
        </li>
    {{/each}}
</ul>
会发现,红色标注的部分,正是我们在todo-controler.js中定义的事件。还会发现,Ember.js封装了一些事件属性,如——
focus-out
insert-newline
escape-press
doubleClick
到这儿,Ember.js的内容就简单介绍完了,总结一下——
1. 程序的加载入口是rounter(即app.TemplatenameRouter),来指定对应的model及controller。路由是负责显示模板,加载数据,以及管理应用程序的状态。
2. 程序的交互入口是controller,这里面包含两个类型的controller,一个是对应model集合的controller,一个是对应model的controller。两者各司其职,增加了代码的可维护性。
Ember.js是典型的MVC(这里有别于MVP、MVVM的设计模式类)框架,还有一个比较典型的MVC框架便是Angular.js,和Ember.js的设计思想大致相同。
从Ember.js的应用,我们可以理解MVC的特点——MVC的View直接与Model打交道,Controller仅仅起一个“桥梁”作用,它负责把View的请求转发给Model,再负责把Model处理结束的消息通知View。Controller就是一个消息分发器。不传递数据(业务结果),Controller是用来解耦View和Model的,具体一点说,就是为了让UI与逻辑分离(界面与代码分离)。

2>Backbone.js(MVP)
依旧先看一下文件架构——

相对于Ember.js和Angular.js,它的模板比较清爽——
<script type="text/template" id="item-template">
    <div class="view">
        <input class="toggle" type="checkbox" <%= completed ? 'checked' : '' %>>
        <label><%- title %></label>
        <button class="destroy"></button>
    </div>
    <input class="edit" value="<%- title %>">
</script>

<script type="text/template" id="stats-template">
    <span id="todo-count">
        <strong><%= remaining %></strong><%= remaining === 1 ? 'item' : 'items' %> left
    </span>
    <ul id="filters">
        <li>
            <a class="selected" href="#/">All</a>
        </li>
        <li>
            <a href="#/active">Active</a>
        </li>
        <li>
            <a href="#/completed">Completed</a>
        </li>
    </ul>
    <% if (completed) { %>
    <button id="clear-completed">Clear completed (<%= completed %>)</button>
    <% } %>
</script>
这是由于添加了Presenter的原因,事件的绑定及页面view的变化,全部由Presenter去做。
这里存在一个model集合的概念,即这里的collection.js——
(function() {
    'use strict';

    var Todos = Backbone.Collection.extend({
        model: app.Todo,

        localStorage: new Backbone.LocalStorage('todos-backbone'),

        // Filter down the list of all todo items that are finished.
        completed: function () {
            return this.filter(function (todo) {
                return todo.get('completed');
            });
        },

        // Filter down the list to only todo items that are still not finished.
        remaining: function () {
            return this.without.apply(this, this.completed());
        },

        nextOrder: function() {
            if (this.length === 0) {
                return 1;
            }
            return this.last().get('order') + 1;
        },

        //
        comparator: function(todo) {
            return todo.get('order');
        }
    });

    app.todos = new Todos();

})();
app-view.js生成应用的一个Presenter实例(new AppView()),并由该实例来绑定事件,并控制集合todos的变化(用户通过view产生交互来触发),一旦todos发生变化,来触发对应的view变化。同样的,这里的todo-view.js干的是同样一件事,只不过针对的是model单个对象。
从Backbone.js的应用,我们可以理解MVP的特点——Presenter直接调用Model的接口方法,当Model中的数据发生改变,通知Presenter进行对应的View改变。从而使得View不再与Model产生交互。

3> Knockout.js(MVVM)
先看看它的页面——
<section id="todoapp" data-bind="">
    <header id="header">
        <h1>todos</h1>
        <input id="new-todo" data-bind="value: current, valueUpdate: 'afterkeydown', enterKey: add" placeholder="What needs to be done?" autofocus>
    </header>
    <section id="main" data-bind="visible: todos().length">
        <input id="toggle-all" data-bind="checked: allCompleted" type="checkbox">
        <label for="toggle-all">Mark all as complete</label>
        <ul id="todo-list" data-bind="foreach: filteredTodos">
            <li data-bind="css: { completed: completed, editing: editing }">
                <div class="view">
                    <input class="toggle" data-bind="checked: completed" type="checkbox">
                    <label data-bind="text: title, event: { dblclick: $root.editItem }"></label>
                    <button class="destroy" data-bind="click: $root.remove"></button>
                </div>
                <input class="edit" data-bind="value: title, valueUpdate: 'afterkeydown', enterKey: $root.saveEditing, escapeKey: $root.cancelEditing, selectAndFocus: editing, event: { blur: $root.stopEditing }">
            </li>
        </ul>
    </section>
    <footer id="footer" data-bind="visible: completedCount() || remainingCount()">
        <span id="todo-count">
            <strong data-bind="text: remainingCount">0</strong>
            <span data-bind="text: getLabel(remainingCount)"></span> left
        </span>
        <ul id="filters">
            <li>
                <a data-bind="css: { selected: showMode() == 'all' }" href="#/all">All</a>
            </li>
            <li>
                <a data-bind="css: { selected: showMode() == 'active' }" href="#/active">Active</a>
            </li>
            <li>
                <a data-bind="css: { selected: showMode() == 'completed' }" href="#/completed">Completed</a>
            </li>
        </ul>
        <button id="clear-completed" data-bind="visible: completedCount, click: removeCompleted">
            Clear completed (<span data-bind="text: completedCount"></span>)
        </button>
    </footer>
</section>
<script src="js/base/base.js"></script>
<script src="js/lib/knockout.js"></script>
<script src="js/app.js"></script>
会发现很多data-bind属性,先不管它,我们在看看ViewModel的定义——
// 针对view来创建ViewModel
    var ViewModel = function (todos) {

        // map array of passed in todos to an observableArray of Todo objects
        this.todos = ko.observableArray(todos.map(function (todo) {
            return new Todo(todo.title, todo.completed);
        }));

        // store the new todo value being entered
        this.current = ko.observable();

        this.showMode = ko.observable('all');

        this.filteredTodos = ko.computed(function () {
            switch (this.showMode()) {
            case 'active':
                return this.todos().filter(function (todo) {
                    return !todo.completed();
                });
            case 'completed':
                return this.todos().filter(function (todo) {
                    return todo.completed();
                });
            default:
                return this.todos();
            }
        }.bind(this));

        // add a new todo, when enter key is pressed
        this.add = function () {
            var current = this.current().trim();
            if (current) {
                this.todos.push(new Todo(current));
                this.current('');
            }
        };

        // remove a single todo
        this.remove = function (todo) {
            this.todos.remove(todo);
        }.bind(this);

        // remove all completed todos
        this.removeCompleted = function () {
            this.todos.remove(function (todo) {
                return todo.completed();
            });
        }.bind(this);

        // edit an item
        this.editItem = function (item) {
            item.editing(true);
            item.previousTitle = item.title();
        }.bind(this);

        // stop editing an item.  Remove the item, if it is now empty
        this.saveEditing = function (item) {
            item.editing(false);

            var title = item.title();
            var trimmedTitle = title.trim();

            // Observable value changes are not triggered if they're consisting of whitespaces only
            // Therefore we've to compare untrimmed version with a trimmed one to chech whether anything changed
            // And if yes, we've to set the new value manually
            if (title !== trimmedTitle) {
                item.title(trimmedTitle);
            }

            if (!trimmedTitle) {
                this.remove(item);
            }
        }.bind(this);

        // cancel editing an item and revert to the previous content
        this.cancelEditing = function (item) {
            item.editing(false);
            item.title(item.previousTitle);
        }.bind(this);

        // count of all completed todos
        this.completedCount = ko.computed(function () {
            return this.todos().filter(function (todo) {
                return todo.completed();
            }).length;
        }.bind(this));

        // count of todos that are not complete
        this.remainingCount = ko.computed(function () {
            return this.todos().length - this.completedCount();
        }.bind(this));

        // writeable computed observable to handle marking all complete/incomplete
        this.allCompleted = ko.computed({
            //always return true/false based on the done flag of all todos
            read: function () {
                return !this.remainingCount();
            }.bind(this),
            // set all todos to the written value (true/false)
            write: function (newValue) {
                this.todos().forEach(function (todo) {
                    // set even if value is the same, as subscribers are not notified in that case
                    todo.completed(newValue);
                });
            }.bind(this)
        });

        // helper function to keep expressions out of markup
        this.getLabel = function (count) {
            return ko.utils.unwrapObservable(count) === 1 ? 'item' : 'items';
        }.bind(this);

        // internal computed observable that fires whenever anything changes in our todos
        ko.computed(function () {
            // store a clean copy to local storage, which also creates a dependency on the observableArray and all observables in each item
            localStorage.setItem('todos-knockoutjs', ko.toJSON(this.todos));
        }.bind(this)).extend({
            throttle: 500
        }); // save at most twice per second
    };
会发现,视图View中的data-bind属性值正是ViewModel实例的对应方法,这似乎看起来很像是视图助手helper要做的事情。其实不然,这里的ViewModel,顾名思义,是对View的一次抽象,即对View再提取其对应的模型。
MVVM的特点如下——
1. ViewModel是model和View的中间接口
2. ViewMode提供View与Model数据之间的命令,即这里的data-bind的值,ViewModel中的方法
3. UI的渲染均由ViewModel通过命令来控制

四、前端MVC模式与传统开发模式的对比
传统的开发模式,大多基于事件驱动的编码组织,举个例子——
$('#update').click(function(e) {
    // 1.事件处理程序
    e.preventDefault();

    // 2.获取对应的model的属性值
    var title = $('#text').val();

    // 3.调用业务逻辑
    $.ajax({
        url        : '/xxx',
        type    : 'POST',
        data    : {
            title        : title,
            completed    : false
        },
        success : function(data) {
            // 4.对data进行处理,并进行对应的dom渲染
        },
        error: function() {
            // 4.错误处理
        }
    });

});
优化一些,我们可以分离事件处理程序和业务逻辑,在这里,就不延伸举例了。总之,传统的开发模式,并没有分层的概念,即没有model、view、controller。好的方面是我们可以对单独的业务逻辑进行抽取并单独测试。并对这个部分代码进行复用及封装。坏的方面,当应用变得越来越复杂的时候,就会显得代码凌乱,维护性日益变差。
有同学可能会说,还可以结合面向对象、单命名空间的方式,让代码看起来更加优雅,更具可维护性。但是还是没有办法有效去分离UI逻辑的频繁变化(这里仅仅针对富应用程序)。
五、总结
总之,既然学习了MVC这个设计模式,当然,我们不一定非要去采用某一个框架(学习曲线、嵌入性、文件大小、兼容性、应用场景等等我们都要进行考虑),我们无需放大前端框架的作用,我们需要领会的仅仅是其在前端应用的思想。就像最初jQuery模拟实现MVC的方式一样,我再来总结几个关键点——
1.构造模型Model
2.分离事件绑定,形成Controller
3.维护模型Model(and 模型集合Model Collection),通过Model的改变,通知对应的View重新渲染
4.分离View显示逻辑
这样,我们借助MVC的设计思想,能够现有代码进行重构,当然也能够对未来的代码进行一定展望。
当然,每一个项目都有自身的特点,个人认为,针对富应用(尤其对增删改的操作占比较大的比例)的项目,MVC的设计模式具备一定的优势。