这个框架主要还是思想,之后,,,还是创建项目好了,
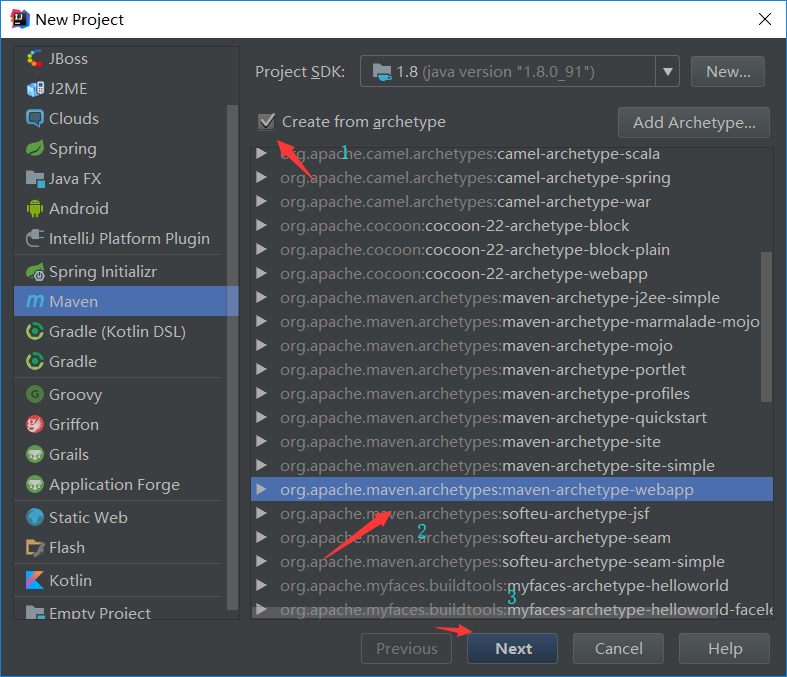
1.新建一个项目
新建一个maven,并且选择webapp类型。

2.点击next选项

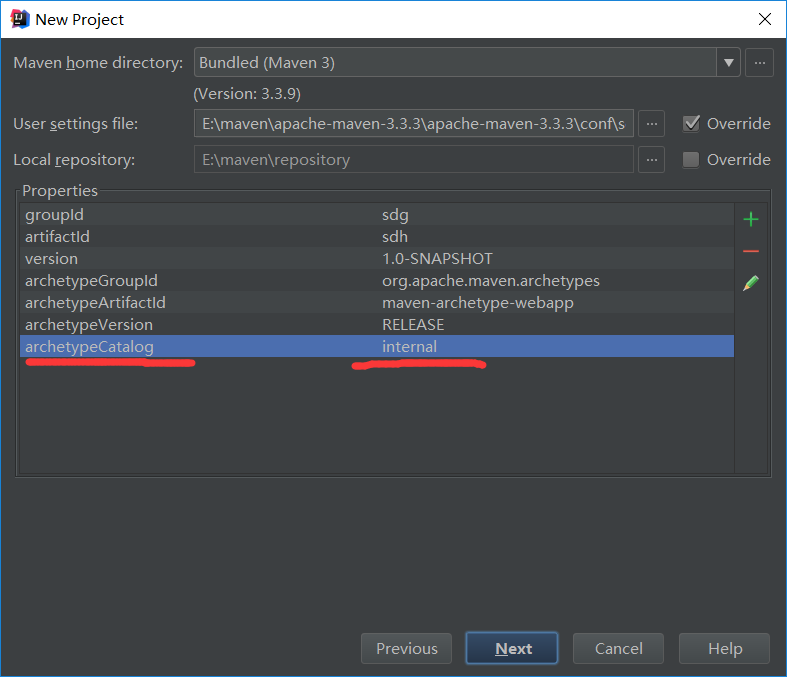
这里面的两个选项可以随便填,但是Artifactid一般是项目名,第一个可以是自己定义的名称了,
3.继续点next

在这我们可以添加name=archetypeCatalog,internal,可以在创建项目的时候快一点,
3.创建好了项目之后就把我创建的一个小案例放上了

1.创建项目的流程
01.引入需要的pom文件节点
02.web.xml文件中配置核心控制器
03.在WEB-INF目录下创建mvc核心配置文件(spring)
<?xml version="1.0" encoding="UTF-8"?>
<beans xmlns="http://www.springframework.org/schema/beans"
       xmlns:xsi="http://www.w3.org/2001/XMLSchema-instance"
       xmlns:context="http://www.springframework.org/schema/context"
       xmlns:aop="http://www.springframework.org/schema/aop"
       xmlns:tx="http://www.springframework.org/schema/tx"
       xmlns:mvc="http://www.springframework.org/schema/mvc"
       xsi:schemaLocation="
        http://www.springframework.org/schema/beans
        http://www.springframework.org/schema/beans/spring-beans.xsd
        http://www.springframework.org/schema/context
        http://www.springframework.org/schema/context/spring-context.xsd
        http://www.springframework.org/schema/tx
        http://www.springframework.org/schema/tx/spring-tx.xsd
        http://www.springframework.org/schema/aop
        http://www.springframework.org/schema/aop/spring-aop.xsd
        http://www.springframework.org/schema/mvc
        http://www.springframework.org/schema/mvc/spring-mvc.xsd">
这个是文件的头部信息,
核心配置文件的名称 必须是 <servlet-name>+”-servlet.xml”
04.在index.jsp页面创建一个连接
<a href="hello">helloSpringMVC</a>
05.在核心配置文件中增加对应的处理bean
<bean id="/hello" class="com.xdf.controller.HelloController"/>
06.创建对应的包和controller
public class HelloController  extends AbstractController{
    @Override
    protected ModelAndView handleRequestInternal(HttpServletRequest request, HttpServletResponse response) throws Exception {
        System.out.println("您已经进入了后台的controller/action/servlet");
        ModelAndView mv= new ModelAndView();
        mv.setViewName("/WEB-INF/welcome.jsp");
        return new ModelAndView("/WEB-INF/welcome.jsp");
    }
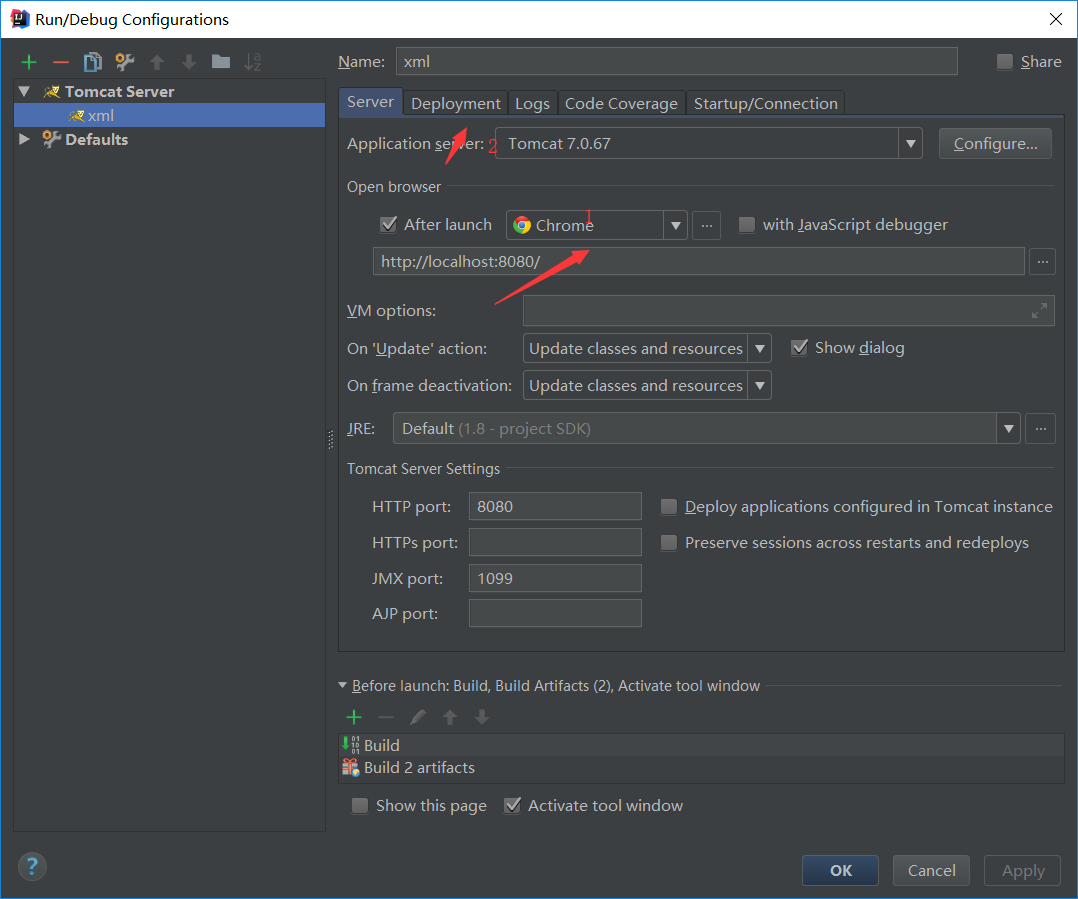
07.部署服务器


启动测试的项目,