Firstly - Check
-
Check if U have global .gitconfig file
-
检查是否有全局 .gitconfig 文件
-
Usually global .gitconfig will be created in directory /Users/yourAccountName
-
通常情况下全局的.gitconfig文件会在文件夹 /Users/你的用户名下
-
Such as mine, it is being /Users/robingao
-
我的是/Users/robingao(Just because my account name of my MBP is robingao)
Secondly - Show the code
-
If not exist, it just indecated that you had never config global git configuration.But it happened rarely.
-
如果不存在,说明你从来没有配置过git的全局配置。但,这种情况极少
-
U can just created it by opening your terminal in spotlight(shotcut: ⌘ + space), and copy and run(just tap ↩︎ button) the code below
-
你可以通过聚焦搜索来打开终端(快捷键:⌘ + 空格),复制并运行(回车)下面的代码
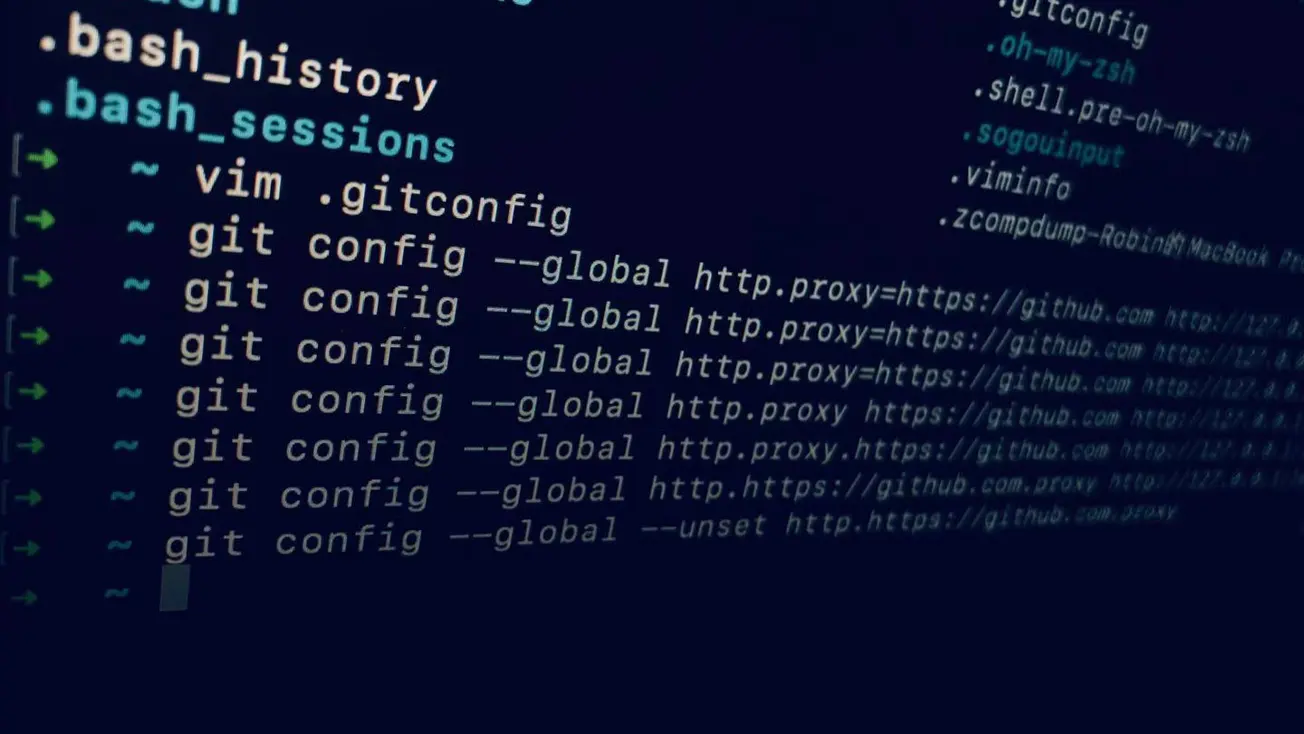
git config --global http.https://github.com.proxy http://127.0.0.1:1080
Thirdly - Description
- U can open the .gitconfig by clicking it, and U can see the text below what was generated just now.
- 你可以打开.gitconfig文件来查看,会显示刚刚生成的如下文本
[http "https://github.com"]
	proxy = http://127.0.0.1:1080
-
The proxy works as a medium between https://github.com and your device
-
代理在你的设备和https://github.com之间充当媒介
-
U must check if your proxy port is 1080. If not, change it into yours.
-
查看你的代理端口是否是1080,如果不是,改成你自己的。
Forthly
- U wanna got all connection through git mediated by your proxy, U might just code
http.proxy.Whole code is shown below - 如果你想所有的git命令都走代理,只需要写
http.proxy,完整代码如下
git config --global http.proxy http://127.0.0.1:1080
Fifthly
- It is not the end. U have to run another code below to ensure https connection go through proxy
- 还没结束。还需要再运行下面的代码,确保https的连接也走代理
git config --global https.https://github.com.proxy https://127.0.0.1:1080
OR(或者)
git config --global https.proxy https://127.0.0.1:1080
------------------------- MAGIC CODE AREA / 完整代码 -------------------------
- If U just wanna got configured right now, and have no time to understand it, just run the magic code behind
如果你就想配置完就完事了,没时间搞懂,那就直接复制运行下面的代码
git config --global http.proxy http://127.0.0.1:1080
git config --global https.proxy https://127.0.0.1:1080
OR JUST GITHUB PROXY
git config --global http.https://github.com.proxy http://127.0.0.1:1080
git config --global https.https://github.com.proxy https://127.0.0.1:1080
------------------------ SOCKS5 HERE / socks5 代理 ---------------------------------
git config --global http.proxy socks5://127.0.0.1:1080
git config --global https.proxy socks5://127.0.0.1:1080
OR JUST GITHUB PROXY
git config --global http.https://github.com.proxy socks5://127.0.0.1:1080
git config --global https.https://github.com.proxy socks5://127.0.0.1:1080
----------------------- UNSET PROXY / 重置代理 --------------------------------
git config --global --unset http.https://github.com.proxy
git config --global --unset https.https://github.com.proxy
OR
git config --global --unset http.proxy
git config --global --unset https.proxy
ANOTHER WAY
- U might open .gitconfig and type the configuration text just like
- 你也可以直接打开.gitcofig文件,直接写下文本,像这个
[http "https://github.com"]
	proxy = http://127.0.0.1:1080
[https "https://github.com"]
	proxy = https://127.0.0.1:1080
END