Beats系列产品:
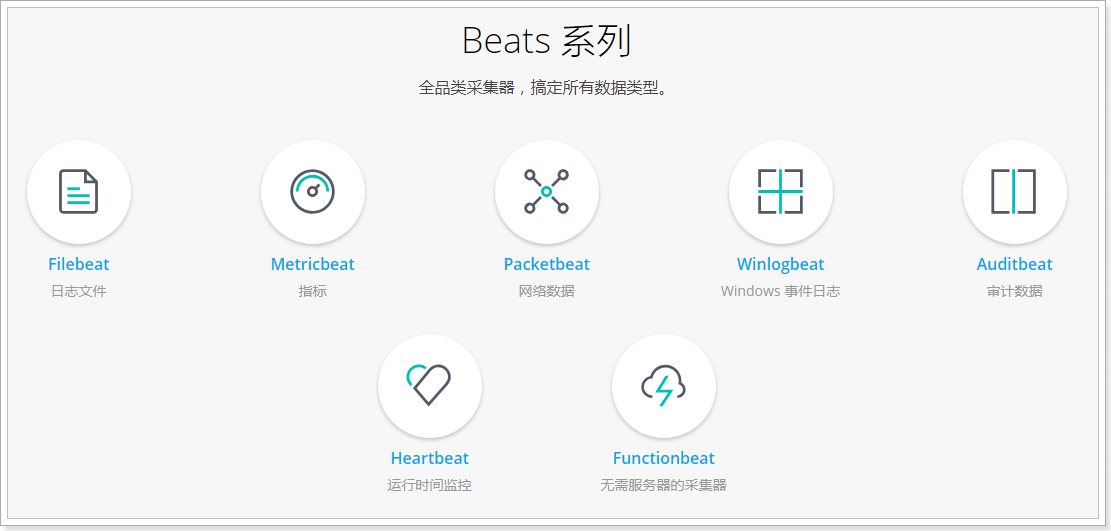
Filebeat:

架构:
用于监控、收集服务器日志文件
部署与运行:
下载地址:https://www.elastic.co/downloads/beats
mkdir /usr/local/beats
tar -zxvf filebeat-6.5.4-linux-x86_64.tar.gz
cd filebeat-6.5.4-linux-x86_64
创建如下配置文件 fan.yml
filebeat.inputs:
- type: stdin #输入的方式
enabled: true #启用输入
output.console: # 输出到控制台
pretty: true
enable: true
启动filebeat
./filebeat -e -c fan.yml # -e 输出到标准输出,默认输出到syslog和logs下,-c 指定配置文件,-d 输出debug信息(-d "publish")
输入hello运行结果如下:hello
{
  "@timestamp": "2020-03-27T03:32:57.130Z",
  "@metadata": {    #元数据信息
    "beat": "filebeat",
    "type": "doc",
    "version": "6.5.4"
  },
  "input": {    #控制台标准输入
    "type": "stdin"
  },
  "beat": {    #beat版本以及主机信息
    "name": "fan",
    "hostname": "fan",
    "version": "6.5.4"
  },
  "host": {
    "name": "fan"
  },
  "source": "",
  "offset": 0,
  "message": "hello",    #输入的内容
  "prospector": {    #标准输入勘探器
    "type": "stdin"
  }
}
读取文件:
复制一份配置并修改
cp fan.yml fan-log.yml
filebeat.inputs:
- type: log
enabled: true
paths:
- /fan/beats/logs/*.log
setup.template.settings:
index.number_of_shards: 3
output.console:
pretty: true
enable: true
在 /fan/beats/logs 目录下准备一下日志文件进行测试
启动 filebeat
./filebeat -e -c fan-log.yml
可以看出,开始会读取已有的日志文件,后面检测到日志文件有更新,立刻就会读取到更新的内容,并且输出到控制台。
自定义字段:
修改配置文件
filebeat.inputs:
- type: log
enabled: true
paths:
- /fan/beats/logs/*.log
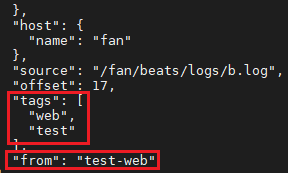
tags: ["web"] #添加自定义tag,便于后续的处理
fields: #添加自定义字段
from: test-web
fields_under_root: true #true为添加到根节点,false为添加到子节点中
output.console:
pretty: true
enable: true
启动测试:
输出到Elasticsearch:
修改配置文件
filebeat.inputs:
- type: log
enabled: true
paths:
- /fan/beats/logs/*.log
tags: ["web"] #添加自定义tag,便于后续的处理
fields: #添加自定义字段
from: test-web
fields_under_root: true #true为添加到根节点,false为添加到子节点中
setup.template.settings:
index.number_of_shards: 3 #指定es索引的分区数
output.elasticsearch: #指定ES的配置
hosts: ["192.168.43.182:9200","192.168.43.182:9201","192.168.43.182:9202"]
Filebeat工作原理:
Filebeat由两个主要组件组成:prospector 和 harvester。
harvester:
负责读取单个文件的内容。
如果文件在读取时被删除或重命名,Filebeat将继续读取文件。
prospector
prospector 负责管理harvester并找到所有要读取的文件来源。
如果输入类型为日志,则查找器将查找路径匹配的所有文件,并为每个文件启动一个harvester。
Filebeat目前支持两种prospector类型:log和stdin。
Filebeat如何保持文件的状态
Filebeat 保存每个文件的状态并经常将状态刷新到磁盘上的注册文件中。
该状态用于记住harvester正在读取的最后偏移量,并确保发送所有日志行。
如果输出(例如Elasticsearch或Logstash)无法访问,Filebeat会跟踪最后发送的行,并在输出再次可用时继续读取文件。
在Filebeat运行时,每个prospector内存中也会保存的文件状态信息,当重新启动Filebeat时,将使用注册文件的数据来重建文件状态,Filebeat将每个harvester在从保存的最后偏移量继续读取。
文件状态记录在data/registry文件中。
读取Nginx日志文件:
创建配置文件 fan-nginx.yml
filebeat.inputs:
- type: log
enabled: true
paths:
- /usr/local/nginx/logs/*.log
tags: ["nginx"]
setup.template.settings:
index.number_of_shards: 3
output.elasticsearch:
hosts: ["192.168.43.182:9200","192.168.43.182:9201","192.168.43.182:9202"]
启动后,可以在Elasticsearch中看到索引以及查看数据:
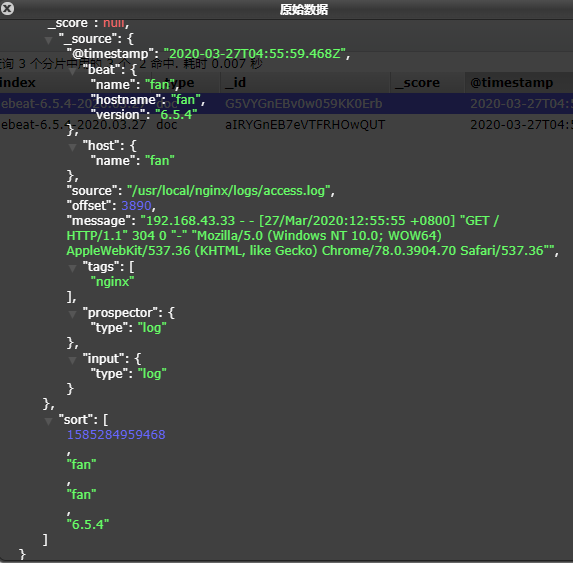
可以看到,在message中已经获取到了nginx的日志,但是,内容并没有经过处理,只是读取到原数据。
Module:
前面要想实现日志数据的读取以及处理都是自己手动配置的,其实,在Filebeat中,有大量的Module,可以简化我们的配置,直接就可以使用,如下:
查看module:./filebeat modules list
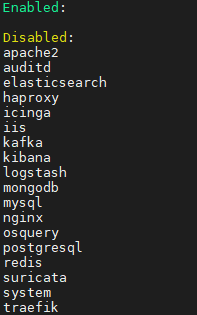
可以看到,内置了很多的module,但是都没有启用,如果需要启用需要进行enable操作:
./filebeat modules enable nginx #启动
./filebeat modules disable nginx #禁用
nginx module 配置:
vim modules.d/nginx.yml
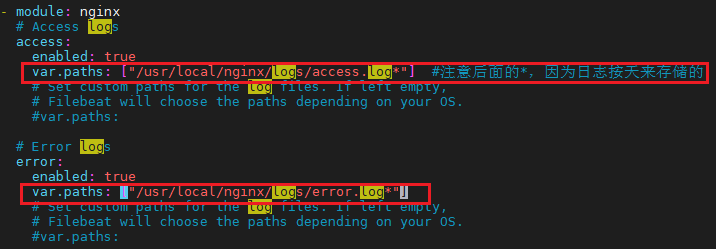
配置filebeat:
vim fan-nginx.yml
filebeat.inputs:
setup.template.settings:
index.number_of_shards: 3
output.elasticsearch:
hosts: ["192.168.43.182:9200","192.168.43.182:9201","192.168.43.182:9202"]
filebeat.config.modules:
path: ${path.config}/modules.d/*.yml
reload.enabled: false
测试:
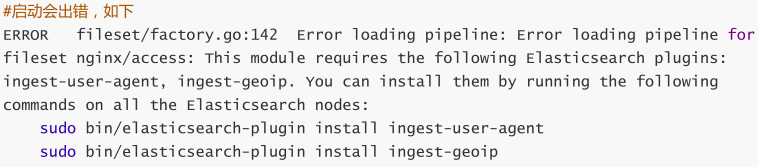
解决:可以直接使用sudo命令安装,但速度很慢,这里使用压缩包
1.把ingest-user-agent.tar、ingest-geoip.tar解压到Elasticsearch的plugins目录下
2.把ingest-geoip-conf.tar解压到Elasticsearch的config目录下
注意:所有集群中的节点都需要安装。
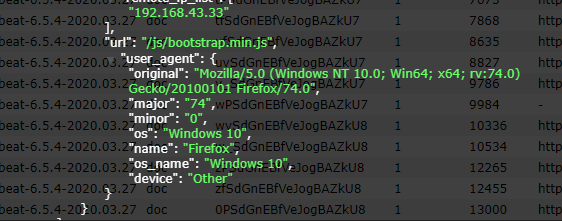
重启后可以看到,数据已经写入到了Elasticsearch中,并且拿到的数据更加明确了
其他的Module的用法参考官方文档:https://www.elastic.co/guide/en/beats/filebeat/current/filebeat-modules.html