一. samba安装
1. 安装:apt-get install samba samba-common smbclient
安装成功后,会默认启动samba服务, 可用ps-ef | grep smb查看
2. 配置文件为/etc/samba/smb.conf
二. 服务器里部署方式
1. 创建目录
创建了3个部门目录和一个共享目录 ,每个部门员工可在相应的部门目录下创建自己的个人目录和文件, 以及查看其他部门目录下文件。 公共共享目录用于所有部门键相互访问彼此的数据使用。目录结构如下
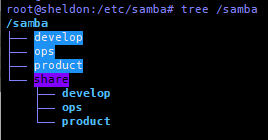
创建命令可简写成 makedir -p /samba/{develop,ops,product,share/{develop,ops,product}}
2. 添加账户
每个部门创建2个账户,搞个脚本方便
#/bin/bash
DEPART=(develop ops product)
for g in ${DEPART[@]}
do
groupadd $g
for u in $(seq 2)
do
useradd -M -s /sbin/nologin -g ${g} ${g}$u
done
done
添加权限并执行
chmod a+x user.sh ./user.sh
smbpasswd –a ops1 #添加samba相应账户,删除账户用smbpasswd –x ops1
3. 配置文件
[global]
workgroup=STAFF #定义工作组,写成自己喜欢的
server string=samba share #服务器提示字串,可随意修改
log file=/var/log/samba/log.%m #日志文件,%m使每个共享主机产生独立的日志文件,%m会替换成客户断的主机名
max log size=50 #单日志最大容量
security=user #可设为user,share. User表示通过用户名密码验证访问,share代表匿名访问
passdb backend=tdbsam #密码存储方式
load printers=yes
cups options=raw
[homes]
comment=home directories
browsealbe=no #目录是否可被浏览
writable=yes #是否可写
[product]
comment=product share
path=/samba/product
browseable=yes
guest ok =no #是否允许匿名访问,仅当security=share时有效,这里没用
writable=no
write list=@product #可写组
[develop]
comment=develop share
path=/samba/develop
browseable=yes
guest ok =no
writable=no
write list=@develop
[ops]
comment=ops share
path=/samba/ops
browseable=yes
guest ok =no
writable=no
write list=@ops
[share]
comment=comment share
path=/samba/share
browseable=yes
guest ok=no
writable=yes
4. 修改权限
Chmod 1775 /samba/{develop,ops,product} #添加sticky权限
Chmod 1777 /samba/share
Chown :develop /samba/develop
Chown :ops /samba/ops
Chown :product /samba/product
最后重启一下samba
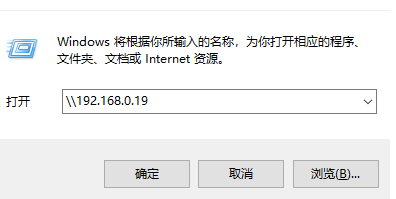
三. Window下连接samba方式
按win+r 在弹出的框框里输入地址,如图,然后输入用户名和密码即可登陆