Django-WebSocket
一.channles模块安装
pip3 install -U channels
二.django中channles配置apps
*/settings.py
INSTALLED_APPS = (
    'django.contrib.auth',
    'django.contrib.contenttypes',
    'django.contrib.sessions',
    'django.contrib.sites',
    ...
    'channels',
)
三.配置路由
*/routing.py
from django.urls import path
from . import consumers
from channels.auth import AuthMiddlewareStack
from channels.routing import ProtocolTypeRouter, URLRouter
from django.urls import re_path

application = ProtocolTypeRouter(
    {
        "websocket": AuthMiddlewareStack(
            URLRouter([
                re_path(r'ws/chat/(?P<room_name>\w+)/$', consumers.ChatConsumer),
				routing.websocket_urlpatterns  # 指明路由文件是django_websocket/routing.py,类似于路由分发
            ])
        ),
        [".goodsite.com", "http://.goodsite.com:80", "http://other.site.com"],
    }
)

*/settings.py
ASGI_APPLICATION = "chat.routing.application"


# 路由分发
websocket_urlpatterns = [
    path('ws/chat', consumers.Chatting), #consumers.Chatting 是该路由的消费者,
]
-
AuthMiddlewareStack:继承django三个中间件SessionMiddleware,CookieMiddleware,AuthMiddlewareStack;
-
通过scopt直接访问用户信息self.scope["user"]相当于request对象,
-
自定义身份认证
- 允许访问的站点:[".goodsite.com", "http://.goodsite.com:80", "http://other.site.com"],默认与Django
ALLOWED_HOSTS设置相同
-
协议路由
ProtocolTypeRouter({
"http": some_app,
"websocket": some_other_app,
})
stream = self.scope["url_route"]["kwargs"]["stream"]
```
-
网址路由
URLRouter([
re_path(r"^longpoll/\(", LongPollConsumer.as_asgi()),
re_path(r"^notifications/(?P<stream>\w+)/\)", LongPollConsumer.as_asgi()),
re_path(r"", get_asgi_application()),
])
```
-
通道名称路由
ChannelNameRouter({
"thumbnails-generate": some_app,
"thumbnails-delete": some_other_app,
})
```
启动服务
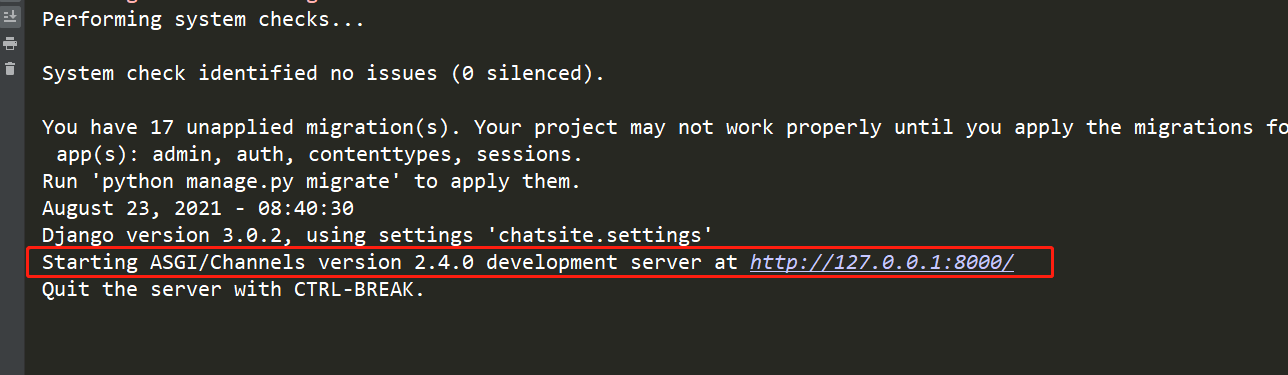
注意以 开头的行。这表明 Channels 开发服务器已经接管了 Django 开发服务器。Starting ASGI/Channels version 3.0.0 development server at http://127.0.0.1:8000/
四.通道配置
通道层允许您在应用程序的不同实例之间进行对话。如果您不想通过数据库传输所有消息或事件,它们是制作分布式实时应用程序的有用部分。
信道层是一种通信系统。它允许多个消费者实例彼此交谈,以及与Django的其他部分交谈。
通道层提供以下抽象:通道是一个可以将邮件发送到的邮箱。每个频道都有一个名称。任何拥有频道名称的人都可以向频道发送消息。
一组是一组相关的通道。一个组有一个名称。任何具有组名称的人都可以按名称向组添加/删除频道,并向组中的所有频道发送消息。无法枚举特定组中的通道。每个使用者实例都有一个自动生成的唯一通道名,因此可以通过通道层进行通信。在我们的聊天应用程序中,我们希望同一个房间中的多个聊天消费者实例相互通信。为此,我们将让每个聊天消费者将其频道添加到一个组,该组的名称基于房间名称。这将允许聊天用户向同一房间内的所有其他聊天用户发送消息。我们将使用一个使用redis作为后备存储的通道层。要在端口6379上启动Redis服务器,首先系统上安装redis,并启动
安装模块
pip3 install channels_redis
*/settings.py

# Redis通道
CHANNEL_LAYERS = {
    "default": {
        "BACKEND": "channels_redis.core.RedisChannelLayer",
        "CONFIG": {
            "hosts": [("127.0.0.1", 6379)],
        },
    },
}

# 内存通道(生产环境切勿使用)
CHANNEL_LAYERS = {
    "default": {
        "BACKEND": "channels.layers.InMemoryChannelLayer"
    }
}
五.创建消费者
"""
@author RandySun
@create 2021-08-22-16:15
"""
import json
from asgiref.sync import async_to_sync
from channels.generic.websocket import WebsocketConsumer
class ChatConsumer(WebsocketConsumer):
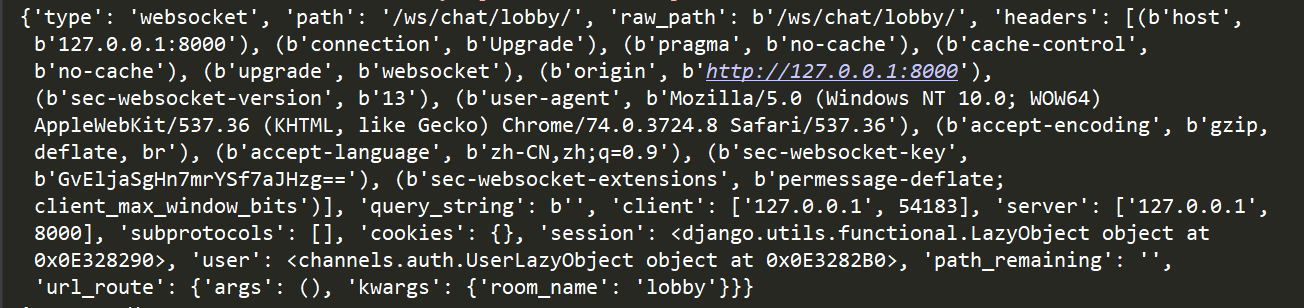
def connect(self):
print(self.scope)
print(self.scope["user"])
self.room_name = self.scope['url_route']['kwargs']['room_name']
self.room_group_name = 'chat_%s' % self.room_name
print(self.room_group_name, 55555555555555555)
# Join room group
async_to_sync(self.channel_layer.group_add)(
self.room_group_name,
self.channel_name
)
self.accept()
def disconnect(self, close_code):
# Leave room group
async_to_sync(self.channel_layer.group_discard)(
self.room_group_name,
self.channel_name
)
# Receive message from WebSocket
def receive(self, text_data):
text_data_json = json.loads(text_data)
message = text_data_json['message']
print(message, 55555555555555555)
# Send message to room group
async_to_sync(self.channel_layer.group_send)(
self.room_group_name,
{
'type': 'chat_message',
'message': message
}
)
# Receive message from room group
def chat_message(self, event):
message = event['message']
# Send message to WebSocket
self.send(text_data=json.dumps({
'message': message
}))
获取参数:self.scope['url_route']['kwargs']['room_name']
指定房间名:self.room_group_name = 'chat_%s' % self.room_name
加入一个房间: async_to_sync(self.channel_layer.group_add)(...)
接受WebSockeet连接:self.accept()
离开房间:async_to_sync(self.channel_layer.group_send)(....)
向房间发送消息:async_to_sync(self.channel_layer.group_send)(...)
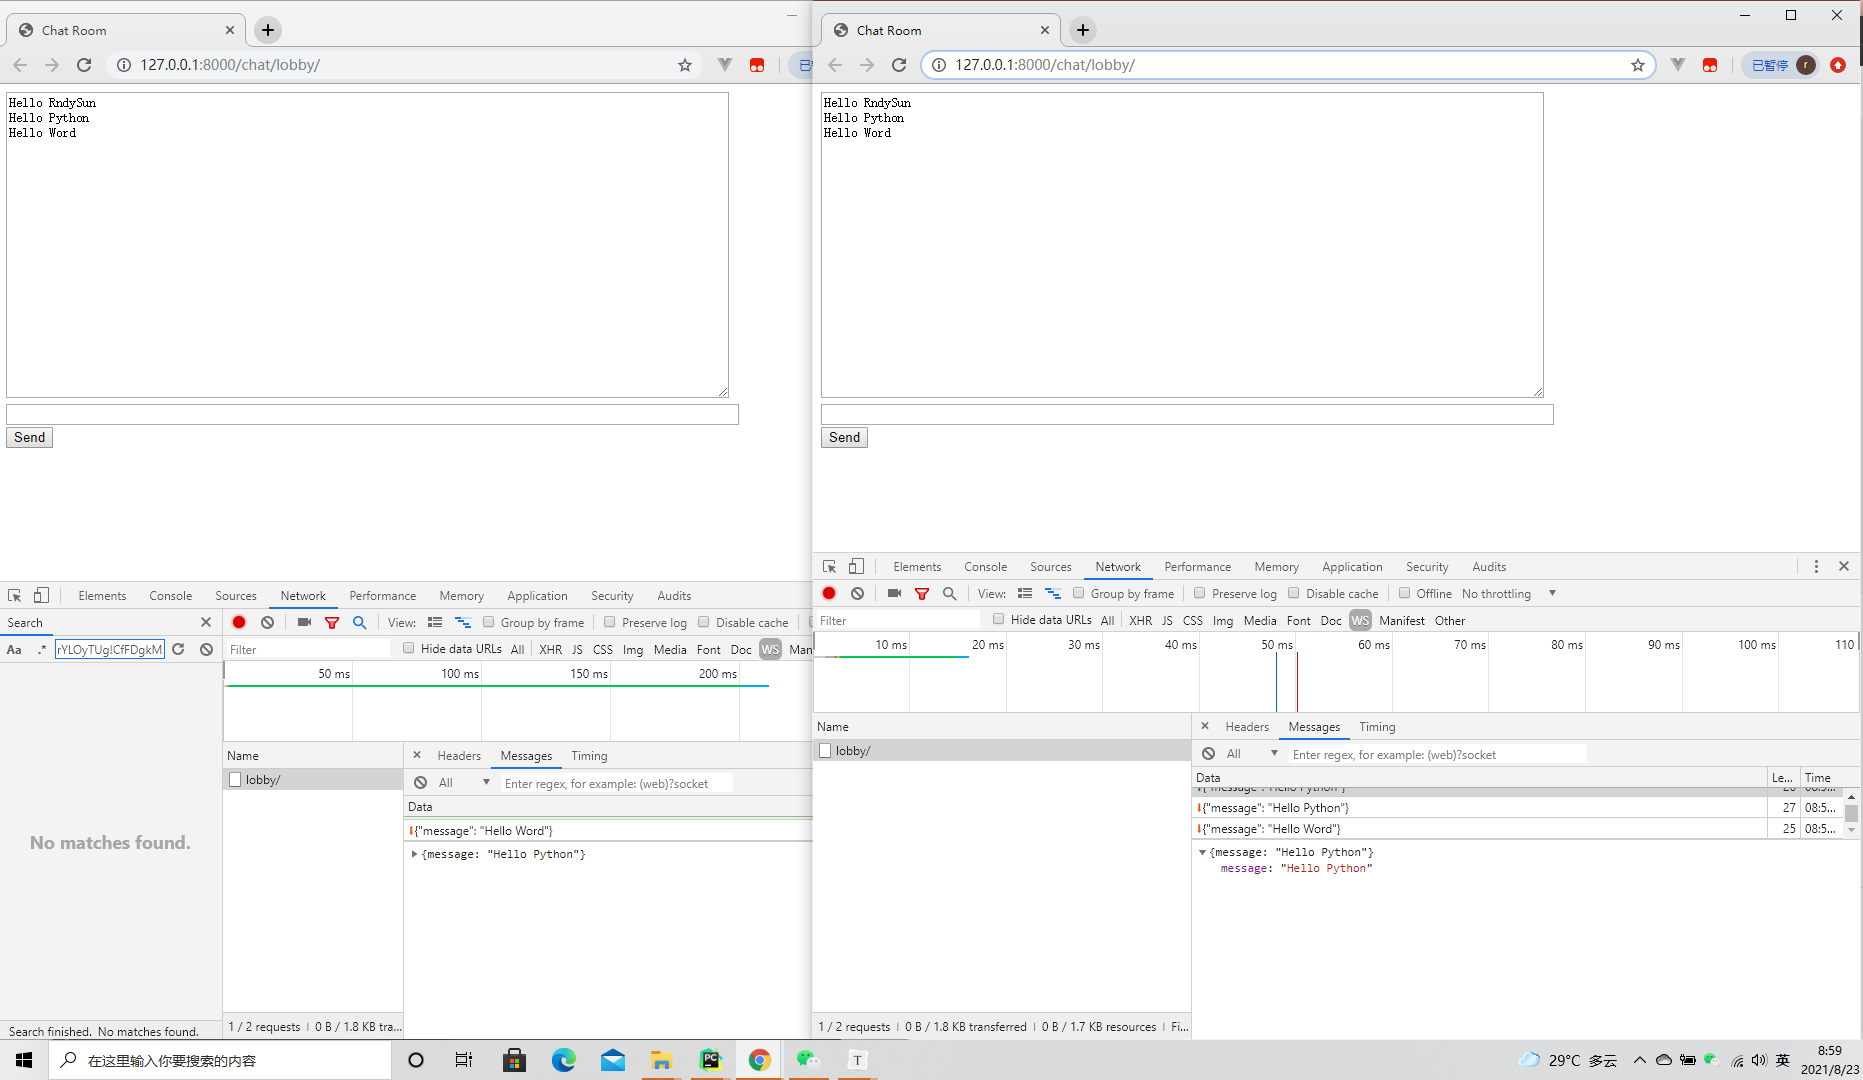
六.Django实现群聊
七.ASGI介绍
ASGI:“异步服务器网关接口”是用于使用Python构建异步Web服务的规范。
它是WSGI的精神继承者,WSGI已被Django和Flask等框架使用了很长时间。
ASGI使您可以使用Python的本机异步/等待功能来构建支持长期连接的Web服务,例如Websockets和Server Sent Events。
ASGI应用程序是一个异步函数,它带有3个参数:作用域(当前请求的上下文),接收(一个异步函数,可让您侦听传入的事件)和发送(一个异步函数,可将事件发送至客户端)。
在ASGI应用程序内部,您可以根据范围字典中的值路由请求。
例如,您可以通过检查scope [‘type’]的值来检查该请求是HTTP请求还是Websocket请求。要侦听来自客户端的数据,您可以等待接收功能。准备好将数据发送到客户端时,可以等待发送功能,然后将要发送给客户端的任何数据传递给客户端
第一步:修改asgi.py
import os
from django.core.asgi import get_asgi_application
from app01.websocket import websocket_application
os.environ.setdefault('DJANGO_SETTINGS_MODULE', 'django_channels.settings')
application_asgi = get_asgi_application()
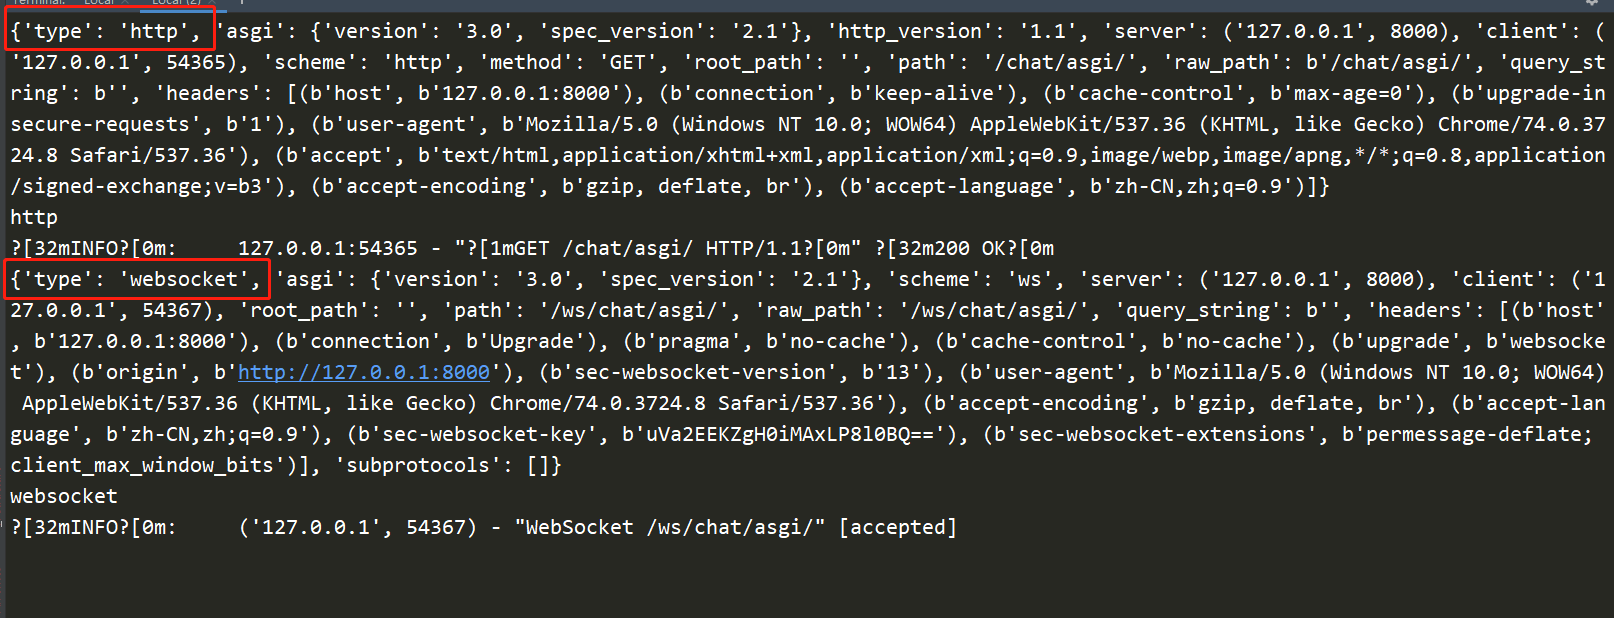
async def application(scope, receive, send):
print(scope)
if scope['type'] == 'http':
print('http')
await application_asgi(scope, receive, send)
elif scope['type'] == 'websocket':
print('websocket')
await websocket_application(scope, receive, send)
else:
raise NotImplementedError("Unknown scope type %s"%scope['type'])
第二步:在app01下新建一个websocket.py
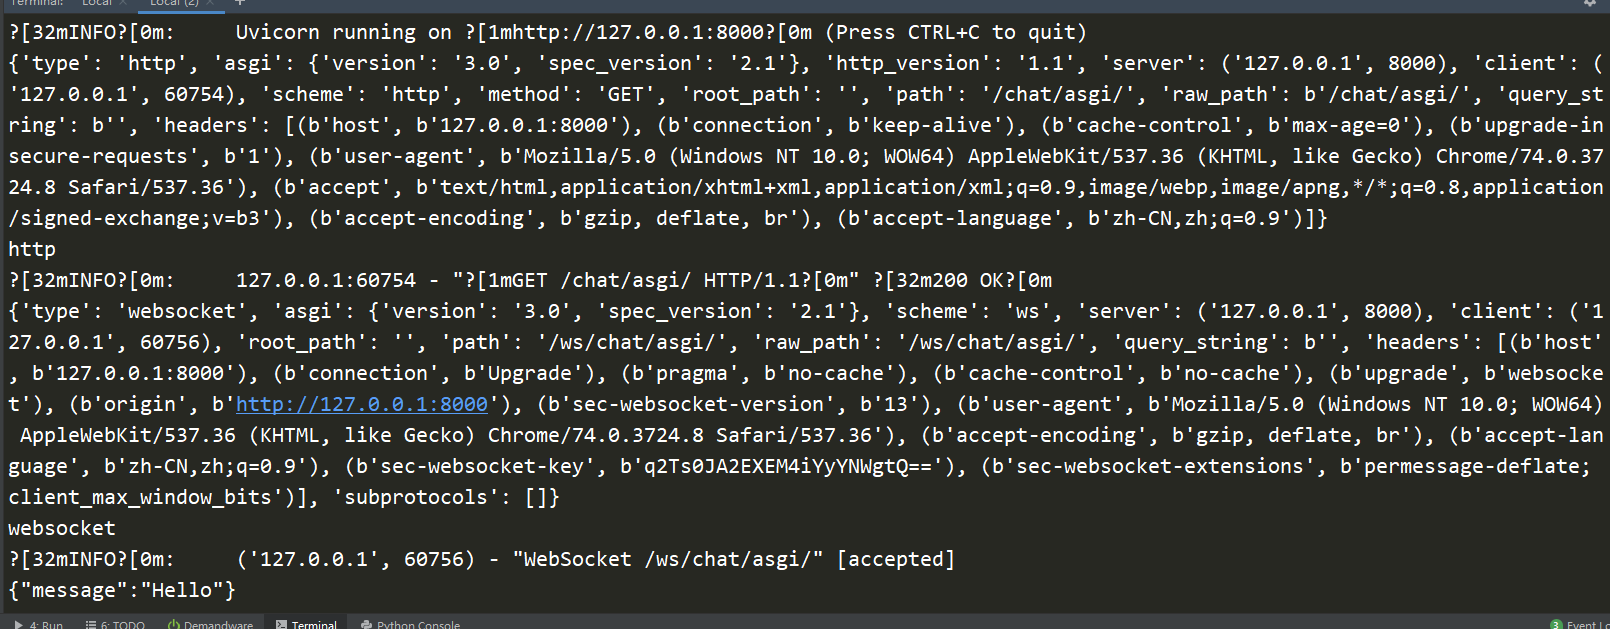
async def websocket_application(scope, receive, send):

    while True:
        event = await receive()
        if event['type'] == 'websocket.connect':
            await send({
                'type': 'websocket.accept'
            })

        if event['type'] == 'websocket.disconnect':
            break

        if event['type'] == 'websocket.receive':
            print(event['text'])
            import json
            # 收到的内容
            rec=json.loads(event['text'])['message']
            await send({
                'type': 'websocket.send',
                'text': json.dumps({'message':'收到了你的:%s'%rec})
            })
第三步:在app01的view.py中写入
def index(request):
    return render(request,'index.html')
第四步:配置路由urls.py
from app01 import views
urlpatterns = [
    path('admin/', admin.site.urls),
    path('', views.index),
]
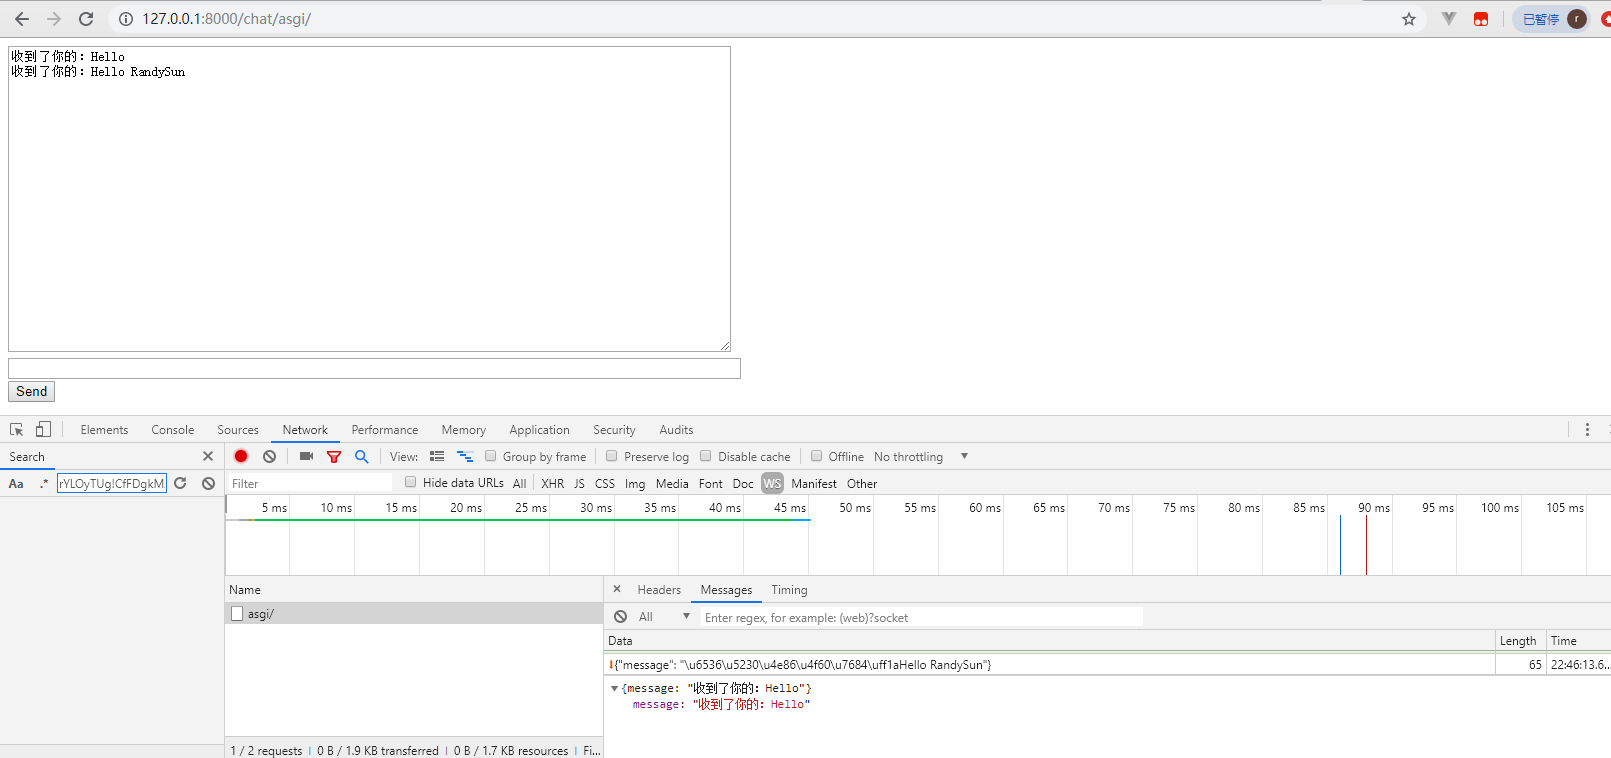
第五步:编写测试html页面(index.html)
<!DOCTYPE html>
<html lang="en">
<head>
    <meta charset="UTF-8">
    <title>websocket通信</title>
    <script src="https://cdn.bootcdn.net/ajax/libs/jquery/3.6.0/jquery.js"></script>
</head>
<body>
<button id="btn">点我连接</button>
<hr>
请输入:<input type="text" id="chat-message-input">
<button id="chat-message-submit">发送</button>
<hr>
通信内容:
<br>
<textarea id="chat-log" cols="30" rows="10"></textarea>
</body>
<script>
    var chatSocket
    $('#btn').click(function () {
        chatSocket = new WebSocket('ws://127.0.0.1:8000');

        chatSocket.onmessage = function (e) {
            console.log(e)
            var data = JSON.parse(e.data);

            var message = data['message'];
            console.log(message)
            var datamsg = $('#chat-log').val() + message + '\n'
            $('#chat-log').val(datamsg)
        };

        chatSocket.onclose = function (e) {
            console.error(e);
        };

    })

    $('#chat-message-submit').click(function () {
        console.log(chatSocket.readyState)
        if (chatSocket.readyState === 1) {
            var message = $('#chat-message-input').val()
            chatSocket.send(JSON.stringify({
                'message': message
            }));
            $('#chat-message-input').val("")
        } else {
            console.log("还没有连接")
        }


    })
</script>
</html>
第六步:使用uvicorn 和daphne启动项目
# 启动项目
pip3 install uvicorn
pip3  install uvicorn[standard]
uvicorn  chatsite.asgi:application


# daphne启动项目
pip3 install daphne
daphne -b 0.0.0.0 -p 8001 --proxy-headers chatsite.asgi:application