0x0、前言
在上篇文章《捣鼓捣鼓腾讯开发者实验室》中,笔者简要分析了一下腾讯开发者实验室,在文章的最后我们提到了可以用脚本来开启服务器,但是没有上传脚本代码。也是因为其他原因没有写,今天有空就又去捣鼓了一下,补了个小脚本,自己玩玩还是挺不错的。
0x1、脚本开启云服务器(cvmmanage)
由于上一篇文章已经分析过了抓包过程,所以这里就不再说了。Talk is cheap,show me the code
脚本代码:
  1 # -*- coding:utf-8 -*-
  2 # @Date: 2017/08/10 21:54
  3 # @Author: r00tuser
  4 # @Blog: http://cnblogs.com/r00tuser/
  5 """
  6    针对腾讯开发者实验室的脚本,通过脚本获取服务器的用户名和密码。
  7    方便有需要的时候开启服务器,搭建环境。
  8 """
  9 import requests
 10 import json
 11 import random
 12
 13
 14 #腾讯开发者实验室的所有实验ID 53个
 15 #以后可以用爬虫来获取所有ID
 16 LABSID = [
 17     '10125','10000','10004','10196','10030','10102','10001','10122','10002','10123',
 18     '10201','10003','10093','10134','10171','10187','10191','10193','10212','10045',
 19     '10192','10040','10054','10096','10098','10026','10029','10108','10120','10036',
 20     '10188','10094','10035','10190','10195','10197','10084','10087','10100','10101',
 21     '10078','10081','10157','10068','10172','10079','10080','10070','10071','10072',
 22     '10075','10178','10181'
 23 ]
 24 # 45分钟
 25 labsIdLow = [
 26     '10000','10196','10030','10102','10001','10122','10002','10123','10003','10093',
 27     '10134','10045','10192','10040','10054','10096','10098','10026','10029','10108',
 28     '10120','10036','10188','10094','10035','10084','10087','10100','10101','10068',
 29 ]
 30 # 1小时
 31 labsIdMiddle = [
 32     '10190','10195','10197','10078','10081','10157','10172','10079','10080','10070','10071',
 33     '10072','10075','10178','10181'
 34 ]
 35 # 3小时
 36 labsIdHigh = [
 37     '10004','10125','10191','10193','10212','10201'
 38 ]
 39
 40
 41 #cookies
 42 cookies = {
 43     'Cookie':'YourCookies'
 44 }
 45 #开启服务器
 46 #labid 实验ID
 47 def startCvm(labid):
 48     startCvmUrl = 'https://www.qcloud.com/developer/labs/ajax/?uin=YourQQNumber&csrfCode=1023972191'
 49     startCvmData = {"action": "receiveResource", "id":labid}
 50     headers = {
 51         'Connection':'close',
 52         'Content-Length': 39,
 53         'Accept':'*/*',
 54         'Origin':'https://www.qcloud.com',
 55         'X-Requested-With':' XMLHttpRequest',
 56         'User-Agent': 'Mozilla/5.0 (Windows NT 10.0; Win64; x64) AppleWebKit/537.36 (KHTML, like Gecko) Chrome/59.0.3071.115 Safari/537.36',
 57         'Content-Type': 'application/json; charset=UTF-8',
 58         'Referer': 'https://www.qcloud.com/developer/labs/lab/10126',
 59         'Accept-Encoding': 'gzip, deflate, br',
 60         'Accept-Language': 'zh-CN,zh;q=0.8'
 61     }
 62     response = requests.post(startCvmUrl,data=json.dumps(startCvmData),headers=headers,cookies=cookies)
 63     result = response.json()
 64     if result['code']!='10002' and result['msg']=='ok':
 65         print 'Start the cvm with labid: %s' % str(labid)
 66         return True
 67     elif result['msg'] == 'not allowed repeat receive':
 68         print 'Have started the cvm with labid: %s' % str(labid)
 69     else:
 70         print 'Start the cvm with labid:%s' % str(labid) +" fail,reason: "+result['msg']
 71
 72
 73 #获取服务器地址,用户名和密码
 74 def getAccountPass(labid):
 75     url = 'https://www.qcloud.com/developer/labs/ajax/?action=EnterRoom&uin=YourQQNumber&csrfCode=1023972191'
 76     postdata = {'labId':labid}
 77     headers = {
 78         'Connection': 'close',
 79         'Content-Length': 11,
 80         'Accept': '*/*',
 81         'Origin': 'https://www.qcloud.com',
 82         'X-Requested-With': ' XMLHttpRequest',
 83         'User-Agent': 'Mozilla/5.0 (Windows NT 10.0; Win64; x64) AppleWebKit/537.36 (KHTML, like Gecko) Chrome/59.0.3071.115 Safari/537.36',
 84         'Content-Type': 'application/json; charset=UTF-8',
 85         'Referer': 'https://www.qcloud.com/developer/labs/lab/10125/console',
 86         'Accept-Encoding': 'gzip, deflate, br',
 87         'Accept-Language': 'zh-CN,zh;q=0.8'
 88     }
 89     response = requests.post(url,data=json.dumps(postdata),headers=headers,cookies=cookies)
 90     result = response.json()
 91     try:
 92         print 'OS: '+result['data']['lab']['resourceConfig']['cvm']['osName']+
 93               "
IP: "+result['data']['experiment']['cvm']['host']+
 94               "
username: "+result['data']['experiment']['cvm']['username']+
 95               "
password: "+result['data']['experiment']['cvm']['password']
 96     except:
 97         print "Can't get the cvm information,Possible the cvm didn't start!"
 98
 99 def cvmManage(labid):
100     labid = int(labid)
101     startCvm(labid)
102     getAccountPass(labid)
103
104
105 if __name__ == '__main__':
106     choice = raw_input("You have two choice to start a cvm:1,SpecialLabsId;2,TimeSelect;3.random;(default 3)")
107     if choice == '':
108         choice = 3
109     #choice 1 第一种选择,直接输入特定的labid
110     if choice == '1':
111         labId = raw_input('Please select a labsid in the list:'+LABSID.__str__())
112         if labId in LABSID:
113             cvmManage(labId)
114     #choice 2 第二种选择,通过时间的长短来选择,low=45分钟,middle=1小时,high=3小时
115     elif choice == '2':
116         timeMode = raw_input('Select a time mode(1,Low;2,Middle;3,High)')
117         templist = []
118         if timeMode=='1':
119             templist = labsIdLow
120         elif timeMode=='2':
121             templist = labsIdMiddle
122         elif timeMode == '3':
123             templist = labsIdHigh
124         labId = raw_input('Please select a labsid in the list:'+templist.__str__())
125         if labId in templist:
126             cvmManage(labId)
127     # choice 3 第三种选择,随机开启
128     elif choice =='3':
129         labId = random.choice(LABSID)
130         cvmManage(labId)
代码里面有了部分注释,代码很简单。
代码其中有两个地方需要修改:
1,YourCookies,即是你登录腾讯云的cookie。
2,YourQQNumber,即是你登录腾讯云用的QQ号。
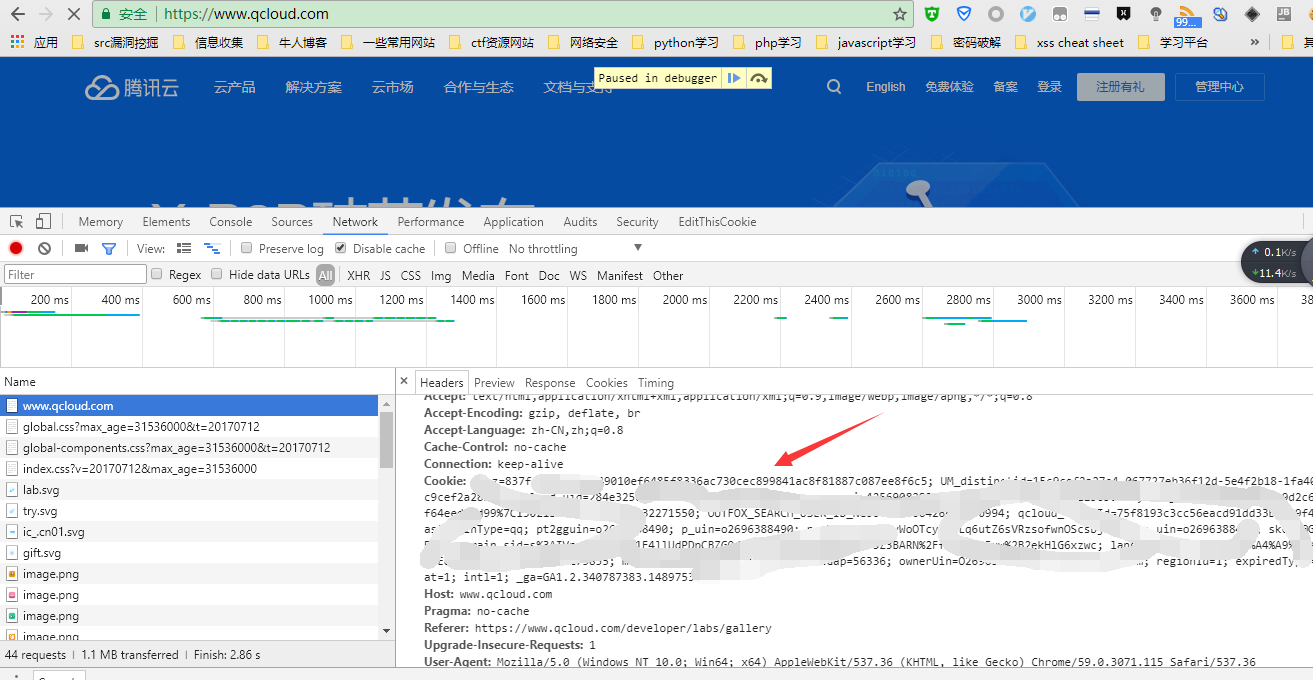
QQ号码好办,那么cookie怎么获取呢?很简单。我们以chrome为例:
正常登录之后,右键检查,选择Network选项,选择"www.qcloud.com",点进去,cookie处那一长串就是了。

复制下来直接粘贴在代码YourCookies处即可,还有别忘记修改YourQQNumber。
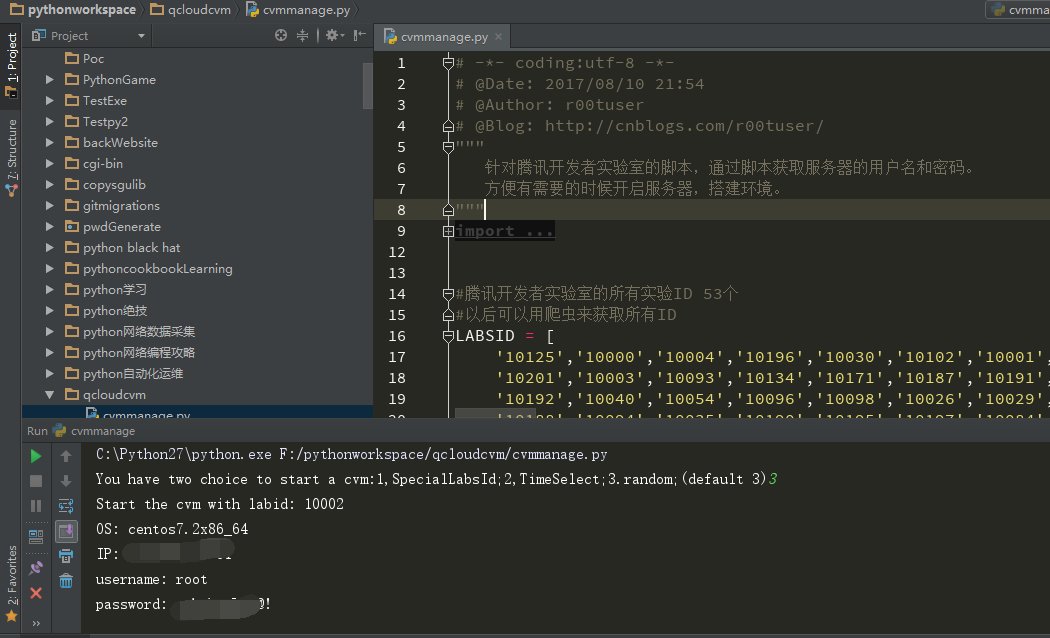
贴一下程序运行的截图:

拿到用户名密码的我们,就可以愉快地用我们喜欢的工具连上cvm了。
还有一个是无意中发现的,倘若不手动结束云实验室,可以在原本的使用时间基础上大概再使用半个小时左右。大概是因为腾讯对已经到点的服务器没有立即回收,还需要排队或者说处理导致的。
0x2、最后
Have fun !